This Week's Sponsor:

Inoreader

Build your own newsfeed and cut through the noise


Rovio Announces New “Bad Piggies” Game To Launch This Month

Finnish videogame maker Rovio has announced “Bad Piggies”, a spin-off of the popular Angry Birds franchise that will let users play from the pigs’ perspective. Titled “Bad Piggies” and set to launch later this month, the game will shift the focus from the birds – typically, the main characters – to the pigs. It is unclear how this will translate in terms of game mechanics, but Rovio promises “never-before-seen gameplay” without slingshots, Angry Birds’ tools to complete levels and clear them of pigs, the enemies.

There’s a lot of empathy towards the lovable enemies from the Angry Birds games, and we’ve been constantly asked: what about the pigs’ side of the story?” said Mikael Hed, CEO of Rovio. “Bad Piggies gives you the chance to play as the second-most-loved characters in the Angry Birds universe, and explore this rich world through their green eyes.

After the modest success of Amazing Alex – a new IP from Rovio based on the acquisition of a game previously called “Casey’s Contraptions” – Rovio kept on releasing updates to Angry Birds, adding new levels and options for free. Earlier this year, Rovio launched a new version of Angry Birds called “Space”, which was downloaded over 100 million times in just 76 days. Also earlier this year, back in May, Rovio announced the billionth download for the Angry Birds franchise, and reported revenue of over $100 million for the fiscal year 2011.

As a side note, an Angry Birds version featuring the pigs’ point of view was rumored all the way back in November 2010.

Bad Piggies will launch on Thursday, September 27, on iOS, Mac, and Android. A teaser website is available here.


Review: Magellan Virtual Analog iPad Synthesizer

In my post about the current state of music-making and discovery on the iPad, I concluded with a roundup of the best, most sophisticated software to professionally create music on the iPad. As I did with shuffler.fm and discovery, I would today like to add a new app to the list of the best software synths available for the iPad. The app that I found worthy of being added is the newest product by music software company Yonac Inc, called Magellan.

Yonac made a name for itself by producing an extensive amount of music-related apps since early 2010. One of their most elaborate and popular efforts has been the Shredder guitar synth to create analog and digital synth leads or pads by playing guitar into the iPad through an interface like the IK Multimedia iRig or the Apogee JAM. The company was also right there when the iPad got unveiled. They developed and promoted one of the very first synth software for the iPad, the Yonac miniSynth.

Magellan is their new masterpiece. It’s a fully fleshed-out virtual analog synth with a lot of power. Let me sum up its basic feature set: two synthesizer engines running at the same time, each of them equipped with three oscillators for basic sound generation, frequency modulation, a step sequencer, and two filters plus eight effects. The app has got an easy to understand interface and produces an immense variety of sounds in very high audio quality. This review not only judges the quality and usability of Magellan, I will also give so detailed instructions and tricks so that you immediately can start making sophisticated music tracks with the app right after you’ve downloaded it. So, if you are curious, stay a while and let me explain you how Magellan works and why it may become a strong competitor to other high-end iPad synths like the KORG iMS-20 or the Sunrizer.

Read more


August 2012 In Review

August has been the lull between July’s Mountain Lion release and September’s inevitable iPhone announcement. But that’s not to say it was a quiet month - it certainly wasn’t. On the news front, we saw Apple and Amazon reacting to Mat Honan’s ‘epic hacking’, the first Mountain Lion update, internal promotions at Apple and of course - the verdict in the Apple v. Samsung trial. August also saw big Pixelmator, Things, Instagram, Drafts and Buzz Contacts app updates amongst a bunch of other updates and new release apps. Finally, in the stories department, we wrote up a bunch of how-to’s and I talked about the rise of third party services and fall of Google in iOS. Be sure to stay tuned this September, it’s going to be a big month.

You can review past ‘Month In Review’ posts here.

The Highlights


Everything Else


Send Favorite Tweets To OmniFocus’ Inbox

In my daily “social networking workflow”, I use the “favorite” feature of Twitter as a todo list of sorts. I couldn’t find a way to add favorites to OmniFocus without leveraging email as a bridge, so I built a solution myself.

Using IFTTT, a single line of bash, Hazel, and AppleScript, I created a simple way to turn a favorite tweet into an OmniFocus task in the application’s inbox, ready for future processing. As an extra, I have also created a more “advanced” version that adds Automator to the mix to only extract URLs from favorite tweets. Read more


Use Dribbble and Instagram as an Apple TV Screen Saver


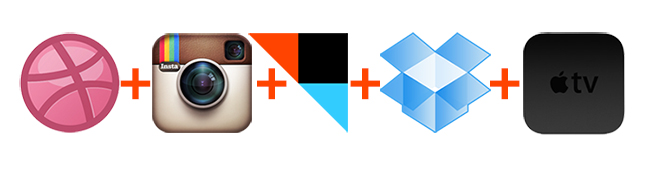
Tired of stock images of plants and animals when your Apple TV screen saver comes on? Why not make it a little more personal with some ingredients from Dribbble and Instagram? With a little IFTTT magic you can have your Apple TV showing your Dribbble and Instagram feeds with just a little fun hacking.

The interactive team over at BlingBlog.tv created a way to make this happen by using Dropbox and IFTTT then sprinkled some recipe magic to make this happen. I tried it last night and it worked perfectly; it only took me about 15 minutes to set up from start to finish. Here are the ingredients and the recipe:

Step 1: Dropbox
You’ll need a Dropbox account if you don’t already have one, but who doesn’t these days? If you don’t, you can sign up for free here.

Step 2: IFTTT
Okay, not everyone has an IFTTT account but you will need one to continue with this tutorial. IFTTT is a great service that lets you build recipes from many different web services. It’s free, so do yourself a favor and sign up if you already haven’t. When you do have an IFTTT account, you can continue.

Step 3: Get your ingredients together
To make the recipes that BlingBlog.tv created, some IFTTT channels will need to be activated. Go here to activate the RSS Feed Channel, the Dropbox Channel, and if you want Instagram, activate its channel as well.

Step 4: Recipes
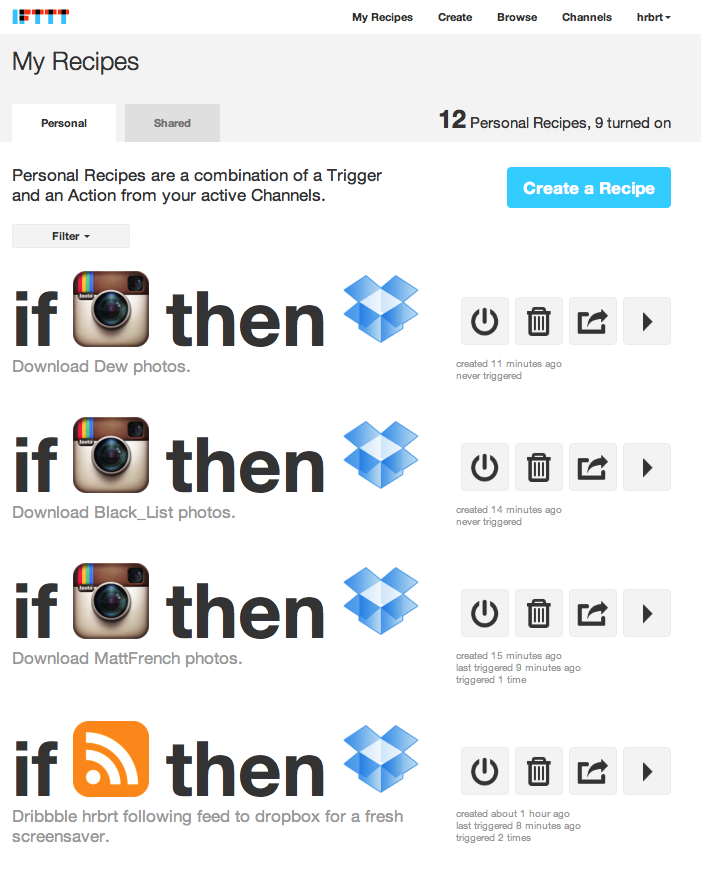
Anytime a new item is added to Dribbble’s popular feed, or your own follow feed if you have an account, it is downloaded to Dropbox. If you have the Instagram channel activated, you can pick a few different users as well to really mix up your screen saver. IFTTT will save an Instagram picture every time that user account posts a new picture. Here are the links here and here that BlingBlog.tv posted if you want to modify or use their recipes. Note that you will need to make sure every recipe points to the same Dropbox folder. Every one of my recipes for this tutorial point to my Dropbox/IFTTT/Instagram folder, even my Dribbble feed.

Step 5: Screen Saver Info
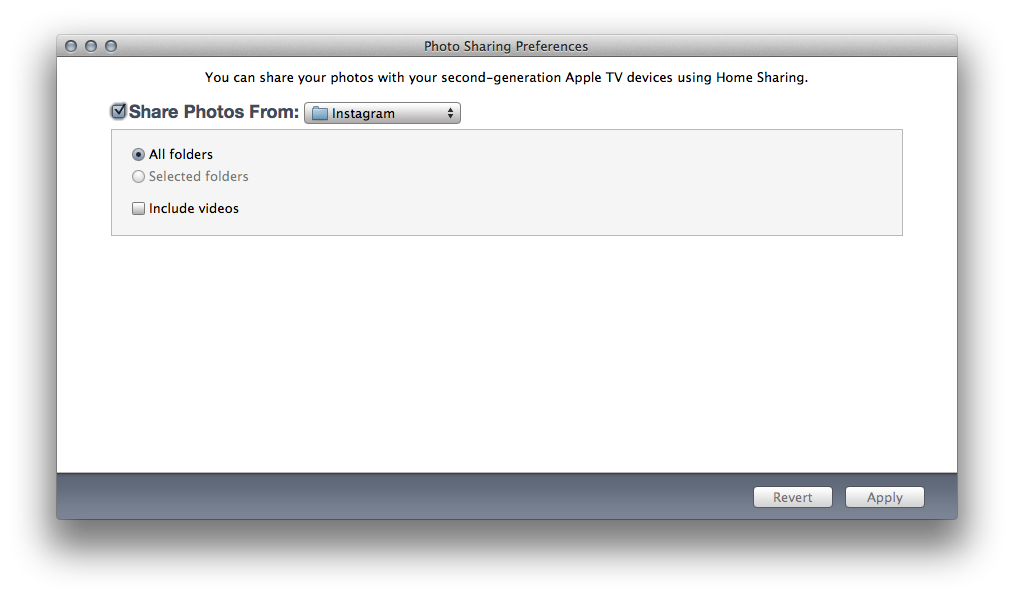
Did I mention this also works on your Mac? Just point to your Dropbox folder via the screen saver system prefs and you’re done with this tutorial. For your Apple TV, you will need to turn on iTunes’ Home Sharing on the Mac that has the Dropbox folder. After that is done, navigate to File > Home Sharing > ‘Choose Photos to Share with Apple TV…’ in iTunes and navigate to the same Dropbox folder (see image below).

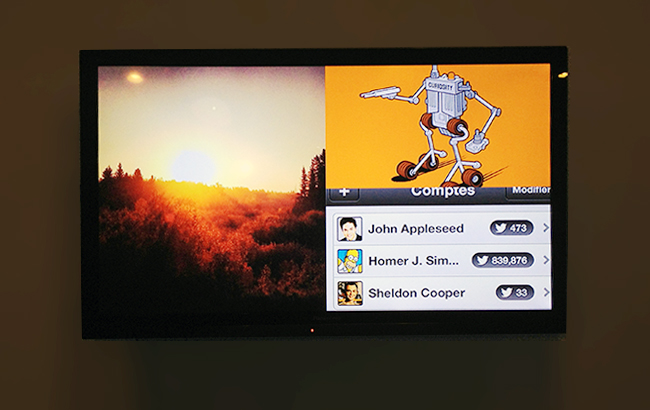
Then, go to your Apple TV > Computers menu and add your Apple ID to link to your Mac’s photo library if you haven’t already done so. Now, go to Screen saver and choose your user Photo library as the source. Here is a resulting picture from my own Apple TV using this recipe. As you can see, it’s showing images saved from the IFTTT recipe – I like the origami effect the best. So, if you get tired of looking at your photos or the boring stock ones that Apple ships, try this recipe for some inspiration!

Here are some FAQs that BlingBlog posted:

  • At the beginning of the week, delete all of the stuff from last week. Sometimes, it’s hard to let go, but this screensaver isn’t for nostalgia; it’s for inspiration. Bring on some new stuff!
  • IFTTT/Instagram recipes only let you choose one user per recipe. We have 3 or 4 different ones going.
  • You aren’t limited to just dribbble or Instagram, IFTTT can also hook up to Flickr or any other photo streaming service that has an rss feed.
  • Apple TV doesn’t automatically update as new images come in, so you have to stop the screensaver and repeat Step 5 from above. And make sure your iTunes is open when it is refreshing the feed.

Tweetbot Mute Filters For U.S. Elections

Tweetbot Mute Filters For U.S. Elections

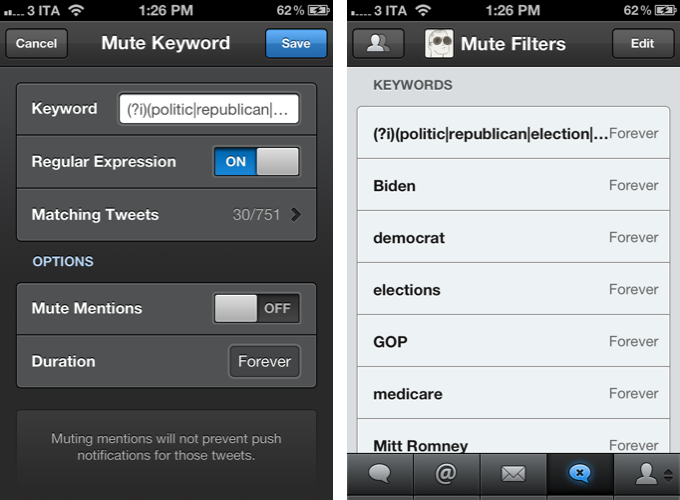
I’ve recently become annoyed with the amount of tweets in my timeline about the upcoming United States elections, so I set out to find a way to mute those tweets without necessarily unfollowing people. In case you missed it, Tweetbot 2.4 introduced support for keyword mute filtering, allowing you to mute (read: make invisible in the timeline) any keyword, with support for regular expression. I manually added hashtags and keywords to the list of filters on my iPhone, iPad, and Mac, but it turns out someone already made a set of filters you can easily install on your devices.

Thanks to Jono Hunt, you can head over this GitHub page and check out the 2012 U.S. elections regular expression he built for Tweetbot. You can add keywords in the middle if you feel like you should be blocking more from your timeline. To install the filter, open the Mute Filters view in Tweetbot, hit the Edit button, then the + button in the upper left corner and select Mute Keyword. Paste the filter, and turn on  Regular Expression. You can set a duration (I chose “forever”) and mute mentions for the filter as well. To make sure you’re entering the expression correctly, Tweetbot will also display matching tweets already in your timeline.

Jono has built other mute filters for recurring tweets besides the elections, so check them out here.

Permalink

Kindle for iOS Updated To 3.2 with Adjustable Margins

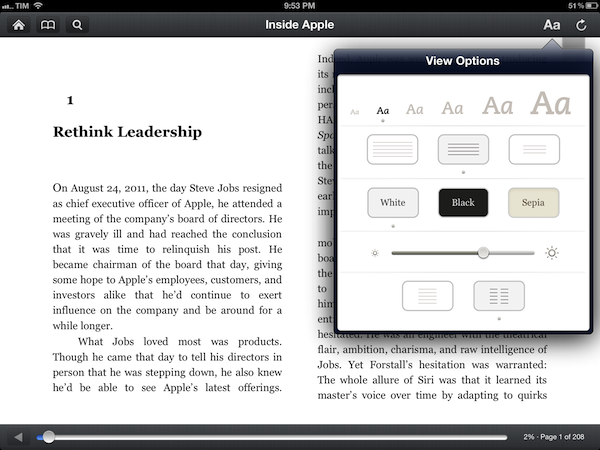
The official Kindle app for iOS has been updated to version 3.2. Following the redesign introduced with version 3.0 last March, the app was heavily criticized for its implementation of wide margins, which was eventually fixed with an update earlier this summer. Now, the app has been updated with a new setting to control “adjustable margins”. You can choose between three different layout options, as pictured above. The option is available on the iPad from the View Options menu, which also includes settings for font size, brightness, and background color.

Speaking of brightness, Amazon says the control slider has been updated to be more responsive and optimized for “better viewing”. The app’s changelog also focuses on “rapid highlights”, a way to mark important passages of a book for future reference that had been implemented by almost any other eBook reader or PDF viewer on the App Store. This option is available under “My Notes & Marks” in the Go To menu.

Among other changes for Print Replica Textbooks, Kindle 3.2 looks like a solid update that addresses a common annoyance of the app. You can find the update on the App Store.


Turn URLs and Webpages Into PDFs In Your Dropbox

I stumble across a lot of interesting webpages on a daily basis. Sometimes it’s a video I want to watch later; sometimes it’s an article I don’t have time to read right away. Other times, I find a webpage that I want to keep around for future reference. For me, there’s a difference between articles to read later and reference material: whereas a new item added to Instapaper has a short life span in terms of attention (read, share, archive), a webpage I want to keep around forever needs to be turned into a document I can read anywhere, highlight, annotate, and carry around between platforms and devices. For that, I like PDFs.

I keep a “PDFs” folder in my Dropbox that contains all the documents I check upon regularly for work and personal purposes. They can be eBooks, tutorials, or guidelines from Apple that are essential to my writing online. Thanks to the increasing support for cloud services in apps like PDF Expert, GoodReader, and iAnnotate, I can keep a single copy of a PDF in my Dropbox, use the app I want to annotate the document with, and forget about duplicates thanks to sync. Furthermore, I’m fairly sure that, due to their popularity, PDFs will still be readable and supported 20 years from now, so I don’t have to worry about data preservation and file formats.

Lately, I have become obsessed with turning longer articles I find on the Internet also into PDFs for long-term archival. For as much as I like Instapaper, I can’t be sure that the service will be around in the next decades, and I don’t want my archive of longform and quality content to be lost in the cloud. So I have come up with a way to combine Instapaper with the benefit of PDFs, Dropbox, and automation to generate documents off any link or webpage, from any device, within seconds.

(Disclaimer: what follows is an explanation of a hack I created for personal use. It uses publicly available tools and apps to fill a personal need. You shouldn’t create PDFs off websites and redistribute them – you should support the sites you read instead).

In short, I use the Instapaper Text bookmarklet to fetch a webpage’s text and images (while preserving hyperlinks and great typography) and I convert the resulting page to PDF using wkpdf. Created by Christian Plessl, wkpdf is a command line tool that uses WebKit and RubyCocoa for rendering HTML content to PDF. Since wkpdf uses WebKit’s HTML rendering, it can generate good-looking PDFs that maintain most CSS2 and CSS3 stylings and properties. I have tried another command line tool for file conversion, Pandoc, but I like wkpdf better for straight HTML to PDF conversion. Read more