iPad Diaries is a regular series about using the iPad as a primary computer. You can find more installments here and subscribe to the dedicated RSS feed.
After several years without updates to a product that, somewhat oddly, “remained in Apple’s lineup”, the Mac mini was revived by the company last November with a major redesign geared toward pro users and designed for flexibility. As listeners of Connected know, one of the show’s long-running jokes was that I would buy my last Mac ever as soon as Apple released a new Mac mini1; when it happened, I took the opportunity to completely rethink my home office with a new desk, well-specced Mac mini, and 4K display that supported both modern Macs and iPad Pros via USB-C.
Effectively, I had never owned a desktop Mac until2 this Mac mini arrived. I always preferred portable Macs to workstations, and over the years I moved from a late 2008 MacBook Pro to a 2011 MacBook Air and, in 2015, back to the (now Retina) MacBook Pro again. Over the past couple of years, however, and particularly since the introduction of iOS 11, my penchant for Mac laptops started clashing with the realization that the iPad Pro had become my de-facto laptop. I was using a MacBook Pro because I thought I needed a portable Mac machine just like when I started MacStories in 2009; in reality, the iPad had been chipping away at the MacBook’s core tasks for a while. Eventually, I saw how my MacBook Pro had become a computer I’d open twice a week to record podcasts, and nothing more.
With the iPad Pro as my primary computer, the Mac’s role in my life evolved into a fixed environment that was necessary for multi-track audio recording and Plex Media Server. And as I shared on Connected on several occasions, I realized that my workflow in 2018 wasn’t the same as 2009 anymore: it no longer made sense for me to have a Mac laptop when what I really needed was a small, but powerful and extensible Mac desktop. That’s why I started waiting for a new Mac mini, and my wishes were granted with the 2018 relaunch of the mighty desktop machine.
For the past three months, I’ve been busy setting up the Mac mini and optimizing it for the tasks that inspired its purchase. I bought external SSD drives (these two) to use for Plex and Time Machine backups; I set up a homebridge server to add unsupported accessories to HomeKit (such as our 2017 LG TV) and turn iTunes playlists into HomeKit scenes; I rethought my podcasting setup (I now have a Zoom H6 recorder and a taller microphone stand) and arranged my desk to make it easier to use the same UltraFine 4K display with the Mac mini and iPad Pro (I just need to plug in a different USB-C cable). Because this Mac mini is fast enough to handle 4K transcoding for Plex without breaking a sweat, I started using youtube-dl to enjoy 4K YouTube videos on iOS devices with the Infuse or Plex apps. I’m trying to take advantage of a powerful, always-on Mac server in any way I can, and I’m having lots of fun doing it.
This doesn’t change the fact that the iPad Pro is my main computer, and that I want to interact with macOS as little as possible. Aside from recording podcasts using Mac apps, I rely on the Mac mini as a server that performs tasks or provides media in the background. Any server requires a front-end interface to access and manage it; in my case, that meant finding apps, creating shortcuts, and setting up workflows on my iPad Pro to access, manage, and use the Mac mini from iOS without having to physically sit down in front of it.
In this multi-part series, I’m going to cover how I’m using the 2018 iPad Pro to access my Mac mini both locally and remotely, the apps I employ for file management, the custom shortcuts I set up to execute macOS commands from iOS and the HomePod, various automations I created via AppleScript and Keyboard Maestro, and more. Let’s dive in.
Table of Contents
- Accessing macOS Files from iOS: FileExplorer and the Files App
- Mixed Automation: iOS Shortcuts for macOS Automation
- Preparing for Podcasts with Keyboard Maestro
- Coming Next…
Accessing macOS Files from iOS: FileExplorer and the Files App
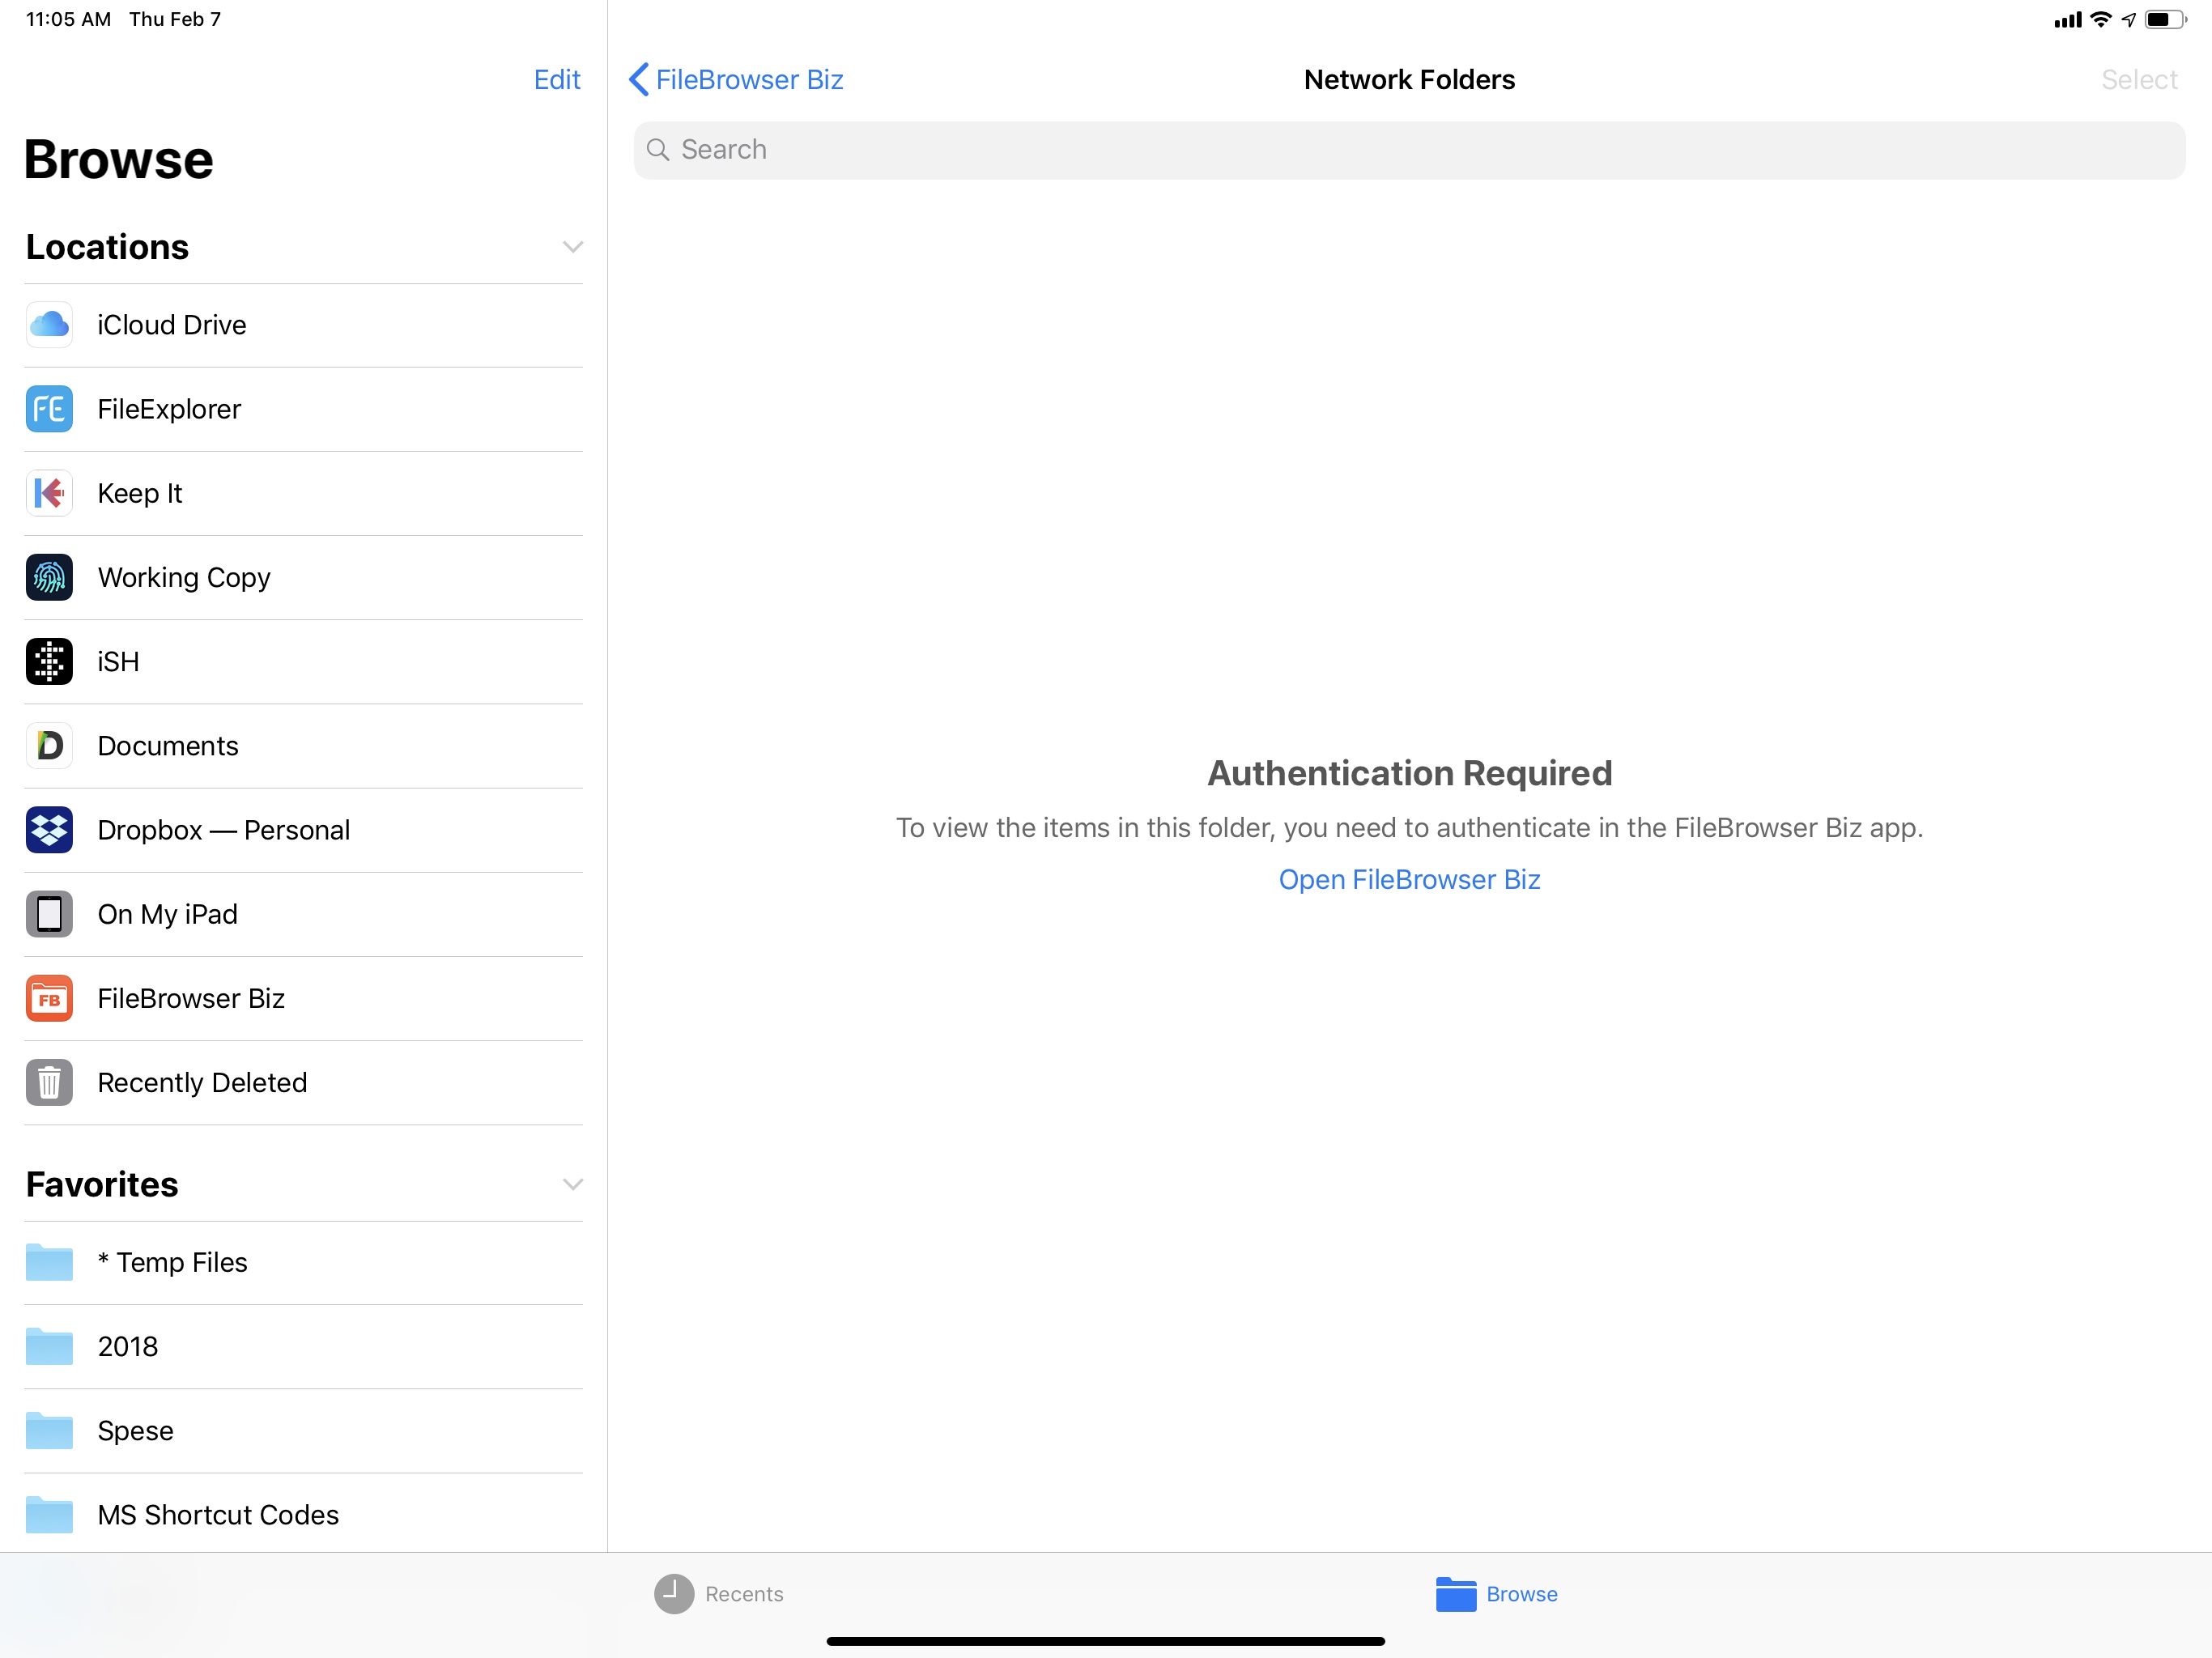
When Panic announced Transmit for iOS was going to be discontinued last year, I set out to find a suitable alternative for connecting to FTP servers on iOS, and I ended up choosing FileBrowser. While I initially approached FileBrowser because it offered native support for SanDisk’s iXpand USB-Lightning flash drive, I decided to start using the app full-time because, unlike Transmit and other similar apps, it embraced modern-day iOS with a file provider extension.
The ability to log into an FTP server or local macOS computer and export documents directly from the Files app (and any other app that integrated with Files) was the perfect example of the benefits provided by the system-wide Files framework. Although I remain convinced that Apple should offer built-in connectivity options in Files to support FTP/SFTP/WebDAV and other server types, FileBrowser was an acceptable solution that I used for months, despite some limitations.
As I noted in my initial coverage of FileBrowser, the app’s Files extension didn’t support logging into servers unless you launched the main FileBrowser app first and opened the connection from there. Between having to do this every time the iPad restarted or the FileBrowser app had been suspended in memory by iOS, the issue got annoying fast. But I didn’t know where else to look for an app that supported exposing servers to Files without requiring additional layers of authentication.
Thankfully, MacStories reader Matthew brought FileExplorer to my attention last December; having used the app every day for over a month now, I can say this is my new gold standard for integration between Files and external servers.
FileExplorer shares more than a few similarities with other third-party file managers for iOS. Its icon and user interface aren’t what I would describe as “pretty” – the UI is functional at best, though it sometimes veers towards Android-ish traits (such as the odd contextual menu); the app comes with its own local storage space that can accept any kind of file passed by other apps; like Readdle’s Documents, FileExplorer offers its own photo viewer and built-in web server to receive files wirelessly from nearby devices (I never use these features); there’s even the ability to play music and videos inside the app. All of these options are now common among Files alternatives for iOS and they’re not the reason why you should pay attention to FileExplorer.
What sets FileExplorer apart is its excellent integration with the Files app, which, unlike FileBrowser, is fully independent from the main app and doesn’t require a separate authentication step. Connections you create in FileExplorer (and I tested this with FTP, SFTP, and macOS servers) show up as folders in the FileExplorer location in the Files app; even if the main FileExplorer app has been force quit, selecting a server inside its Files extension will open a connection in the background and display the contents of the connected server, allowing you to browse its file structure.
Coming from FileBrowser’s constant authentication errors, FileExplorer’s reliable integration with the Files app is a game-changer: (S)FTP or SMB servers can be accessed from Files (and therefore any iOS document picker that uses Files, including Mail, Safari, or Slack) with just a couple of taps, as if they were a native feature of the Files app. Thanks to FileExplorer, any compatible server can become part of Files’ UI and integration with the rest of iOS, which includes functionalities such as drag and drop, multiple views and sorting options, asynchronous transfers, and the share sheet. Technically, this was possible with FileBrowser too; FileExplorer’s superior Files extension makes the whole experience faster and more pleasant to use.
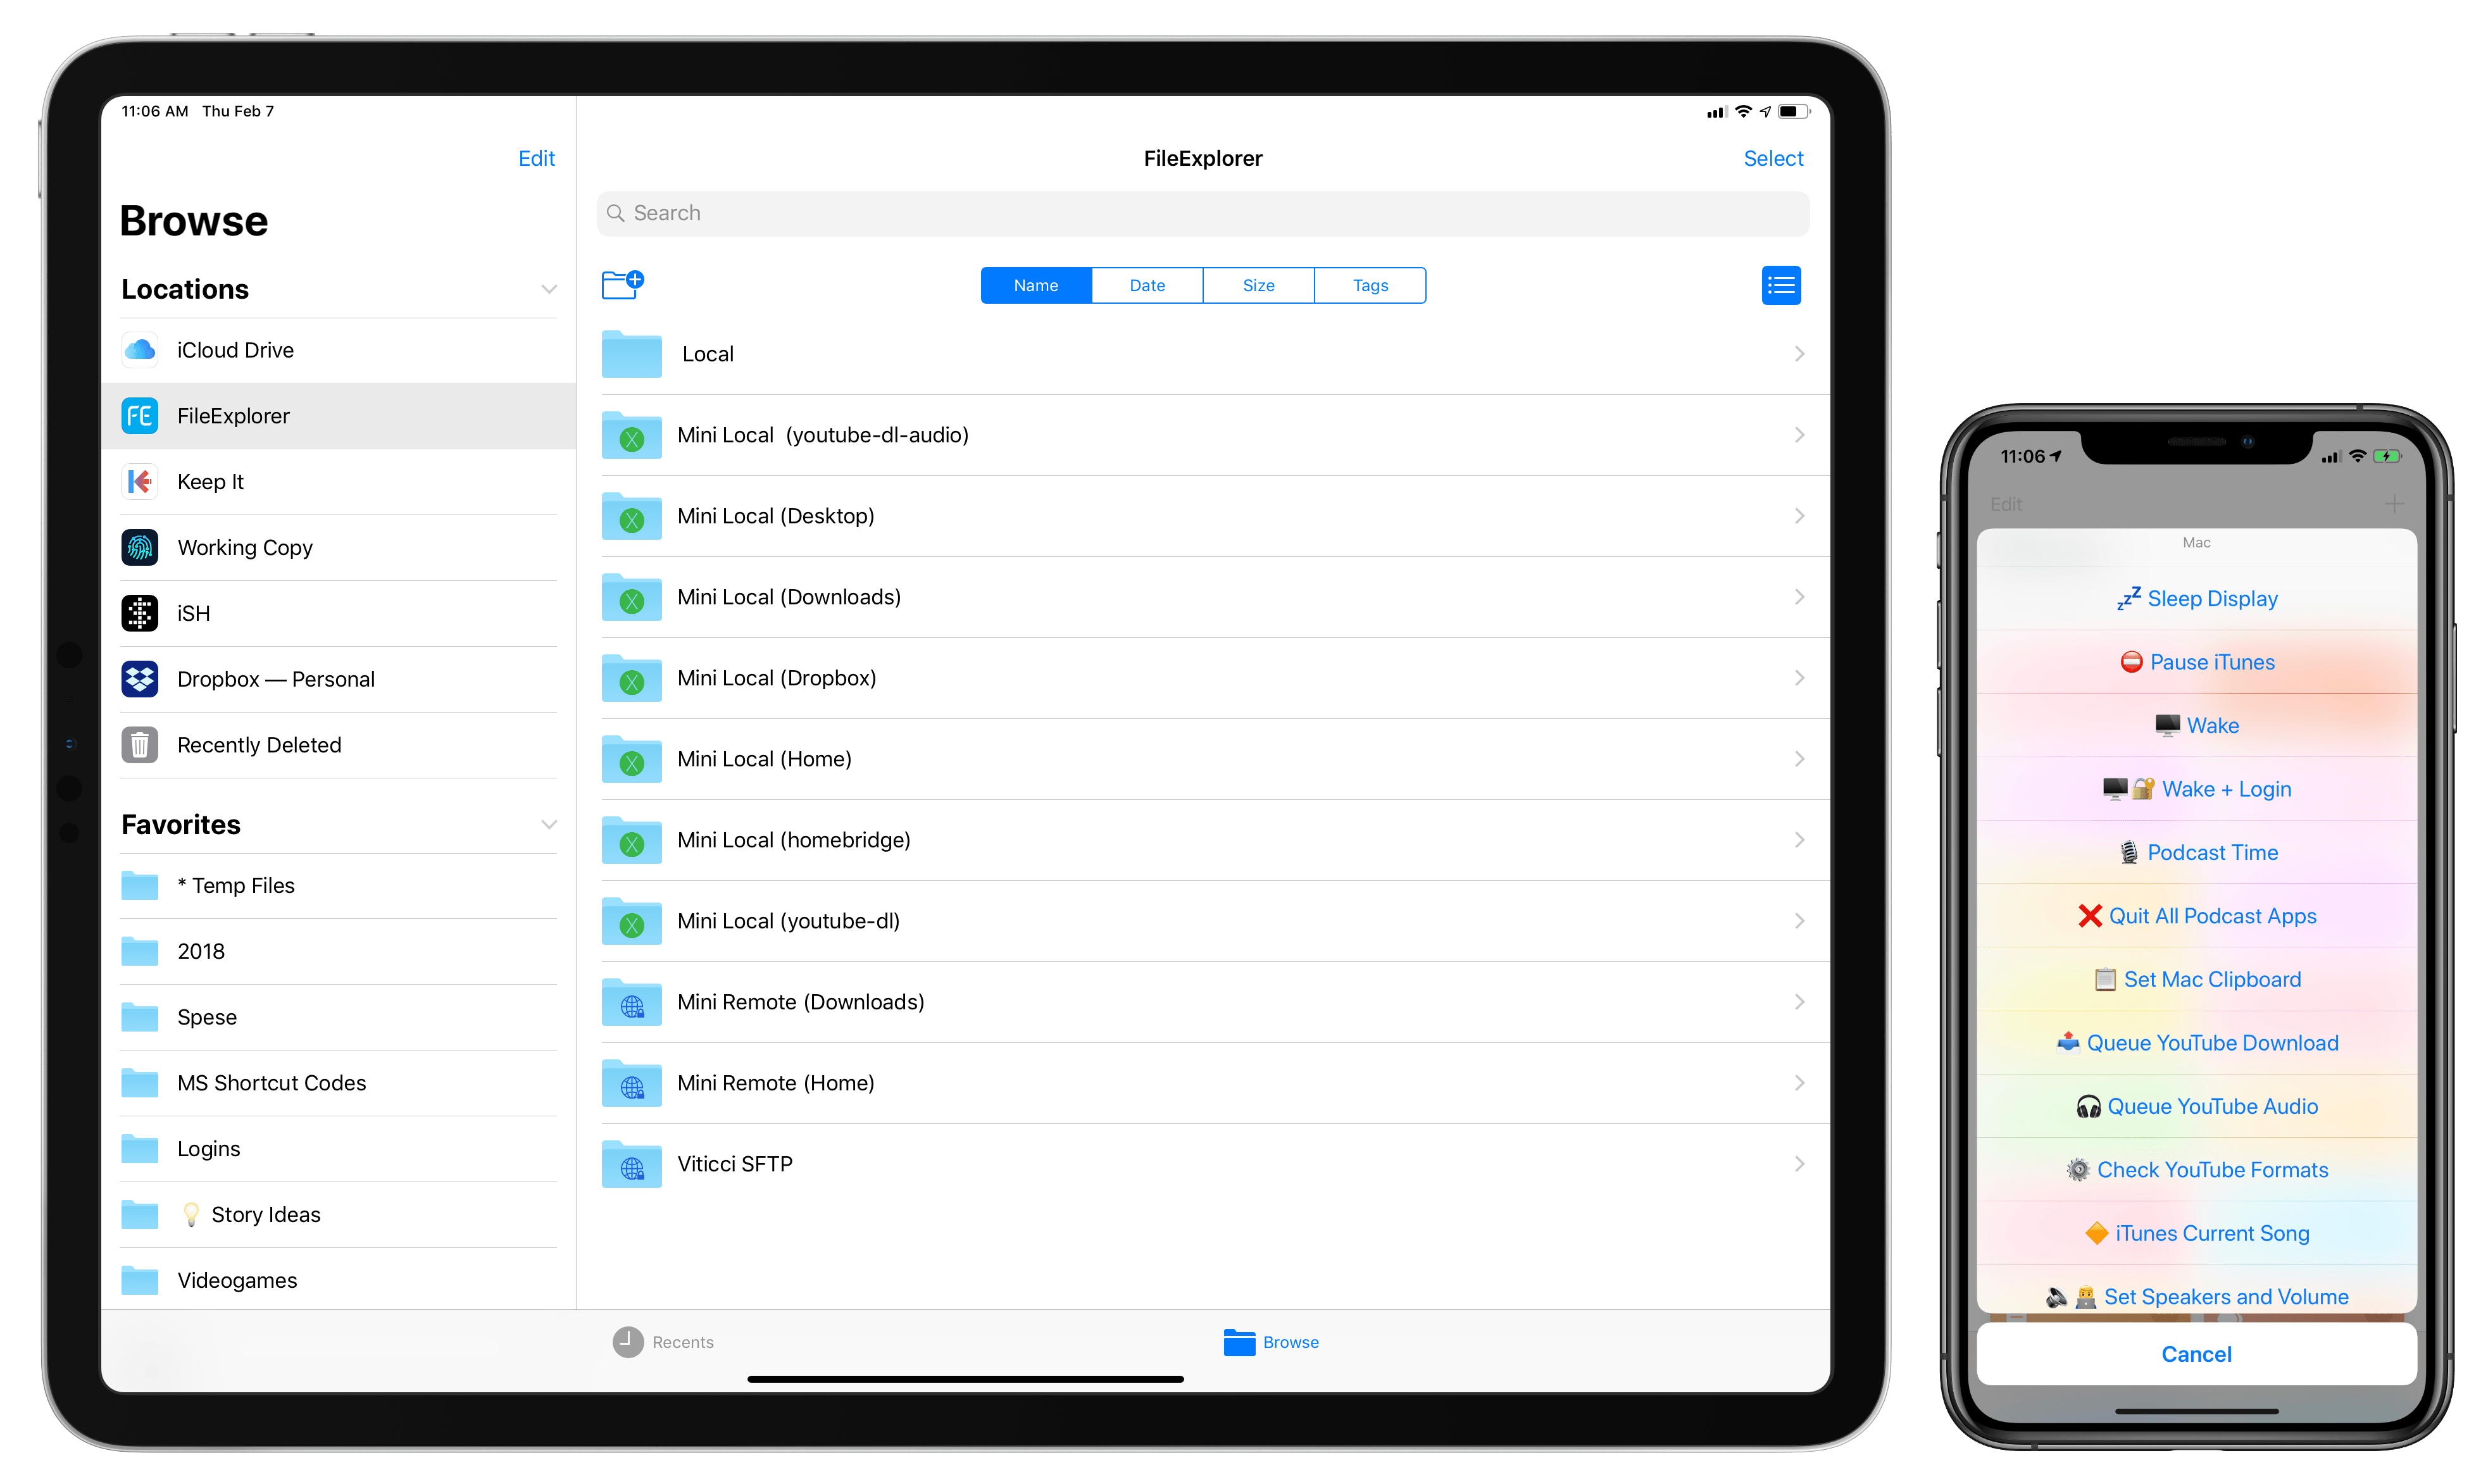
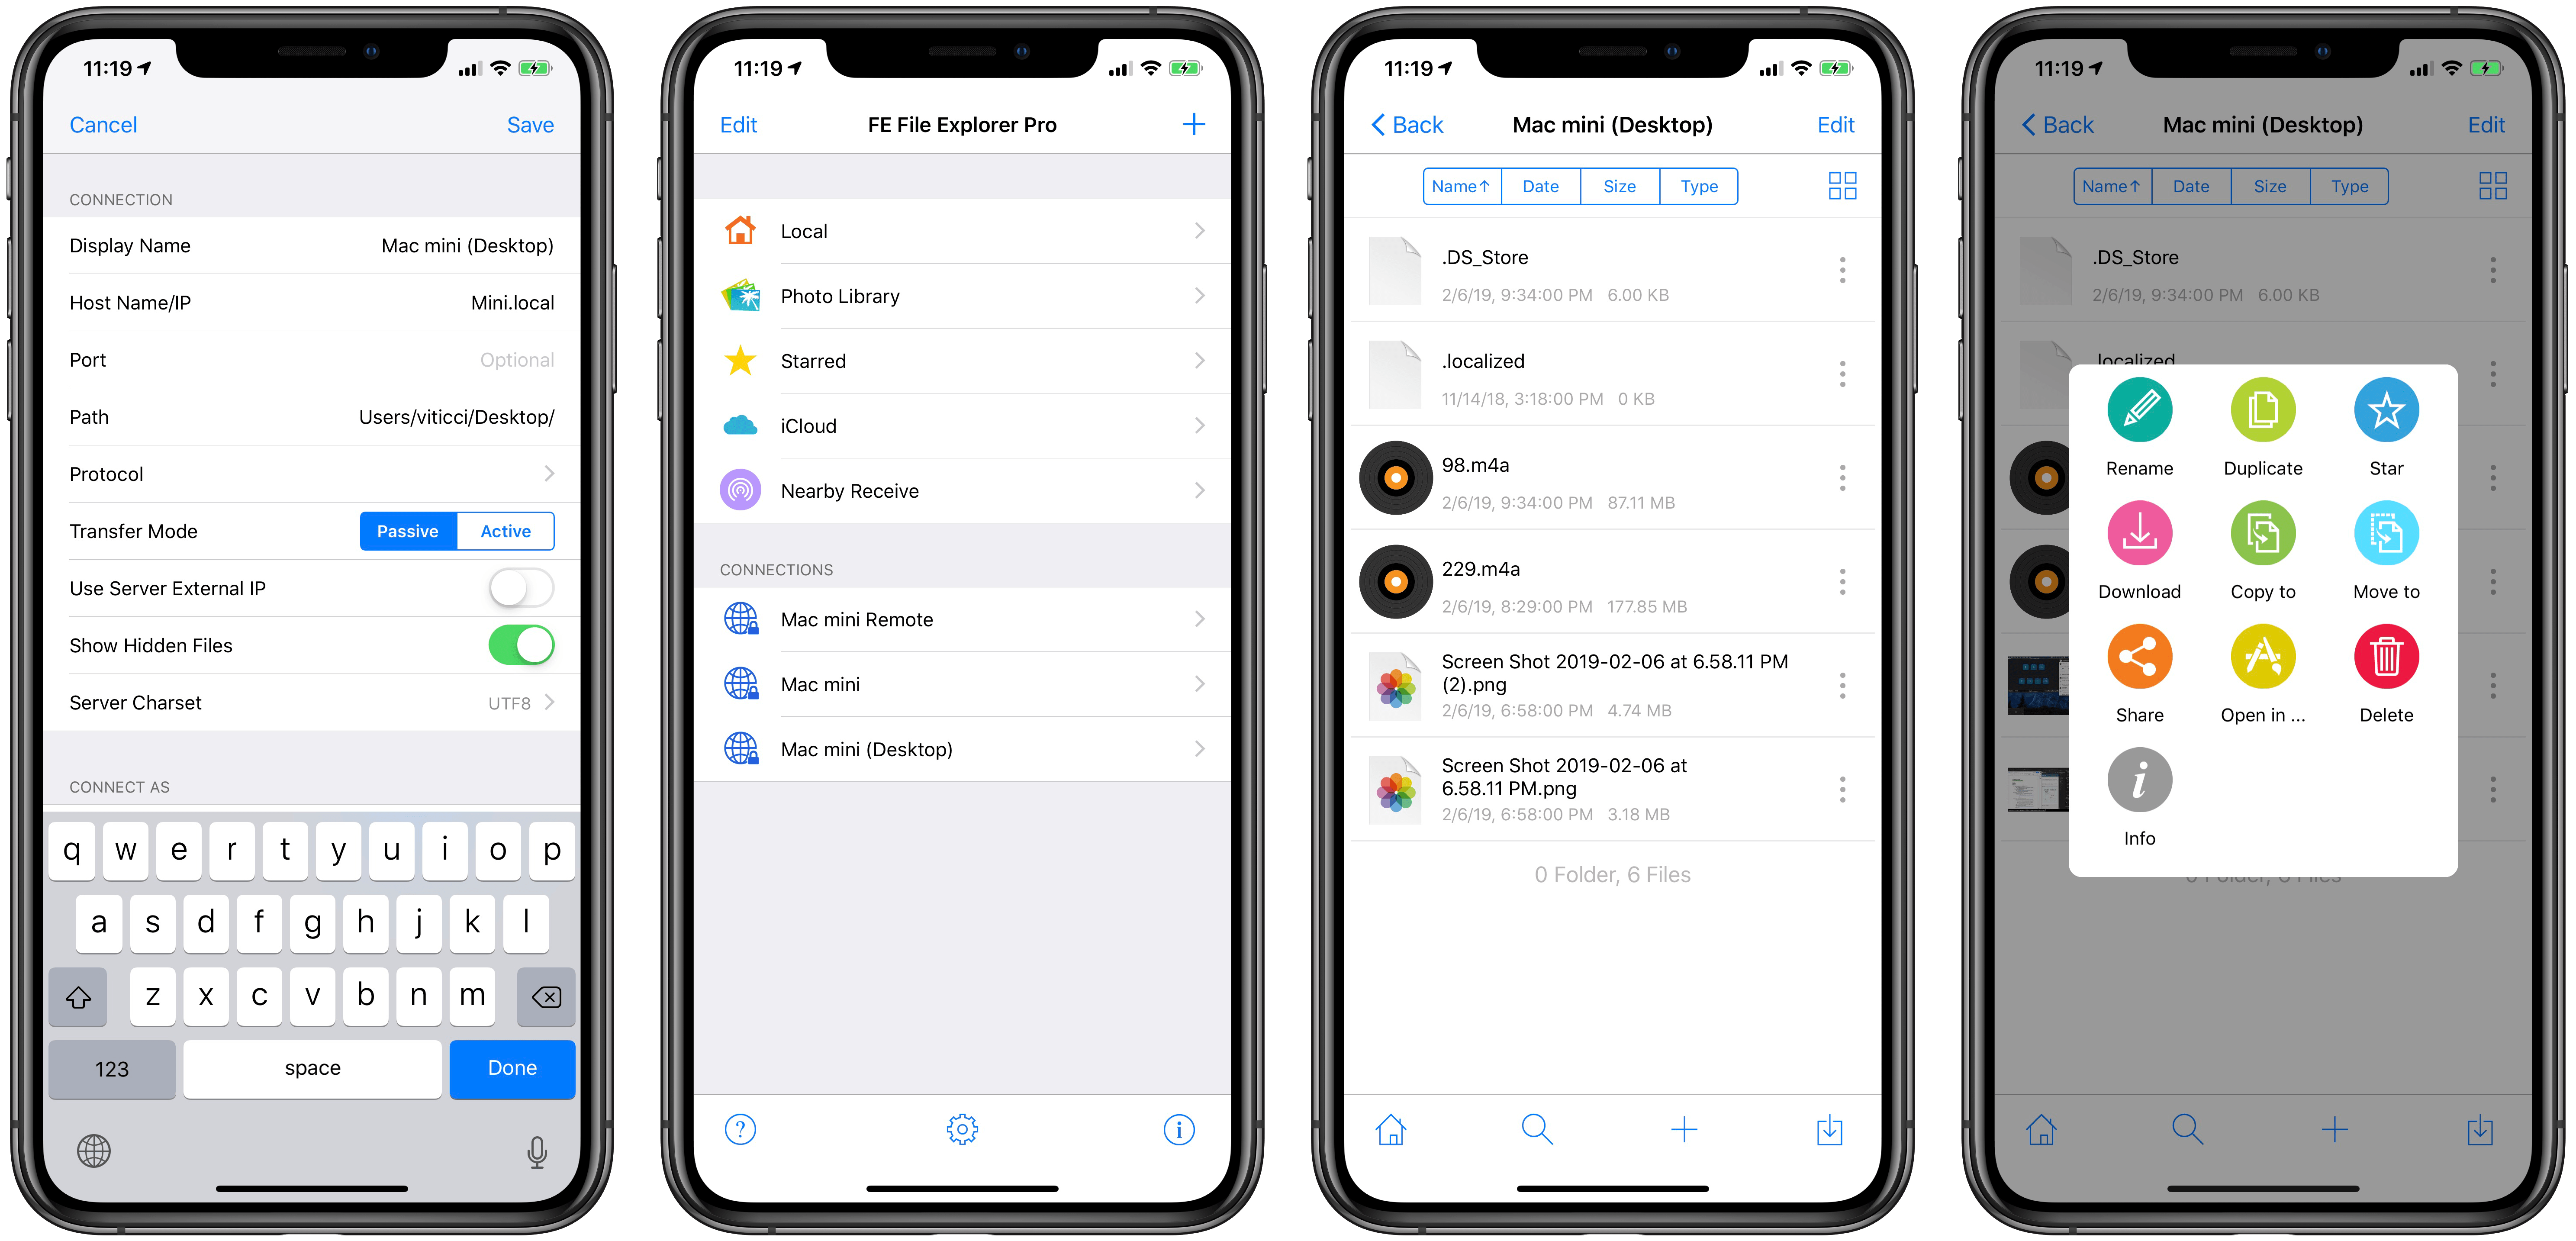
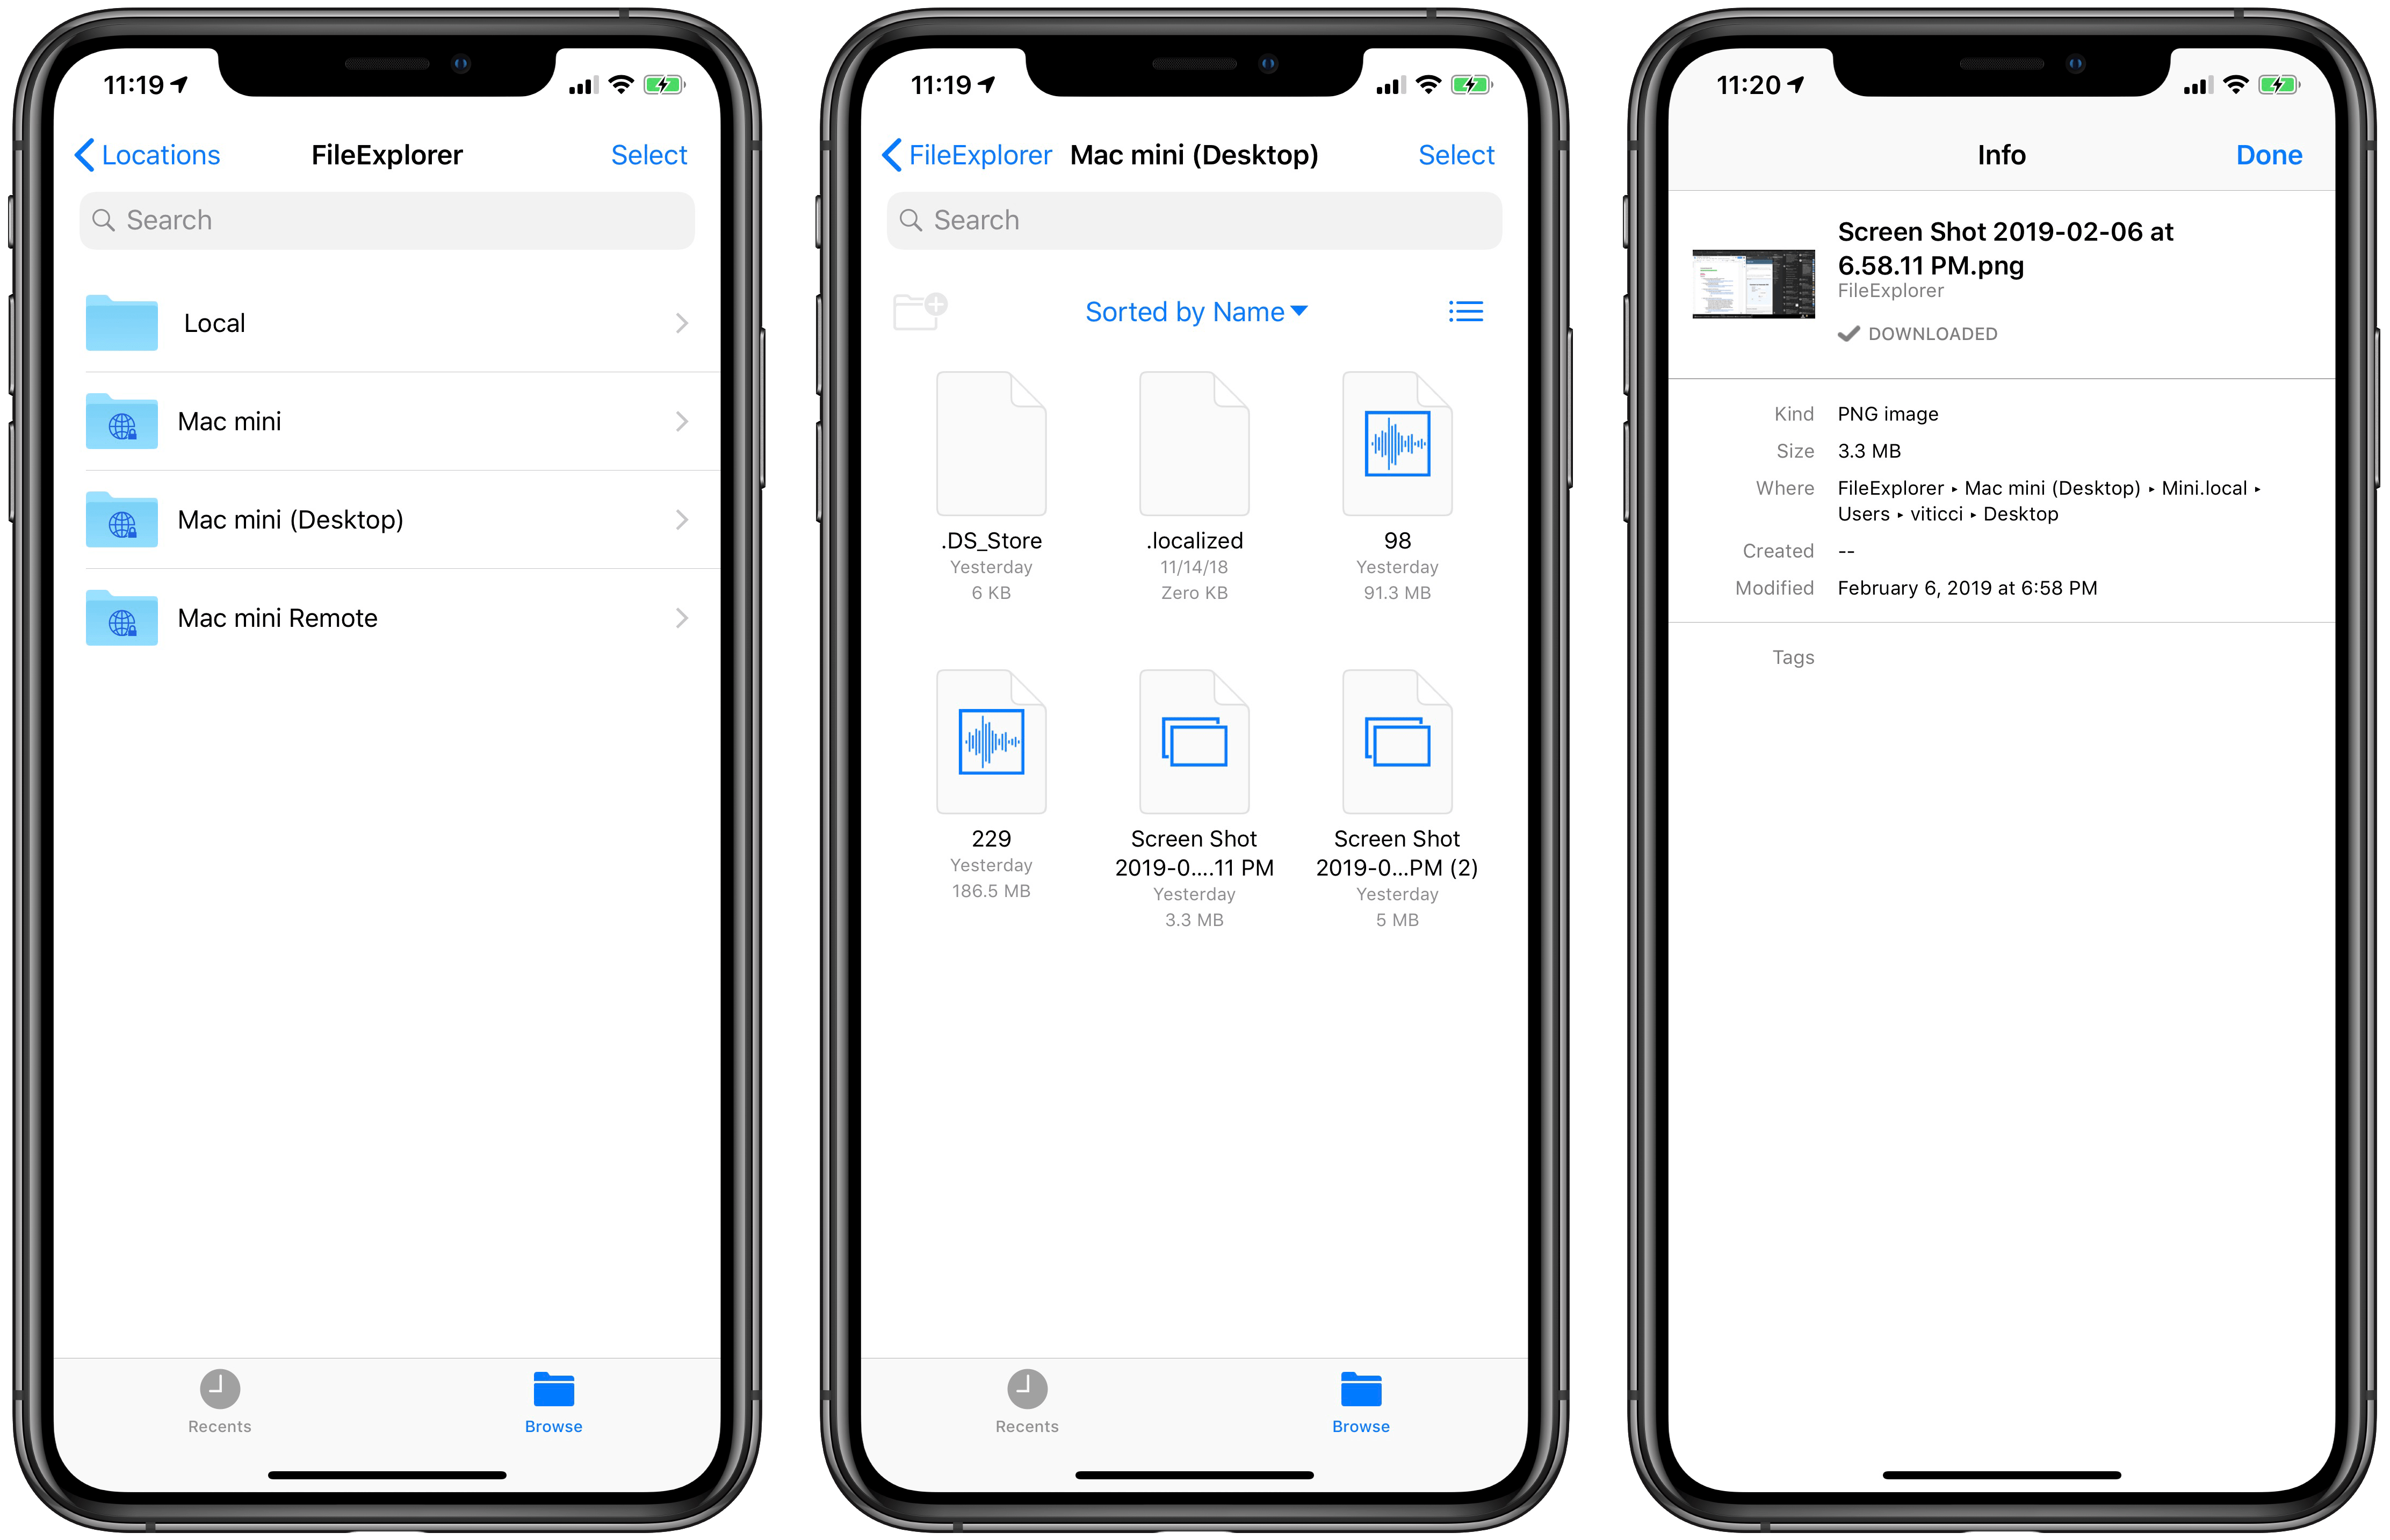
I’ve been taking advantage of FileExplorer’s support for the Files app in a couple of ways. I set up multiple locations for different folders on my Mac mini such as Home, Downloads, Desktop, and the youtube-dl folder where I download YouTube videos offline. These are folders that I don’t sync with iCloud Drive or Dropbox and that contain files or sub-folders I still want to access from iOS.
To add multiple locations, I started from an initial macOS connection in FileExplorer and duplicated it multiple times, changing the initial path to different folders of my macOS user account.3 In the Files app, these connections appear as special folders with an ‘X’ logo in the FileExplorer location and I can tap on one to start browsing the contents of a folder on the Mac mini from my iPad Pro.
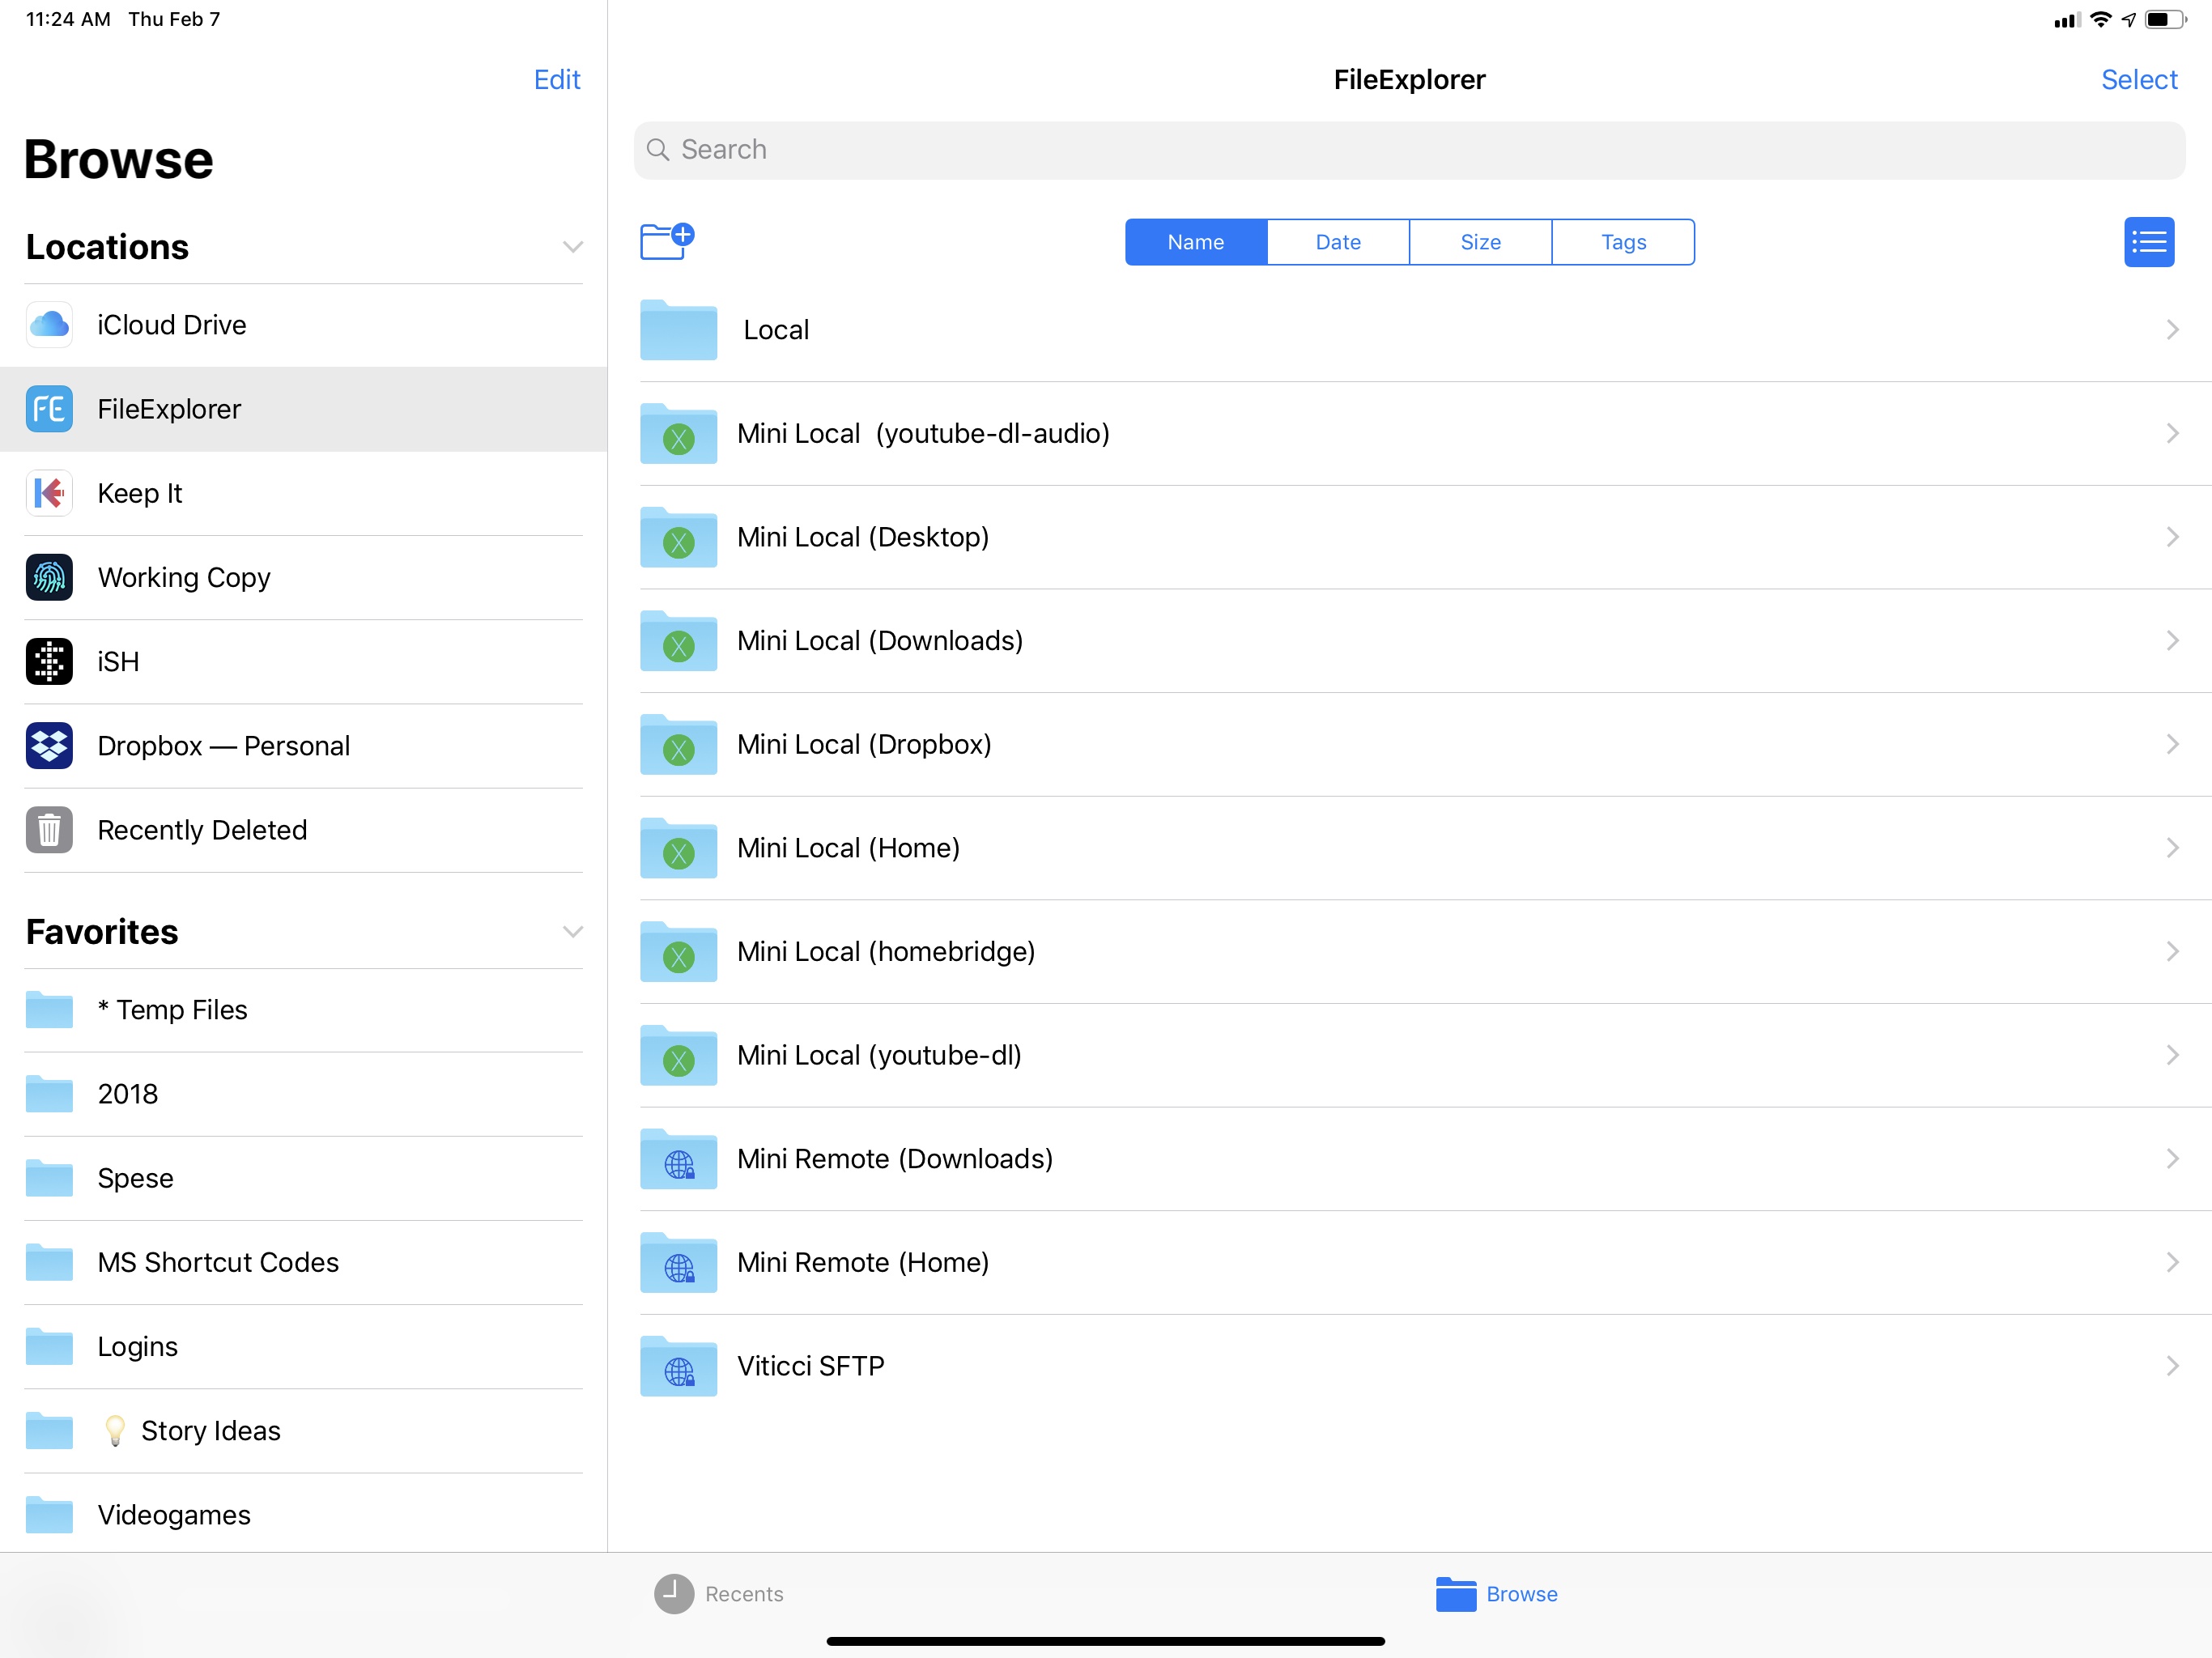
In addition to local connections to the Mac mini, I also added SFTP servers to FileExplorer to connect to my web server as well as my Mac mini when I’m outside of my home network. The latter is based on a dynamic DNS service that gives me a unique domain (whose IP address is constantly updated by my ISP’s modem) that points to the mini’s internal address on the home network. This way, even when I’m not at home, I can SSH into the Mac mini4 and, say, grab a file from its Downloads folder without having to upload it to cloud services such as Dropbox first. Again, none of this is necessarily new to iOS power users, but the ability to do so from Files or a Files picker without authenticating inside another app first is unprecedented.
This is not to say that FileExplorer is perfect. As I noted above, the app isn’t the prettiest to look at and I’ve spotted a handful of typos throughout the UI. FileExplorer can’t sync connections across devices with iCloud5, doesn’t support Picture in Picture for video playback, and doesn’t integrate with the Open-in-Place API for files and directories yet. This means that, for now, you won’t be able to edit FileExplorer’s documents in-place inside other apps. There’s also an argument to be made about the fact that FileBrowser offers more contextual options for selected files, supports Siri shortcuts on iOS 12, and provides an overall nicer app experience than FileExplorer.
But that’s exactly the point: I don’t want to spend time in a third-party file manager because my iPad already has one that can be enhanced with extensions. Considered through the lens of Files integration, FileExplorer beats FileBrowser thanks to the speed and reliability of its Files provider, which requires no management once it’s been set up. With FileExplorer’s Files integration, my most-used Finder folders are always a couple of taps away, which has dramatically simplified how I can exchange files between the Mac mini and iPad Pro.
Mixed Automation: iOS Shortcuts for macOS Automation
Ever since I got the Mac mini, I was interested in exploring an idea I had long been putting off: blending iOS and macOS automation using Siri and the Shortcuts app.
For lack of a better name, I’m calling this mixed automation – which I’m going to use to indicate a series of techniques to trigger AppleScripts, Keyboard Maestro macros, shell commands, or even BetterTouchTool actions on the Mac by mixing them with actions and native iOS features via Shortcuts.
At a basic level, mixed automation consists of using the ‘Run Script Over SSH’ action of Shortcuts to send a command to a Mac on the same local network and execute an action included in the script itself. This method in itself is not new to Shortcuts (it was possible with Workflow before too) and, in the case of AppleScript, relies on the well-oiled machine that is the osascript command. However, I’ve been trying to expand this approach further by going beyond AppleScript alone and triggering Keyboard Maestro macros (which I find easier to put together than AppleScript); more importantly, I am trying to combine the automation possibilities of the Mac with iOS-only features of Shortcuts, such as the ability to activate these commands with Siri, present native UIs with dialogs and lists, or activate other native iOS app shortcuts in addition to sending commands to a Mac.
Mixed automation is a topic I plan to cover on a regular basis going forward here on MacStories as well as Club MacStories. For this reason, the shortcuts in this article are only an initial batch of the ones I’ve been working on; there’s lots more I’d like to share in the future and other solutions I want to test and explain when it comes to fusing Shortcuts and Mac automation.
That being said, allow me to detail some examples of shortcuts for macOS that I’ve been using for the past couple of months.
Wake Mac
This is the shortcut I’m using most frequently when I want to access my Mac mini from the iPad Pro. Built using the caffeinate command of the macOS shell (which sends a request to wake the computer from sleep), the shortcut wakes the Mac mini, bringing up the login screen.
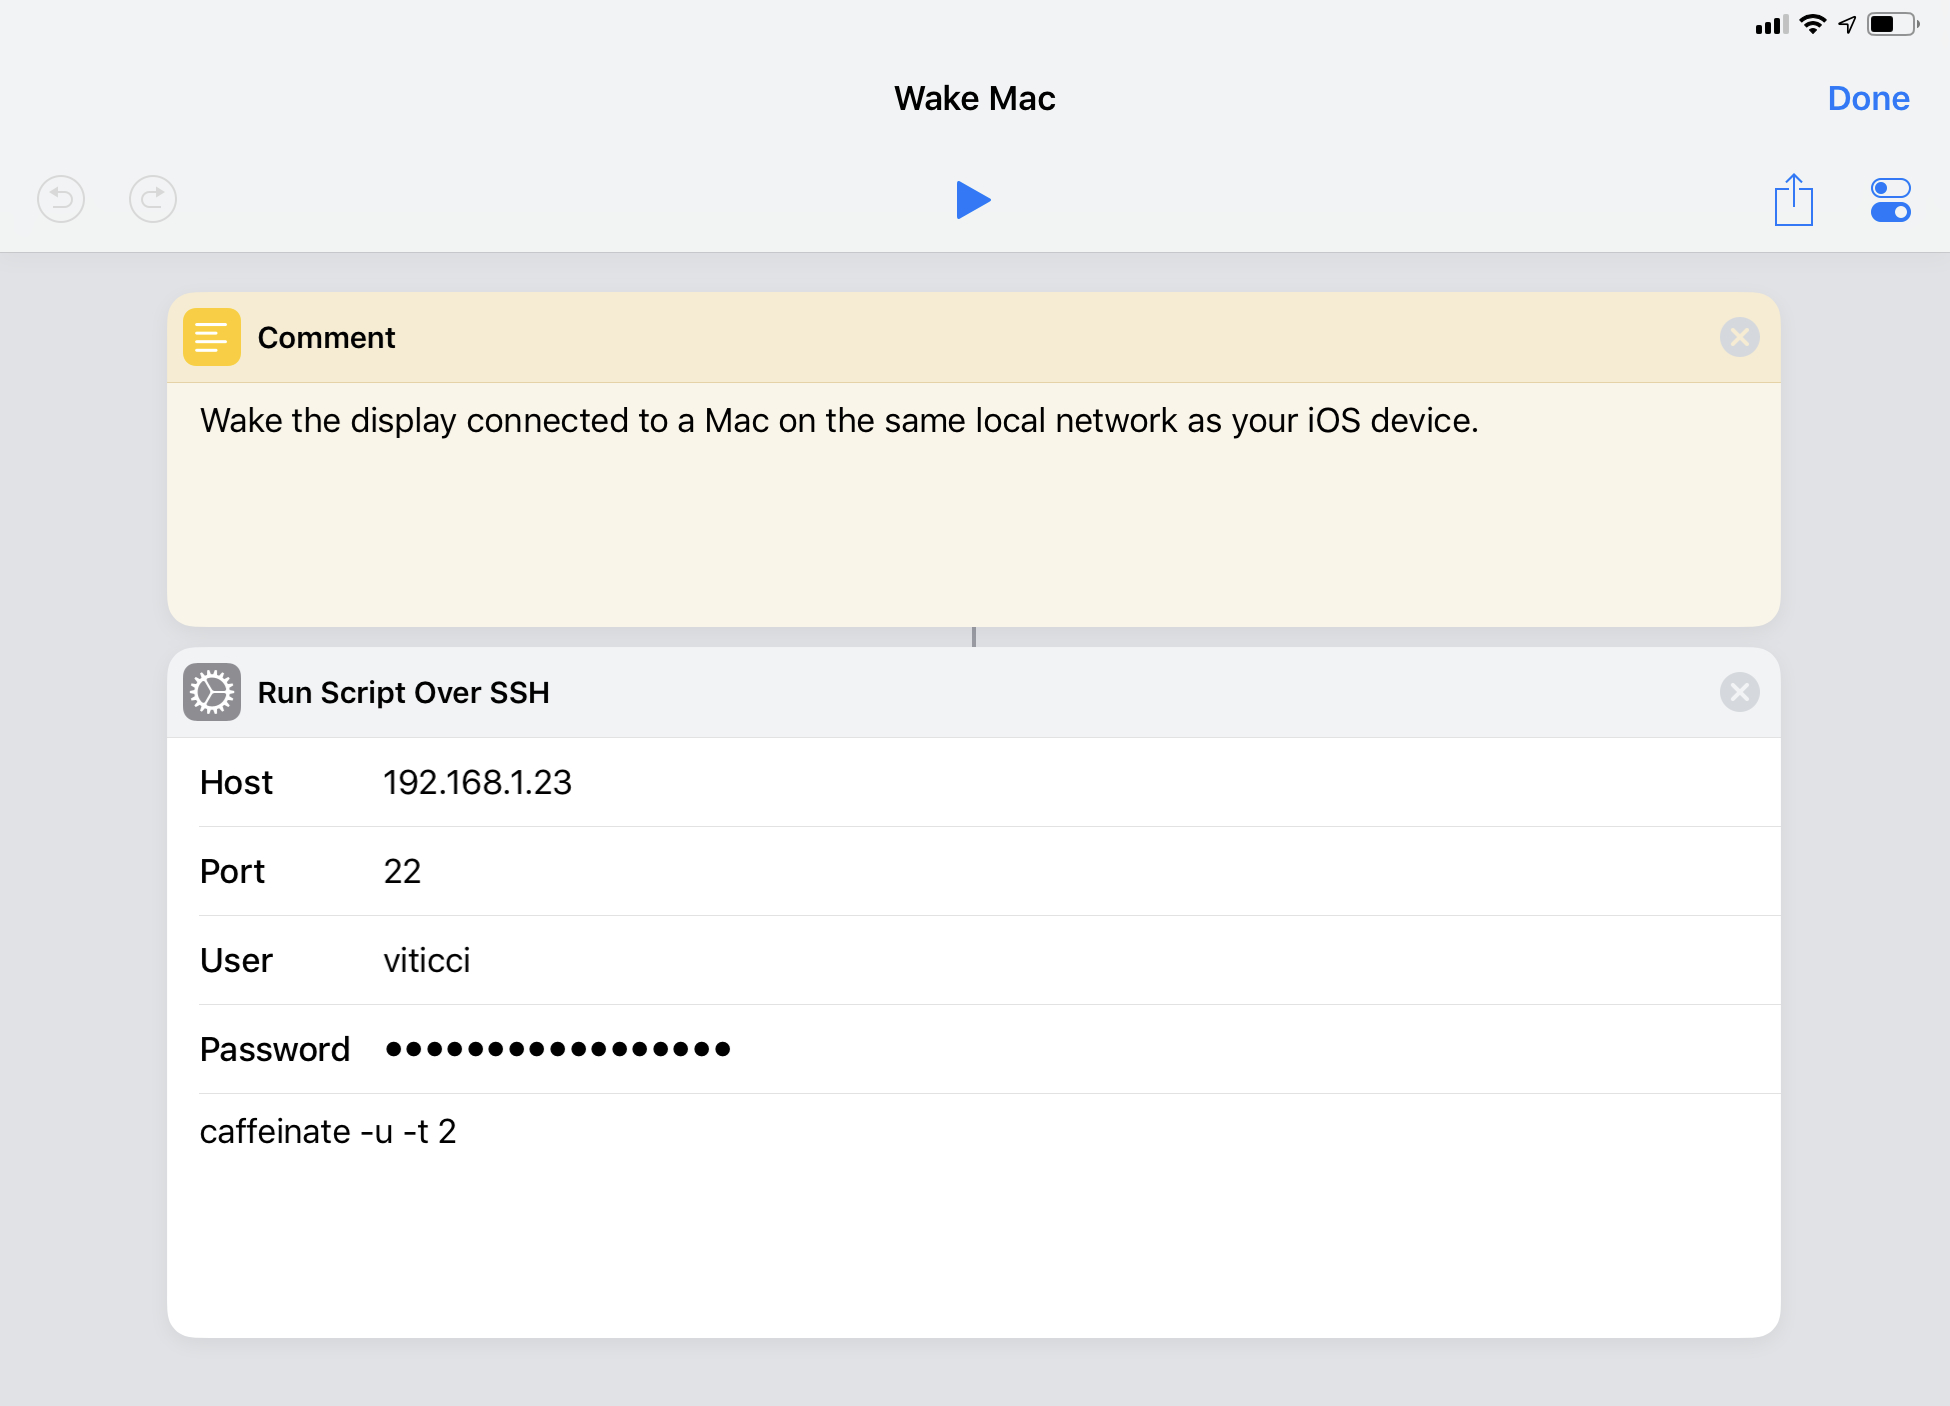
Here’s why this shortcut is a good example of Apple’s seamless integration of different pieces of its ecosystem: because I’m wearing the Apple Watch and my apartment is small enough for the Mac to consider the Watch “nearby”, as soon as the shortcut has finished running I feel a series of taps on my wrist that tell me the Apple Watch has unlocked the Mac mini.
Of course, we can go even further and remove the need to run the shortcut from the Shortcuts app altogether. I assigned a “Wake my Mac” phrase to the shortcut, so I can now ask any permutation of Siri around the house (iOS, Watch, or HomePod) to wake my computer before I even walk into the office.6 “Wake my Mac” should be a native Shortcuts action, but caffeinate works well enough for now.

Wake Mac
Wake the display connected to a Mac on the same local network as your iOS device.
Wake Mac with Login
There are times when I need to log into my Mac mini but I’m either not wearing an Apple Watch or sitting too far from the mini for the proximity-based Watch unlock to work. Fortunately, there’s still a way for Shortcuts to call a script on macOS and log in by “typing” the user’s password; it’s not elegant, but it gets the job done.
By telling System Events to keystroke the Mac’s password as text, it’s possible to create a shortcut that wakes the Mac first (with caffeinate), waits a second, then pastes the password in the secure text input field that is selected by default when a Mac is awoken from sleep.
I don’t run this shortcut often (like I said, my apartment is small enough for the Apple Watch login to never fail, and I’m rarely without my Apple Watch), but it’s good to have the option if needed.

Wake Mac + Login
Wake the display connected to a Mac on the same local network as your iOS device and paste your password in the login screen by simulating keystrokes.
Sleep Mac
This shortcut is the exact opposite of Wake Mac and I use it whenever I don’t want to wait for the Mac mini to go to sleep on its own. Maybe I’m about to fall asleep and am bothered by the display’s light, or perhaps Silvia and I are watching a TV show and don’t want to see another light source in our field of vision. With this shortcut, I can instantly put the UltraFine display connected to the Mac mini to sleep.
Sleep Mac uses the pmset shell command with the displaysleepnow setting. The pmset command is used to modify and interact with power management settings of a macOS machine, and it supports a variety of options including network sleep, Power Nap, disk sleep, proximity wake, and more. In my case, I don’t want to put the entire computer to sleep – just its display. With this shortcut, the display is turned off immediately and, if activated via Siri and voice, I even get a response back saying “The Mac’s display is off”. It’s nice to be able to say “Hey Siri, sleep Mac” on iOS and see an instant result on another computer running a different OS.

Sleep Mac
Put the display connected to a Mac on the same local network as your iOS device to sleep.
Set Mac Clipboard
I, like others at the time, was not completely satisfied with Universal Clipboard when it launched as part of the Continuity initiative for Mac and iOS. For a long time, Universal Clipboard just straight up didn’t work or was too slow to paste the contents of another device’s clipboard; the feature was, at least for me, “fixed” at some point last year, and I would say it now works about 80% of the time, particularly if I’m copying and pasting between iOS devices. Still, there are occasions when Universal Clipboard just doesn’t want to sync the clipboard between platforms, and because I noticed the issue was more frequent when attempting to paste on the Mac something that had been previously copied on iOS, I decided to fix it myself with a shortcut.
At a high level, the shortcut works by chaining the printf and pbcopy shell commands so that the iOS clipboard is formatted as a string of text and “piped” to the Mac’s clipboard, ready to be pasted in any text field. As you can imagine, the shortcut takes advantage of the fact that Shortcuts comes with a native ‘Get Clipboard’ action that passes whatever has been copied on iOS as input for the next step.
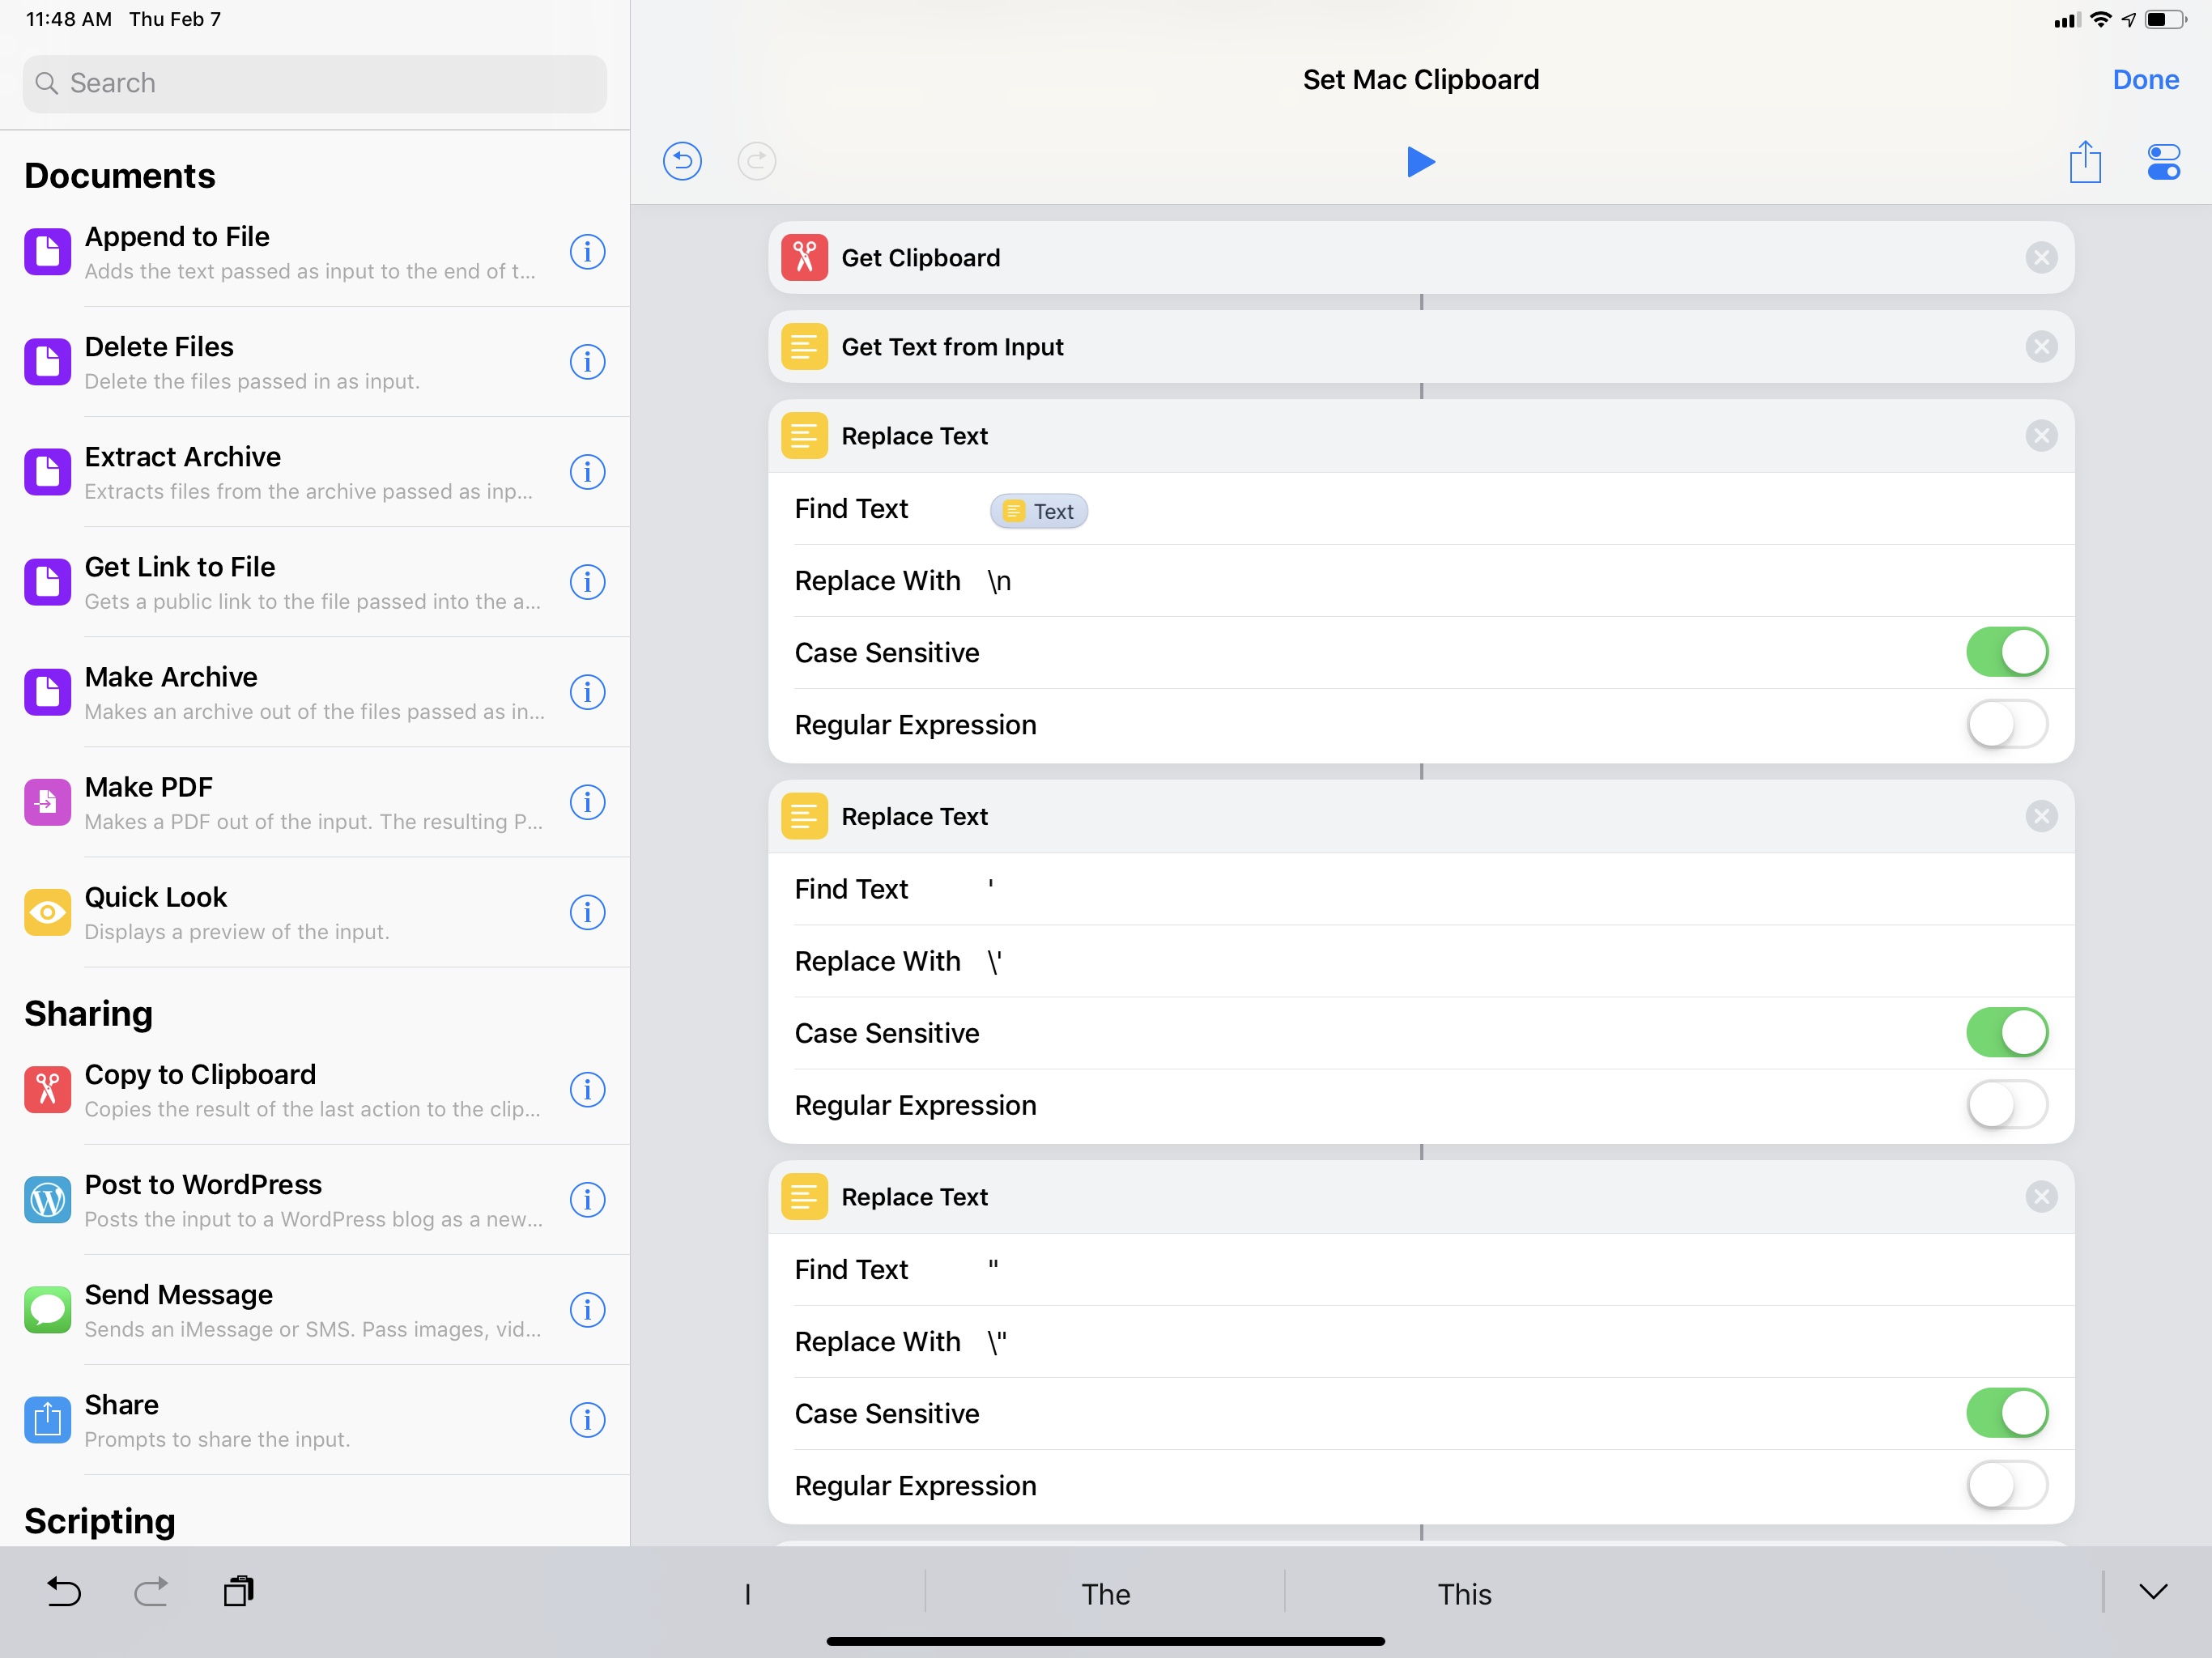
Before sending the iOS clipboard over to the Mac’s shell, however, the shortcut performs some cleanup tasks: line breaks are replaced by \n and both single and double quotes are escaped. Then, it’s just a matter of running a script over SSH with a pipe character (|), passing the output of the first command to the second one. Considering the manual Find/Replace that I do in the shortcut itself, the printf step is probably not even necessary, but I stole this approach from the excellent Mac Maestro shortcut launcher, and I prefer the additional check it involves.

Set Mac Clipboard
Set your Mac’s clipboard to the contents of the current iOS clipboard. The shortcut cleans up the iOS clipboard by escaping line breaks and quotes.
Check YouTube Formats
This is part of a longer story about how I’m using youtube-dl to download YouTube videos on the Mac mini and watch them in 4K on iOS (which I am going to write about at a later date), but I wanted to mention this shortcut because, despite its simplicity, it’s become one I run on an almost daily basis.
I have a whole setup (consisting of iCloud Drive, Hazel, shell scripts, Pushover, and Shortcuts) dedicated to converting YouTube links to audio or 4K video using my Mac mini. For those unaware of youtube-dl, it’s an amazing command line program that can download YouTube content in a variety of formats with support for dozens of custom settings and different scenarios (such as YouTube playlists). While the program can download the file behind a YouTube video and can do so automatically provided the right configuration flags, I prefer to use my own syntax to download – whenever possible – 4K videos in the WebM format with the highest frame rate available. However – and this is quite common for newly uploaded videos – 4K versions aren’t immediately available for download (or streaming) because YouTube is slow at processing high-quality formats. Which means I usually have to check if the format I want is actually available, otherwise I won’t bother with the download at all. For this reason, I had to write a shortcut to make it easy to check available video formats from iOS with two taps.

This is easy to do with youtube-dl thanks to its -F flag, which returns a plain text list of formats, resolutions, and file sizes for each version of a video available for download. My shortcut does the following: assuming there is a YouTube link in the system clipboard, the shortcut runs youtube-dl -F on the Mac mini via SSH and returns the output from the shell, which is cleaned up a little by adding the line breaks between each format. This takes about two seconds to run and it’s faster than any alternative I’ve tried on iOS (including running youtube-dl via iSH and Pythonista, but we’ll get into that in the future).
The result isn’t pretty, but it’s easy enough to scan the list for “2160p” or “2440p” entries once you get used to how the output is formatted. If the format I want is available, I’ll run another shortcut to start a download on the Mac mini, but I’m not covering that aspect today.

Check youtube-dl Formats
Use youtube-dl to check the available download formats for a YouTube link copied to the clipboard on iOS. The shortcut assumes youtube-dl has been installed on a local Mac under the /usr/local/bin folder.
- It was funny because everybody thought the Mac mini line was done. ↩
- Many years ago, I did use an iMac for a few months. However, I never considered that machine truly mine – it was set up at my parents' house (where it now sits unused) and I worked on it for a while until I moved in with my girlfriend a few months later. ↩
- FileExplorer supports key-based authentication alongside username and password. ↩
- Though you can save and export a configuration file and re-import it on a different device, which gets the job done. ↩
- A fancier term to indicate a dedicated corner of our bedroom. Please let me have this one. ↩