Ben McCarthy’s career as a developer coincides almost exactly with mine as a writer. As a result, I’ve had the pleasure of watching Obscura evolve from little more than an idea to one of the best camera apps on the App Store. As with so many apps, what sets Obscura apart from others is Ben’s attention to detail, impeccable design taste, and deep knowledge of the app’s subject matter – photography.
Today, Obscura 4 is out, less than two years since I reviewed version 3 with a refreshed design and a handful of new features. The update includes a change in Obscura’s business model, too. In the past, the app was paid up front, with each major release being a new purchase. Going forward, Obscura is free to download, with certain advanced features, known as Obscura Ultra, requiring a subscription.
CYME announced today that its app Peakto has added Pixelmator Pro integration. Peakto is a Mac app that uses AI to organize your photos from numerous sources, including Apple Photos, Lightroom Classic, Luminar, Capture One, and more. The app handles multiple file types and offers navigation by keywords, location, and other metadata too.
Today’s announcement adds Pixelmator Pro documents to the mix. As with other image sources, Pixelmator Pro files will be organized and viewable in Peakto. For Pixelmator Pro users, the announcement today means new ways to explore their image collection alongside images from other apps. The integration with Peakto also allows Peakto users to access Pixelmator Pro as an editing destination with one click.
I haven’t had a chance to try Peakto’s new Pixelmator Pro integration yet, but it looks like a good combination for users of both apps. Peakto gains another source of photos to organize, and Pixelmator Pro users have a new way to manage their images.
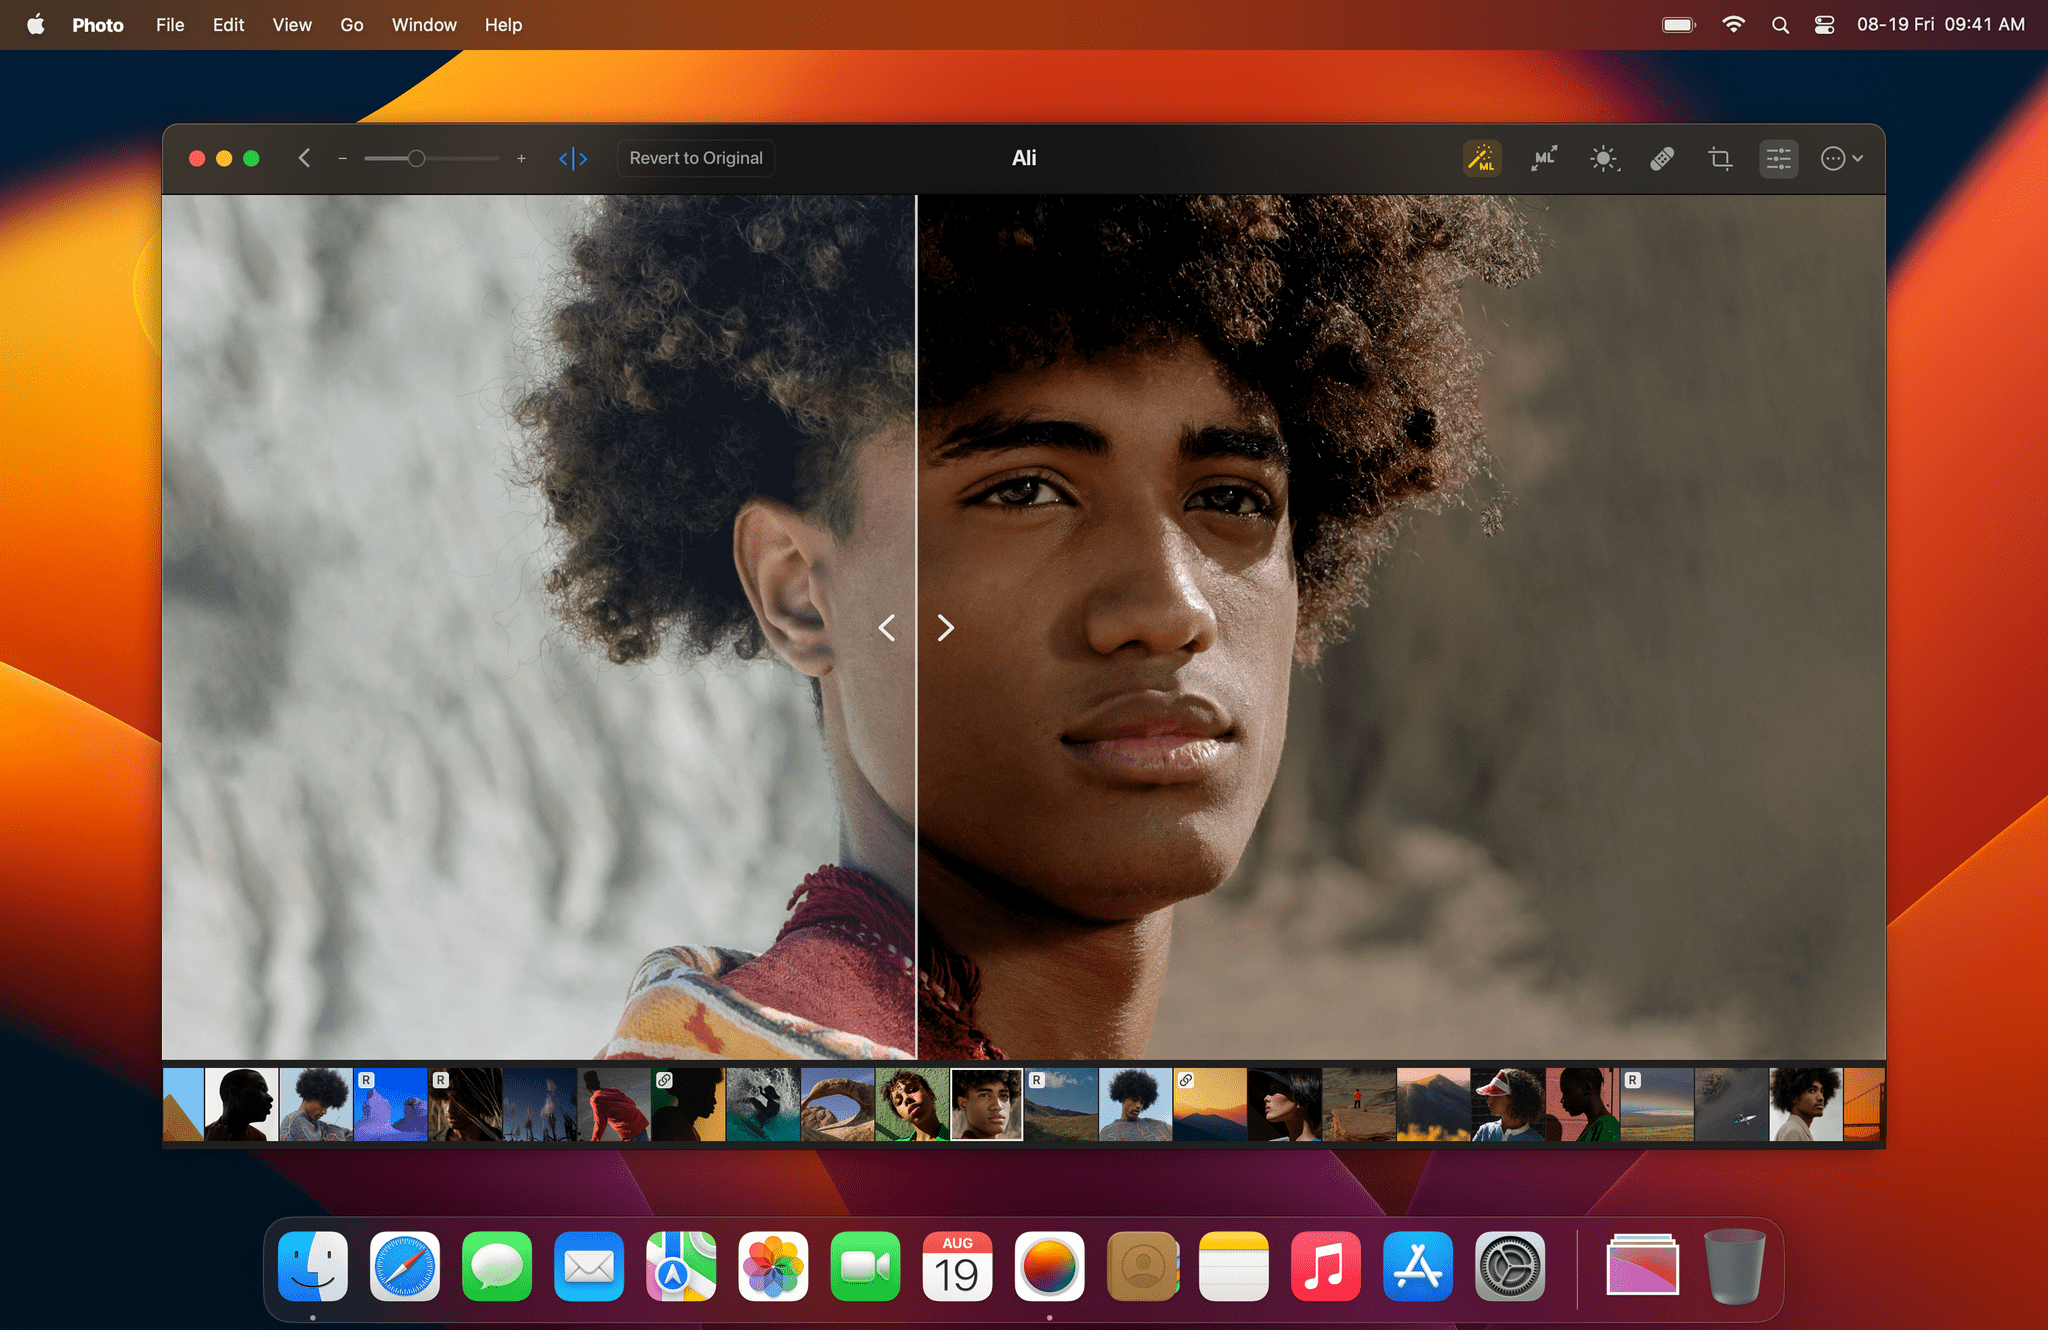
In his latest video, MKBHD eloquently summarized and explained something that I’ve personally felt for the past few years: pictures taken on modern iPhones often look sort-of washed out and samey, like much of the contrast and highlights from real life were lost somewhere along the way during HDR processing, Deep Fusion, or whatever Apple is calling their photography engine these days. From the video (which I’m embedding below), in the part where Marques notes how the iPhone completely ignored a light source that was pointing at one side of his face:
Look at how they completely removed the shadow from half of my face. I am clearly being lit from a source that’s to the side of me, and that’s part of reality. But in the iPhone’s reality you cannot tell, at least from my face, where the light is coming from. Every once in a while you get weird stuff like this, and it all comes back to the fact that it’s software making choices.
That’s precisely the issue here. The iPhone’s camera hardware is outstanding, but how iOS interprets and remixes the data it gets fed from the camera often leads to results that I find…boring and uninspired unless I manually touch them up with edits and effects. I like how Brendon Bigley put it:
Over time though, it’s become more and more evident that the software side of iOS has been mangling what should be great images taken with a great sensor and superbly crafted lenses. To be clear: The RAW files produced by this system in apps like Halide are stunning. But there’s something lost in translation when it comes to the stock Camera app and the ways in which it handles images from every day use.
Don’t miss the comparison shots between the Pixel 7 Pro and iPhone 14 Pro in MKBHD’s video. As an experiment for the next few weeks, I’m going to try what Brendon suggested and use the Rich Contrast photographic style on my iPhone 14 Pro Max.
Sebastiaan de With, part of the team behind the excellent camera app Halide, has published his annual iPhone camera review, this year putting the iPhone 14 Pro Max through its paces in and around San Francisco, Bhutan, and Tokyo. de With’s review is packed with details about every lens and Apple’s computational photography pipeline, taking readers behind the scenes in ways that Apple simply doesn’t.
…with iPhone 14 Pro’s ultra-wide camera comes a much larger sensor, a new lens design and higher ISO sensitivity. While the aperture took a small step back, the larger sensor handily offsets this.
While arguably, a quad-bayer sensor should not give true 48-megapixel sensor resolution as one might get from, say, a comparable ‘proper’ digital camera, the results out of the iPhone 14 Pro gave me chills. I have simply never gotten image quality like this out of a phone. There’s more here than just resolution; the way the new 48 megapixel sensor renders the image is unique and simply tremendously different than what I’ve seen before.
Overall, the advances made to Apple’s Pro-line cameras are impressive this year. With new shooting modes and changes across all of the cameras, I’m looking forward to spending more time experimenting with what the iPhone 14 can now do.
Be sure to check out the full review for de With’s stunning photography and details on the iPhone 14 Pro Max’s other lenses, as well as what’s improved and what hasn’t when it comes to Apple’s Photonic Engine processing pipeline.
If you’re curious about the technical changes to the iPhone 14 Pro’s cameras, the Halide team has you covered with a side-by-side comparison between the iPhone 13 Pro and iPhone 14 Pro. There are a lot of interesting details in the post, but it looks like the most significant changes are to the Main (formerly known as Wide) camera:
The Wide camera sees the greatest changes. The lens gets a bit wider, a 2mm focal length difference. The aperture is smaller (‘slower’), means the lens collects less light. This was probably necessary to work with a larger sensor. We calculate that the Wide camera is able to collect 20% more light compared to last year’s camera, even with this slightly worse aperture, thanks to its larger size.
We’re astonished by the improvement in the camera sensor’s ISO range. It goes far beyond previous iPhone cameras. Given high ISO values are accompanied by more noise, it’s highly likely this ISO range is made possible by how its higher resolution sensor combines 4 pixels into one, vastly reducing noise.
How these spec changes play out in practice will be interesting. We got some initial impressions in the reviews published earlier today, and Austin Mann’s review reveals some of the practical implications of the numbers cataloged by the Halide team. Still, I’m eager to see what Halide’s Sebastiaan de With and others think once they’ve had more time to push these cameras to their limits.
Austin Mann’s review of the iPhone 14 Pro’s cameras is out, and as usual, he’s back with beautiful photos from an interesting location. This time it’s the Scottish Highlands where Mann put the iPhone Pro’s new cameras to the test.
One of the advantages of the new 48MP camera is more latitude to crop images without reducing their resolution too far. There’s a great example in Mann’s review of a tight crop on a rooster that illustrates how far an image can be cropped and still retain lots of detail. Still, Mann concludes that he’s more likely to shoot at 12MP than 48 in most situations because it’s still the fastest way to shoot and performs so well in low-light. Mann was also impressed with shooting video in Action Mode, although he notes that it requires good lighting and crops the resulting video substantially.
With high-resolution imaging capability, Action mode stabilization, and a Cinematic mode that now supports 4K at 24 fps, the iPhone 14 Pro is a powerful imaging tool in the pocket of a creative pro. Beyond the cameras, new safety features like Emergency SOS via satellite and crash detection are exciting to have with me (and with my loved ones).
Now I’m just hoping we see some monster steps forward in the digital workflow so we can quickly get these beautiful files off our cameras and into our projects to share with the world!
For examples of the kind of shots that are possible when the iPhone 14 Pro is in the hands of a professional and more details on the camera’s performance, be sure to visit Mann’s site.
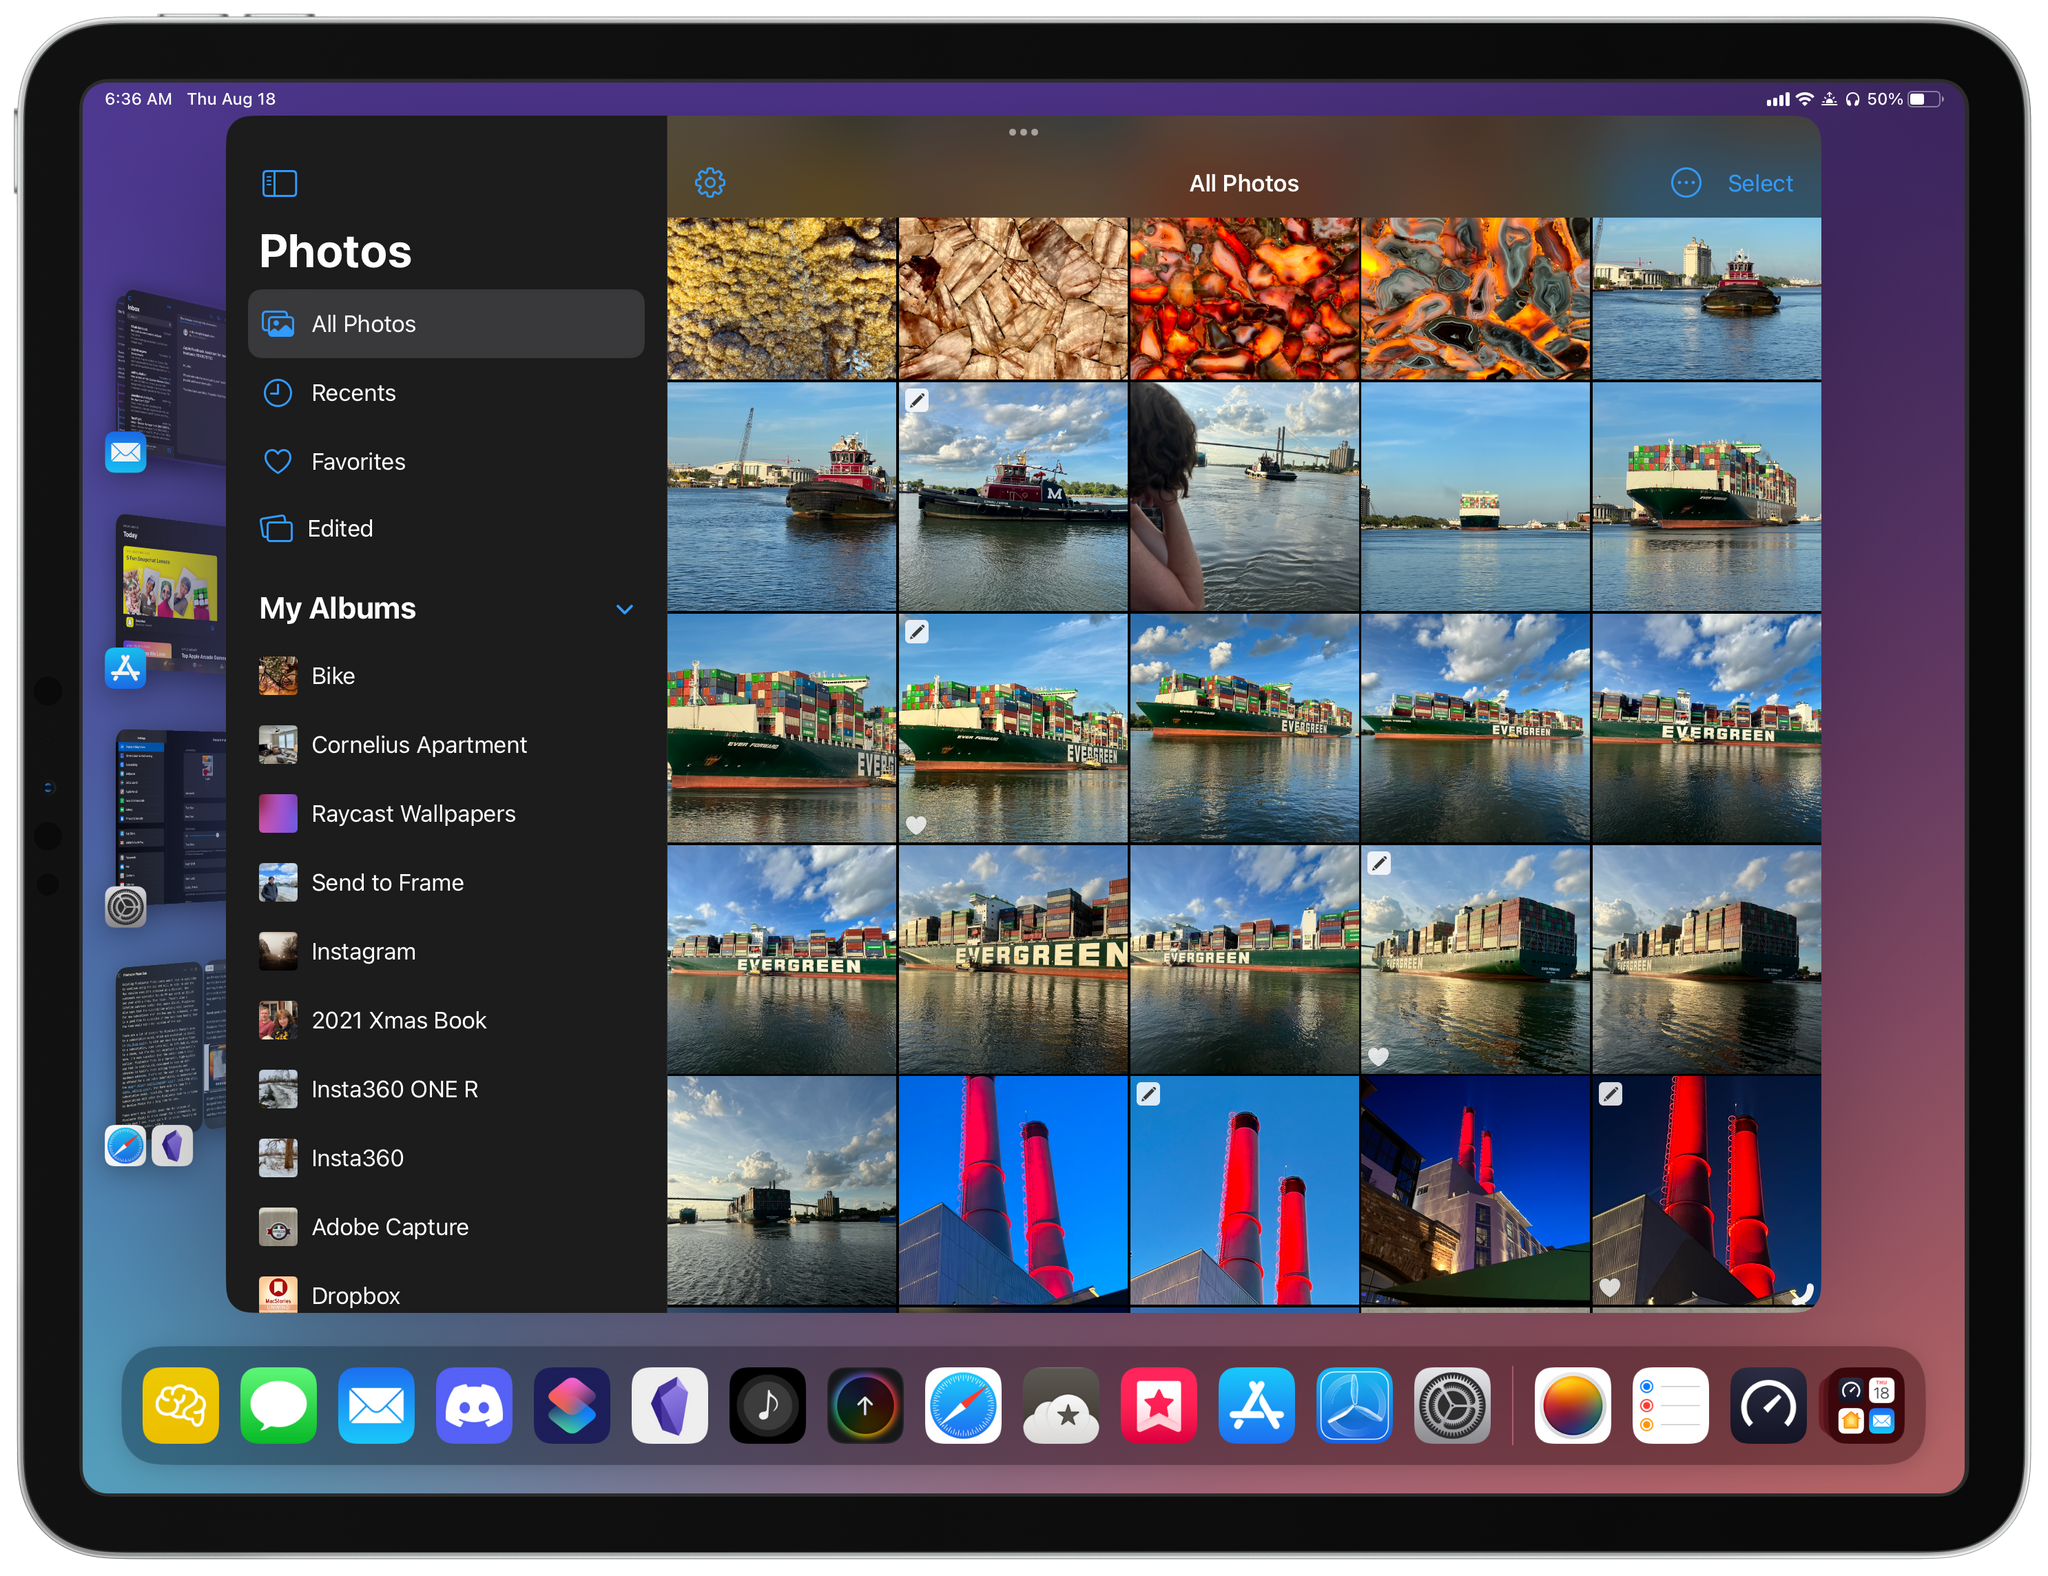
Over the years, I’ve shared family photos with my wife Jennifer in three ways: iMessage, AirDrop, and Shared Albums. However, of those, iMessage won hands down, not because it’s the best way to share photos, but because Messages is an app we already use every day to communicate. Plus, sharing photos with Messages is easy whether you’re already in the app and using the Photos iMessage app or in the Photos app itself and using the share sheet. From conversations with friends and family, I know I’m not alone in my scattershot approach to sharing photos with my family.
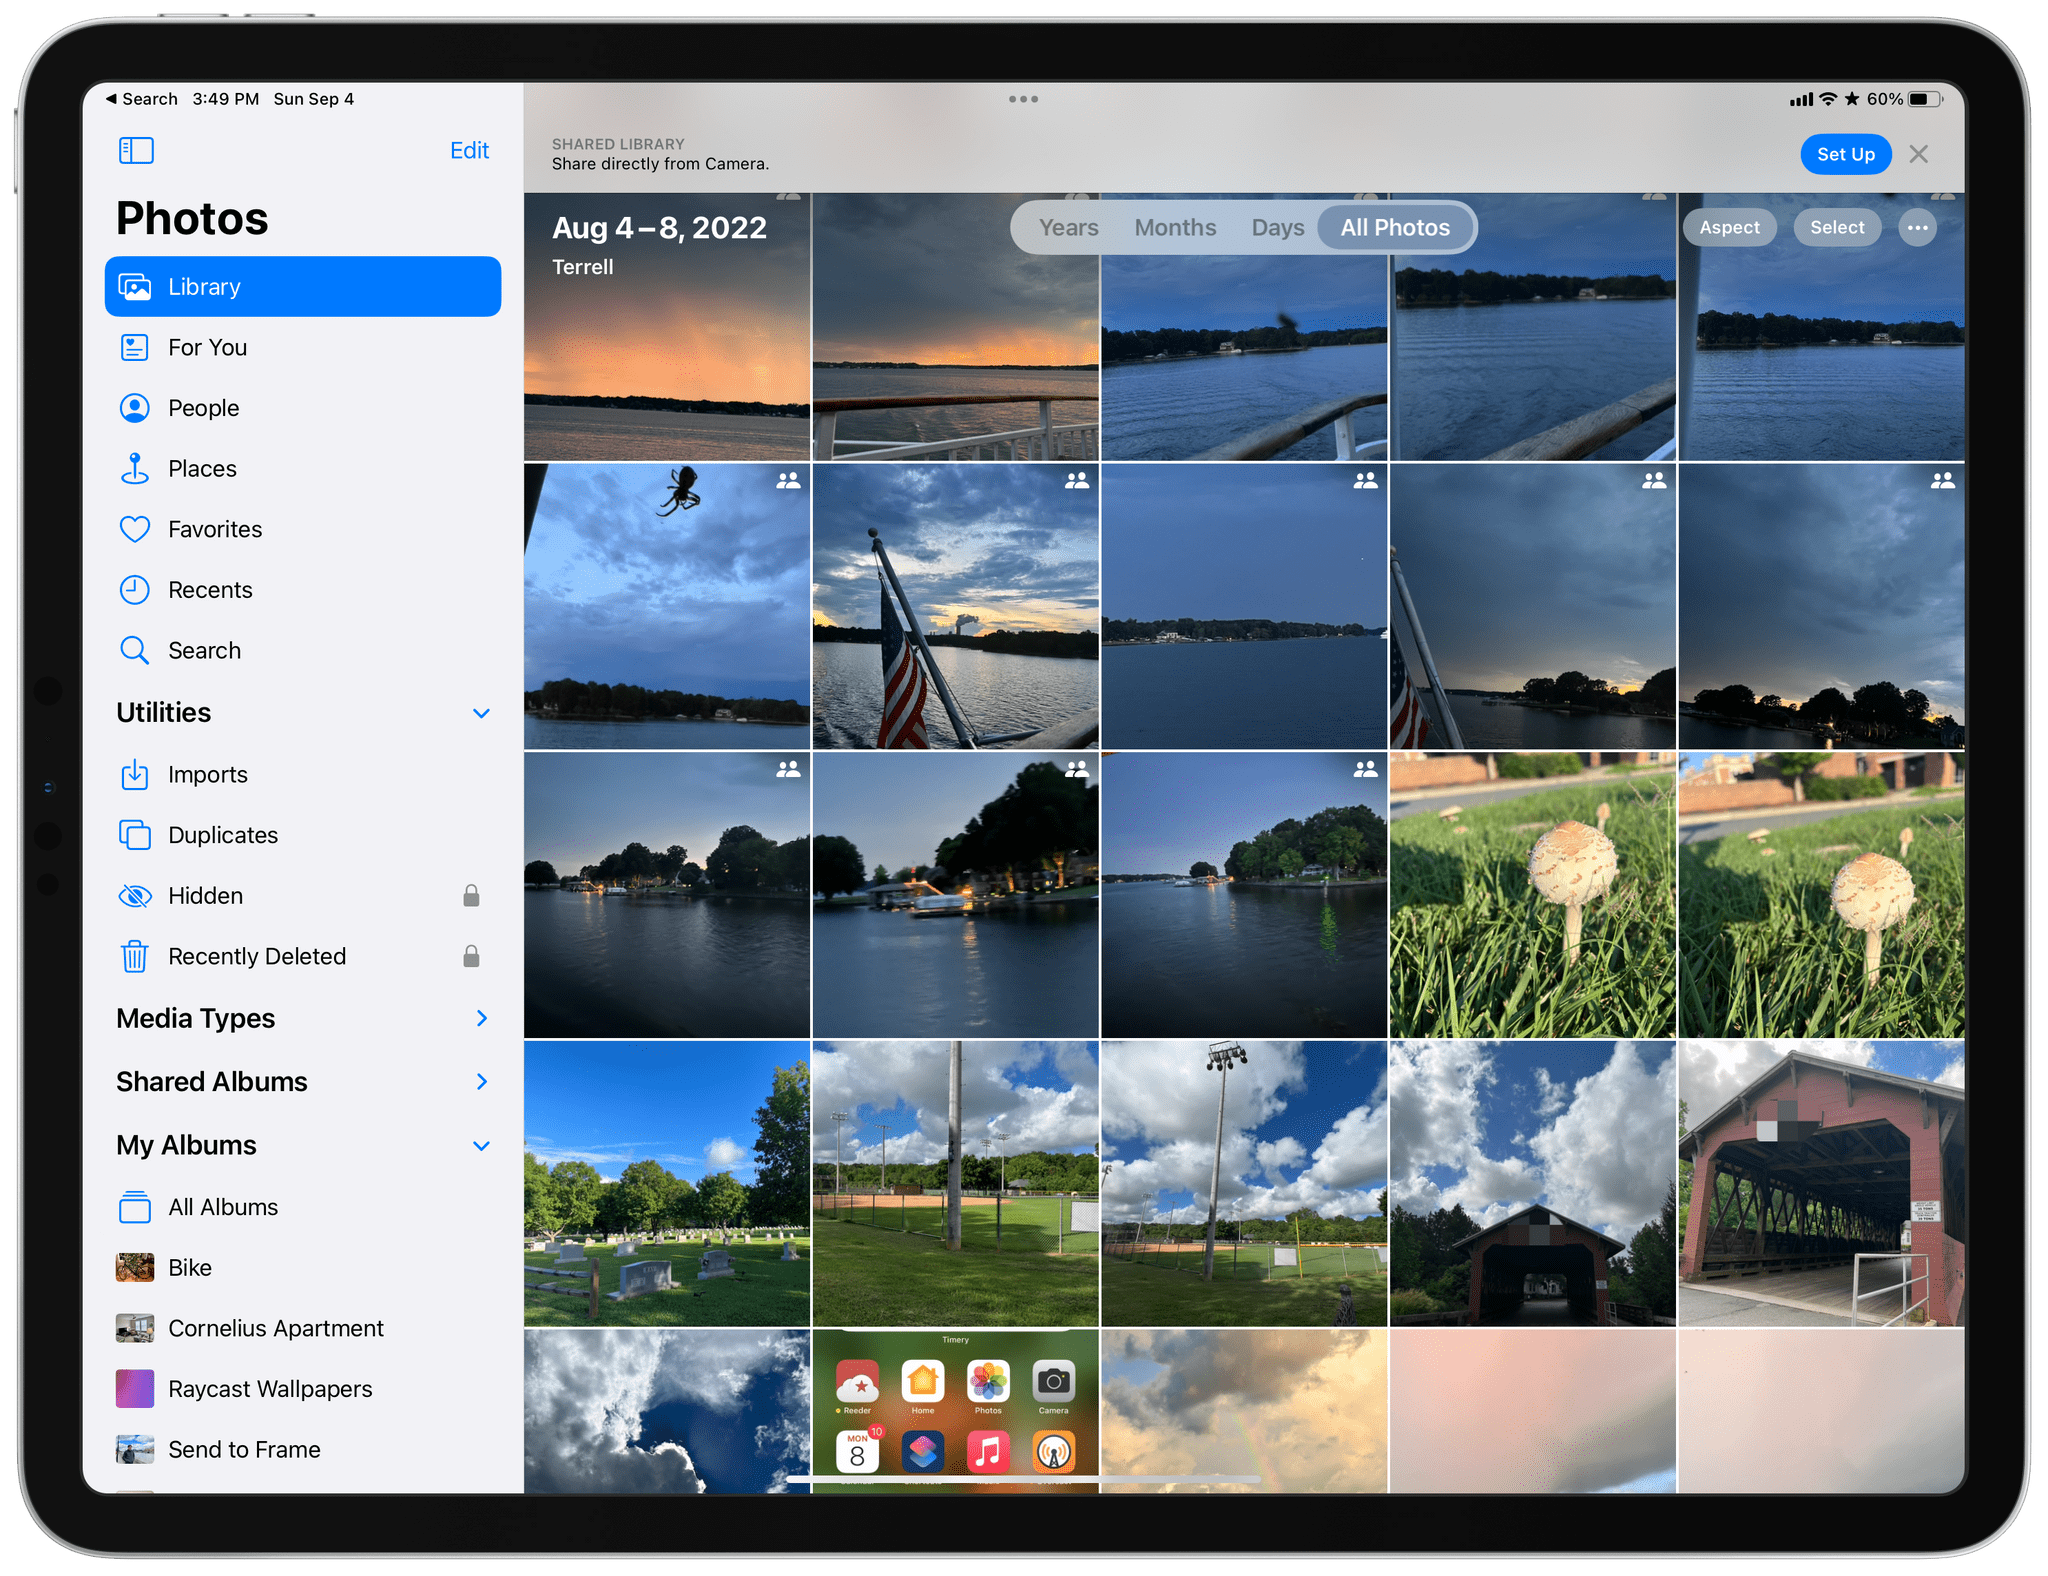
It’s into that chaotic, ad hoc mess and all of its variations that users have improvised over the years that Apple is stepping in with iCloud Shared Photo Library, its marquee new Photos feature for iOS and iPadOS 16 and macOS Ventura. And you know what? It just works.
The feature lets anyone with an iCloud photo library share part or all of their photo library with up to five other people. Once activated, a new library is created that sits alongside your existing one and counts against the iCloud storage of the person who created it.
One critical limitation of iCloud Shared Photo Library is that you can only be a member of one shared library, a restriction that is designed to limit the library to your immediate household. That means I could share photos with my wife and kids because there are fewer than six of us, but I couldn’t set up another library with my siblings or parents for our extended families. Nor could I invite one of my extended family members to use the extra slot I’ve got in my family library unless they were willing to forego being part of any shared library their own family created.
Unwinding a shared library.
So, what do you do if you’re in a shared library and want to join a different one? There’s a button in the Photos section of Settings to leave a library, so you can do so with one tap, saving all of the photos in the shared library to your personal library or keeping just those you originally contributed to the shared pool. Deleting libraries is possible too, but only by the person who created them, who is given the choice of keeping all images or just the ones they contributed when they do so.
Existing Pixelmator Photo users won’t have to subscribe to continue using the app and should be able to add the Mac version at a discount when it’s released. New customers can subscribe for $4.99 per month or $23.99 per year after a 7-day free trial. There’s also a lifetime purchase option that costs $54.99. Pixelmator says that the subscription pricing will increase for new subscribers when the Mac app is released, so now is a good time to subscribe if you were hoping that the team would add a Mac version.
Pixelmator Photo for iPad.
There are a lot of reasons for Pixelmator Photo’s move to a subscription model, which are explained in detail in the team’s blog post. As with any move from paid-up-front to a subscription, some users will be left behind, which is a shame, but I’m not surprised by Pixelmator’s move. I’m more surprised that the switch didn’t occur earlier. Pixelmator Photo is a top-notch, high-quality app that is continuously developed to keep up with advances in Apple’s photo editing frameworks and hardware updates. That’s not the sort of app that can be offered for a set price indefinitely, as demonstrated by the manyothersophisticatedapps, including other photo editing apps, that have made the leap to a subscription model. Hopefully, the switch to subscriptions will allow the Pixelmator team to continue to develop Photo for a long time to come.
There aren’t many details about the Mac version of Pixelmator Photo to share except for the image at the top of this story, but I like what I see. If you’ve used the iPad version of Pixelmator Photo, the Mac app will be immediately familiar with its spare UI and focus on the image being edited. There’s no word yet on when the Mac version might be released, but when it is, we’ll have a complete review.
Photo editors are the perfect fit with automation tools because, so often, there’s a set of edits, filters, transformations, or file exports that you want to apply to multiple images. Many apps come with some sort of built-in batch processing tool, which is great, but supporting automation opens the door to integrating users’ photo editing processes with system features like Finder and other apps.
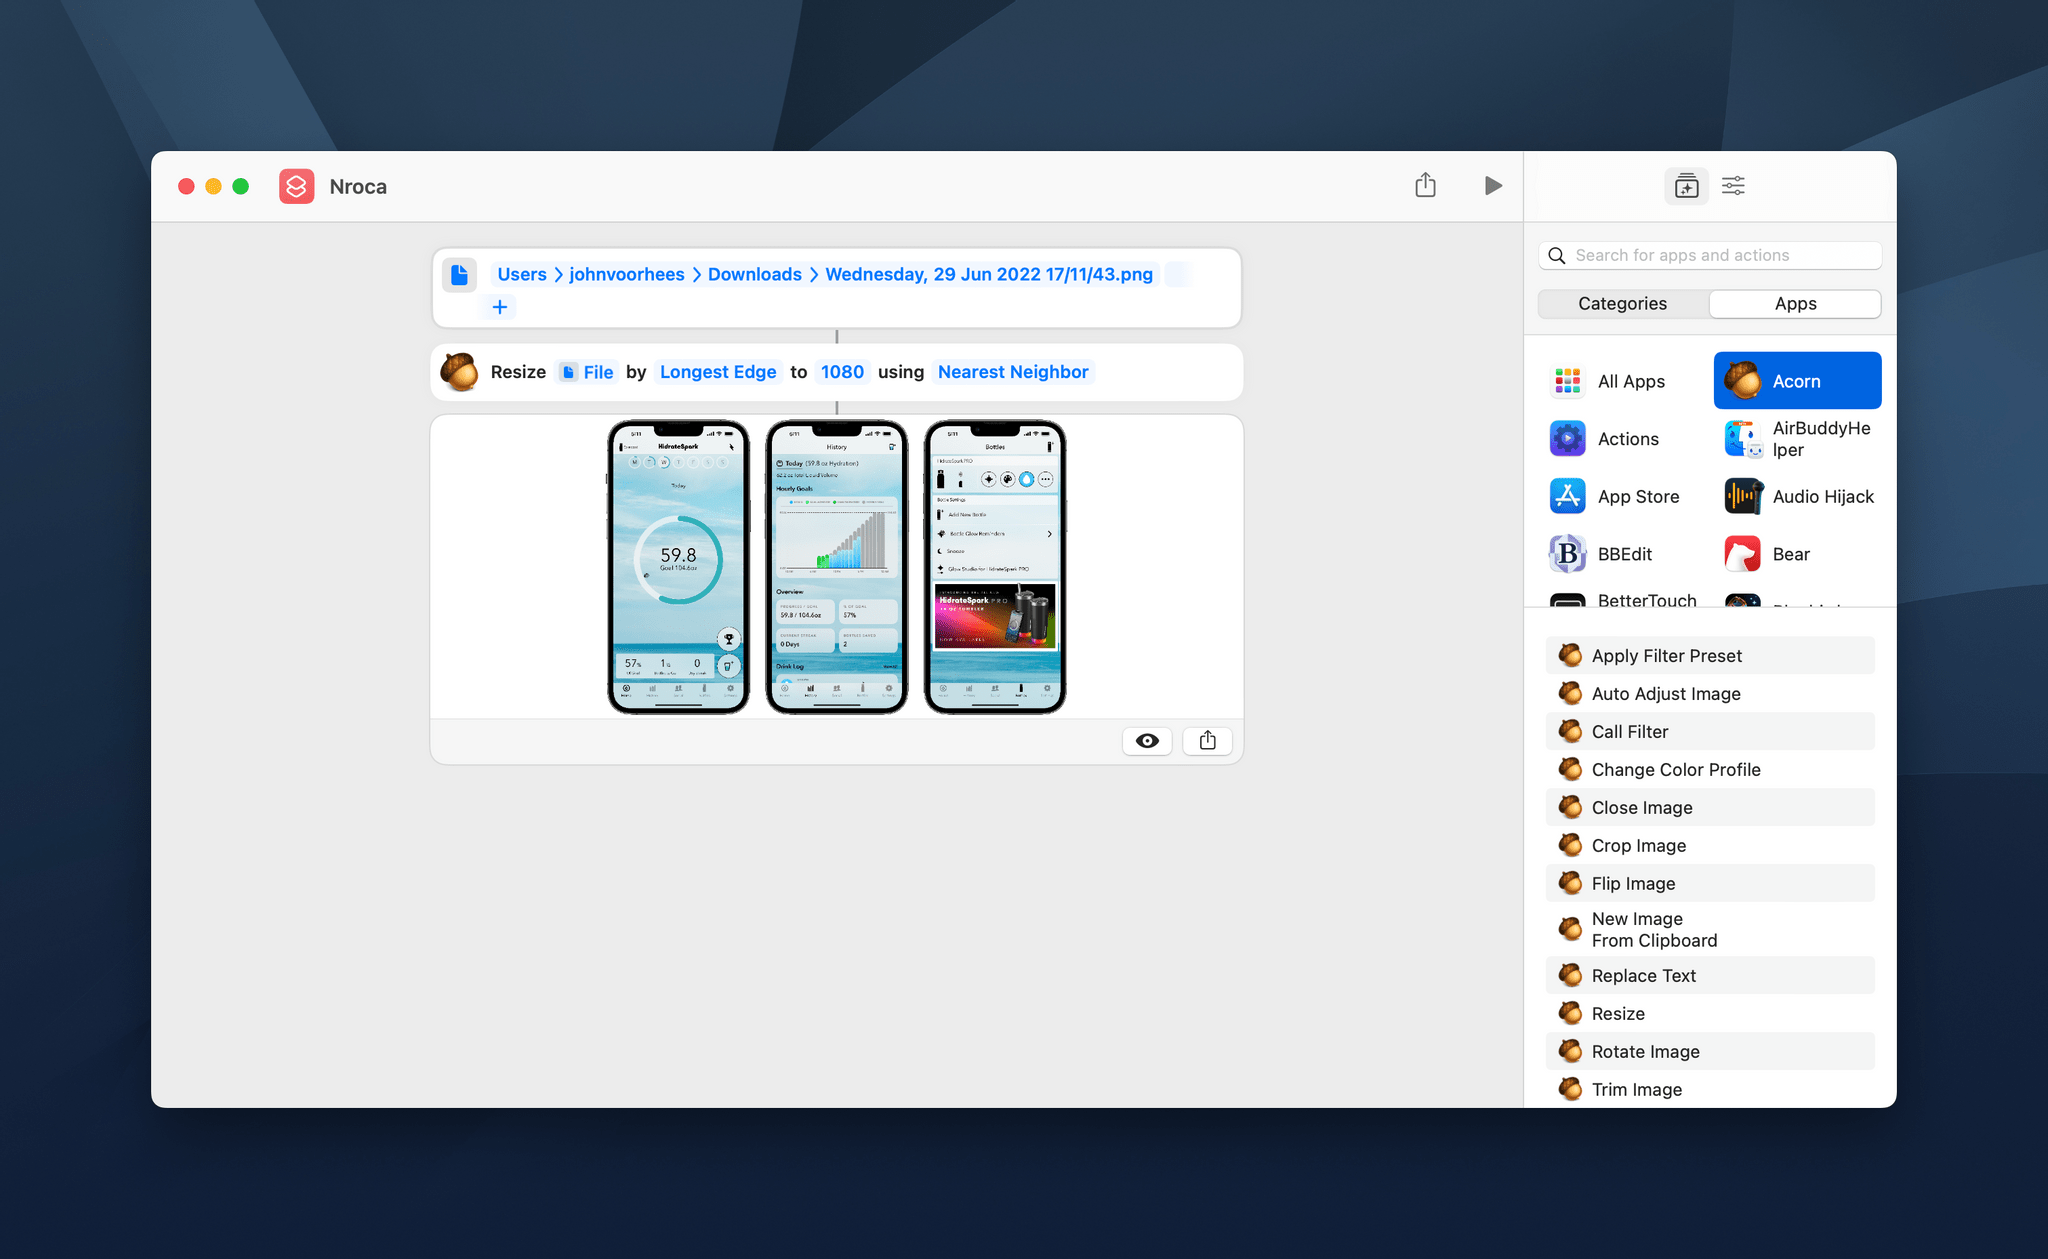
Earlier this year, Pixelmator Pro added deep Shortcuts integration, which opened up a long list of the app’s functionality via Shortcuts, enabling shortcuts like the machine learning-based super resolution one that Federico shared during Automation April. More recently, that app has been joined by Acorn, a Mac app with a long history of supporting automation with AppleScript and JavaScript support, as well as Automator actions.
With the release of version 7.2 at the end of July, Acorn added its own deep catalog of Shortcuts actions for users, including actions to:
Create images from the clipboard
Crop, rotate, flip, trim, and resize images
Apply individual filters and presets
Change the color profile of photos
Search for text in images
There’s some overlap with what can be done with other apps like Pixelmator Pro, but not as much as you might think. By combining Acorn’s actions with other system and third-party app actions, extremely sophisticated workflows that would take substantial time to complete one image at a time can be reduced to running a single shortcut, which, of course, is what Shortcuts and other automation schemes are all about.
](https://cdn.macstories.net/img_6643-scaled-1667389950306.jpg)