This Week's Sponsor:

Textastic

The Powerful Code Editor for iPad and iPhone — Now Free to Try


Chrome for iOS Updated With Messages Sharing, New History Menu

Chrome

Chrome

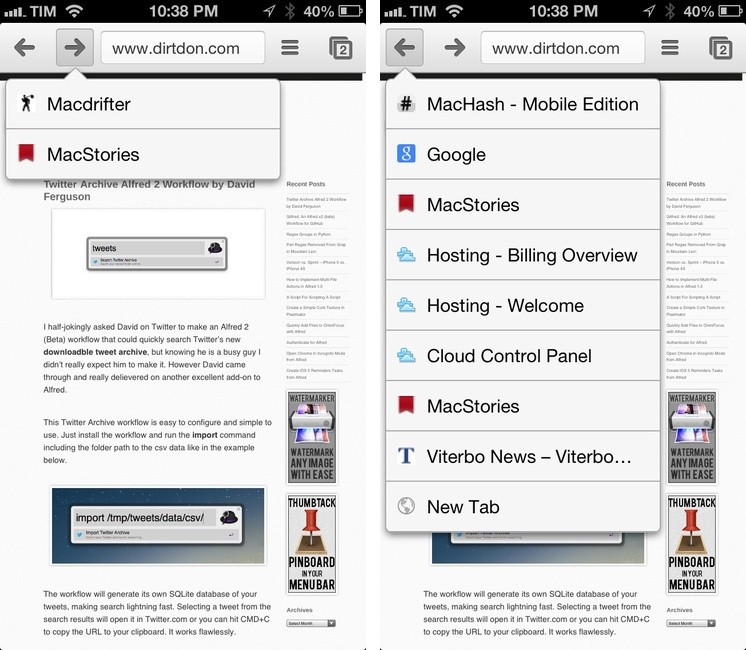
Released earlier today, Google Chrome for iOS has been updated with built-in Messages sharing and a new menu to access previously-visited webpages.

Available from the Share menu in the top toolbar, Messages integration brings up a modal Messages window to send a webpage’s title and URL to someone else. This is a good addition – I’ve long relied on bookmarklets and third-party apps to forward Chrome links to Messages – but unfortunately one I’ll make little use of, as iOS doesn’t let you quickly address a message to a pre-defined group of contacts.1

I find the new History menu much more interesting for my daily Chrome workflow. Similarly to Safari, you can now tap & hold the Back/Forward buttons to show a list of websites you have navigated to; tapping on one will take you back to that page. Like Apple’s implementation, this is a per-tab history; unlike Safari, the list of pages is shown in a dropdown menu rather than a full-screen modal view (on iPhone).

Read more


Justnotes 1.3 Syncs Twice as Fast

Justnotes 1.3 Syncs Twice as Fast

It’s been a little while since we’ve talked about Justnotes, but the developer has been progressively adding features and polishing the app in order to capture what makes Simplenote such a pleasure to use. Boiled down to just the essentials, Justnotes replicates Simplenote’s web experience in favor of a polished desktop app, providing more flexibility such as importing notes in OS X Mountain Lion or exporting simple text files.

Justnotes 1.3 is updated with Simplenote’s new syncing API, which is estimated to be over twice as fast as before. Shawn Blanc notes an additional useful feature that lets you hide the modification date thanks to a simple command that can be run in the Terminal.

You can download a trial of Justnotes to use for 15 days, but for a limited time, it’s available for $5.99 (normally $9.99) on the Mac App Store.

Permalink

Recovering a Lost QuickTime Recording

I recently wrote up an interview here on MacStories and although I was able to get it posted, I almost had to scrap the entire article because QuickTime crashed and I lost the recording of the interview.

I say it was a crash but to this day I still don’t know what happened. I had recorded my conversation with Ken Case on my Mac using QuickTime X player. The process to record audio with QuickTime is simple enough and it has never failed me in the past. After we got off the phone I immediately hit play on the recording to make sure the sound levels were adequate – first mistake. I should have hit Save then checked the sound levels. Not wanting to listen to the interview on the speakers in my display I paused the interview and left the room to track down my headphones. When I came back the audio recording was gone. The QuickTime application was still running but the recording window was gone.

My stomach dropped.

I frantically started tabbing through all of my open applications to see if anything else had closed, but they were all running. I checked all my desktop spaces and minimized windows but found nothing; it was gone and I hadn’t clicked save.

At this point, I hit up Viticci and started cussing like sailor at my own stupidity. He later told me that when I wrote up this recovery tutorial, I could post exactly what was said in our conversation. However it was so explicit that I decided not to.

Anyway, I started crawling the web for any information I could find on QuickTime temp file locations, Viticci and Cody contributed some suggestions as well.

Here are some of the potential locations I checked via web results:

$TMPDIR/com.apple.QuickTimePlayerX 
~/Library/Caches/QuickTime/ 
/tmp /var/folders/ 
/tmp/501/TemporaryItems/ 
/Library/Application Support/ 
etc... 

Unfortunately, none of those directories turned up anything useful. As last attempt I decided to run some 3rd party recovery software.

I did a quick Google search and downloaded a demo of Disk Drill for Mac. After running it for about an hour, it found a lot of deleted files, but not my QuickTime recording. The problem was I still didn’t even know what format it would be in or what filename it might have.

I soon remembered that I had a copy Data Rescue 3 so I immediately ran it. Data Rescue 3 ran for several hours, well in to the night, and found a lot more than the demo of Disk Drill found. However I was in the same situation, I had a lot of files but none of the audio recordings it found was the interview with Ken Case and I still had no idea where I should be looking.

So I decided I would start another recording in QuickTime, stop it, then check all of those temp location suggestions I had found. Unfortunately I didn’t find anything useful doing that.

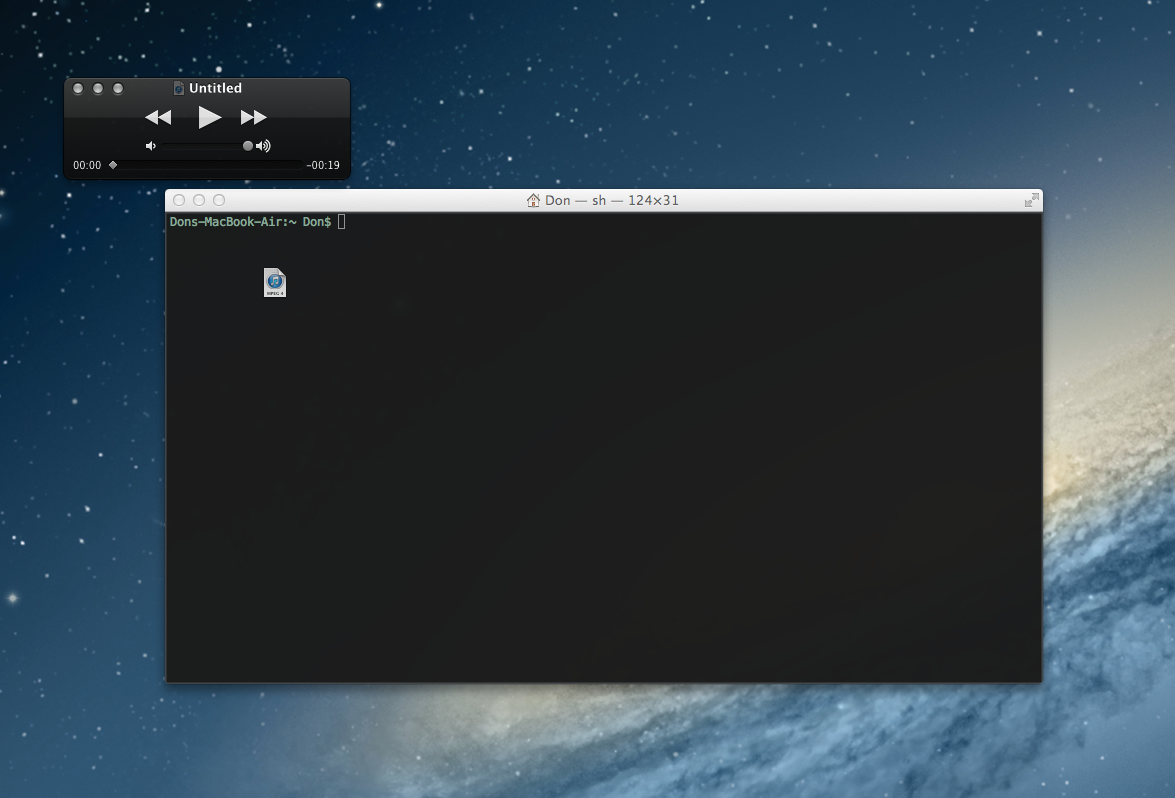
Then by either divine intervention or a stroke of genius I opened a Terminal window and dragged the little QuickTime icon from the recording window in to the Terminal window and dropped it.

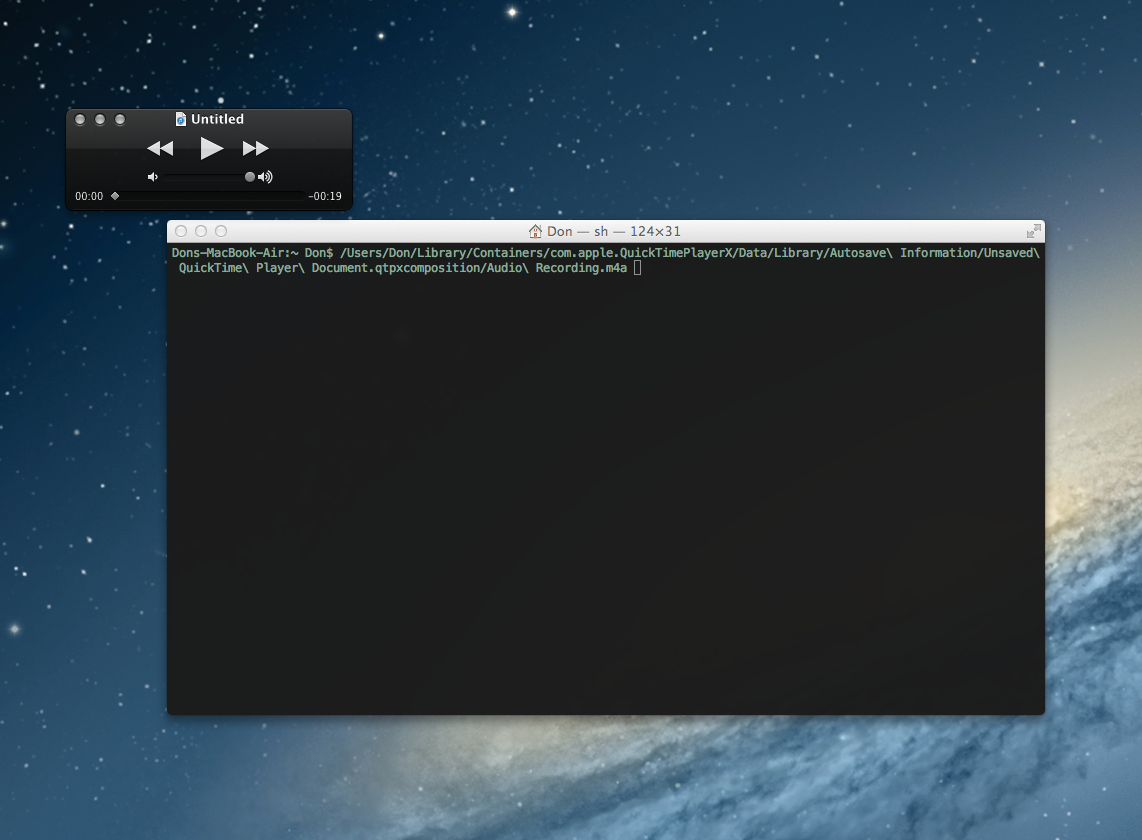
Sure enough, it printed out the location and file name of that test recording.

It all became clear, I can’t believe I hadn’t thought of it sooner. Now that QuickTime is sandboxed I needed to look in QuickTime’s container for the temp recording. I finally had all of the information I needed:

In the directory:

/Users/Don/Library/Containers/com.apple.QuickTimePlayerX/Data/Library/Autosave Information 

In a bundle called:

Unsaved QuickTime Player Document.qtpxcomposition 

I simply had to right click on the .qtpxcompostion file and inside I found the .m4a audio recording of my QuickTime test.

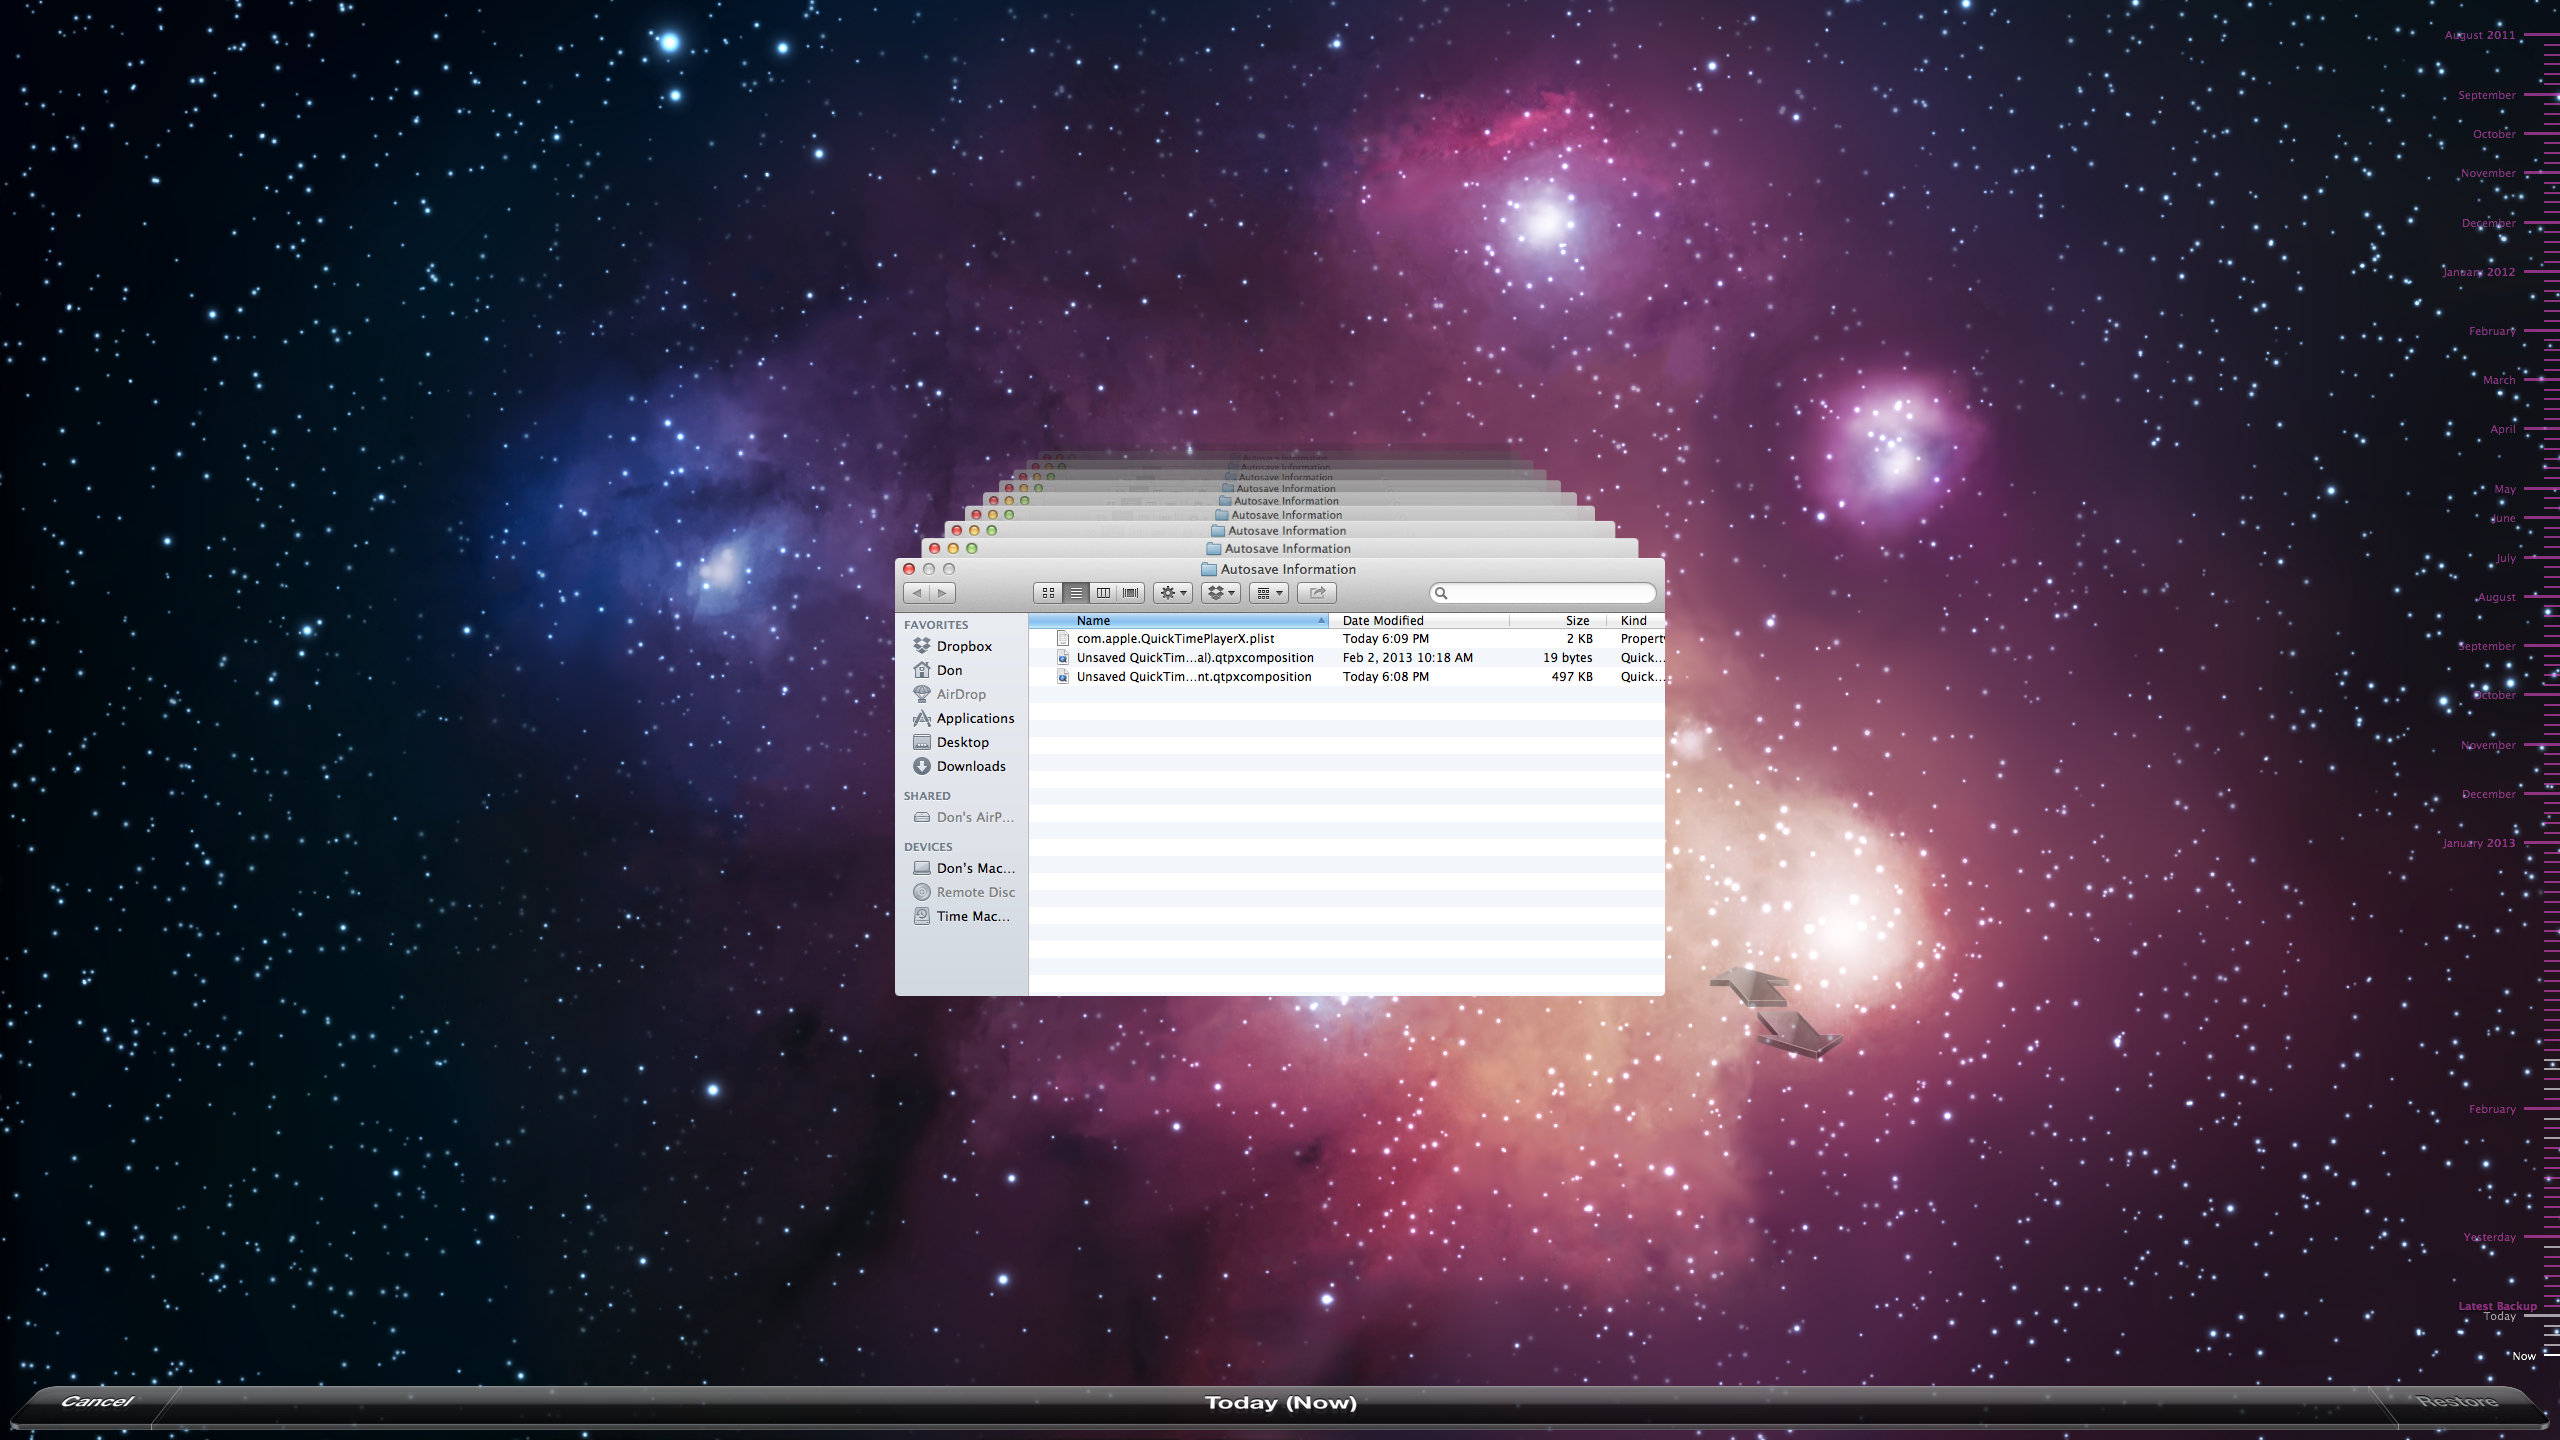
Now this is where the magic ends; this next part, the actual recovery of the file was thanks to Time Machine doing hourly updates. I simply had to open the Quicktime Autosave Information directory in Time Machine to the time right after I ended the call with Ken and there was my recording in its sandboxed temp directory.

I know this probably seems like common sense – just open up Time Machine and recover the file. However if you don’t know the filename or the directory it was located in your backup is not going to be much use. Thus, I felt this was worth sharing in case you are ever in the situation of having to retrieve a lost QuickTime recording.

Now you know where to look.


Project Amy Integrates App.net Private Messaging Into Messages for OS X

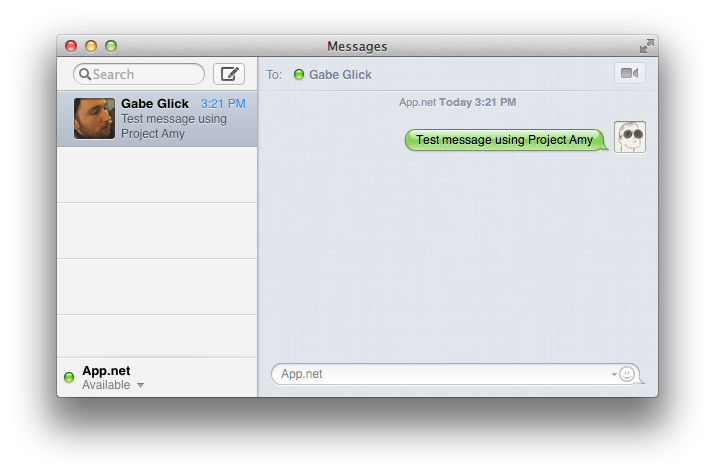
Developed by Steve Streza and released during last night’s App.net hackathon, Project Amy integrates App.net private messaging with the Messages application for OS X. A first version of Project Amy has been made available for download on App.net itself.

Project Amy is a clever experiment that showcases the App.net API and Apple’s IMServicePlugin.framework: using only public APIs and no proxies (unlike Steve’s first App.net project), Project Amy adds App.net as a native account in Messages, allowing you to have private conversations with other App.net users inside Messages. Once installed, you can simply login with your App.net credentials to have the account listed alongside AIM in the bottom left corner of Messages; choose Window > Buddies (or hit CMD+1) to show a list of users that you can send private messages to (they will be displayed as online with their full names rather than usernames).

Because it uses official APIs, messages sent through Project Amy also show up on App.net’s online messaging interface, Omega. In my tests, messaging with one or multiple users in Messages correctly mirrored the conversations to Omega, where they were updated in real-time without needing to refresh the webpage. I was even able to drag images into the conversation in Messages, and, while they didn’t show up as attachments on my end, they did appear as inline uploads on Omega and inside the recipient’s Messages application. Obviously, file uploads were handled by App.net’s File API as well.

Project Amy is a little buggy in this first version, but certainly promising. Aside from using an official OS X framework that few developers seem to know about, it shows the potential of the App.net API as a versatile solution capable of delivering more than just Twitter clones at this point.

Check out Project Amy here.


Evernote for Mac Updated with “Quick Note”

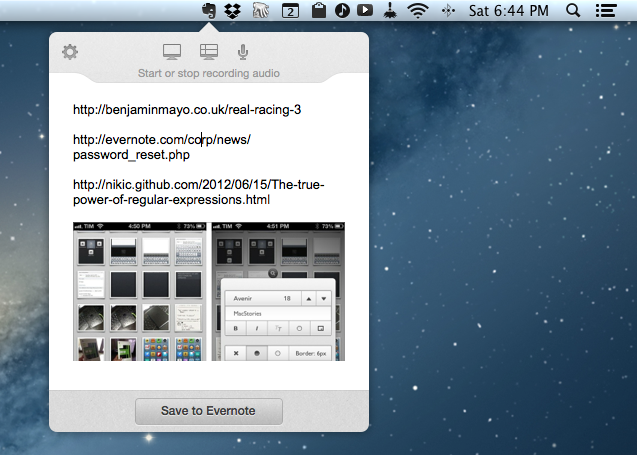
Alongside a notice to warn their users of a security breach, Evernote released today an update to their Mac app, which reaches version 5.0.6. For now, the update is only available for versions of Evernote downloaded outside of the Mac App Store.

According to the changelog, the update “addresses a security issue that requires you to reset your password”. It’s unclear how Evernote for Mac may have affected the security of passwords of the service, but Evernote says more details will be posted on their blog. Read more


Speeding Up OmniFocus Sync

Speeding Up OmniFocus Sync

Some great tips by Sven Fechner on how you can speed OmniFocus sync. It involves archiving data on the Mac and resetting sync databases on your iOS devices:

The free OmniSync Server makes life a lot easier and keeps your OmniFocus world, well, in sync. If you use your own WebDAV server you have the same capabilities but without the awesome “Mail Drop” feature which allows you to email in your actions.

While the OmniSync Server is fairly reliable, it is not necessarily the fastest syncing solution on the planet. In particular when your database gets larger and more convoluted.

It’s the first time I’ve followed this procedure, and, indeed, my OmniFocus database has been slimmed down and it now takes 5-8 seconds less to sync on WiFi; the improvement is even more considerable on 3G.

I’ve used my own WebDAV server with OmniFocus for months, but the convenience (and simplicity) of the Mail Drop feature lured me back to Omni Sync Server. Mail Drop works amazingly well in conjunction with Drafts, allowing me to quickly send off a task to my OmniFocus inbox in the cloud. In moving to Omni Sync Server, I didn’t lose the ability to have the latest version of my OmniFocus database mirrored to a calendar: OmniFocus does, in fact, come with some great debug commands to change its default sync times.

As an aside, while looking forward to OmniFocus 2, The Omni Group has posted the first batch of videos from The Setup event in San Francisco a few weeks ago. You can watch them here.

Permalink


Batch Resize Images On iOS with Reduce

Reduce

Reduce

I deal with two types of images on my iOS devices: photos and screenshots.

For photos, I’ve long settled on a Dropbox-based workflow that takes care of automatically archiving and sorting photos for me. For screenshots, the story is a bit more complicated.

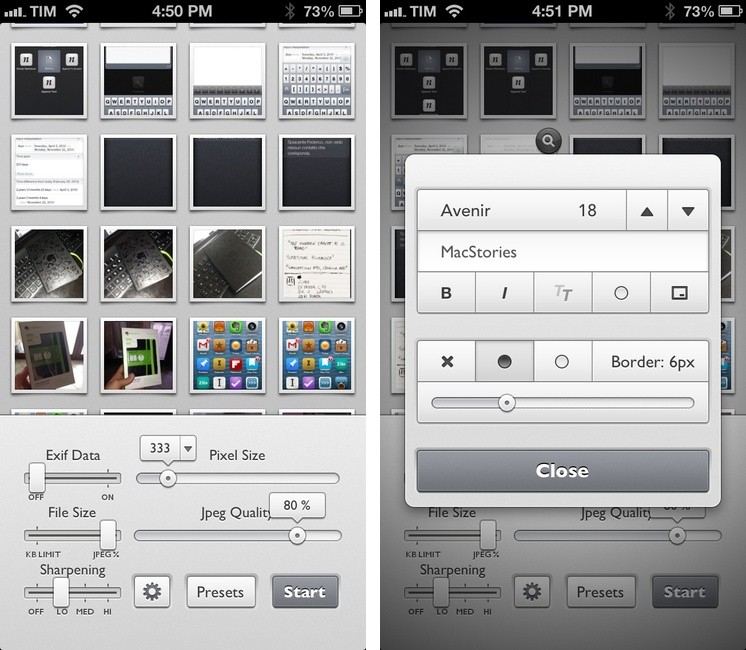
For months, I used OneEdit, an iPhone/iPad app to batch resize images from the Camera Roll; OneEdit comes with a lot of features, including presets, Dropbox sharing, and FTP uploads. The downside is that the app’s interface is clunky and convoluted, with seemingly no intention from the developer to update it. In spite of that, however, I kept using OneEdit to resize multiple screenshots at once, save them to the Camera Roll, fire up Diet Coda, and move them to our FTP server. When we decided to move 4 years of image uploads off the FTP and onto a CDN (alongside new uploads on a daily basis), I asked our Don Southard to create a Hazel script that would monitor Dropbox for screenshots and upload them to the CDN. This is what I’ve been using in combination with some Pythonista scripts that would resize screenshots for me.

My iOS screenshot workflow is faster thanks to Pythonista and the Hazel script running on the Mac mini, but I miss the possibility of having a single app capable of batch resizing and uploading images to Rackspace Cloud Files.1 The latest Pythonista update made things dramatically better with the Photos module, but I still can’t pick multiple photos at once (and, obviously, I still have to deal with Python).

My “ideal” batch resizing photo app for iOS would excel in two different aspects: it would be Universal and have an elegant interface to pick multiple photos at once to batch resize them with presets; it would come with a plethora of sharing options built-in, including Cloud Files and SFTP support. Reduce is close to excellence when it comes to the first one.

Read more


Simple Japanese Emoticons with Kaomoji

At MacStories, we use iMessage on a daily basis as our team chat. Alongside the occasional meme, Twitter link, or article we need to check out, the Japanese emoticon is a common occurrence in our group thread. I’ve always wondered whether my fellow teammates learned to manually type out flipping tables and other emoticons – also known as kaomojis – while I was stuck using the good-looking, but obvious Apple default emoji. If you happen to live in a team chat of remote workers every day you know how much more successful an original GIF or meme can be.

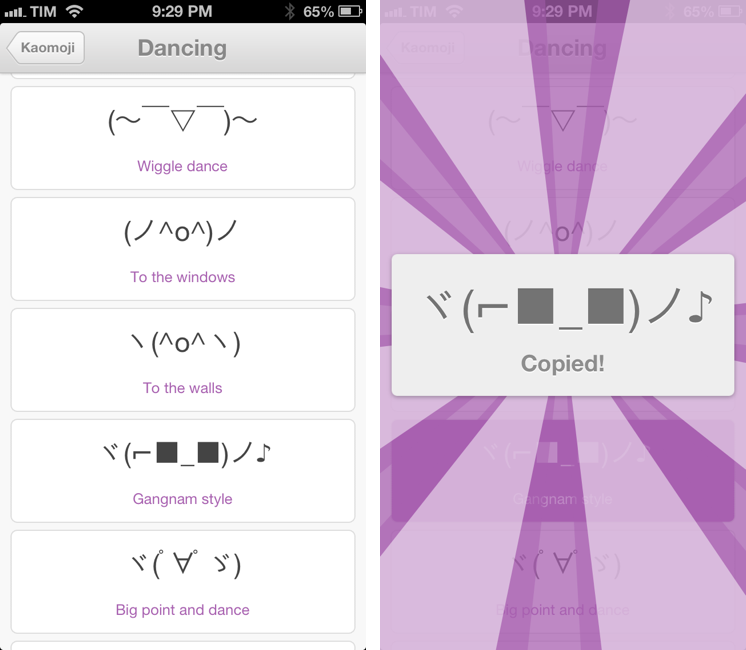
My quest towards iMessage emoticon domination is over with Kaomoji. A simple $0.99 iPhone app made by Richard Henry (product designer at Quora), Kaomoji contains 1,000 Japanese-style emoticons organized in 28 categories such as Happy, Sad, Evil, Love, Cats, Dogs, Dancing, and the game-changing Table Flip.

Kaomoji’s UI is clean and focused on the actual emoticons. Categories are color-coded, and tapping on one will open a dedicated page with properly colored highlights and fonts. It’s a nice touch. The app has only one feature: copy. Tapping on a kaomoji will bring up a manga-like success message showing a bigger version of the emoticon with the text “Copied”. Once copied, you can paste the text anywhere – be it iMessage, Twitter, Facebook, or any other app.

Kaomoji does one thing extremely well. I like the selection of emoticons, and if I had to nitpick I’d say it’d be nice to have built-in Twitter and Messages/Facebook actions to send text without leaving the app. I would also like to see an iPad version in the future.

Kaomoji is only $0.99 on the App Store.

Let’s also put the table back. ┬──┬◡ノ(° -°ノ)