This Week's Sponsor:

Notify

Monitor Websites & RSS Feeds. Private. Simple. No Servers Required.


Posts tagged with "automation"

Poking A Hole In The Sandbox: Using URLs on iOS

Poking A Hole In The Sandbox: Using URLs on iOS

Using URLs on iOS

Using URLs on iOS

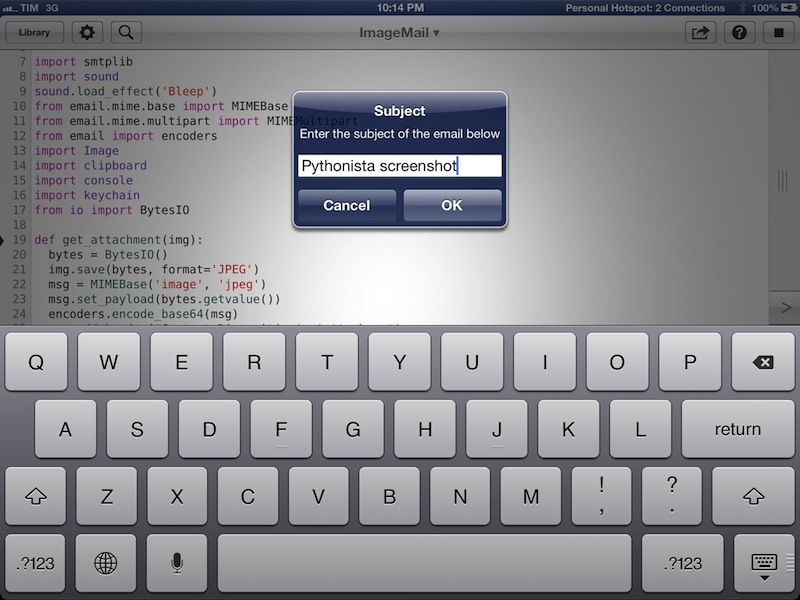
Just yesterday I wrote extensively about URL schemes and, specifically, x-callback-url in my review of Pythonista:

I believe that, going forward, Pythonista and other similar apps will show a new kind of “scripting” and task automation built around the core strenghts of iOS. As we’ve seen, x-callback-url is a standard that leverages a part of iOS – URL schemes – to achieve simple, user-friendly and URL-based inter-app communication that can be used in a variety of ways. Looking ahead, there’s a chance rumored features such as XPC will bring more Mac-like functionalities to iOS, but developers will still find new ways to make iOS more powerful without giving up on positive aspects such as increased security and the simplicity of the app model.

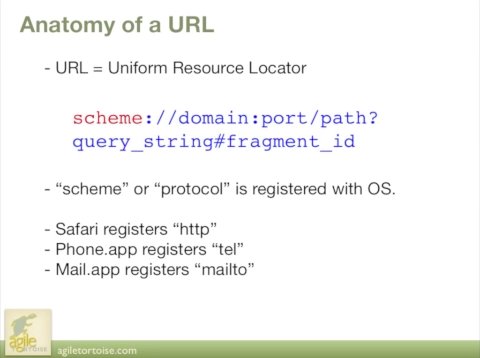
My workflow focused on x-callback-url, a protocol created by Agile Tortoise’s Greg Pierce. Thanks to 360|iDev, you can now watch a free session video of Greg Pierce himself explaining the basics of URL schemes on iOS as well as techniques to properly implement his specification, x-callback-url, to allow for more advanced inter-app communication, such as the one I’m using with Pythonista.

If you’re a developer and you’re interested in knowing more on the subject, check out the free video here.

Permalink


Automatic Screenshot Uploading with Dropbox and Automator

Automatic Screenshot Uploading with Dropbox and Automator

Matteo Agosti figured out a simple yet effective way to upload items to your Dropbox Public folder and automatically receive their URLs in the clipboard: Automator.

After long time using various utilities to automatically share my screen shots when I updated to Montain Lion I had to find another solution as many of them stopped working. It came to my mind that OS X is bundled with Automator, an extremely powerful utility that I always relegated to thumbnails generation. So I decided to give it a try and I eventually made it. That’s how I did.

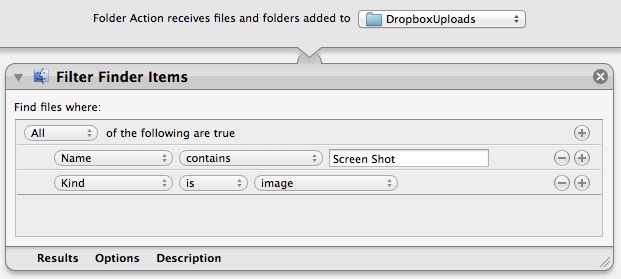
His folder action is extremely simple: it monitors a folder, filters items that begin with “Screen Shot” and that are images, then moves them to your Dropbox Public folder. By using your unique Dropbox ID, it places a link in the clipboard guessing what the final URL will look like; the URL is made of the standard initial “dropbox.com/u/” portion combined with a URL-encoded version of the file’s name.

The obvious downside is that this workflow isn’t directly communicating (i.e. uploading) with Dropbox: it’s simply moving files and composing the link that you will get once the upload is finished. In my tests, for instance, the URL received by the workflow became available after 10-20 seconds – when the Dropbox app actually finished uploading the file. After that, the URL was indeed correct.

Still, if you’re looking for a simple way to upload public Dropbox files and get a link back, you should check out Matteo’s post.

Permalink

Automatically Convert .iconset to .icns with Drag & Drop

Automatically Convert .iconset to .icns with Drag & Drop

Earlier today I indirectly asked on App.net and Twitter if there was a way to automate the process of converting sets of icons for non-Retina and Retina devices. On its developer documentation, Apple recommends using iconutil and tiffutil to convert application icons and graphic resources, respectively. Once you’ve packaged, for instance, .png files inside an .iconset folder, you should fire up the Terminal, and run the command for the .iconset folder you want to convert. How about automating the process for batch conversion of multiple files?

As it often turns out, if you can think about it, then someone likely already blogged about it. Jono Hunt wrote a drag & drop utility earlier this year to do just that: select multiple .iconset folders, drop them onto the app, receive converted .icns files.

Apple have changed the way you should compile .icns files used for Mac application icons. Instead of using Icon Composer you should now use the “iconutil” Terminal command with .png images contained in folders with the .iconset extension. I created an AppleScript droplet to simplify the process. Just drag the .iconset folder containing your .png files on to the app to easily create a retina ready .icns icon.

Jono has also released versions of the script that work with Alfred and Automator. He also build a counterpart for tiffutil, available for download here.

Permalink

Automatically Save An OmniFocus Project As iThoughts Mind Map

Automatically Save An OmniFocus Project As iThoughts Mind Map

After I posted about my OmniFocus > iThoughts mind-mapping workflow, several readers asked whether it’d be possible to only convert a specific section of OmniFocus to iThoughts format (as well as plain text and OPML). As Robin Trew, creator of the script, explains in the Help section:

Specify a sub-tree by the OmniFocus id of its root node. Defaults to None.

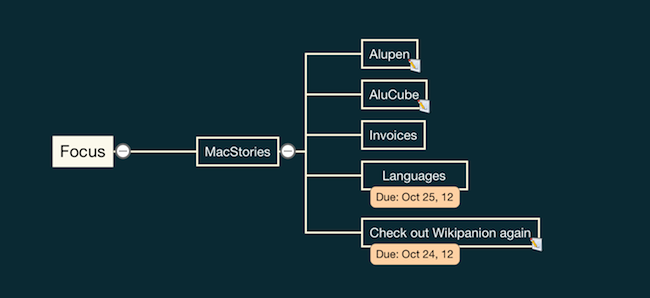
You can, in fact, slightly modify the script  by adding an -a switch and the ID of a particular project to restrict the query to that project and its subtree. This will work if you only want to export a specific Project to mind-map; Contexts have a different subtree structure in OmniFocus’ database.

For instance, I only wanted to create a mind map for my MacStories project. To do so, I control-clicked on the project in the app’s sidebar, and selected “Copy As Link”; this will give you an OmniFocus URL like omnifocus:///task/oREye1BBxdg. The ID is the alphanumeric string after /task/.

Follow my tutorial, and add the -a switch as an additional filter:

python $HOME/ofoc_to_mindmap_018.py --output=$HOME/Dropbox/Maps/MacStories -m map.itm -c '0' --format=itmz -a oREye1BBxdg

Make sure to check out Robin’s script, as it’s much improved since the original release. You can also visit Robin’s website (and follow him on Twitter) for several AppleScript-related custom scripts and resources.

Permalink

Send Selected OmniFocus Task to Plain Text File

I save a lot of stuff into OmniFocus: bits of text, URLs, emails. I used to save favorite tweets into it, too. The app’s Quick Entry panel is so easy to invoke and so well-integrated with core parts of OS X  that, most of the time, I find myself clipping information that shouldn’t be into OmniFocus at all. However, I also find the process of manually going through that information beneficial to my workflow: it allows me to mentally and practically separate actionable items (tasks) from things to read and things to write (Instapaper material and my future articles, essentially).

I have created a simple AppleScript to send the selected OmniFocus task to a text file. The script is meant for how I use OmniFocus; hopefully you’ll find it useful as well. Feel free to modify it.

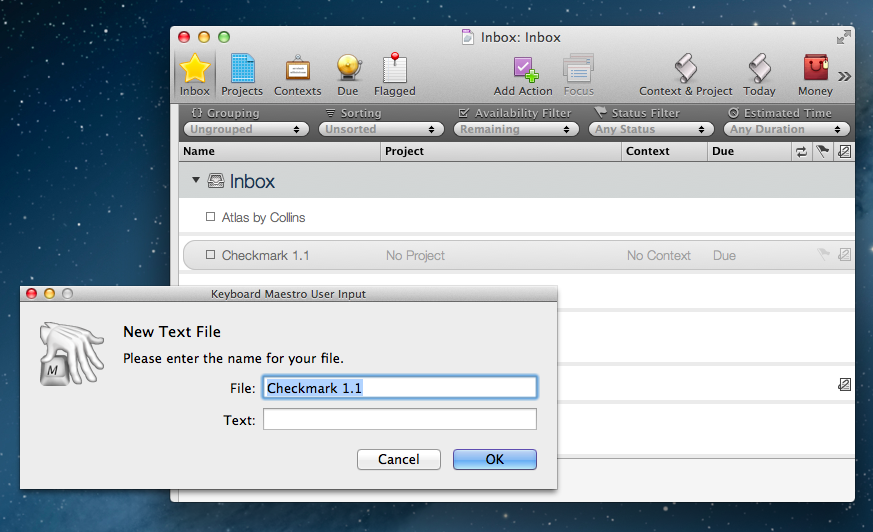
Typically, when I decide to go through my OmniFocus inbox, I find a lot of tasks that are actually ideas of things I want to do or write. Ideas don’t go into OmniFocus. Until those ideas become actionable items, I send them to a text file so I can elaborate on them and see if they can evolve. Like I said, most of the time those ideas are for new articles.

I store all my notes in a single Apps/ directory on my Dropbox. Based off the same AppleScript, I have created a Keyboard Maestro macro to create a new text file for each processed task; this is for ideas I know will turn out to be single, standalone articles. For ideas I’m not so sure about, I prefer to append them as text to an Ideas.txt file I keep in Dropbox as an “everything bucket” for inspiration. Read more


SearchLink: Markdown Links Without The Browser

I don’t know how Brett Terpstra finds the time to do everything he does, but I do know I enjoy the results.

Brett’s latest effort is SearchLink, a system Service to generate Markdown links automatically for a variety of web services. In Brett’s words:

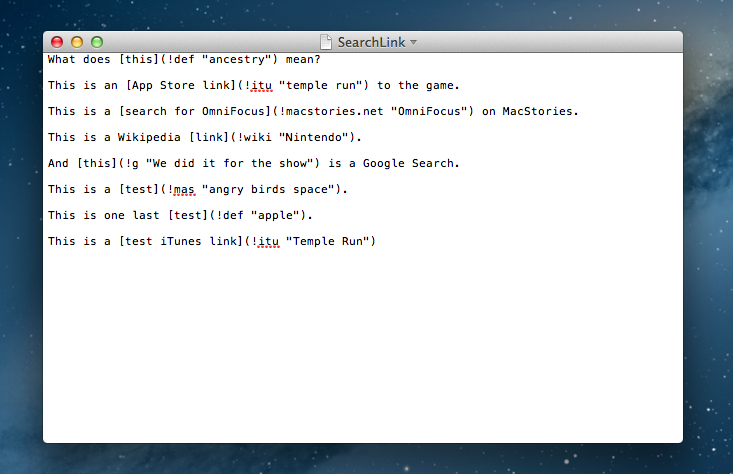
SearchLink is a System Service for OS X that handles searching multiple sources and automatically generating Markdown links for text. It allows you to just write, marking things to link as you go. When you’re done, you run it on the document and — if your queries were good — have your links generated automatically without ever opening a browser.

Essentially, SearchLink is a Ruby script that, in the background, generates valid Markdown for inline links inserted in plain text. These can be links pointing to a Google search, a Mac App Store or iTunes search, last.fm, Wikipedia, and more. Instead of having to switch to the browser when you’re writing, you can just write using SearchLink’s simple syntax. Once you’re done, run the Service, and SearchLink will contact web APIs to transform your text into the first/best result for your query, formatted in Markdown. Read more


Drafts 2.2 Adds Custom Email Actions

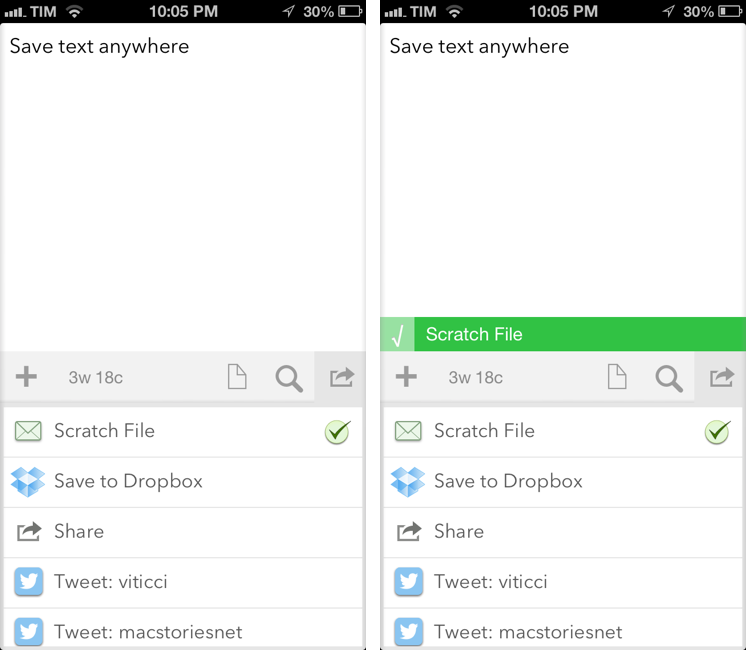
Agile Tortoise’s Drafts for iPhone and iPad is one of my most-used apps for iOS. It sits on the Home screen of both my devices, and I rely on it to send text to a variety of apps and services. With a combination of support for URL schemes and external APIs, Drafts has become a fantastic way to get text saved somewhere else quickly. Plus, we’ve been following Drafts here at MacStories for a while now, and the app underwent quite the evolution recently.

After the major 2.0 update (our review here), I have been looking forward to version 2.2. Released today (app is version 1.2 on the iPad), Drafts now includes new actions for Nebulous Notes (a personal favorite of mine), Netbot, Notefile, and Pastebot. It’s also got a new “Use First Line as Title” setting and advanced options for actions.

More importantly, Drafts 2.2 comes with support for custom email actions, which is the reason I’ve been using Captio for the past two years. It’s with a bit of sadness that I drop Captio, but the app hasn’t even been updated for the iPhone 5 yet, and Drafts does so much more. Custom email actions allow you to send emails to predefined addresses using either your own email accounts, or a background service provided by Agile Tortoise. Read more


Faster Markdown Editing with Nebulous Notes Macros

I have written about Nebulous Notes before. Back in August, I posted an overview of my workflow with the app, plain text, and Markdown:

Combining Nebulous’ support for text substitution and cursor position macros has enabled me to achieve a powerful workflow when it comes to writing in Markdown. For instance, I can select words I want to turn into inline links, and have the app automatically wrap them between square brackets, and paste the contents of my clipboard (the link) to the right. To copy Markdown-ready links, I use my own bookmarklet. Or if I want to create a list, I can hit a button that inserts an asterisk and a space. Or again, if I need to create a text file with a format that OmniOutliner recognizes correctly, I can indent items with Nebulous’ $tab and $cursor macros.

Since then, a major 6.0 update to the app has been released, which, in my opinion, deserves another look. For the occasion, I’ve put together a few videos showing how I use the macros I have created for easier and quicker Markdown (more specifically, MultiMarkdown) formatting. The videos were recorded on a Mac using QuickTime capturing an AirPlay Mirroring session through Reflection. I have embedded them here using the video tag supported by most modern browsers (video files are encoded in MPEG-4). For Firefox users, there’s a fallback to Theora .ogv files (converted using ffmpeg2theora). I will also make my macros available for download at the end of this post. Read more