When Federico and I published our setups last November, I was happy with mine, but there was still something that bothered me. Every day, I wound up with too much stuff strewn across my desk. At the same time, some of the things I use most days felt annoyingly out of reach. These weren’t monumental annoyances, but they were daily distractions that led me to leave things on my desk for long stretches of time where they were in the way. So, I started thinking about ways to improve my setup again.
What I realized is that I had nowhere to put any of the little things I use each day, so they’d end up all over my desk, which then snowballed into a bigger mess. The solution was to bring those little things closer but create places for them that are out of the way. At the same time, I made a greater effort to tuck cables and wires out of the way where I can’t see them, which has also helped cut down on clutter.
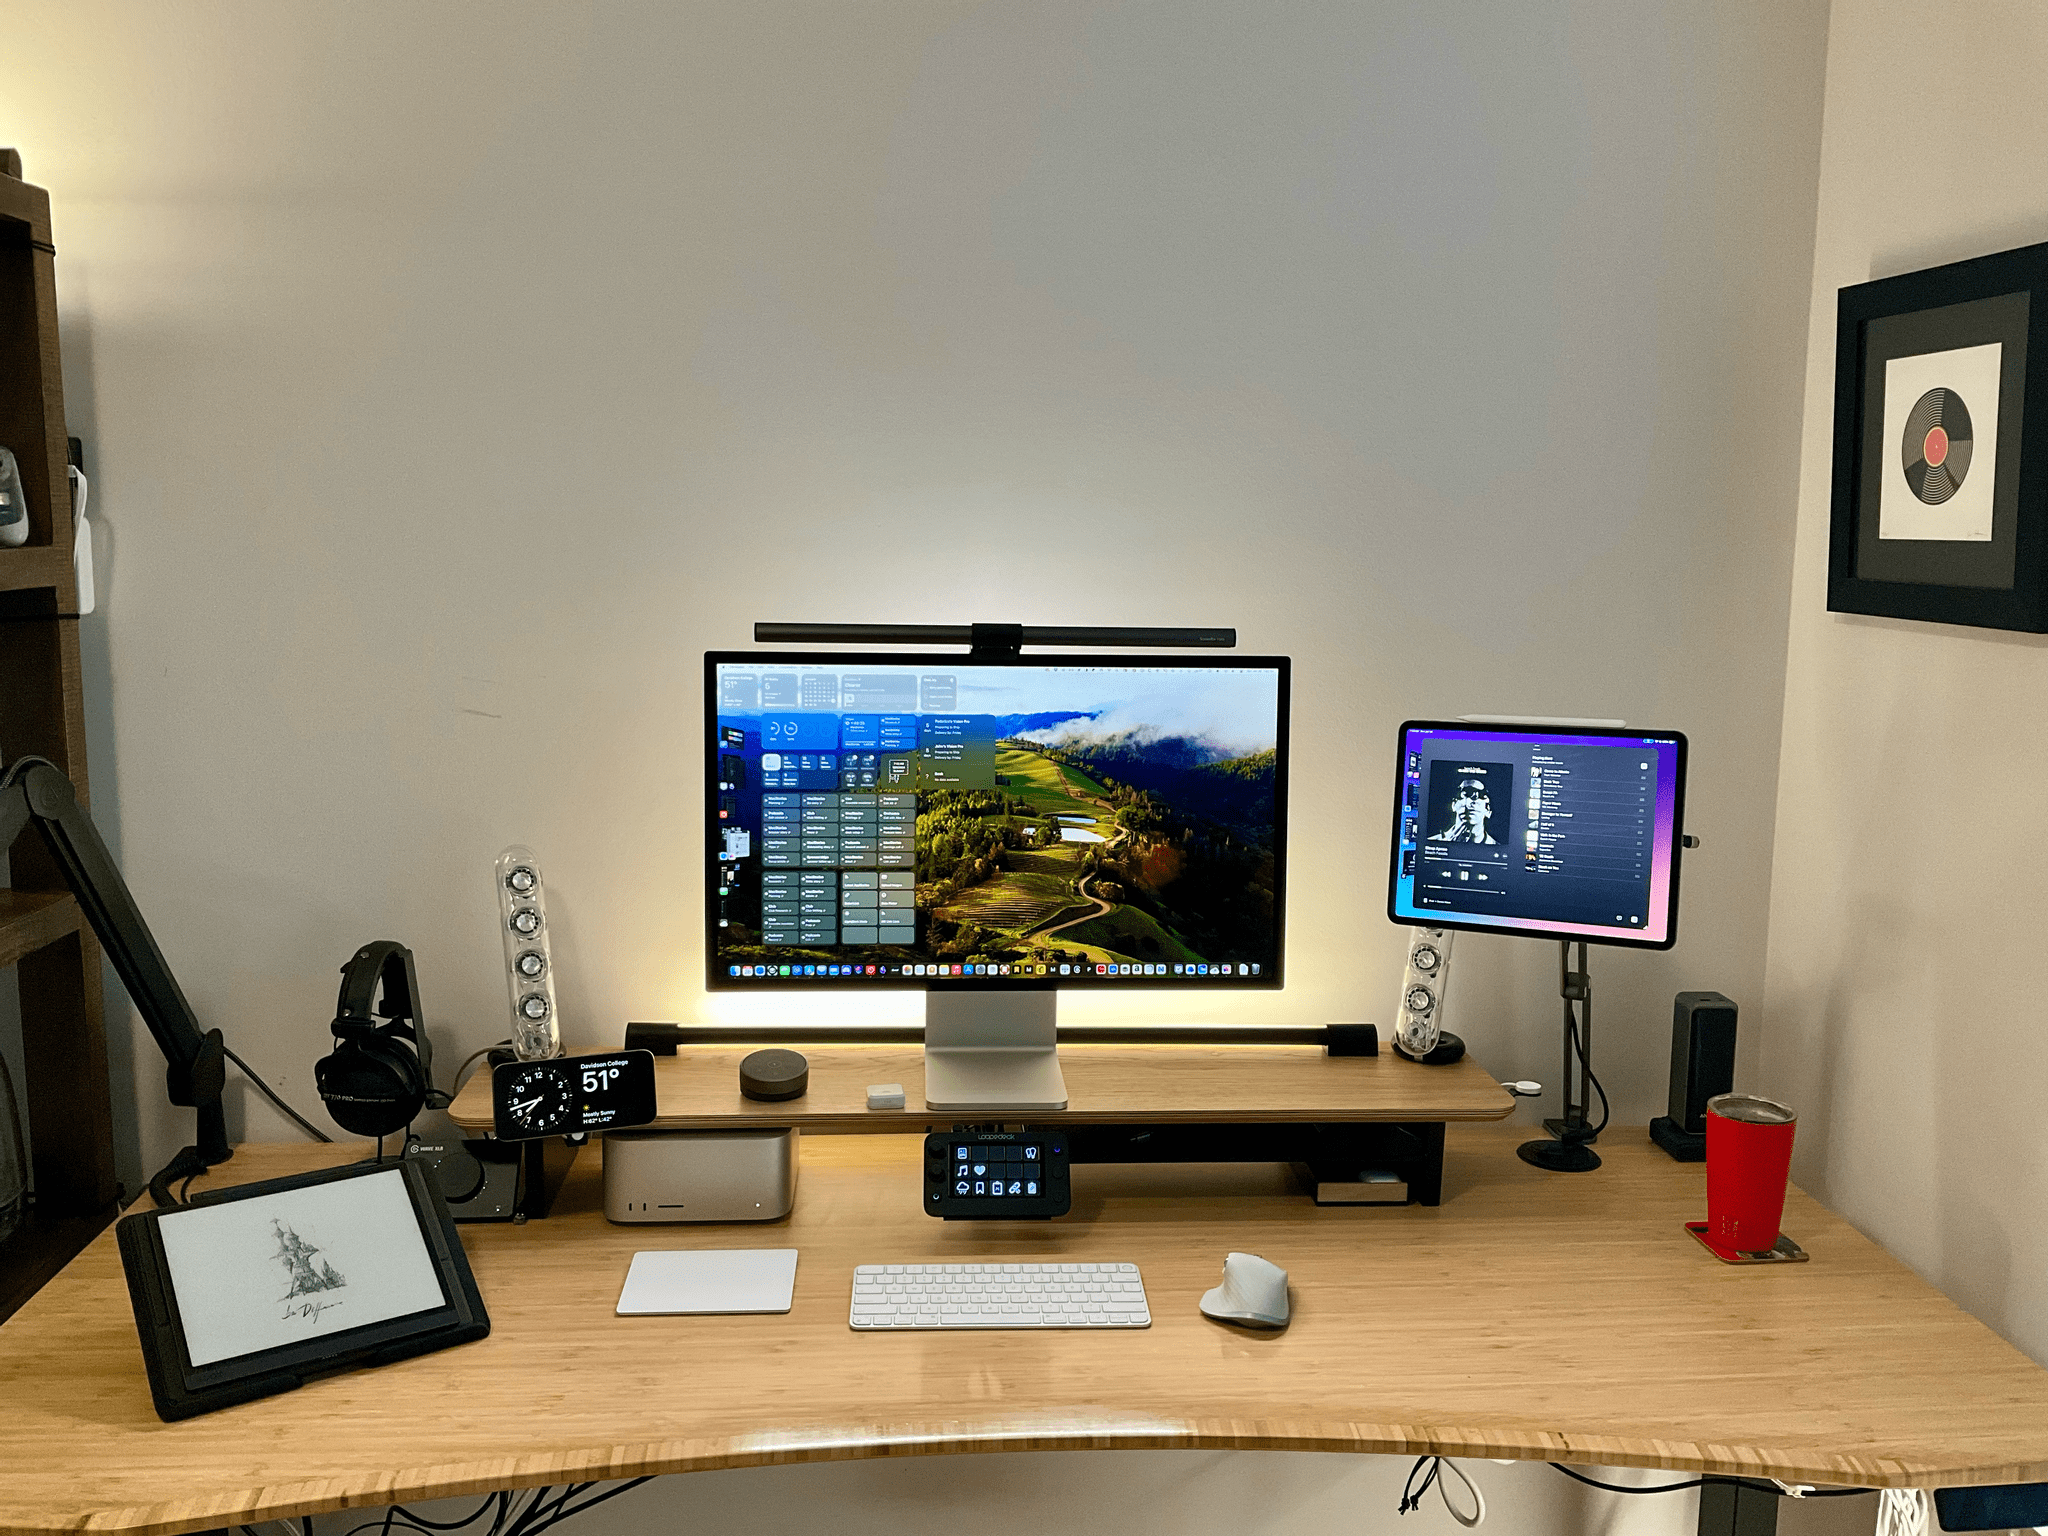
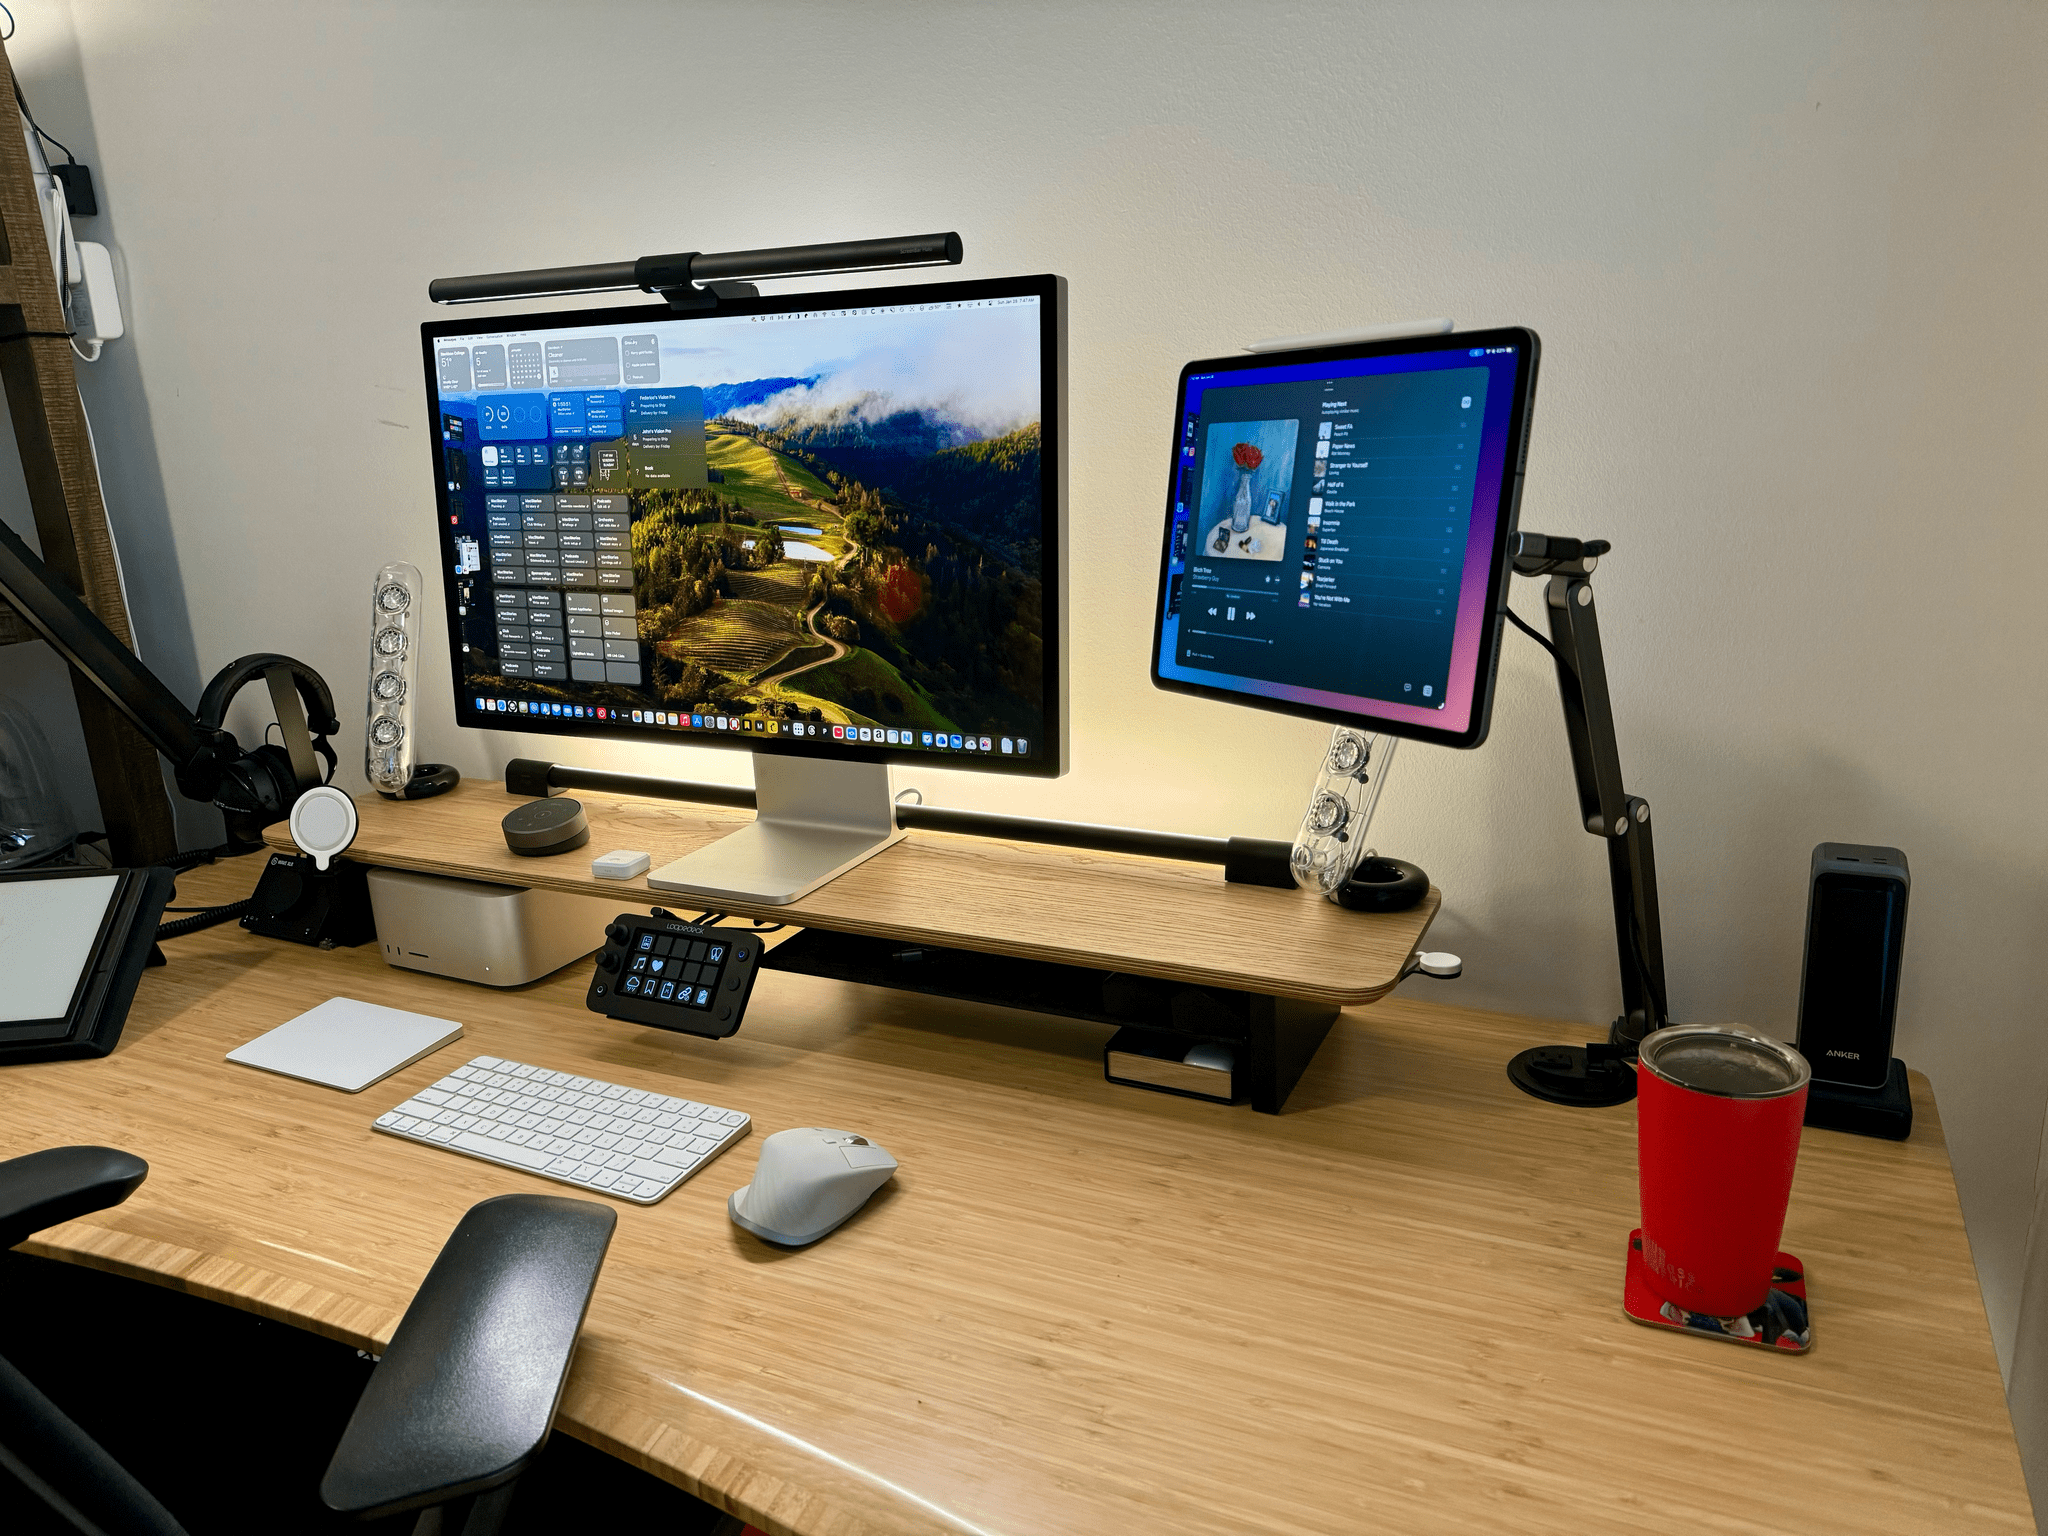
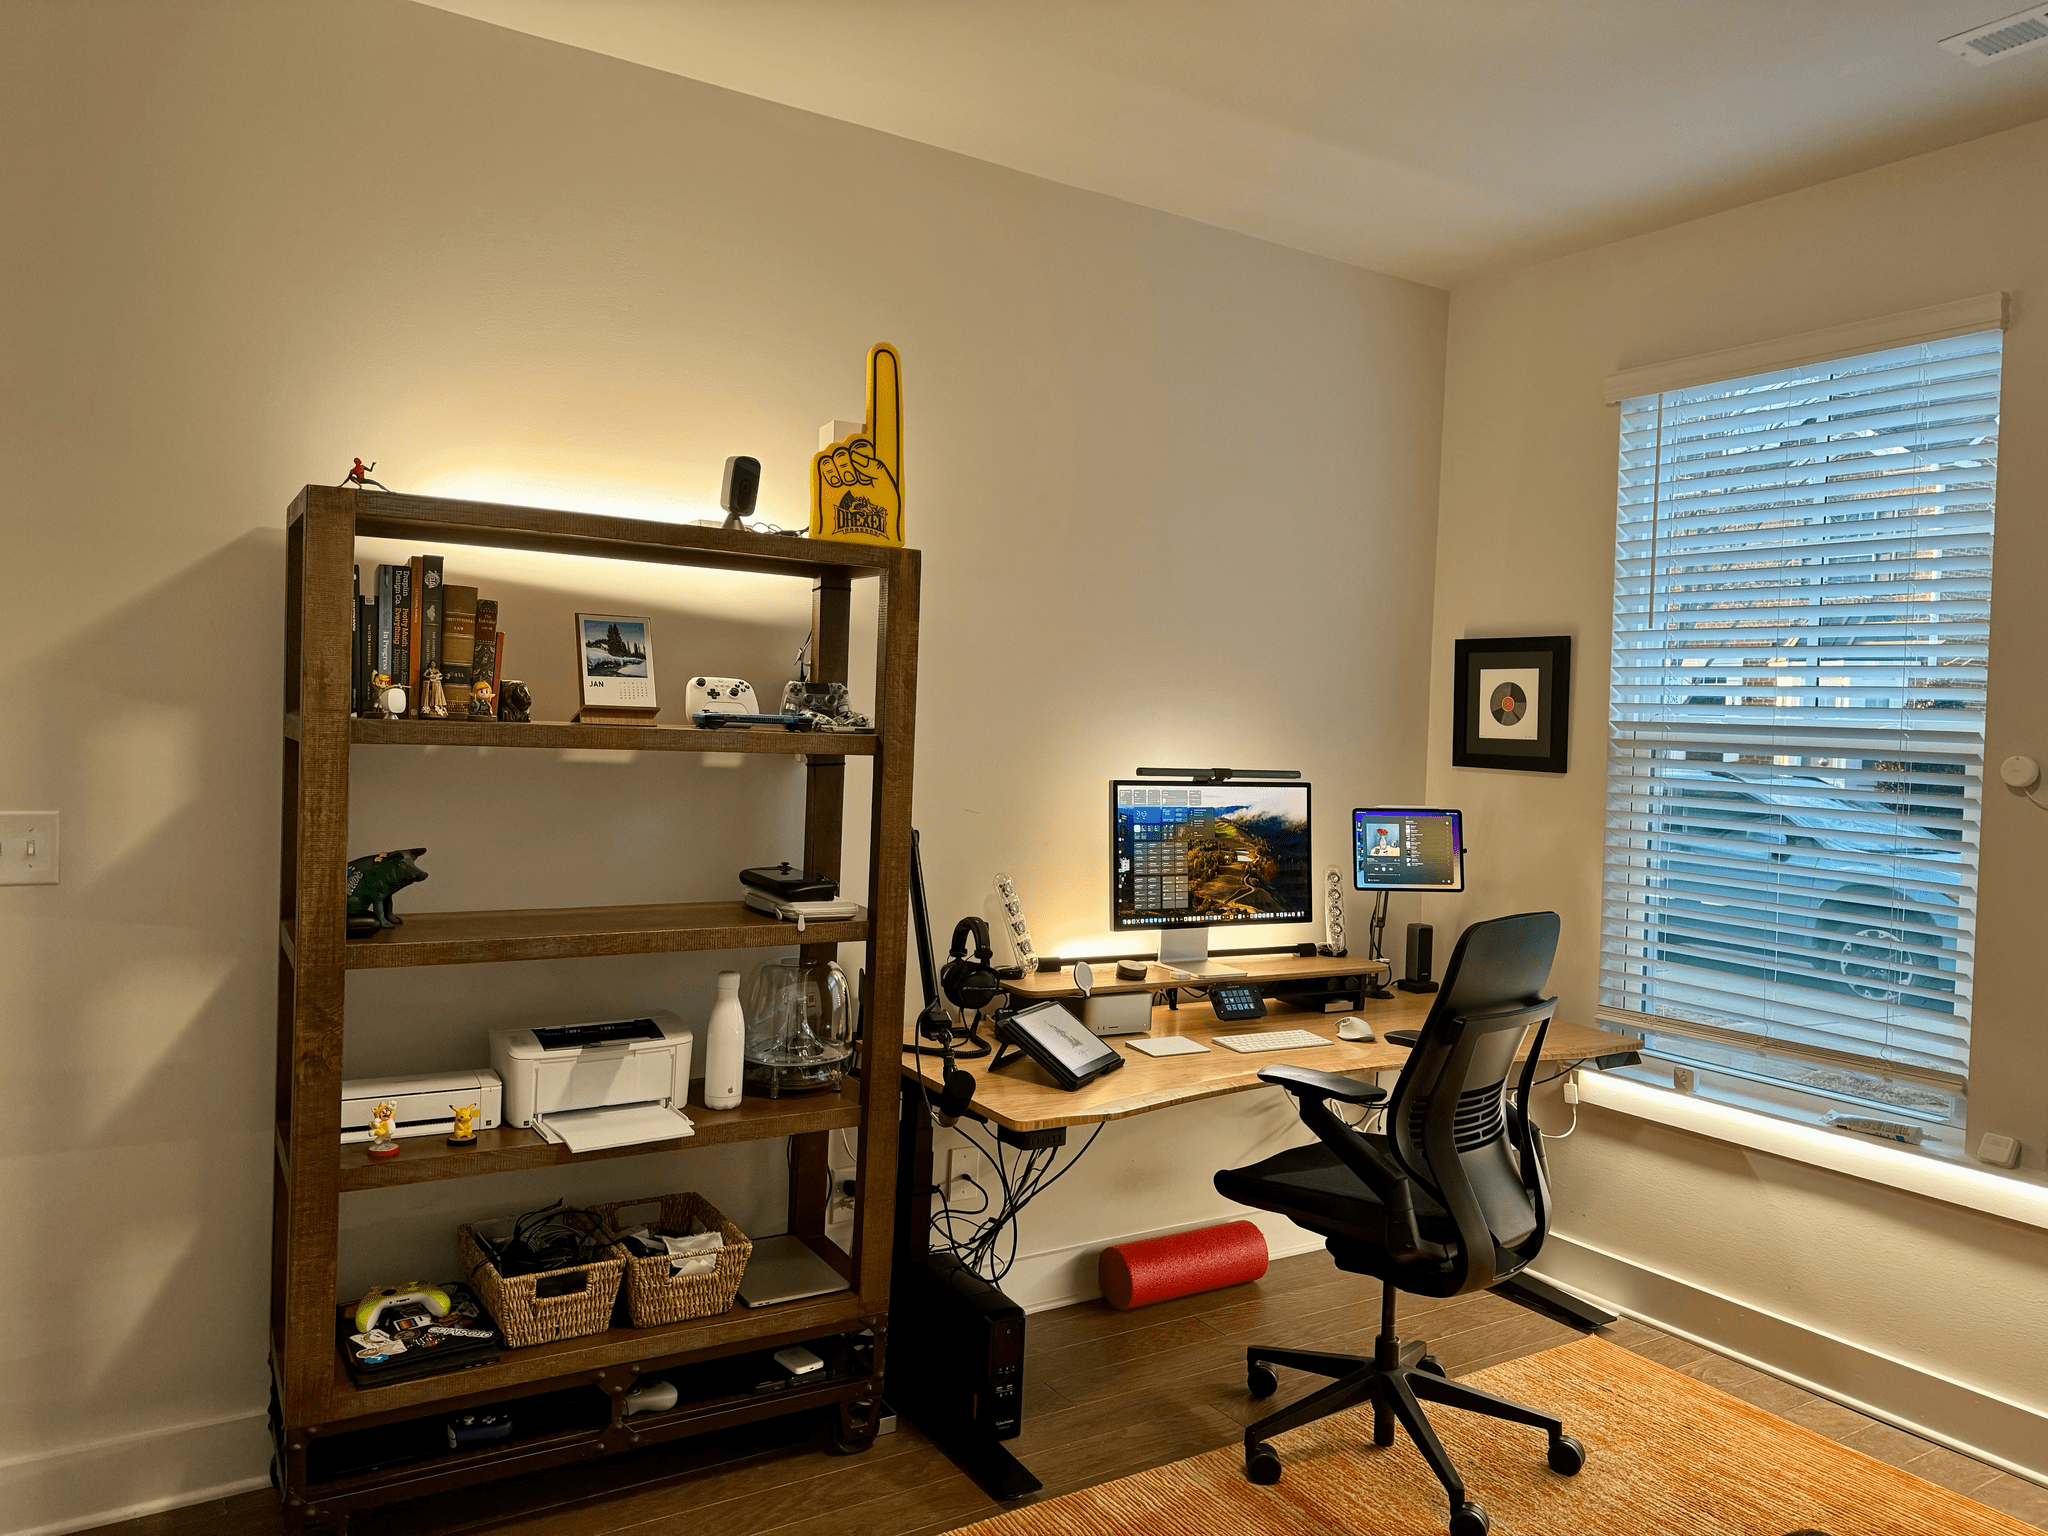
The centerpiece of this revised setup is a Balolo Setup Cockpit. There are a lot of companies that make desk shelves, but they never appealed to me because I’ve always been able to adjust my Studio Display to a comfortable height without one. I could tuck things under the shelf, but I needed more than that.
What I like about the Balolo shelf is that it has a system of attachment points on the underside of the shelf for adding accessories that have allowed me to get more off my desk and out of the way. It’s turned out to be the perfect floating, modular extension of my old setup that makes a long list of small adjustments that add up to a big difference overall.
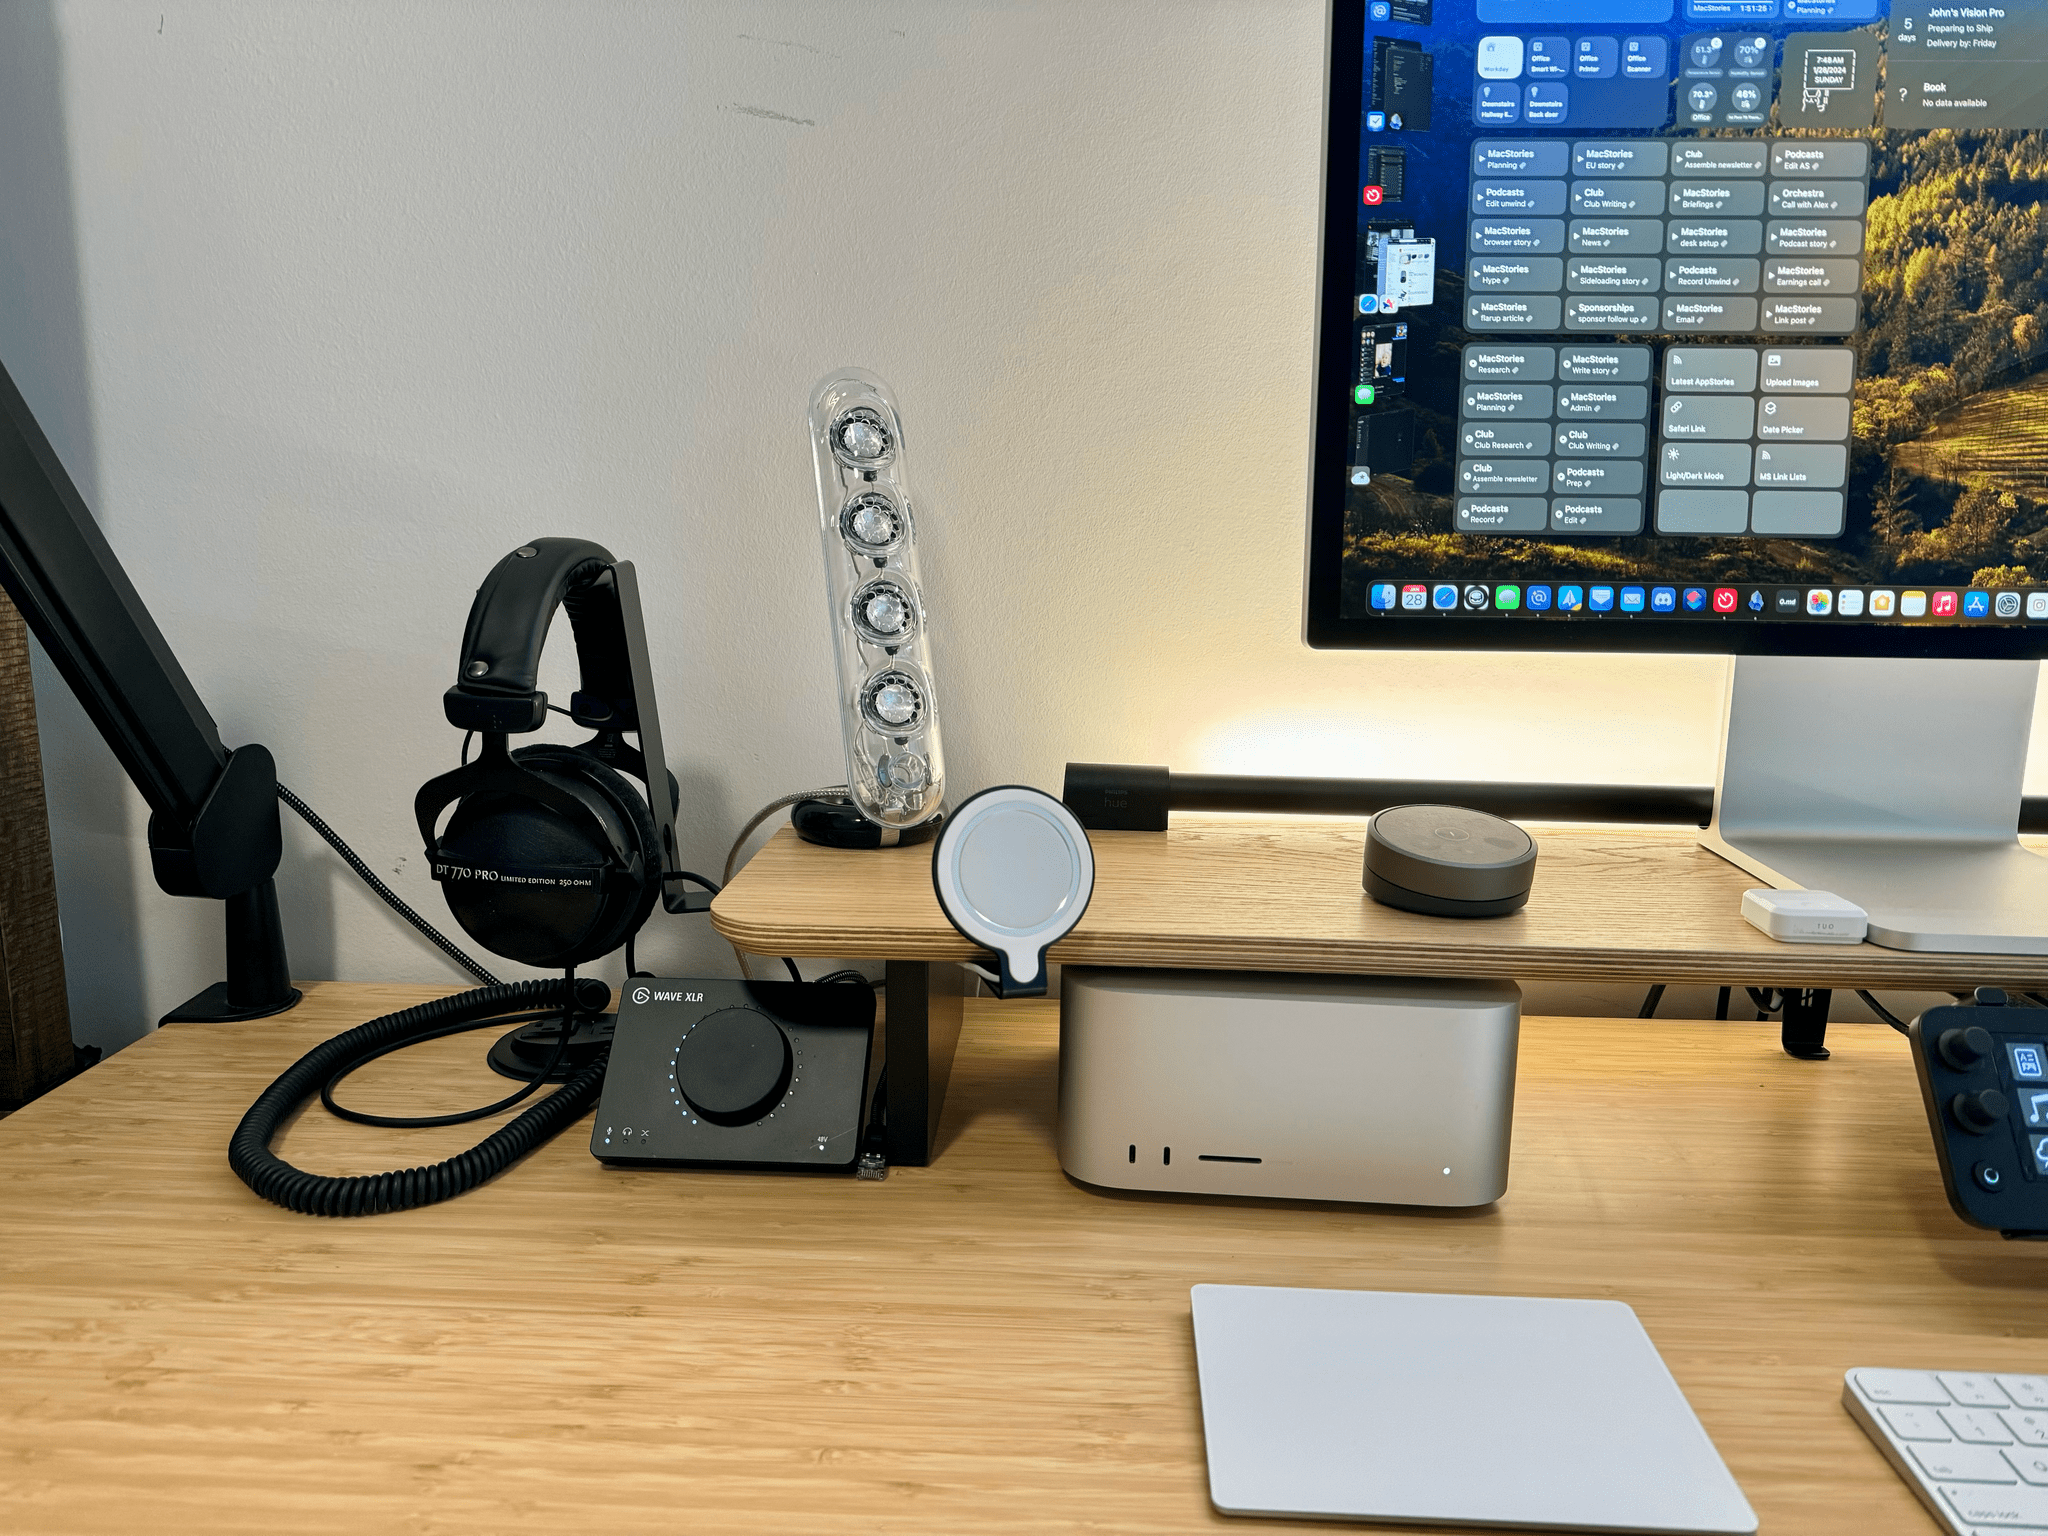
On the left side of the shelf, I attached Balolo’s headphone stand. That’s where my microphone and audio interface are, too, so they’re out of the way when not in use. The headphones are now closer to the audio interface, so they can be left plugged in at all times, with the cord snaking through an opening at the base of the stand, which helps keep the cable out of the way and from pulling out accidentally. My Elgato Wave XLR audio interface fits nicely under the left edge of the shelf and is also out of the way where its always-on LEDs don’t distract me.
There’s a Balolo iPhone Qi charger puck accessory attached to the front side of the shelf, too. It’s perfect for keeping my iPhone in StandBy mode as I work, displaying my schedule, music playing, weather, and other information.
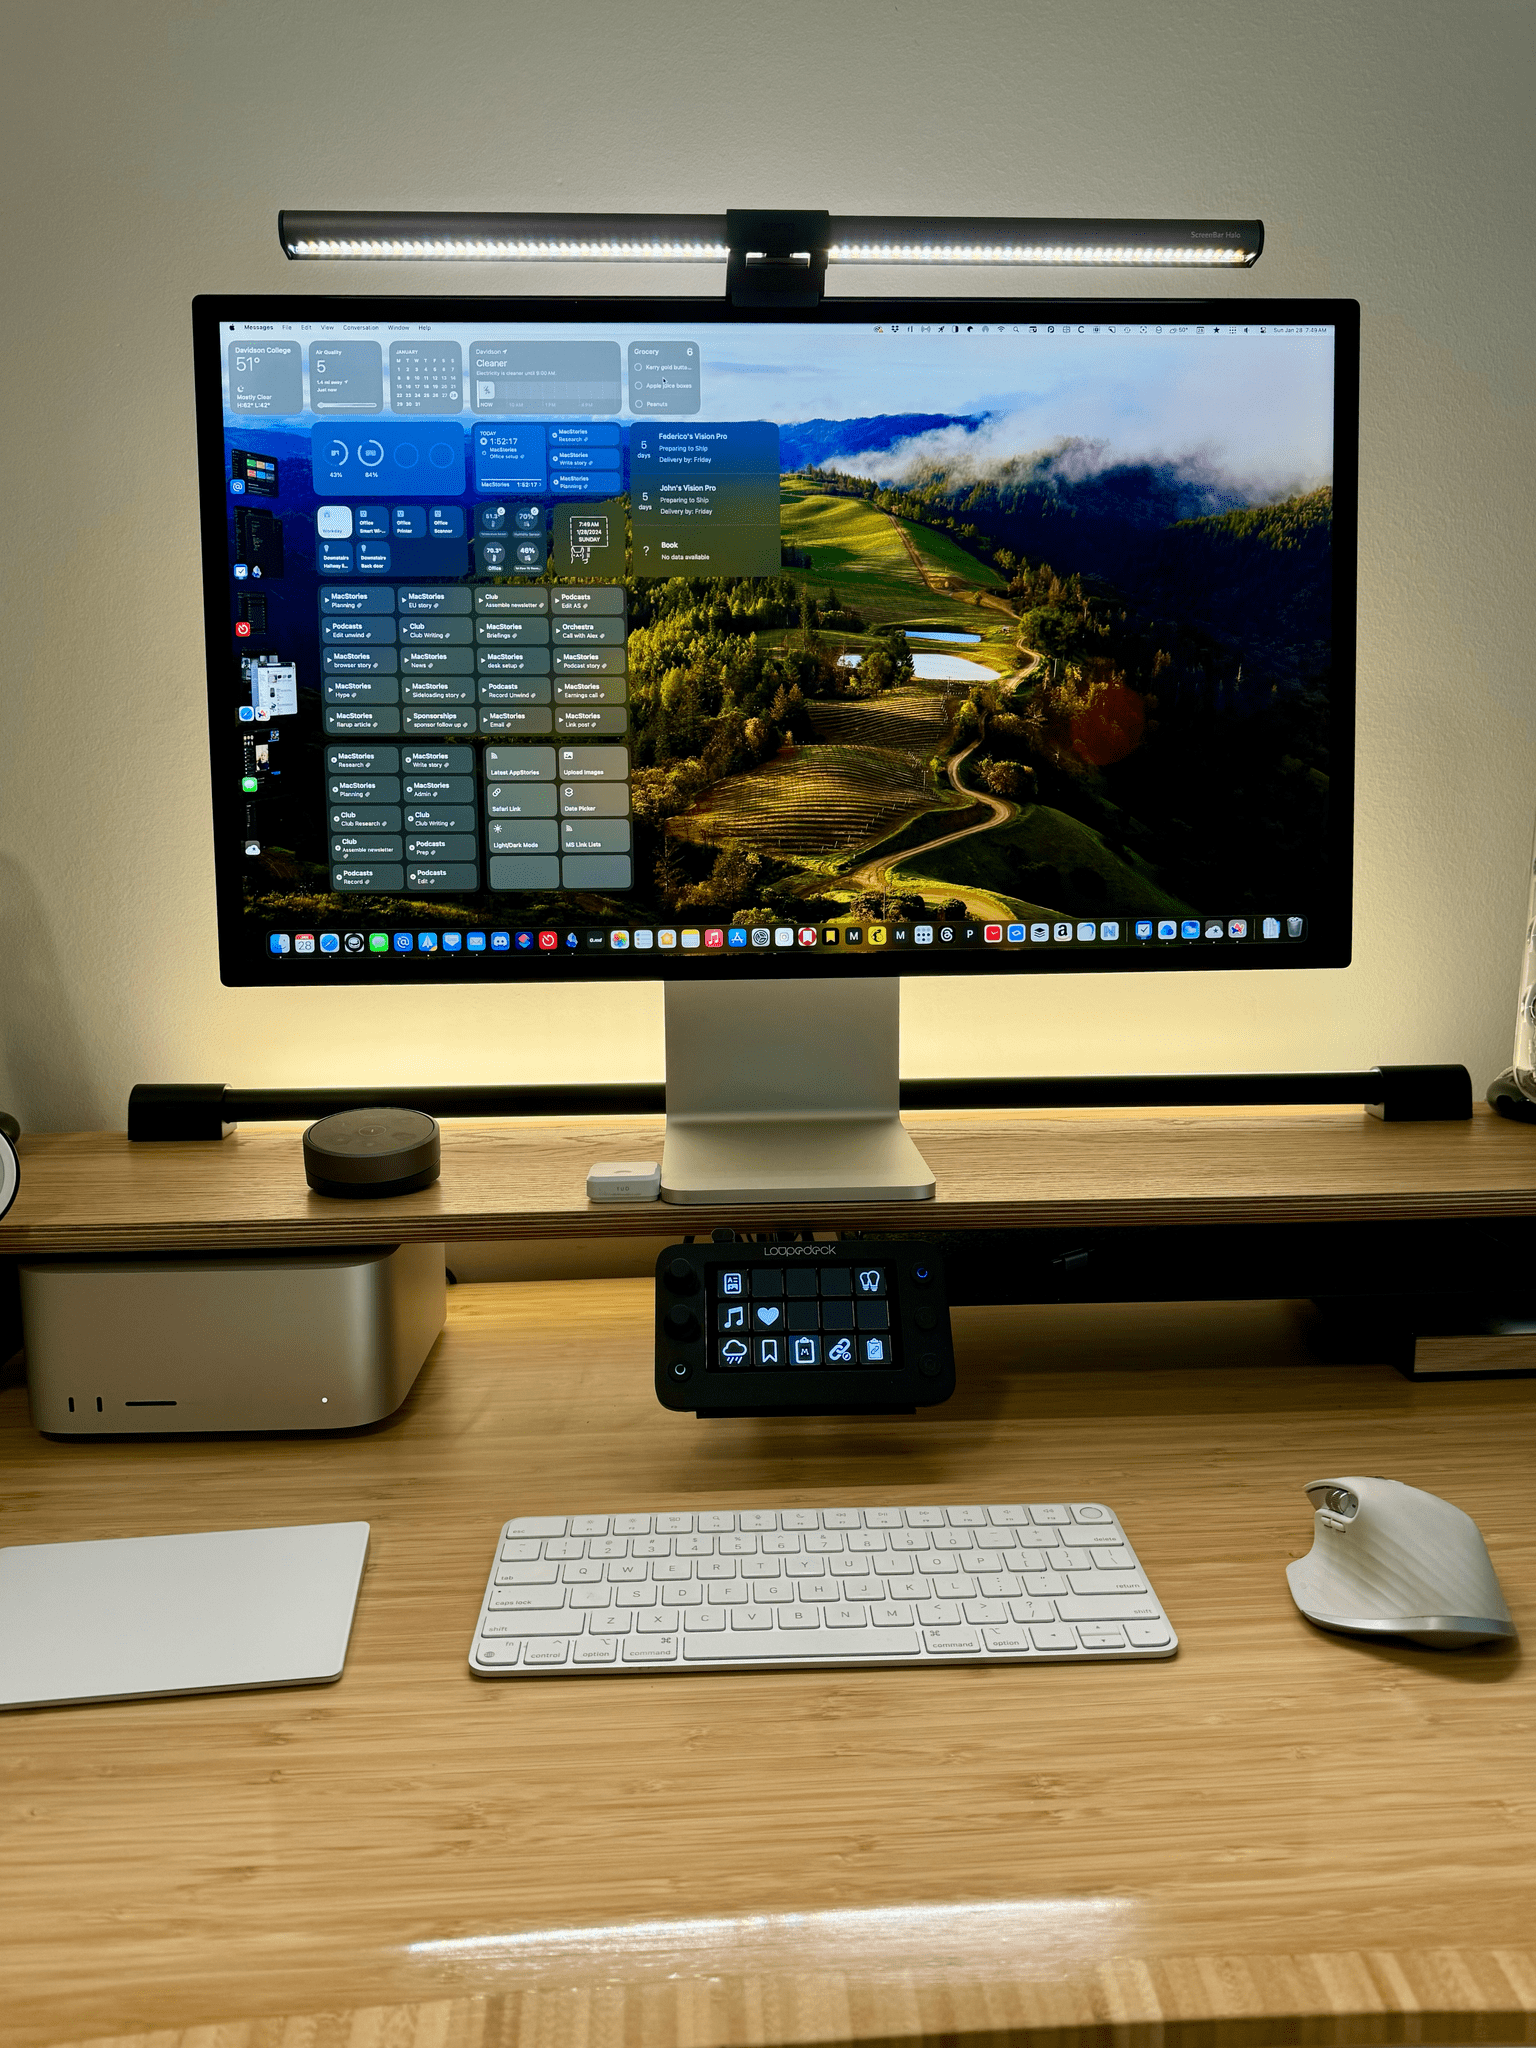
In the center of the shelf, just above my keyboard, is a non-slip pad accessory from Balolo where my Loupedeck Live S sits. My Loupedeck setup is still very simple, but I can already tell I’ll be using it more for the simple reason that it’s now as easy to reach out and use as the function row on my Magic Keyboard.
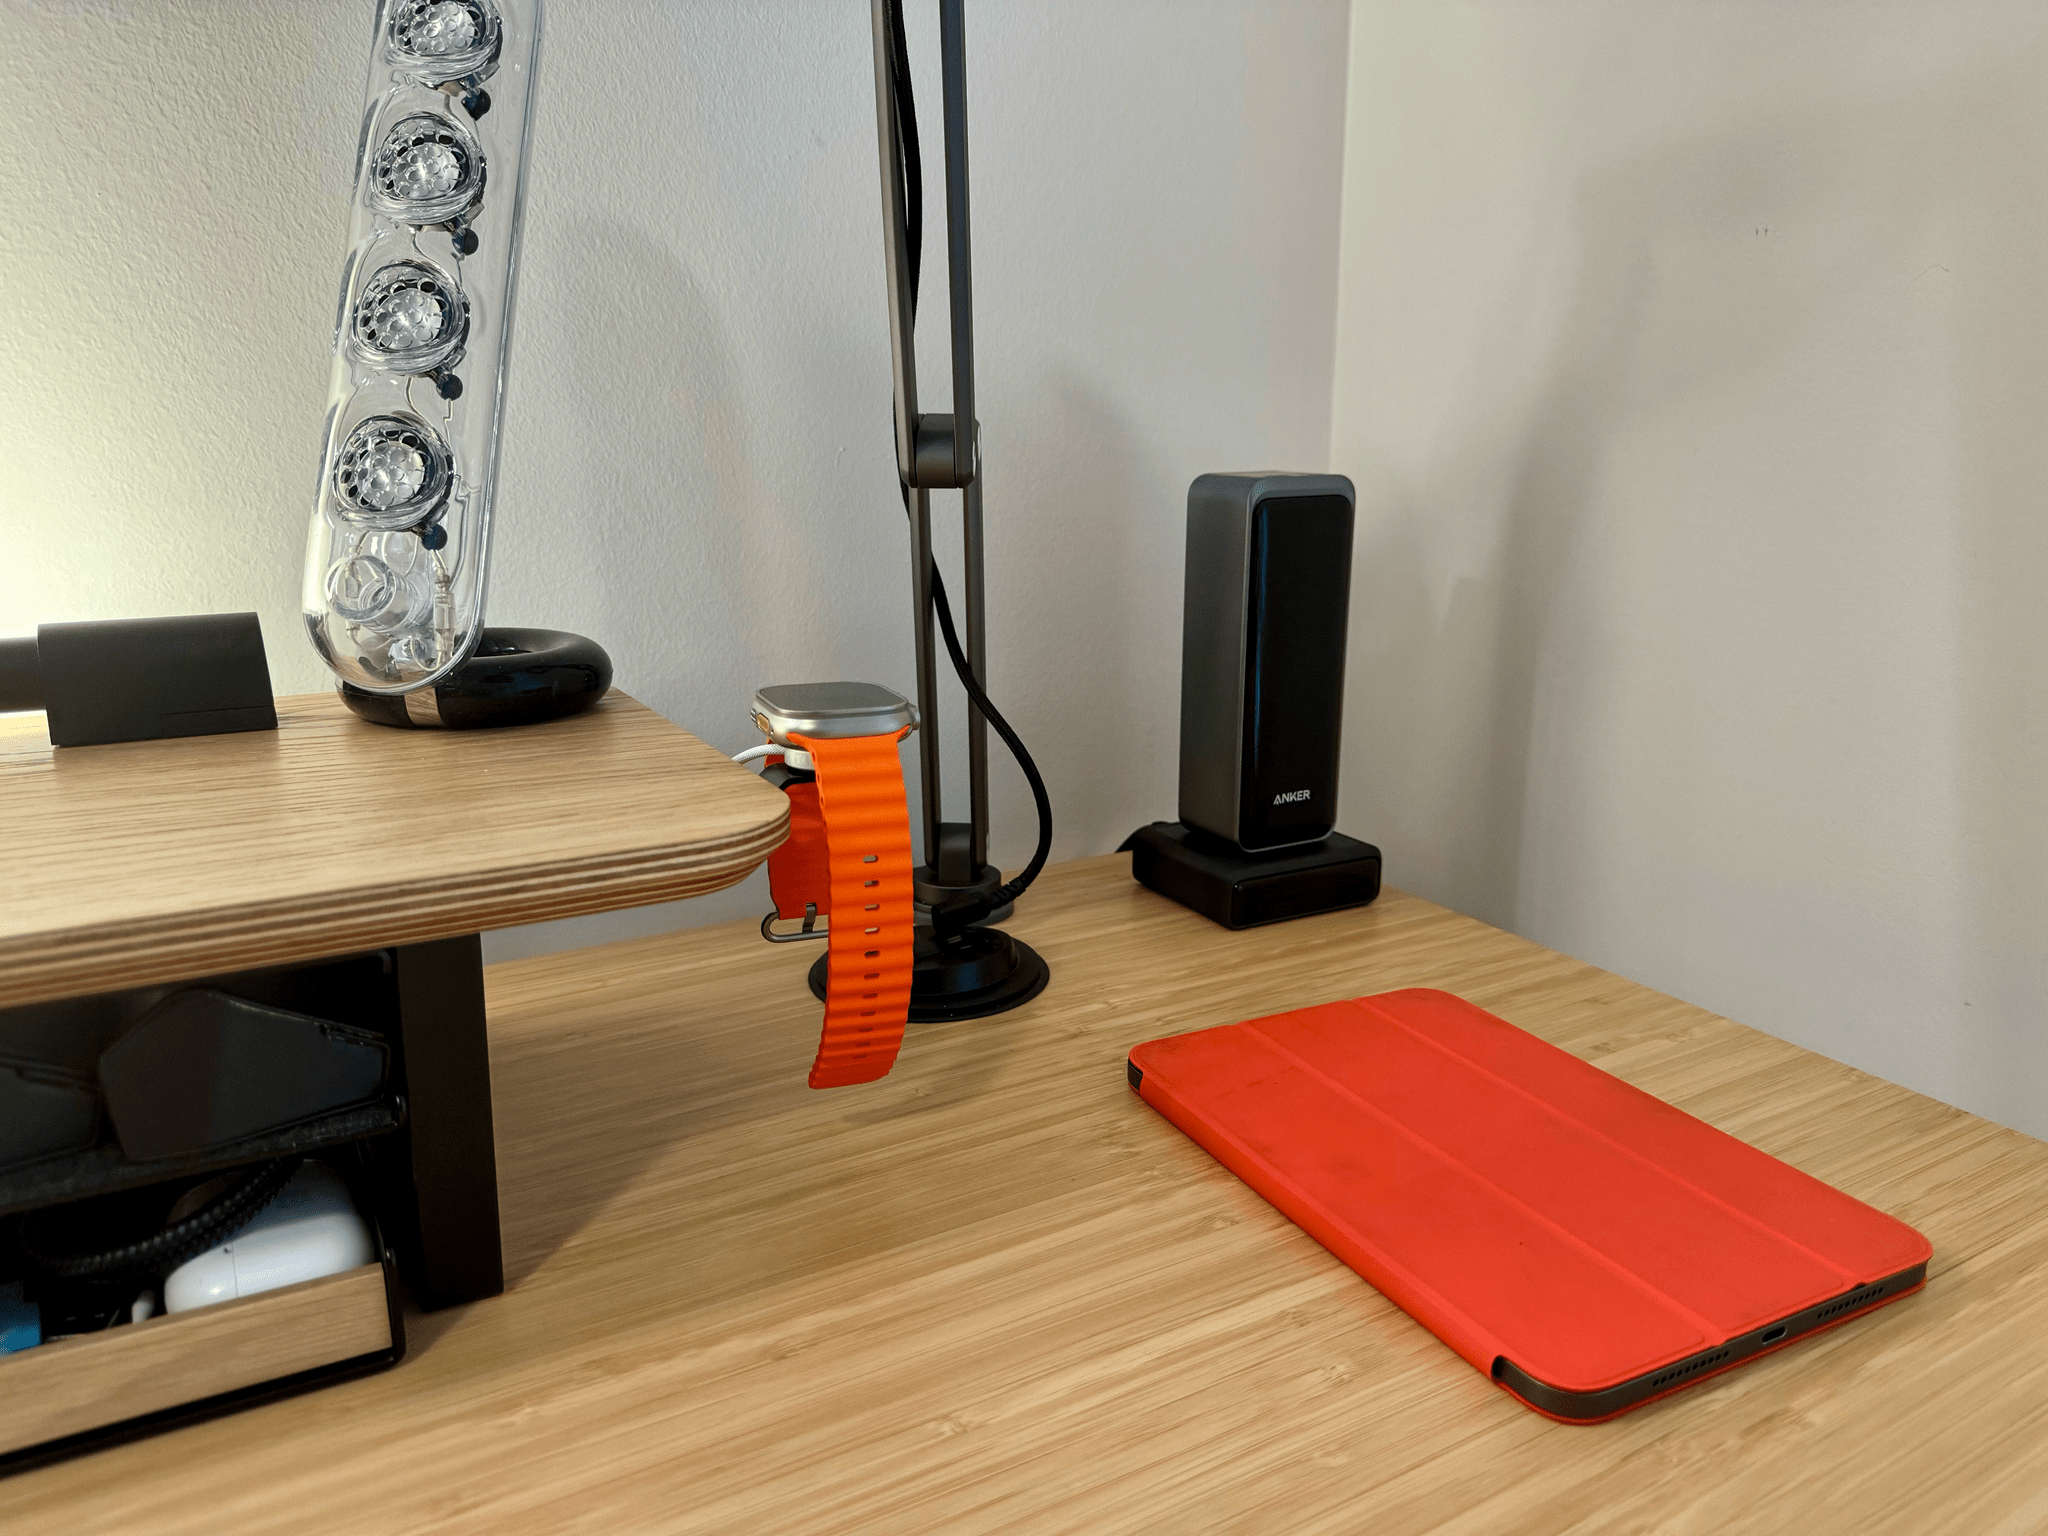
On the right side is Balolo’s Apple Watch charging puck stand, which I also love because it’s elevated, allowing my Apple Watch Ultra’s band to hang down, preventing the magnetic connection from being broken, which happened a lot when I’d charge my Watch with it lying sideways on my desk. Plus, I just like having the cable tucked out of the way.
The final two Balolo accessories are a large shelf that hangs under the right side of the Setup Cockpit for storing little things. It’s not tall, but I store my glasses case there along with my iPad mini and other small items. Finally, I purchased a small metal and wood tray from Balolo that’s perfect for the smallest things I need most often, like my wallet, keys, AirPods Pro, a short USB-C cable, and a microfiber cloth.
With so many accessories, the Balolo setup wasn’t cheap, but having my iPhone and Watch off the desk while they charge but within easy reach and a better place to store my podcasting headphones has made a big difference. Plus, I’m using the Loupedeck Live S more now that it’s practically on top of my keyboard. I could have managed without the extra shelf and tray, but they, too, have helped reduce clutter and keep little items within easy reach, which I appreciate.
Other Refinements
With the Balolo Setup Cockpit at the center of my setup, I looked for other ways to improve my immediate desk surroundings. The first thing I did was get a magnetic arm for my iPad Pro. I am still a fan of the Twelve South HoverBar Duo, which can sit on your desk or be clamped to the side of a desk. But, I lost the clamp in my move and wanted the whole setup off my desk, so I went with the KU XIU Magnetic Foldable Arm, which can hold the iPad higher than the HoverBar Duo. Plus, because it’s magnetic, the iPad is easier to remove for taking away from my desk.
I keep the iPad connected to a USB-C cable that plugs into a USB-C charging port near where it’s clamped to the desk. At the iPad end of the cable, I have a right-angle USB-C adapter connected to the cable to make it even less noticeable.
One of the few things I left sitting directly on my desk that’s not tucked out of the way under the Balolo Cockpit is the base of my Anker Prime 27,650mAh 250W power bank. This is the same battery Federico uses, and it’s currently the best one available, as far as I’m concerned. The battery magnetically attaches to its separately sold base and charges very fast. Plus, it has two fast-charging USB-C ports and one USB-A port, which come in handy when I have extra devices to charge.
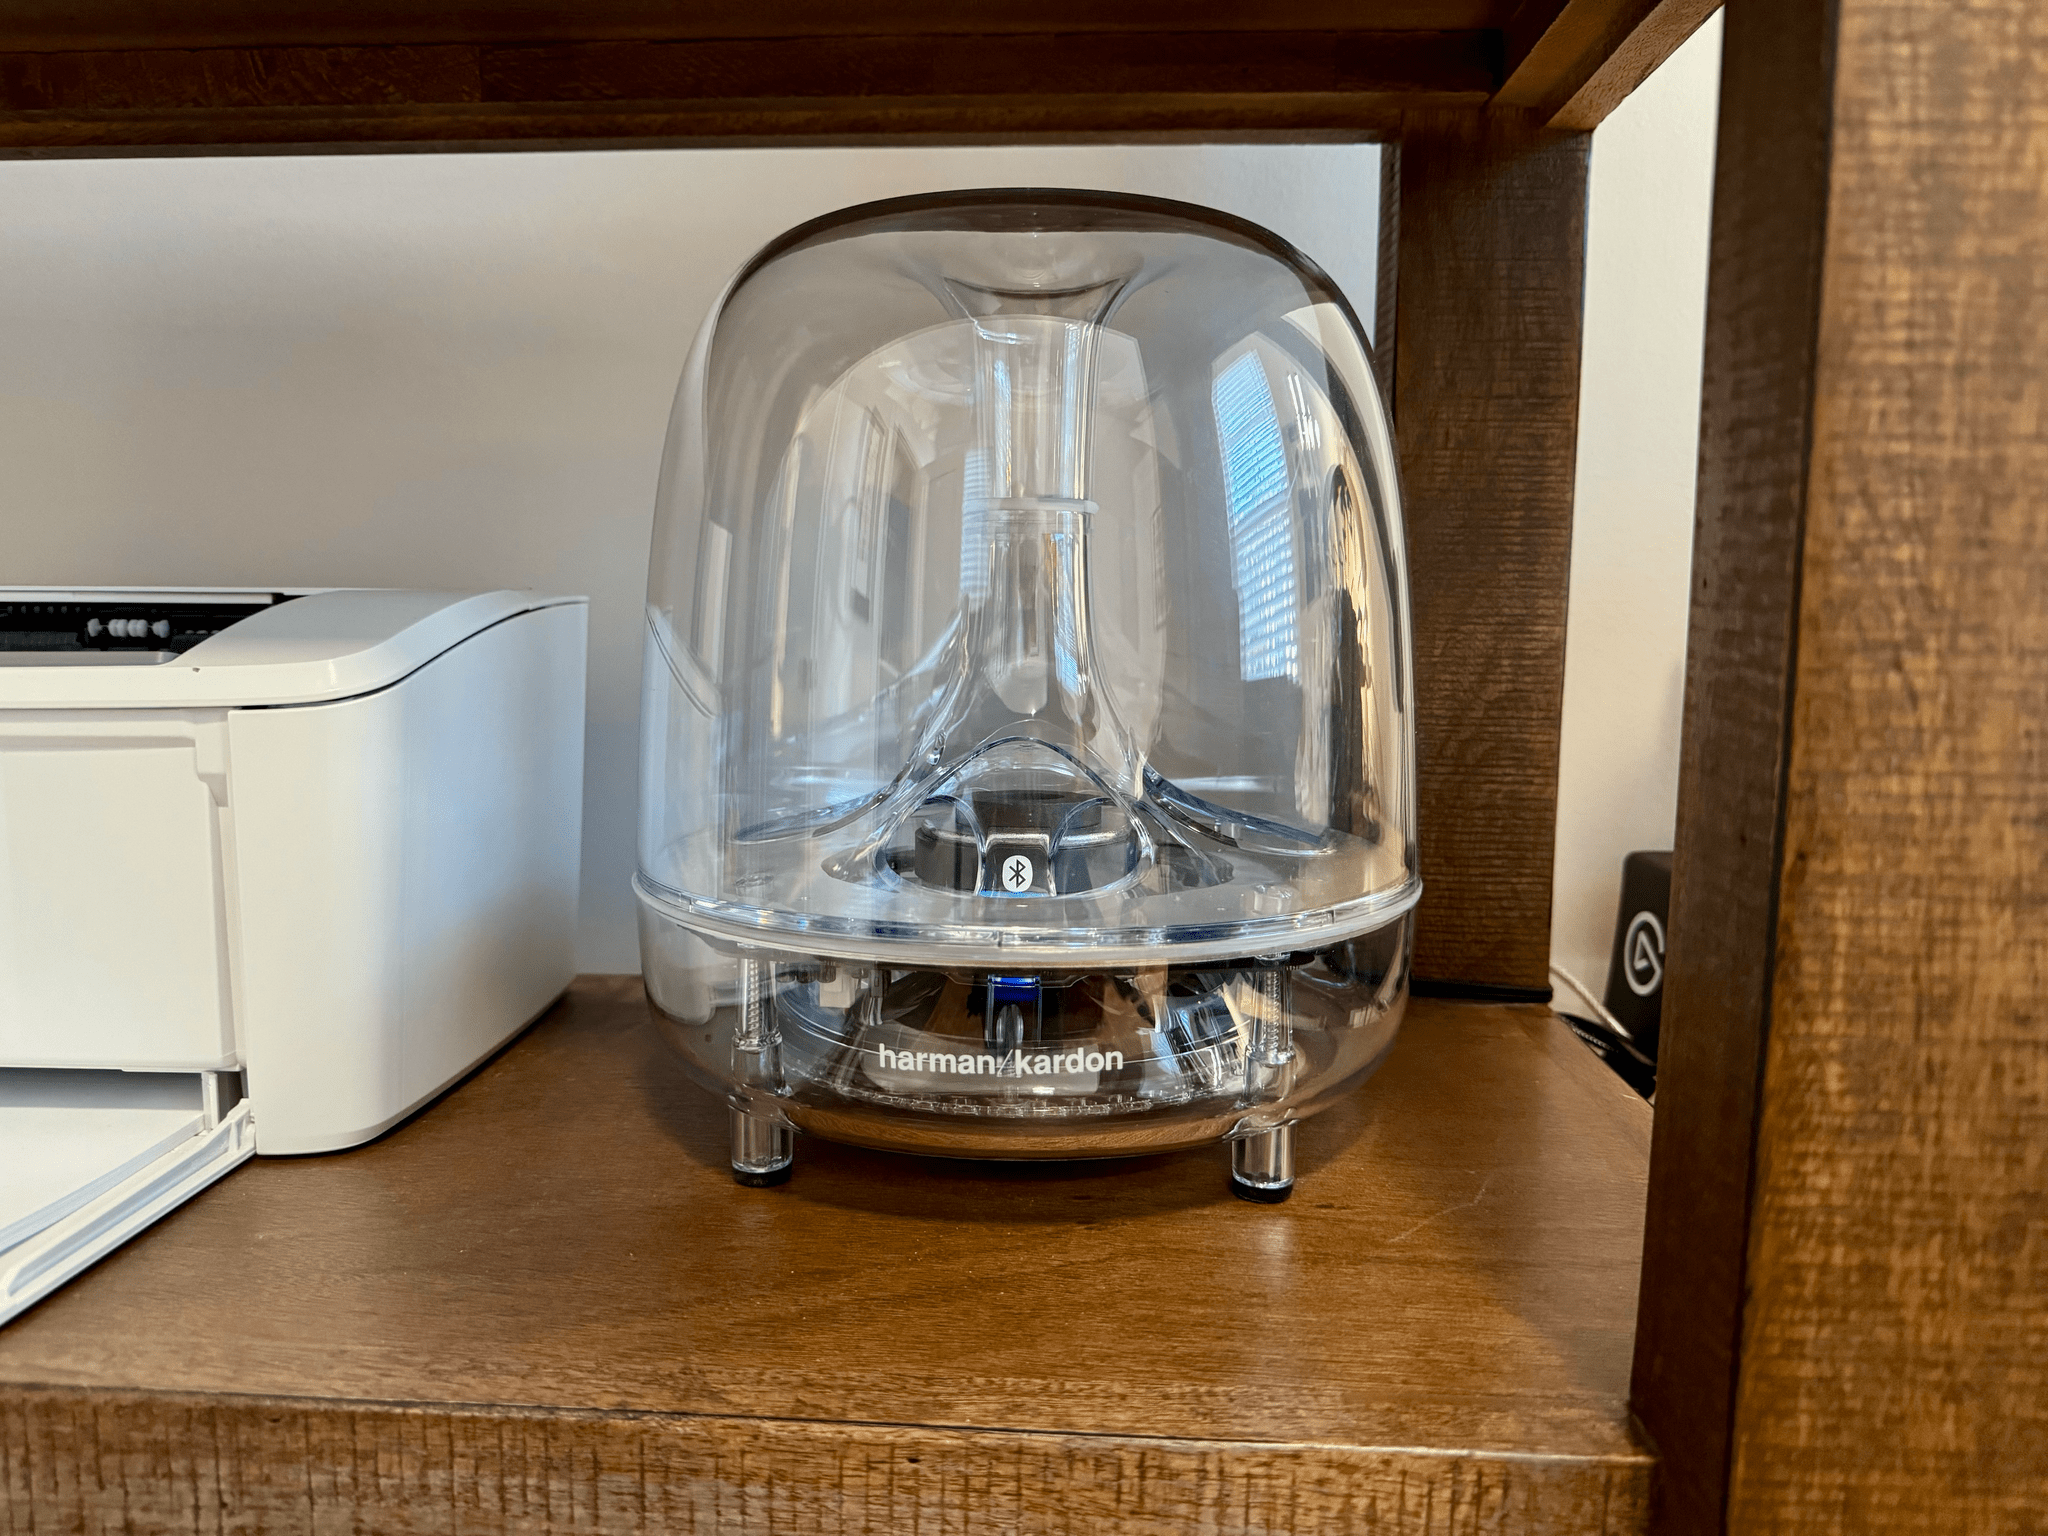
There are two additional changes above my desk and four below. My Harmon Kardon SoundSticks III speakers are not new but were in storage for a couple of years because there was no place for them in my past setups. Now, the main speakers sit on the ends of the Balolo Setup Cockpit, and the subwoofer sits on the bookshelf next to my desk. I use a Belkin SoundForm Connect adapter to AirPlay music to the SoundSticks, which only supports Bluetooth or hardwired out-of-the-box. And, I typically pair them with my Sonos Move speaker that sits behind me to fill the room with sound.
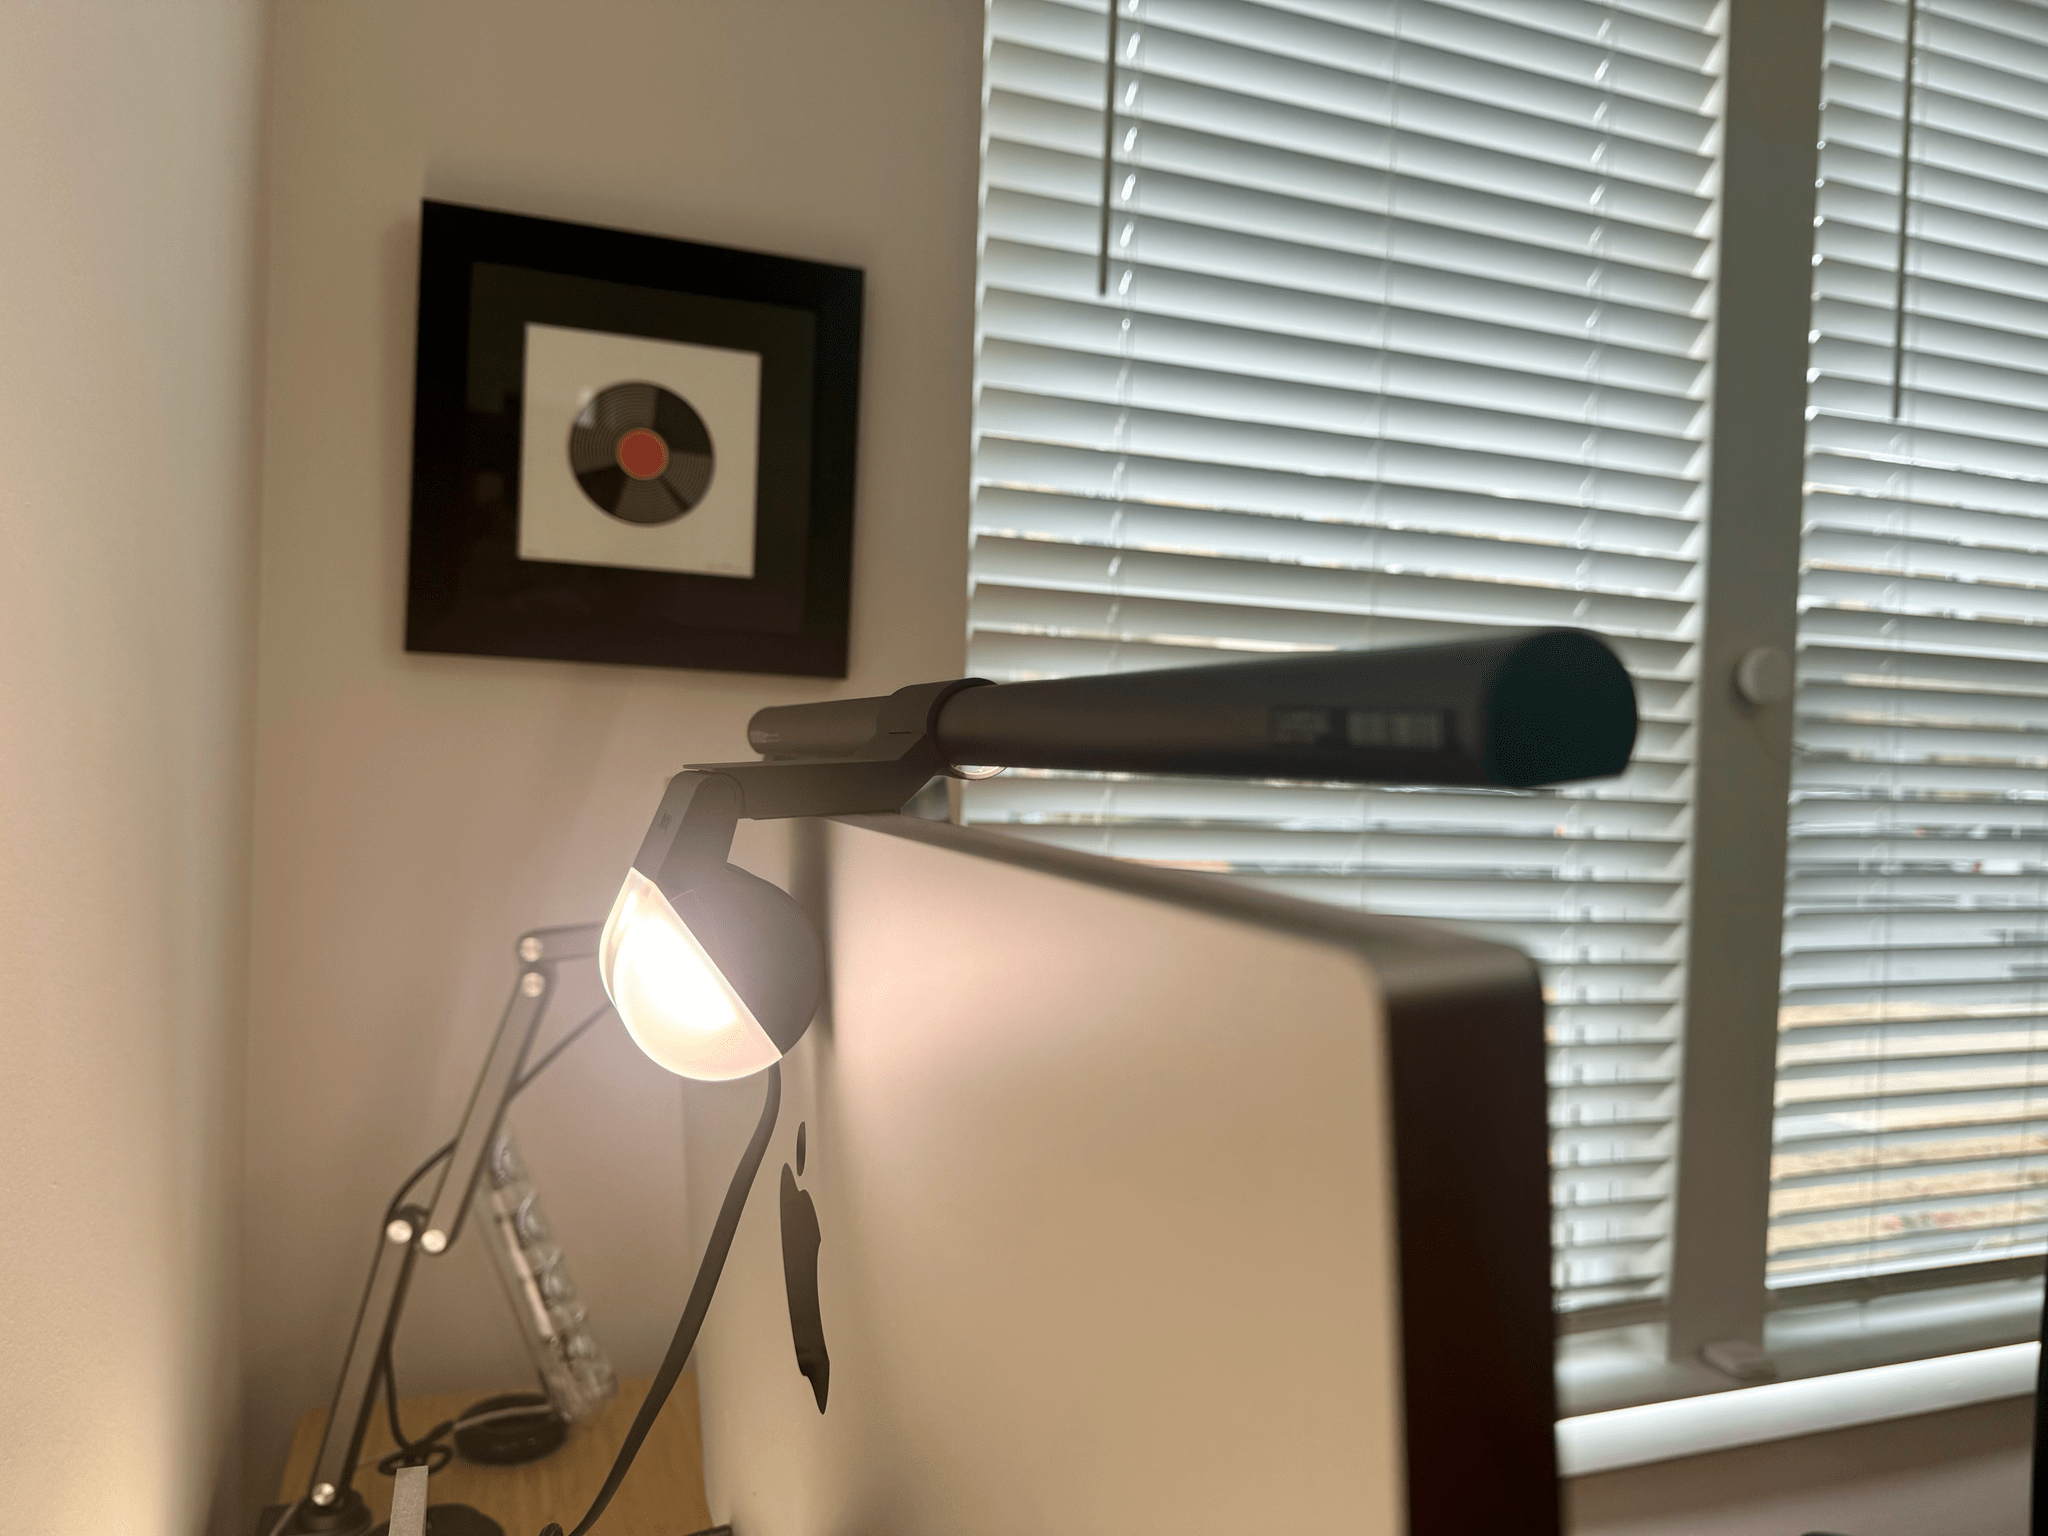
Perched above my desk is the BenQ ScreenBar Halo light that’s controlled by the black disk you see sitting next to my Studio Display. The light, which I previously reviewed, does a fantastic job of evenly lighting the desk in front of me and casting a nice glow behind the Studio Display helped out by a Philips Hue gradient tube light.
What you can’t see on my desk is just as important as what’s up top. The first new item is a Meross HomeKit power strip that sits in the cable management tray hanging beneath my desk. It has four outlets and four USB-A ports. The USB ports are powered as a unit but the electrical outlets are powered separately, meaning that they can be controlled separately in the Home app and with automations. I’m also using an Eve Energy HomeKit power strip for other devices.
The USB-A ports on the Meross power the iPhone charger, Apple Watch charger, and BenQ light. The electrical outlets handle the Anker Battery base, the outlet in the desk that powers the iPad Pro, and another charger that I’ll cover in a moment. There’s one open, unused outlet too. I use a simple automation for the iPad Pro that turns the desk outlet on when the iPad’s battery reaches 30% and off when it hits 90%, so it’s not charging the iPad all day. Then, at 6 pm each day, the outlet is turned off until I get up the next morning.
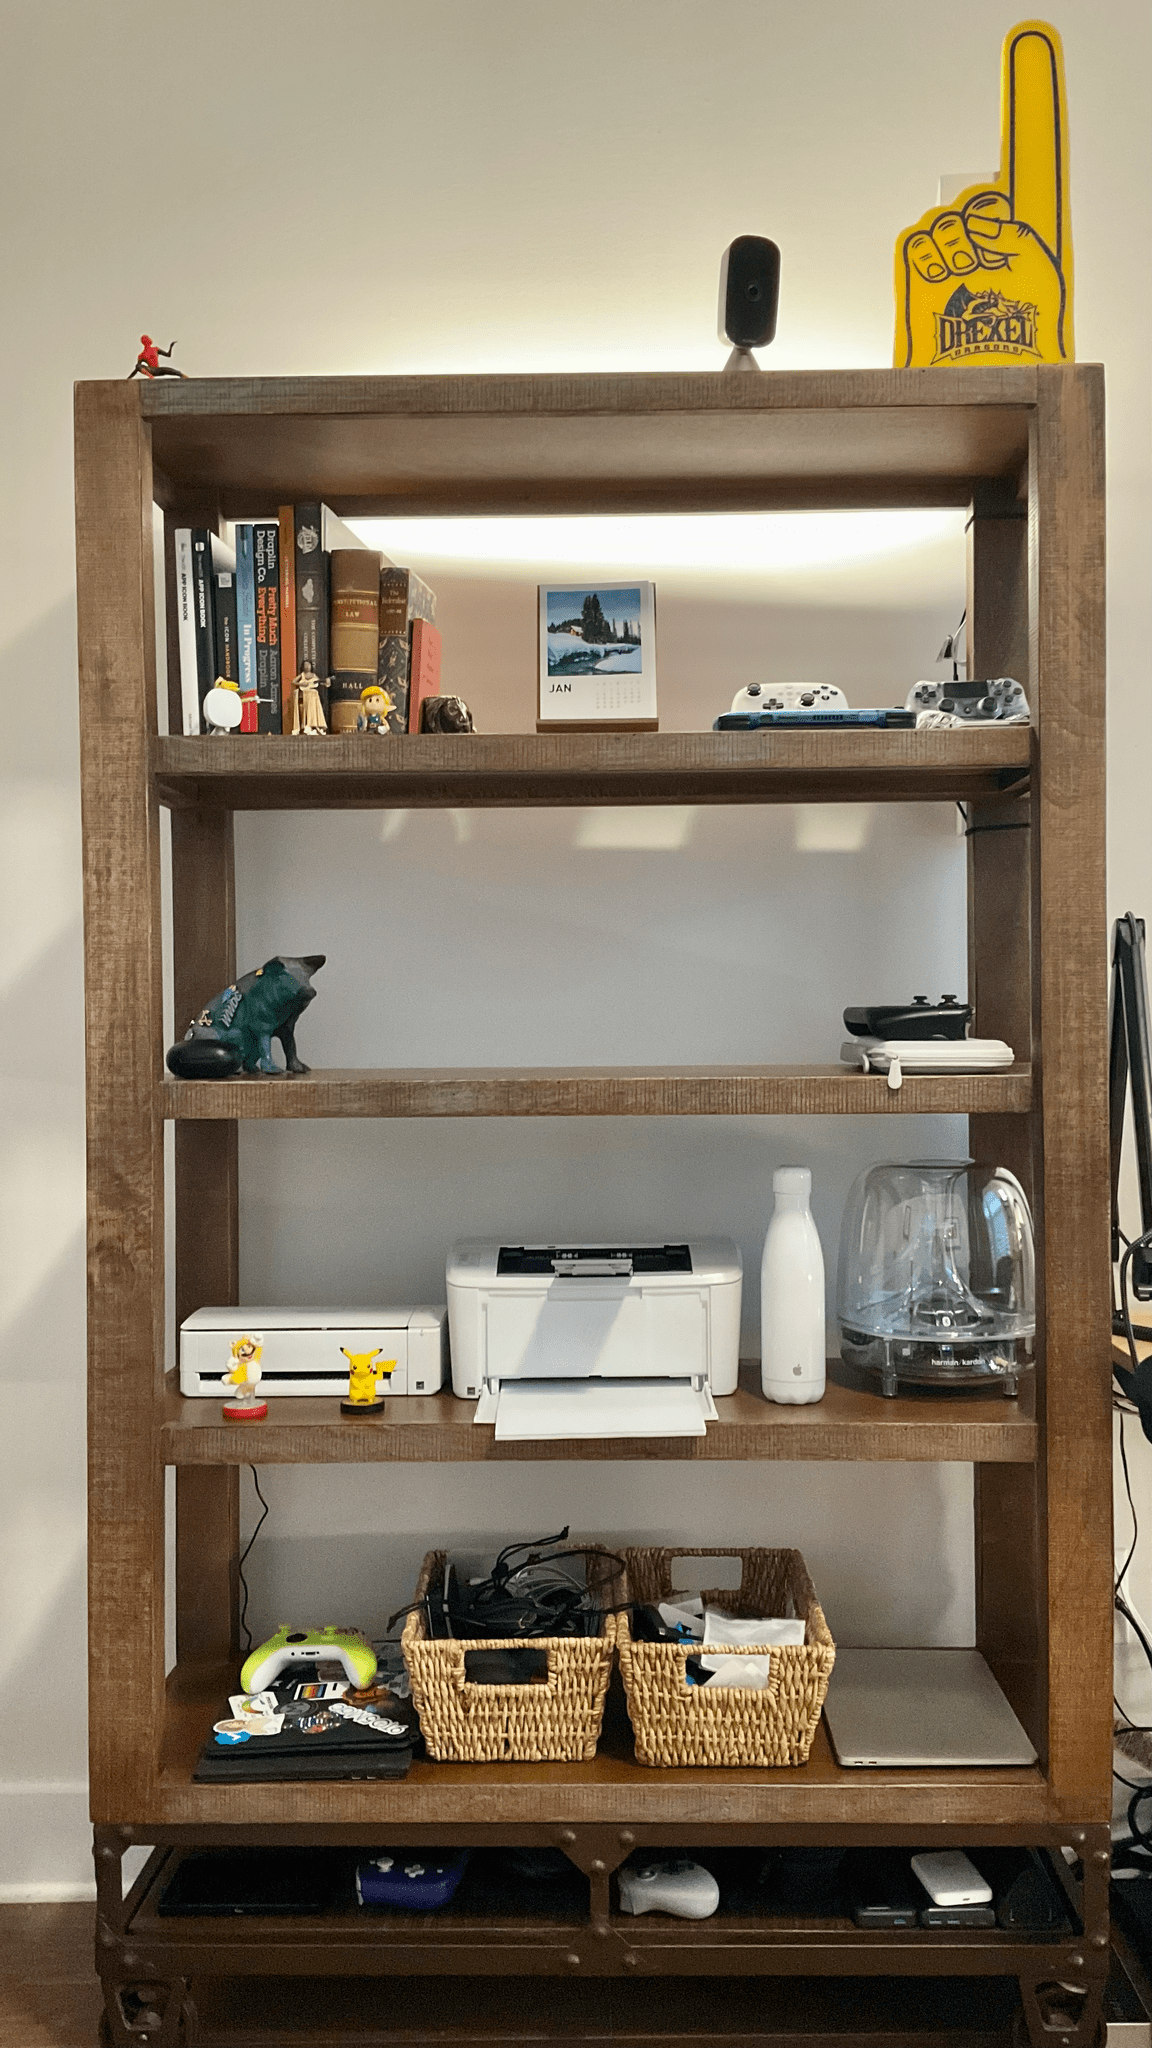
The other hidden power source in my setup is a small surge protector mounted to the back of my bookcase that powers the Wi-Fi router, Philips Hue Gradient Tube light, a Home Assistant Green hub, and Ecobee security camera on the top of my bookcase. The electrical cords and cables behind the bookcase and under the desk are all secured and tidied up with elastic loop stays that are tightened with toggle switches. These are great because they’re inexpensive, sturdy, and easy to use, making them the best cable management system I’ve found.

The same cable management tray beneath my desk houses a Samsung T9 4TB SSD, too. It’s a fast and quiet drive that I use for Carbon Copy Cloner backups. I’m using another for the MacBook Pro I have on loan from Apple, and I love them. They’re fast, small, and run relatively cool compared to the bus-powered portable hard drives I was using before.
Under the front left corner of the desk, I’ve mounted my UGreen charging station, a device that isn’t new to my setup but used to be on my bookshelf. Moving it closer but out of sight has been perfect. It can deliver 200W of power and has four USB-C and two USB-A ports. Plus, there’s plenty of room on that side of the desk now to charge multiple devices as I work. It’s powered by the Meross HomeKit power strip, too, so it’s only on when I need it.
Some cables are still noticeable hanging under the desk because I need the slack to raise and lower it, but overall, the cable situation is much better than before.
Finally, I added a Trendnet 2.5Gbps switch, which is also velcroed under the desk. I plan to discuss this more soon, but I had some networking issues when we moved into our new house that I never quite resolved. My Mac Studio was on wired Ethernet, so it didn’t really matter at the time, but with the Vision Pro arriving, I revisited the problem I was having, fixed it, and now have multiple fast wired connections, which allowed me to move one of my Wi-Fi routers out of a closet where the signal was blocked and onto the top of my bookcase where it blankets my office in fast Wi-Fi, which will be perfect for the Vision Pro’s arrival today.
That Trendnet switch also connects to a Satechi 2.5 Gbps dongle via Cat 6 Ethernet, all of which is tucked out of sight in the Balolo Setup Cockpit’s black metal shelf. There’s plenty of room for me to pull the dongle out, attach it to the MacBook Pro, and then work with it connected to the Studio Display with over 2 Gbps down and up.
There’s another Ethernet cable hidden next to the Studio display for easy connection to a Kiloview N40 NDI HDMI encoder that I can use to broadcast any HDMI source over my network, using a wired or wireless connection. That lets me play my Nintendo Switch on my Studio Display if I want, and I’m hoping it will be the key to 4K60 console gaming on the Apple Vision Pro.
To round things out, I have a few other additions and changes to highlight
- The GameSir G8 Galileo iPhone controller has replaced the Backbone One as my favorite iPhone gaming accessory
- I’m using Sony Pulse earbuds for gaming on the PS5 and love them
- For running, I have a pair of Beats Powerbeats Pro wireless earbuds that I’ve been using for a long time but neglected to add to my original setup story
- I’ve been slowly building a collection of OWC Thunderbolt 4 cables for fast charging and data transfers
- I bought a Tomtoc soft case for the MacBook Pro I have on loan from Apple, and so far, it’s done a good job of protecting the laptop when I leave home
- I cleared off a shelf on my bookcase for the Vision Pro, found a spare Magic Keyboard and Magic Trackpad that I originally bought for use with my iPad Pro but will dedicate to the Vision Pro, and bought a case to hold the keyboard and trackpad as I move them around the house
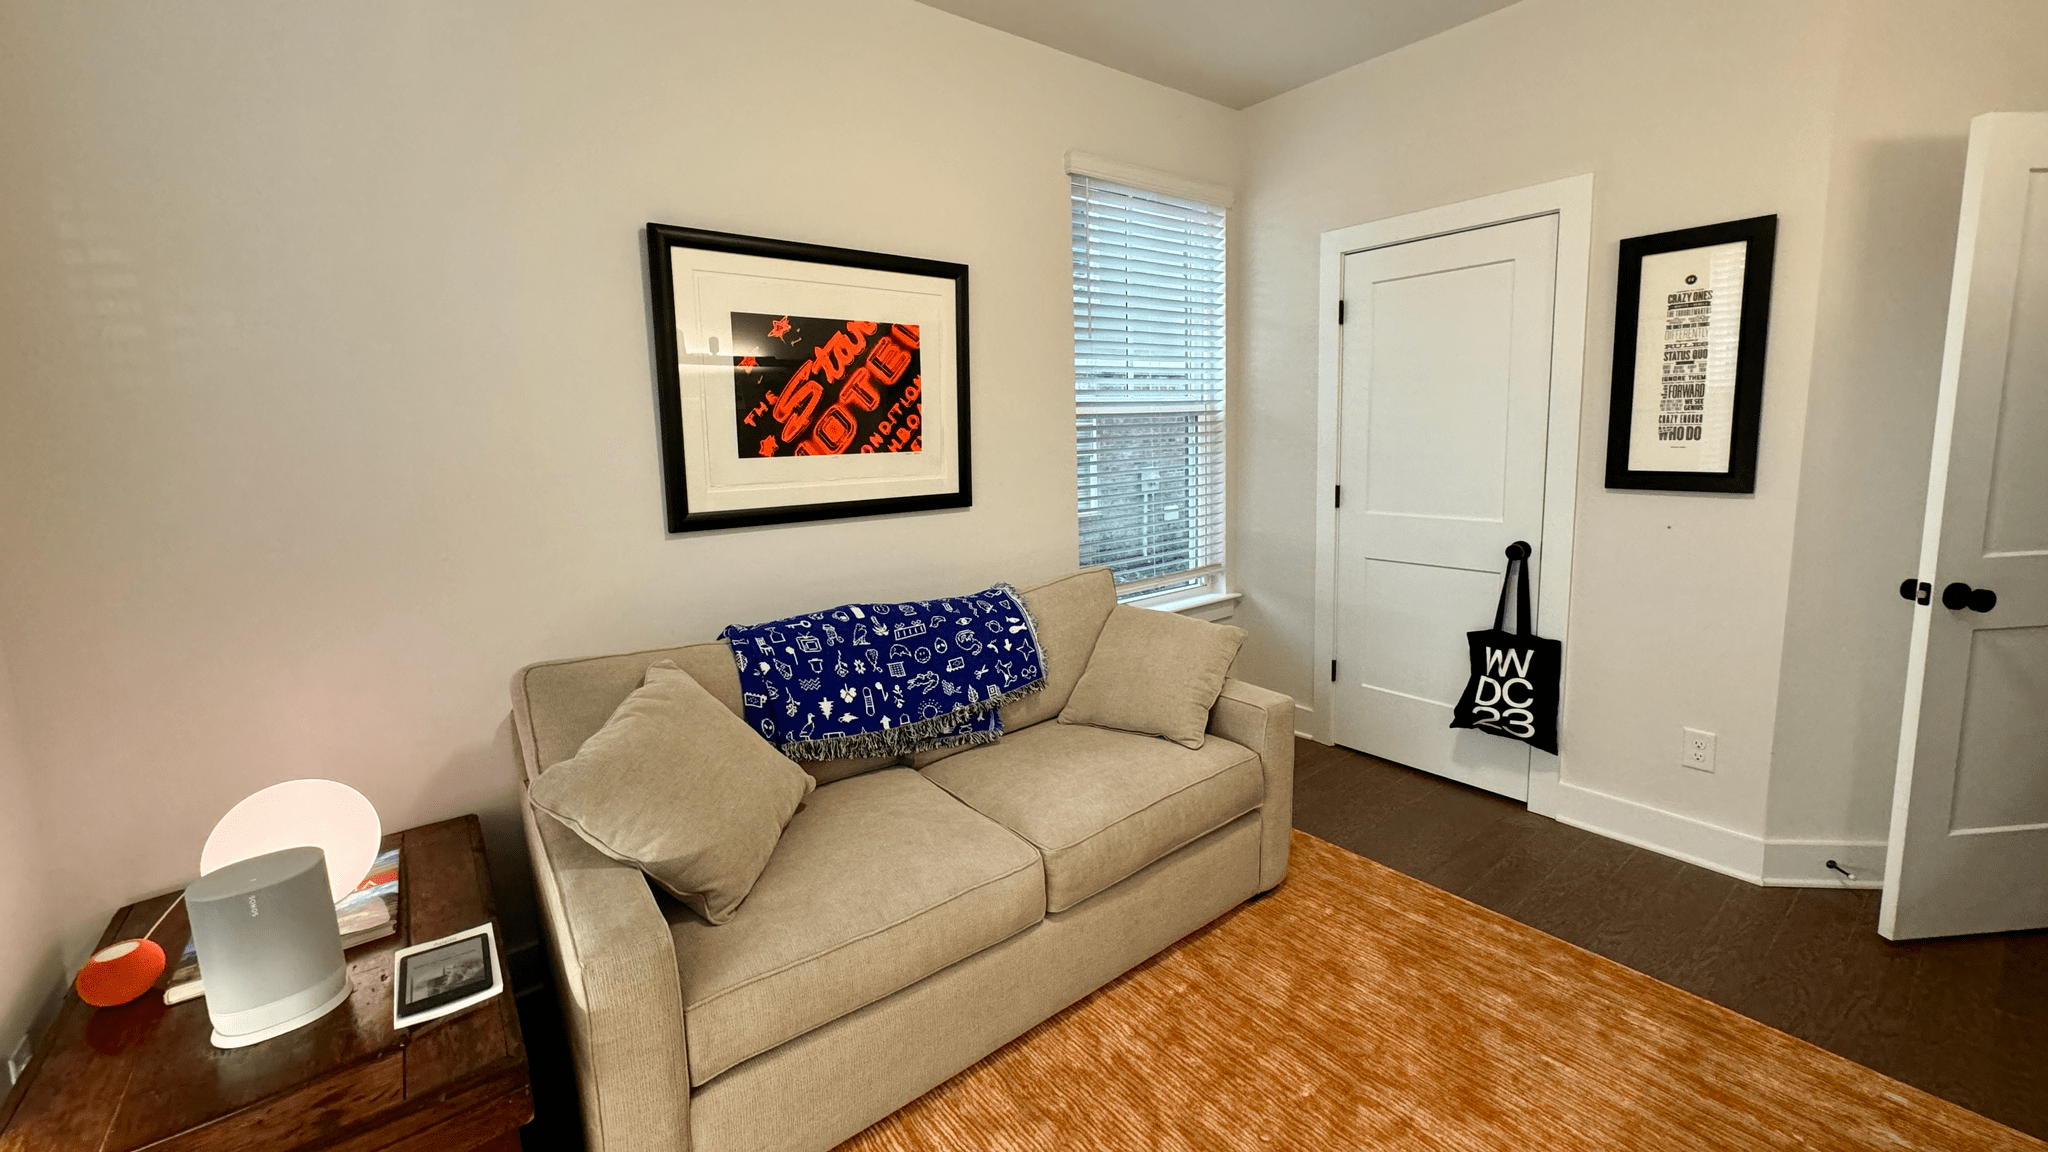
- One of my kids got me a Susan Kare original Mac iconography Cairo Throw that’s been a nice addition to the couch in my office
Finally, I’m using a handful of new apps regularly:
- Natural Reader is an expensive subscription, but I love the AI voices it uses to read text whether I’m using it to help me proofread articles I write or read articles I’ve saved
- I reviewed Paste last year, and I’ve been using it more and more to pass bits of information between devices
- iStat Menus is perfect for evaluating how well different Macs hold up under load when playing games like Resident Evil 4 and Death Stranding
I’d be kidding myself if I declared my office setup finished, but what I like now is that it’s far more refined than when I moved in. I didn’t have the time then to focus obsessively on my environment. I was just happy to have my space set up and functional. Now, though, it’s exactly the kind of setup that I’ve always wanted, which makes it a great place to get things done.
Note: MacStories participates in the Amazon Associates and other affiliate programs and may be paid a small commission if you click on a link and purchase a product or service from a third party. For more information on how MacStories uses affiliate links, please read our Privacy Policy.