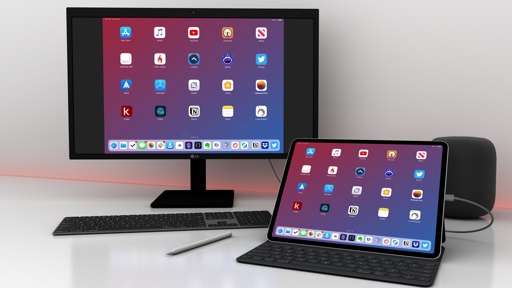
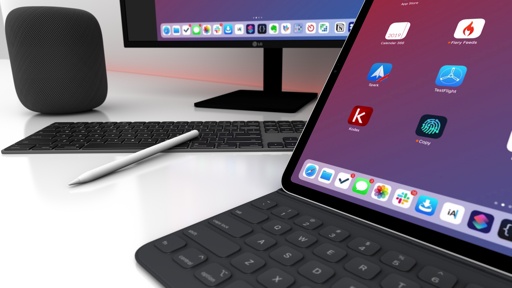
Podcasting from iPad Pro
Since I started using the iPad as my main computer seven years ago, recording podcasts with the setup I like was always one of the areas where iOS fell short, which forced me to keep using a Mac. Over the years, I managed to slowly move previous Mac-only tasks to the iPad, but podcasting always remained the last bastion of macOS functionality that I couldn’t adapt to the iPad Pro. Earlier this year, I finally found a solution to this problem by following Jason Snell’s approach and tweaking it to my needs. Even though it all works – I’ve been able to record various Relay FM shows from my iPad Pro – the different pieces of equipment I have to use to get it done on an iPad encapsulate how far behind in terms of audio recording and file management iOS still is compared to macOS.
I primarily consider myself a writer, but podcasting has become a substantial part of my income and another job unto itself that takes up a sizable amount of my time every day. By the end of the month, I will be the co-host of six different podcasts19. A lot of work goes into preparing shows: we don’t like to just “show up and talk on Skype”; on all the podcasts I do, my co-hosts and I like to make sure we’re following a well-researched outline of topics that can drive a spontaneous conversation without rambling and wasting listeners’ time. Ultimately, however, the most important part of podcasting is, well, sitting down to talk and have a conversation. And, of course, just like I want to use the best hardware available to me for MacStories articles, I want to record podcasts with the best setup and hardware I can get my hands on.
I’ve been podcasting regularly on a weekly basis since 2013. In this time, particularly thanks to Myke and Stephen, I’ve identified a series of requirements for my podcasting setup – basic rules for podcast recording that ensure a consistent quality for the experience of recording podcasts with other people and the audio files that make up the episodes listeners download.
Before I dive into more details, I’d like to make something clear: you don’t need this setup or equipment to get started with podcasting; this is simply what I like to use to produce multiple podcasts on a weekly basis, and it’s the result of optimizing my setup over the span of six years. I recommend following some of the underlying techniques if you want to produce a good-sounding show, but you don’t need to spend several hundred dollars to get started with a new podcast.
To record a podcast, I have a conversation with my co-hosts on Skype. However, we don’t use the audio of the Skype conversation itself as the episode: while we’re talking, each of us records a high-quality local audio track from our microphones; at the end, multiple local tracks are mixed together in one audio file that gives the illusion we’re all talking together in the same room rather than thousands of miles apart over Skype. This right here is, by far, the most important requirement for the way I like to record podcasts: we want to use Skype, but each of us has to record the local track of our own microphone input.
Secondly – and this is why I’ve been unwilling to try other “solutions” for podcasting on iPad over the years – I want my co-hosts to hear my voice coming through the same microphone I’m using to record my local audio track. To have a good conversation with natural back and forth that yields a good final product, I think it’s important that everyone on Skype gets to hear the other person loud and clear.
I mention this because, over the years, I’ve been recommended various approaches for recording podcasts on iPad with the only caveat being that I couldn’t use the recording microphone for a Skype call as well. The main hang-up here is that, if you just plug a USB microphone into an iPad Pro, due to iOS software limitations you will not be able to use the same microphone to simultaneously have a Skype call and record your own local audio track; one of the two will stop if you try to do this in iOS 12. To work around this issue, some folks came up with the following idea: you could use the iPad Pro connected to a USB microphone to record your local audio, plus a separate device, like an iPhone, to have a Skype call and talk to other people using earbuds or AirPods.
I’m glad that this approach is working for some, but for me it comes with major problems on several different levels.
First of all, I don’t want to use separate devices to record local audio and Skype calls; I like to keep my iPhone around for emergencies (if someone has to call me or my girlfriend needs to tell me something) and for reference, so I can quickly look up information while I’m talking. Second, I don’t want my co-hosts to hear my voice with the cheap quality that earbuds produce; I’ve been on the other end of this setup and, let me tell you, once you’re used to recording podcasts with co-hosts whose audio comes through a great microphone, it’s hard to go back to talking to someone who’s using AirPods. Furthermore, when I’m recording, I like to hear my own voice as it’s going through the microphone and coming back into my headphones; if I were to use a separate device for Skype calls, I’d have to wear AirPods under my headphones, which is just ridiculous and something I’ll never be able to accept.
For all these reasons, I could never get behind the many suggestions for podcasting on iPad I received over the years that involved using a separate device for Skype calls. My requirements can then be summed up as follows: I want to use the microphone I prefer to record my local audio and hear myself; I want to use Skype to talk to my co-hosts, and I’d like them to hear my voice coming through my microphone; and, both the Skype call and local audio recording have to happen in an all-in-one setup that involves only one computer. Finally, at the end of this entire process, I need to be able to quickly upload my local audio track to a shared Dropbox folder.
Before I describe all the compromises that were necessary to sort of replicate this setup with an iPad Pro, let me provide you with a baseline of details on how I record podcasts with my Mac mini.
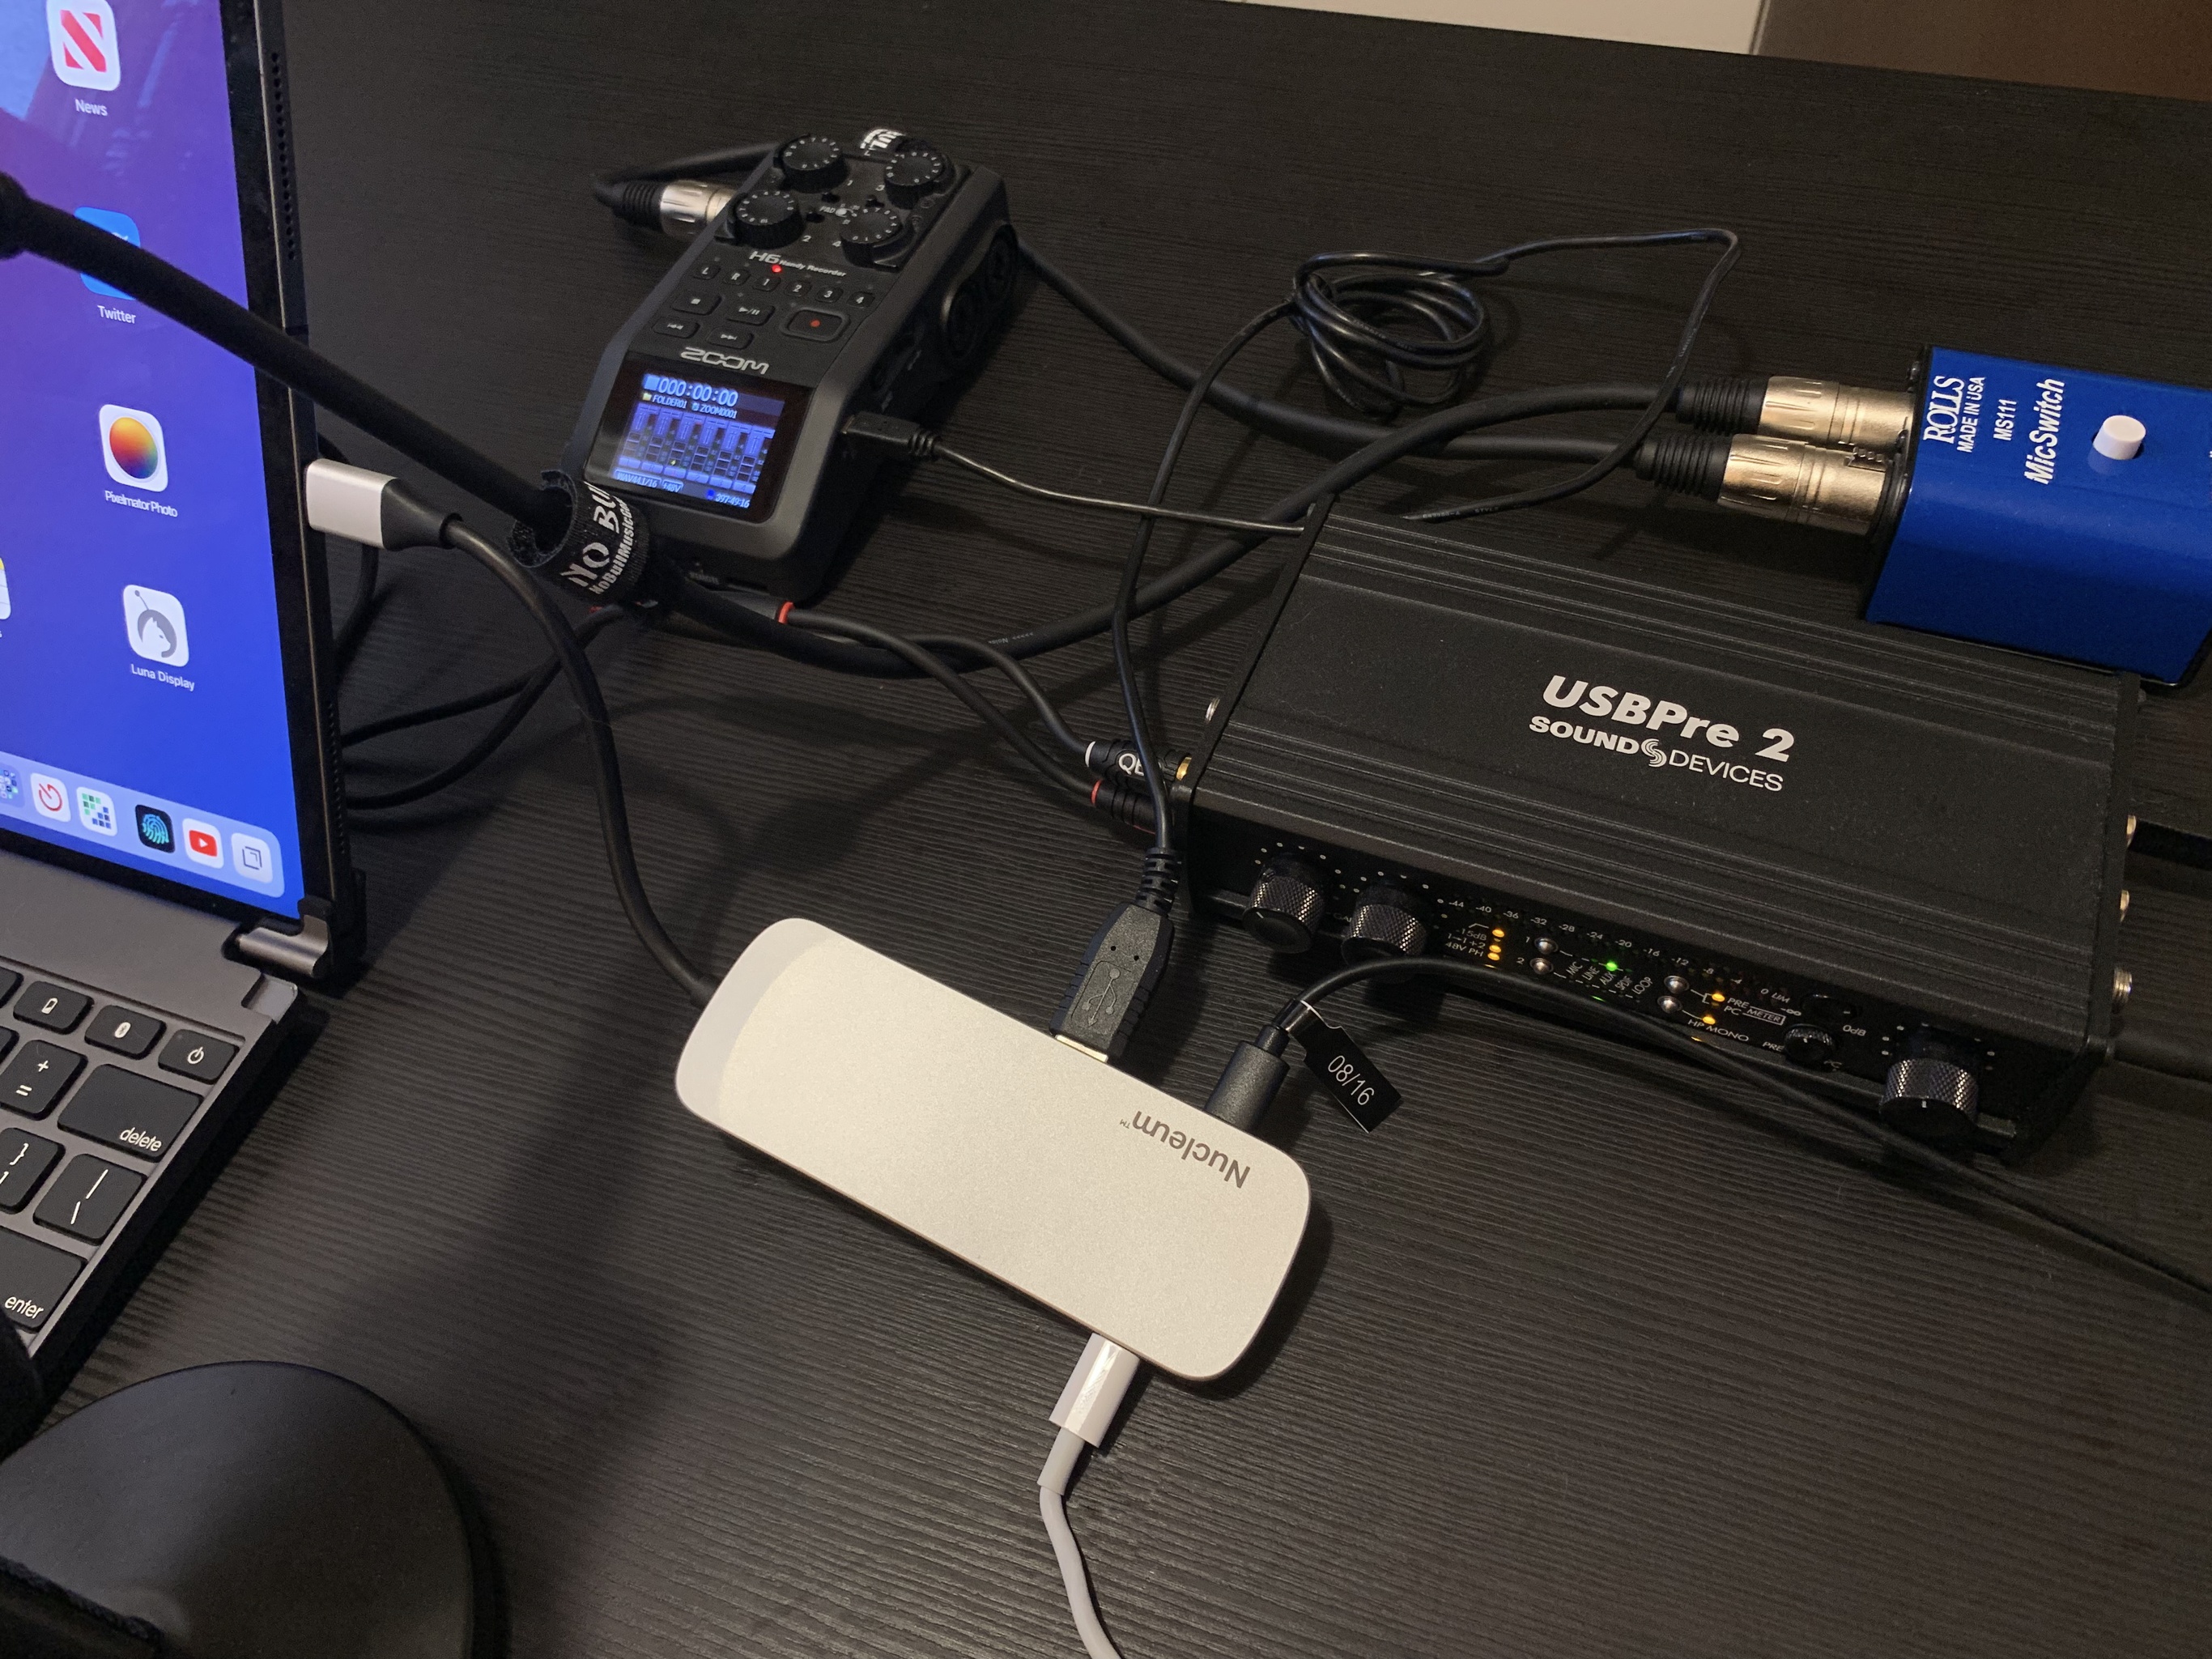
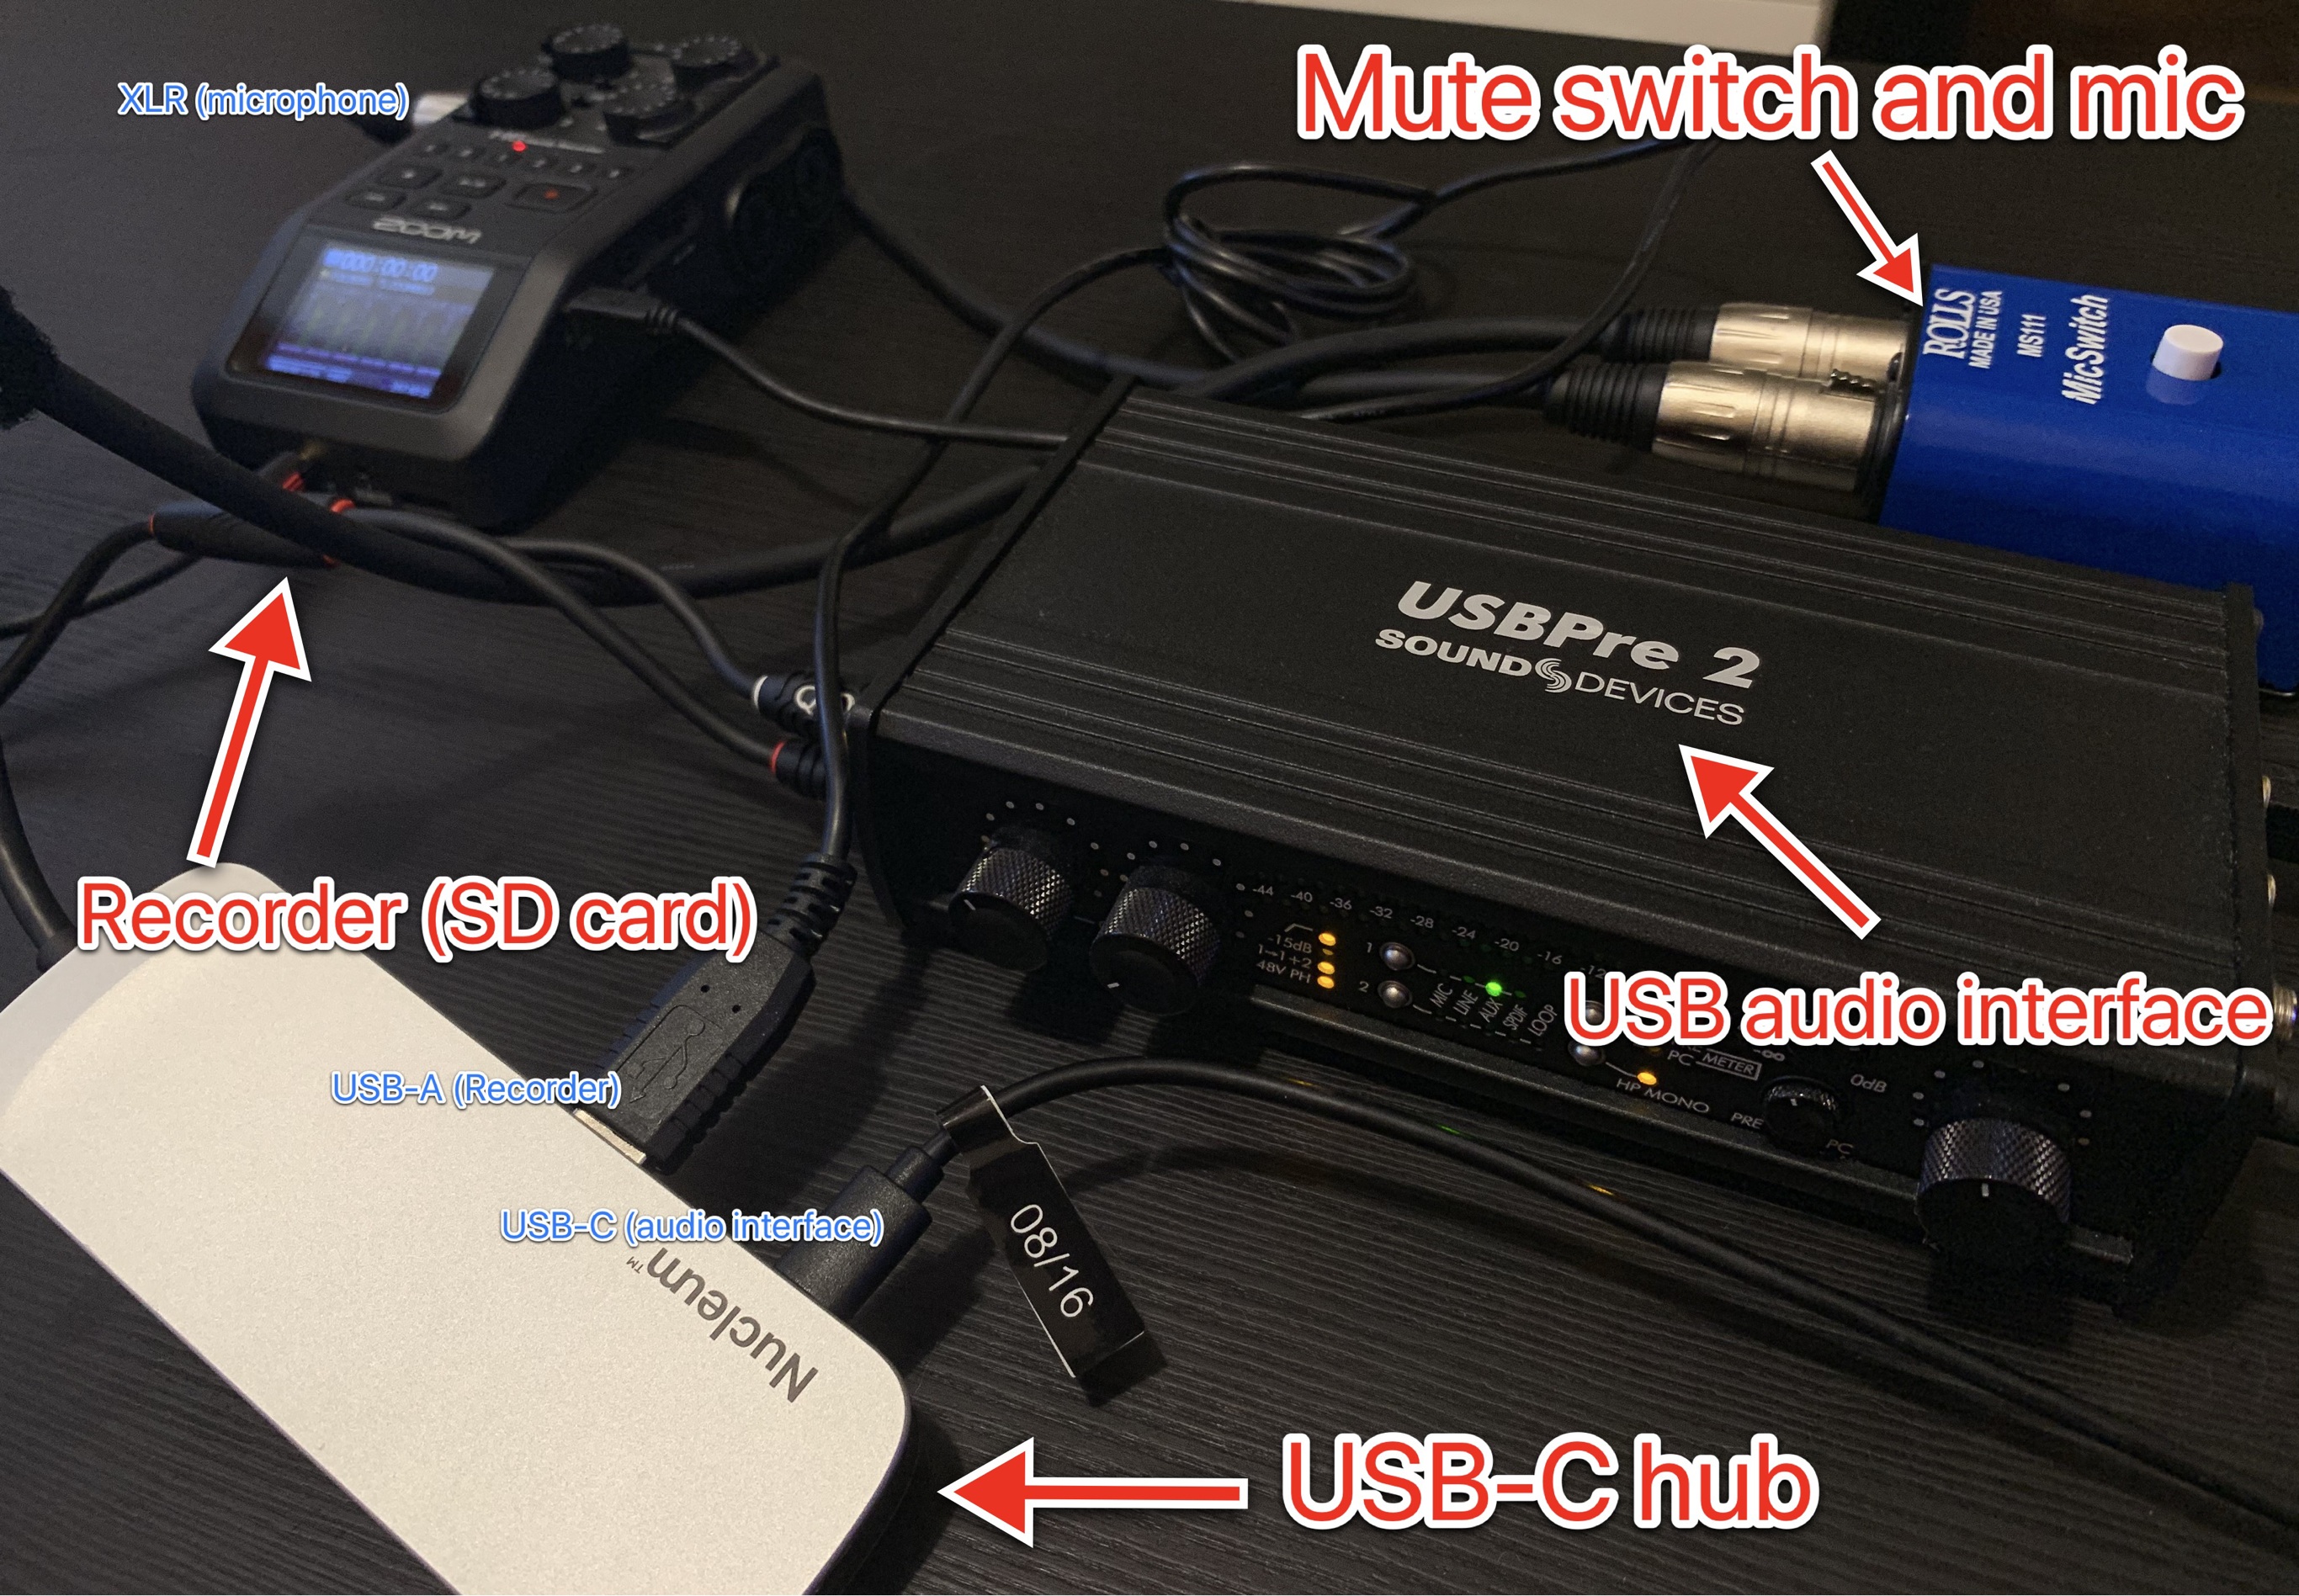
I use a Shure Beta 87A condenser microphone that I plug via XLR into a physical mute switch, which is a tiny metal box that has a button on it I can press whenever I need to cough or if there’s any other noise in the room I don’t want my co-hosts to hear. The mute switch has another XLR cable coming out of it that goes into my USB audio interface, the Sound Devices USBPre 2. This is another hefty metal box that’s plugged into my UltraFine 4K display via USB-C and which provides input (my microphone’s audio) to the Mac. To hear audio from my co-hosts on Skype, as well as to hear my own voice coming from the microphone, I plug my headphones via standard 3.5mm headphone jack into the USBPre 2.
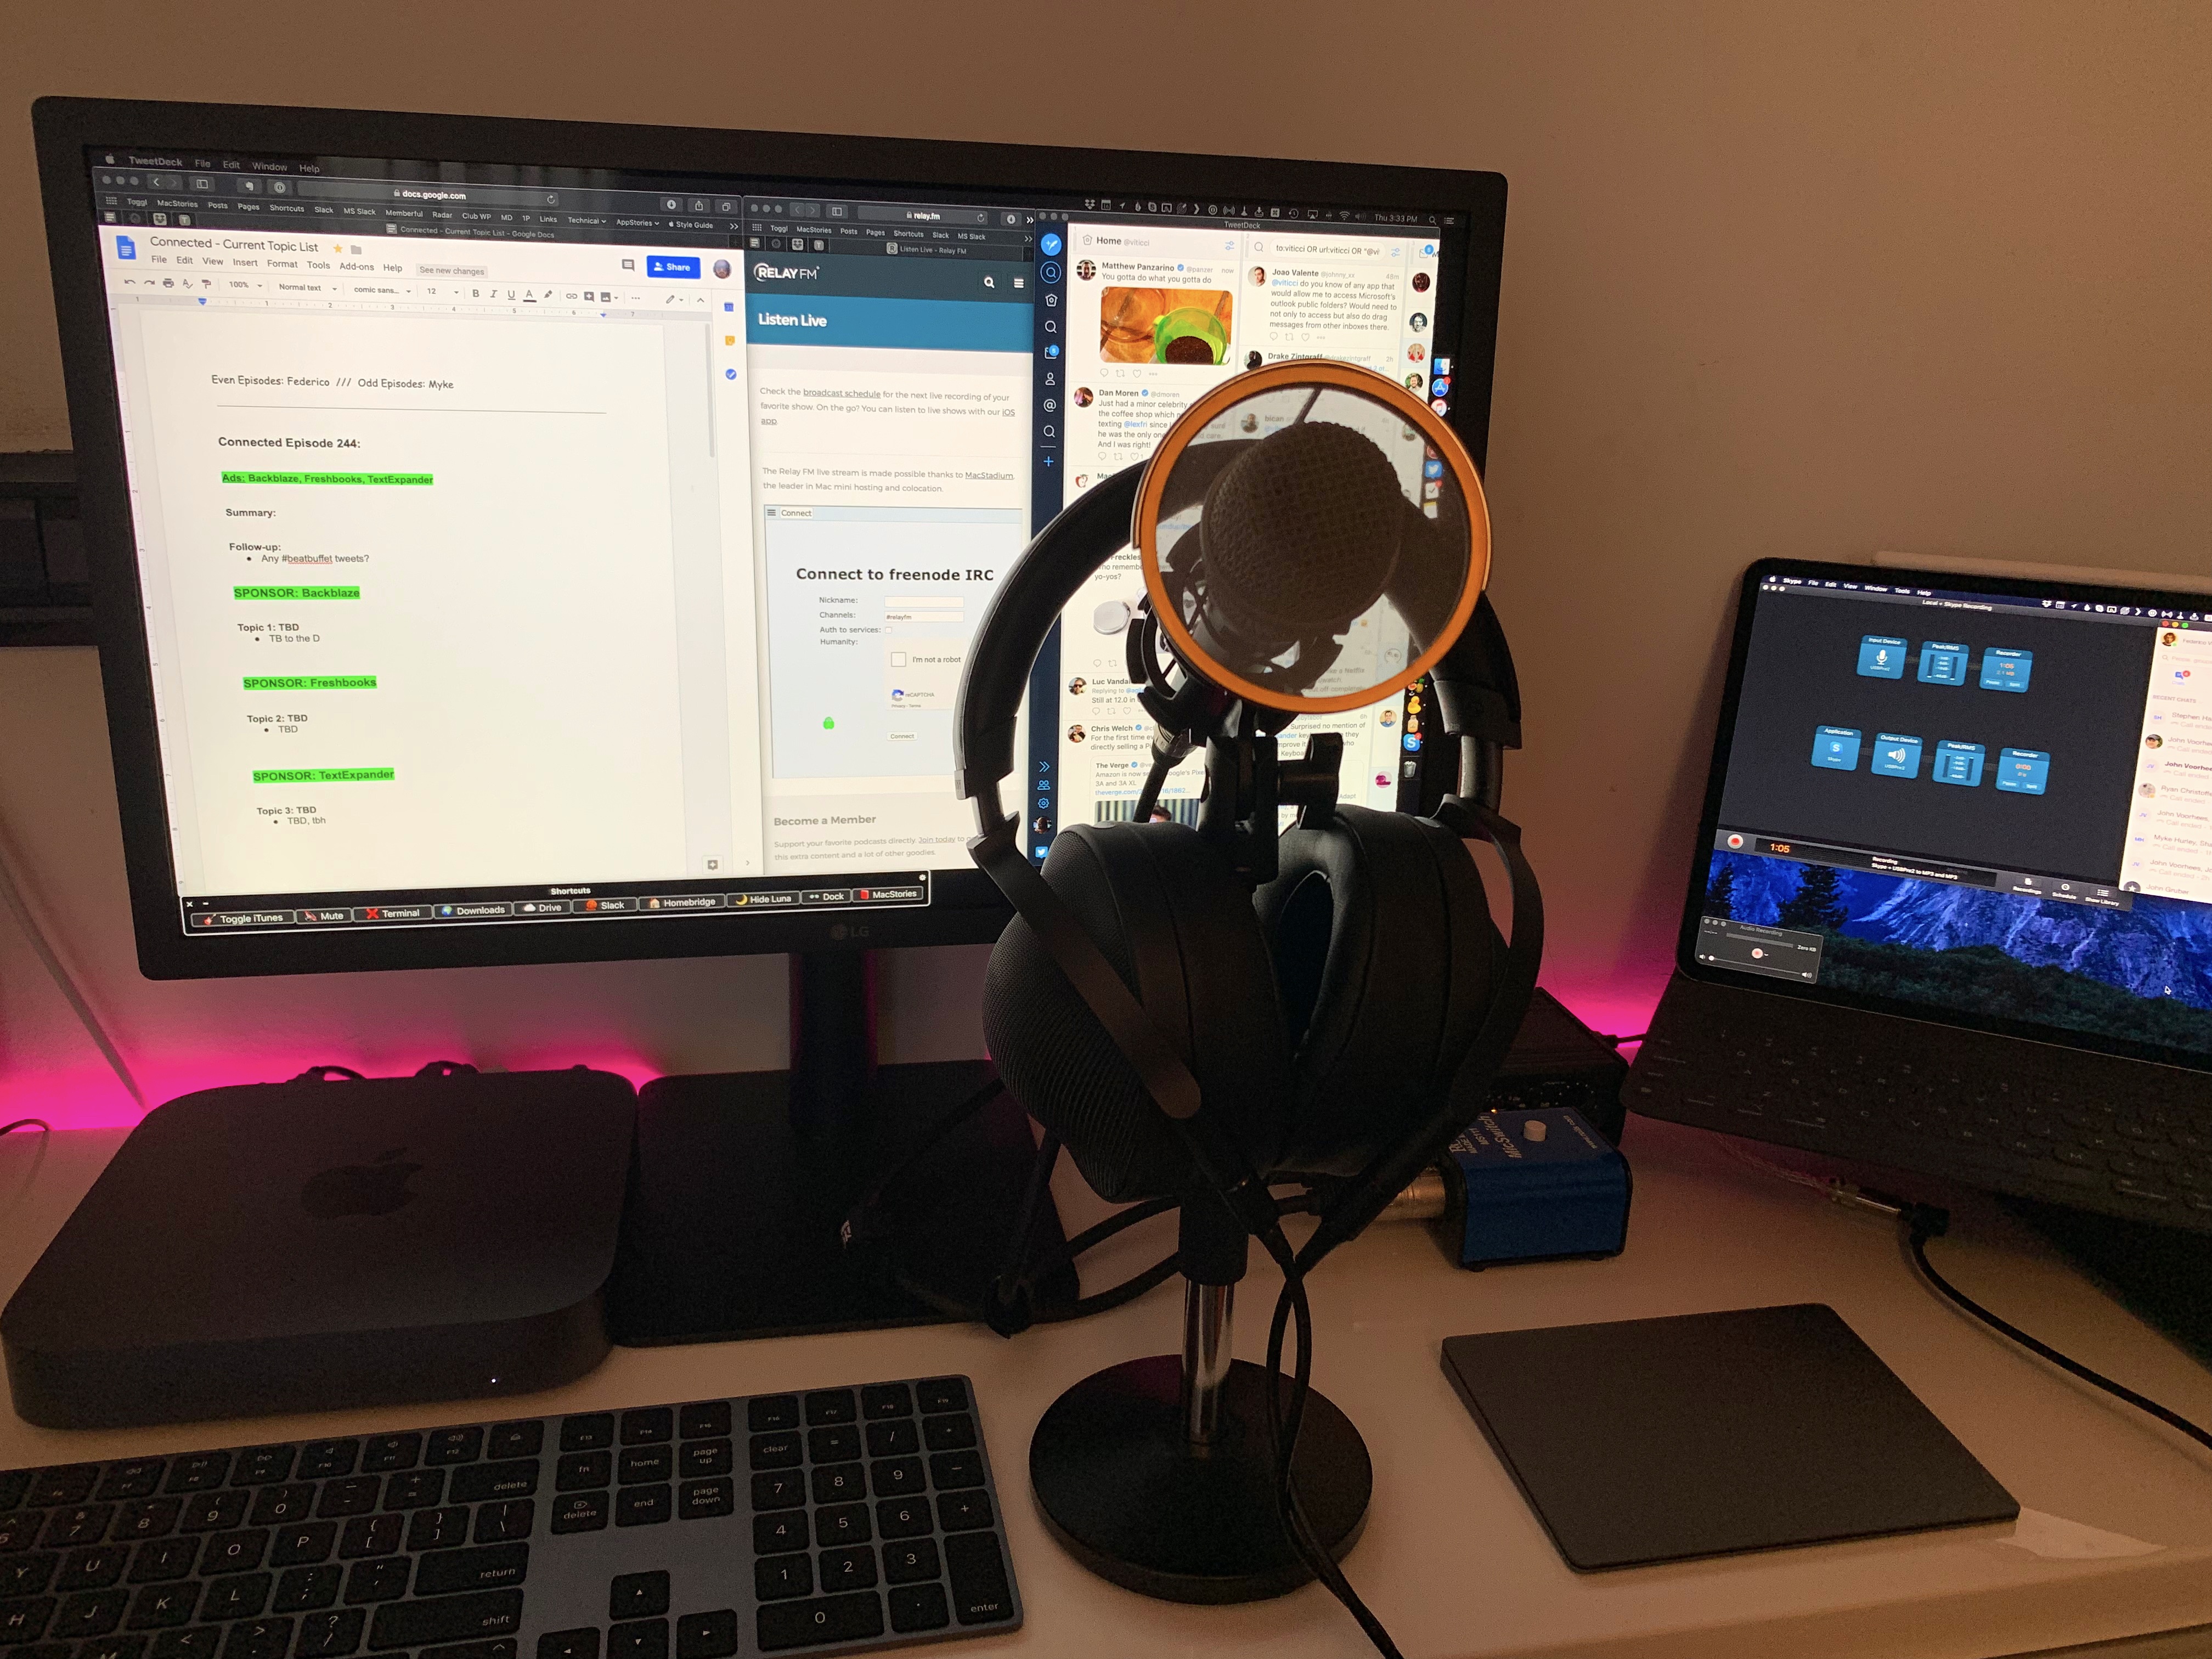
Using Rogue Amoeba’s excellent SoundSource app for macOS, I make sure all the system input and output settings are configured correctly (this is the kind of app that is impossible to create for iOS) and I run my Keyboard Maestro macro to prepare the UltraFine display and iPad Pro running Luna Display for podcasting. While a call is happening in Skype, I use QuickTime Player to record my local microphone audio and Audio Hijack to record additional backups of the Skype call and my local track. At the end, I upload QuickTime’s .m4a file to Dropbox using Safari.
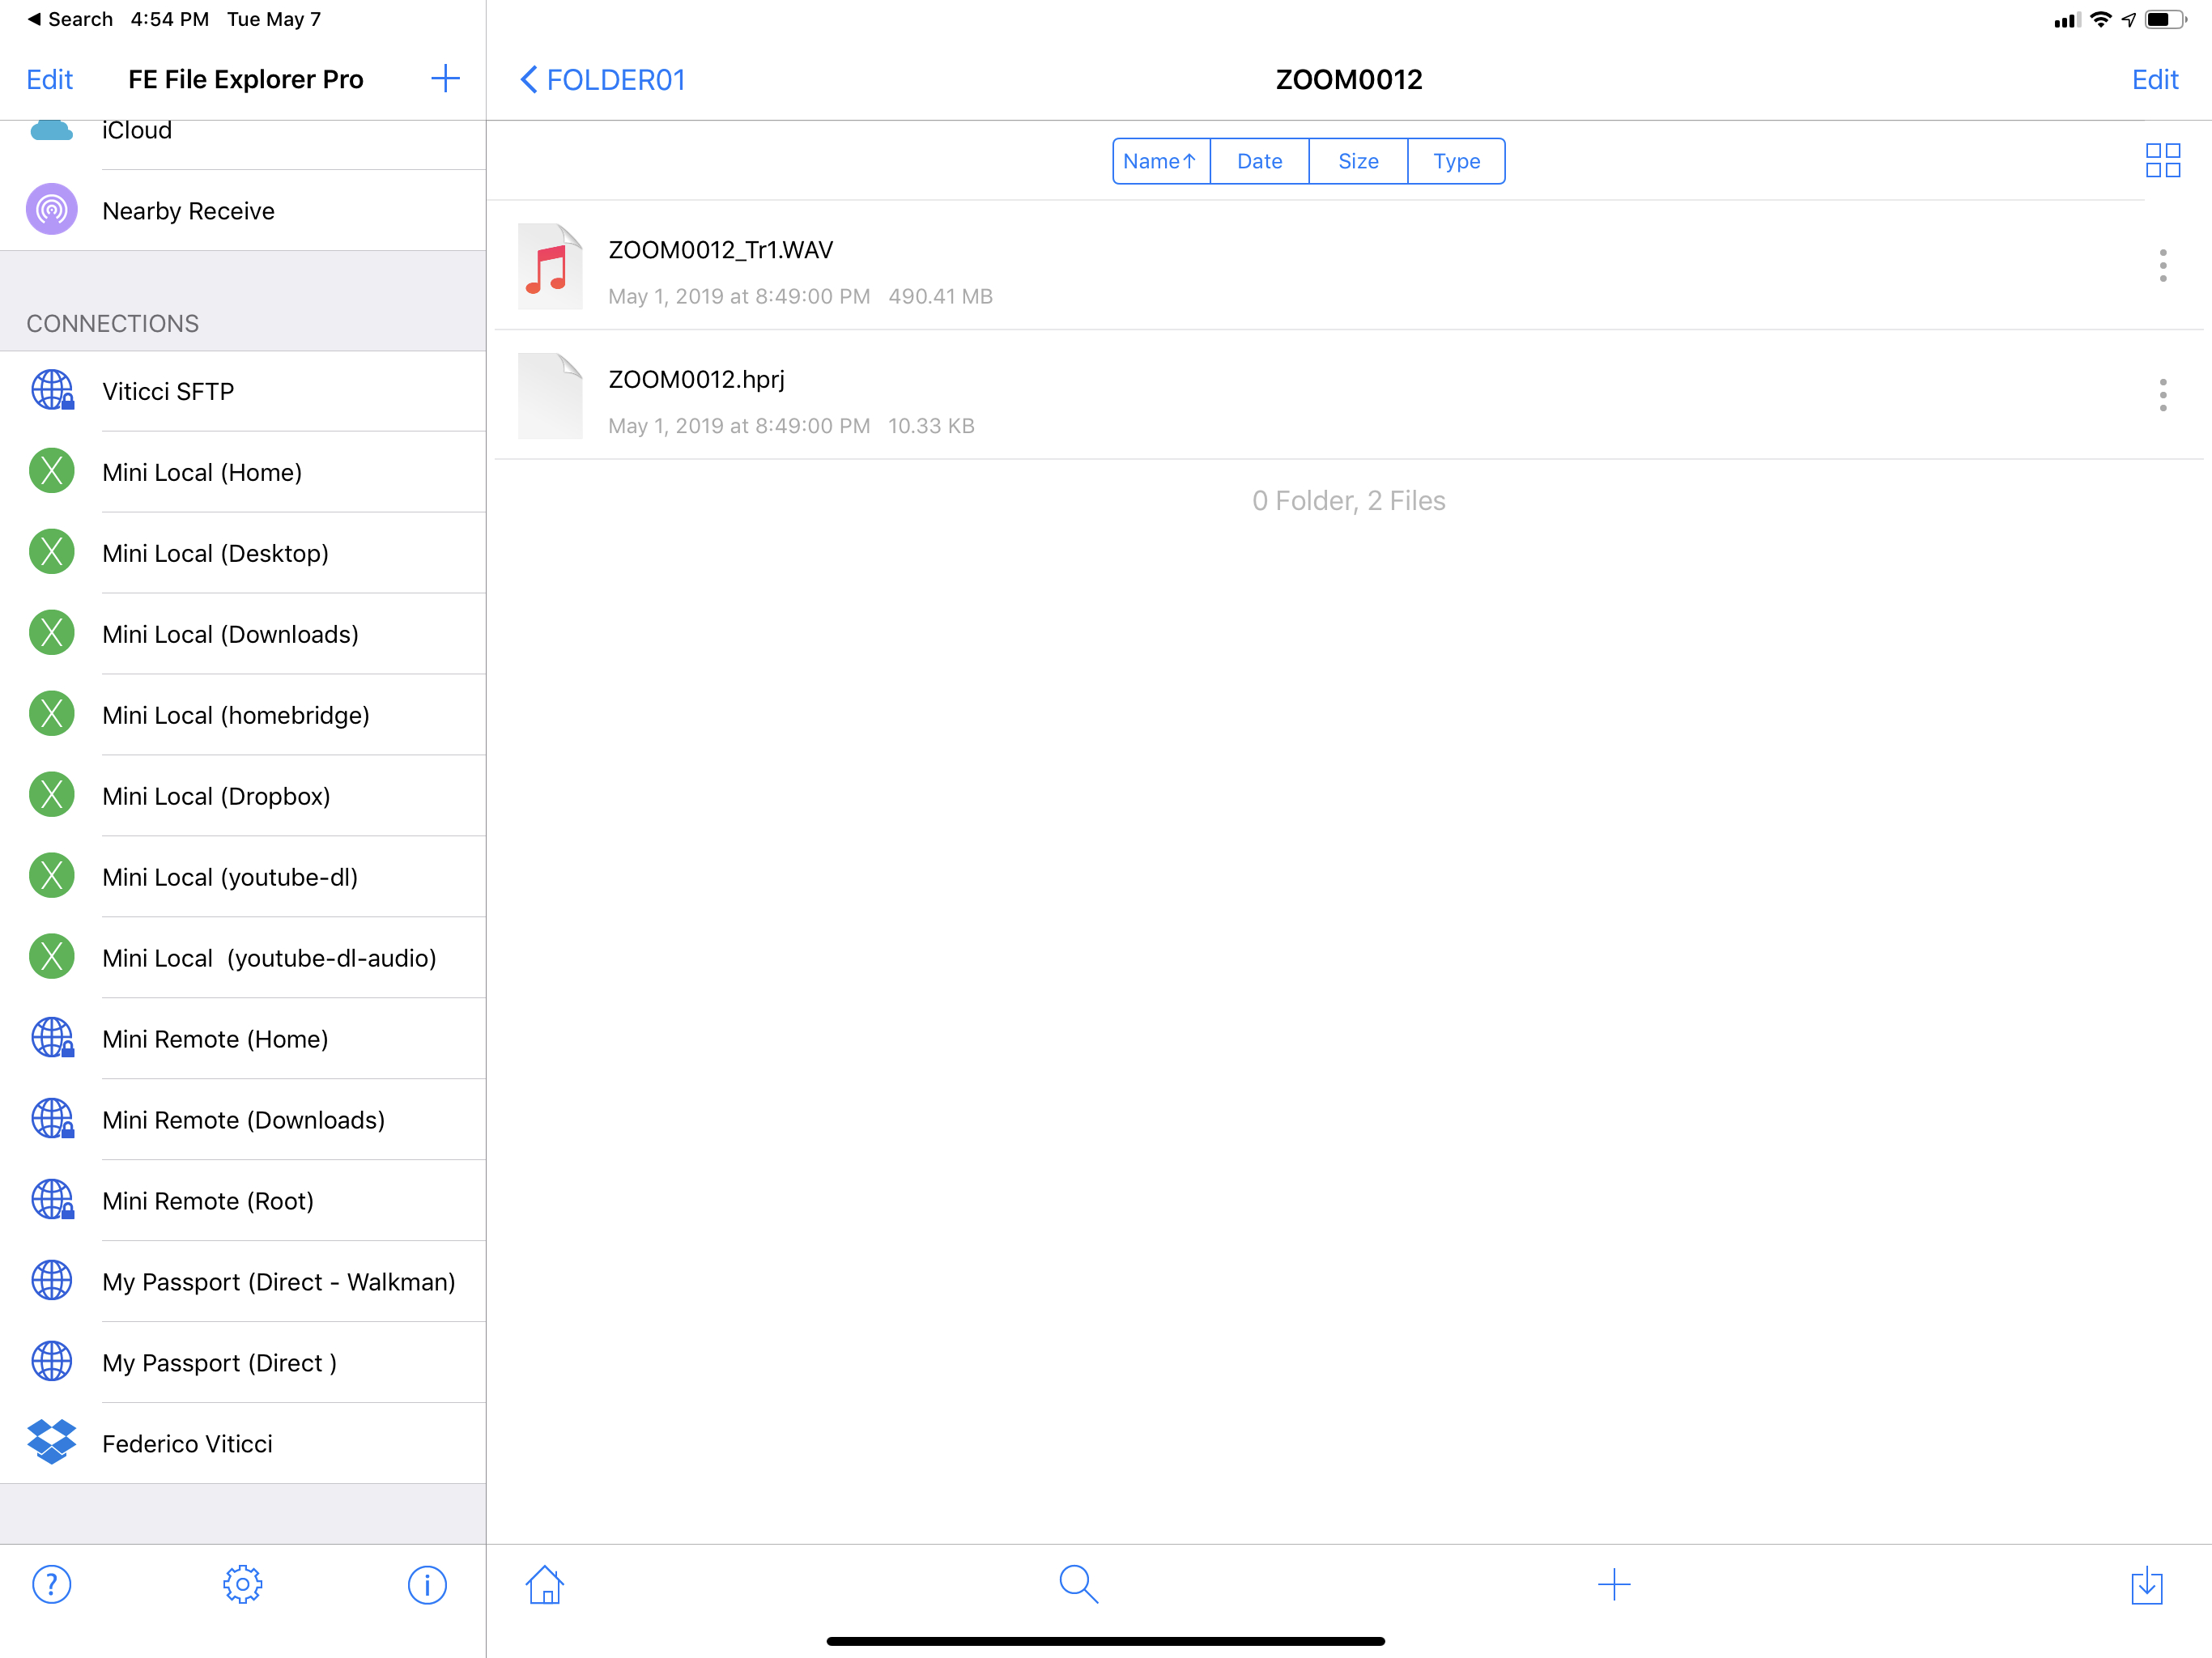
This setup has been, more or less, what I’ve used for the past six years to produce podcasts on Relay FM and AppStories. I started with a basic USB microphone for the first year, then I upgraded to the Shure Beta 87A paired with a Tascam 2X2 USB interface, which I used for over four years. When the Tascam died unexpectedly last year, I bought a Zoom H6 recorder, a device that can be used both to record audio from a microphone plugged in via XLR onto an SD card or as a USB audio interface (but not both at the same time).
I was familiar with the USBPre 2 audio interface my friends were using, but I was in a rush to find a replacement for the Tascam (which broke in the middle of the summer while I was at the beach house) and the USBPre 2 was not available on Amazon Italy. Earlier this year, after finding a local reseller of premium audio gear here in Rome, and after reading how Jason Snell managed to make the USBPre 2 work with an iPad Pro, I decided to kill two birds with one stone and get the USB interface I wanted with the added benefit that it was also going to work with the iPad Pro.
The question is: just how well does that audio interface work with the iPad Pro in practice?
A Tale of Many Cables
Here’s the main problem that prevents the iPad Pro from leveraging my podcasting setup like the Mac mini can: iOS, unlike macOS, has no concept whatsoever of “choosing between multiple audio inputs” and letting multiple apps access the same input source. On a Mac, I can have Skype use my microphone as input and let QuickTime record that microphone’s local track at the same time; on iOS, there is no interface to manage audio inputs on a per-app basis, and there is no default, system-wide feature to let multiple “audio sessions” happen at the same time.
Jason Snell came up with an ingenious solution to use the same microphone for a simultaneous local recording and Skype call where participants would hear the microphone’s audio: using a Zoom H6 audio recorder to offload the task of recording a local microphone track. He concluded:
And that’s it! It’s not pretty, it’s two more boxes than I’d otherwise bring, and I refuse to weigh the difference in boxes and compare it to the weight of my 11-inch Air. The important thing is that I was able to travel with my iPad and no Mac and have more or less the same podcast experience that I have when I’m sitting at home at my iMac.
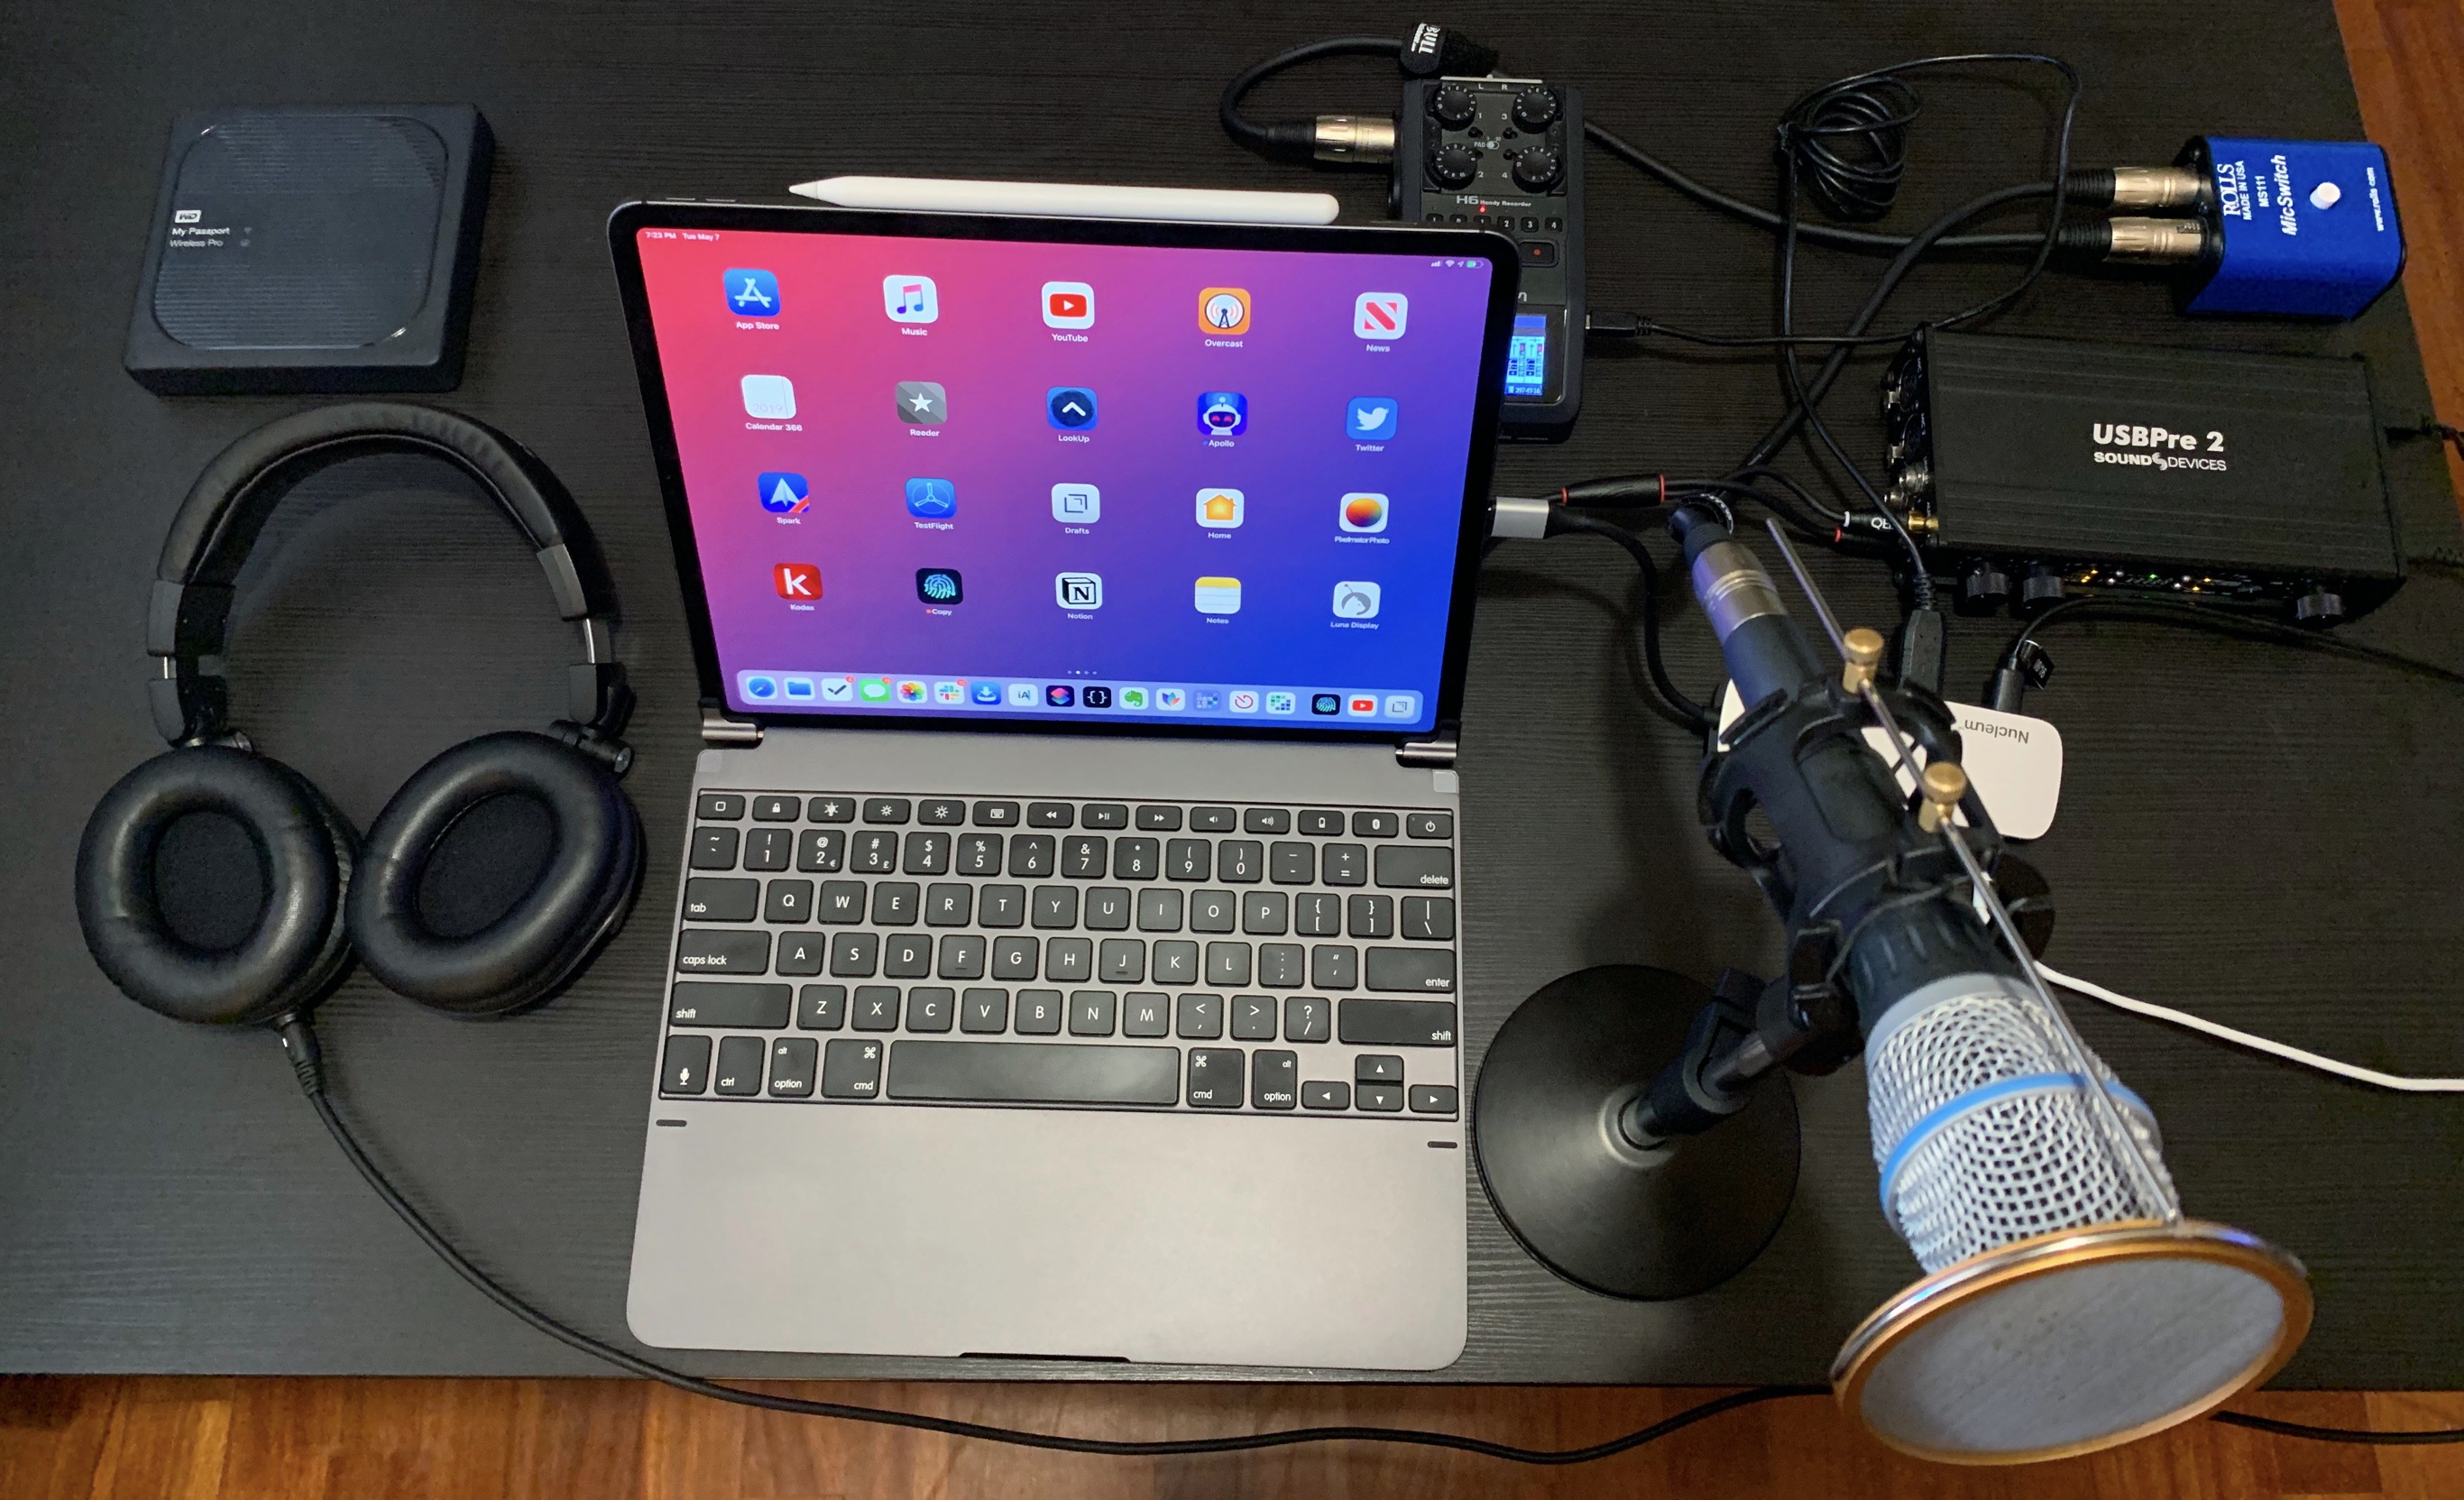
His approach consists of a microphone plugged via XLR into a Zoom H6 that records a local audio track and saves it onto an SD card; by running a standard stereo RCA cable from the Zoom’s line-out port into the USBPre’s AUX IN ports, and by plugging the USBPre into the iPad Pro via USB-C, he then figured out how to “mirror” the microphone’s input on the iPad Pro and use it with Skype without interfering with the recording, which is happening on the Zoom H6 recorder, completely separate from the iPad Pro. This way, you’re not using two iOS devices to split local recording and Skype: you’re using a dedicated audio recorder plus a USB interface that bridges the iPad Pro and the microphone. Besides the extra piece of equipment necessary and the difficulties involved with transferring files from an SD card to the iPad Pro (more below), the downside of this approach is that there’s no additional backup of the Skype call going on because, again, there’s no Audio Hijack (or Call Recorder) for iOS.
It just so happened that I already owned a Zoom H6 recorder, and I’d been eyeing the USBPre 2 for a while, so when Jason shared his findings and after I found a Sound Devices reseller here in Rome, I knew it was time to give this experiment a good try. I’ve been recording podcasts from my iPad Pro using a tweaked version of Jason Snell’s setup for a few months now; while it’s not an ideal experience, it allows me to record podcasts when I cannot use my Mac, which was always the end goal.
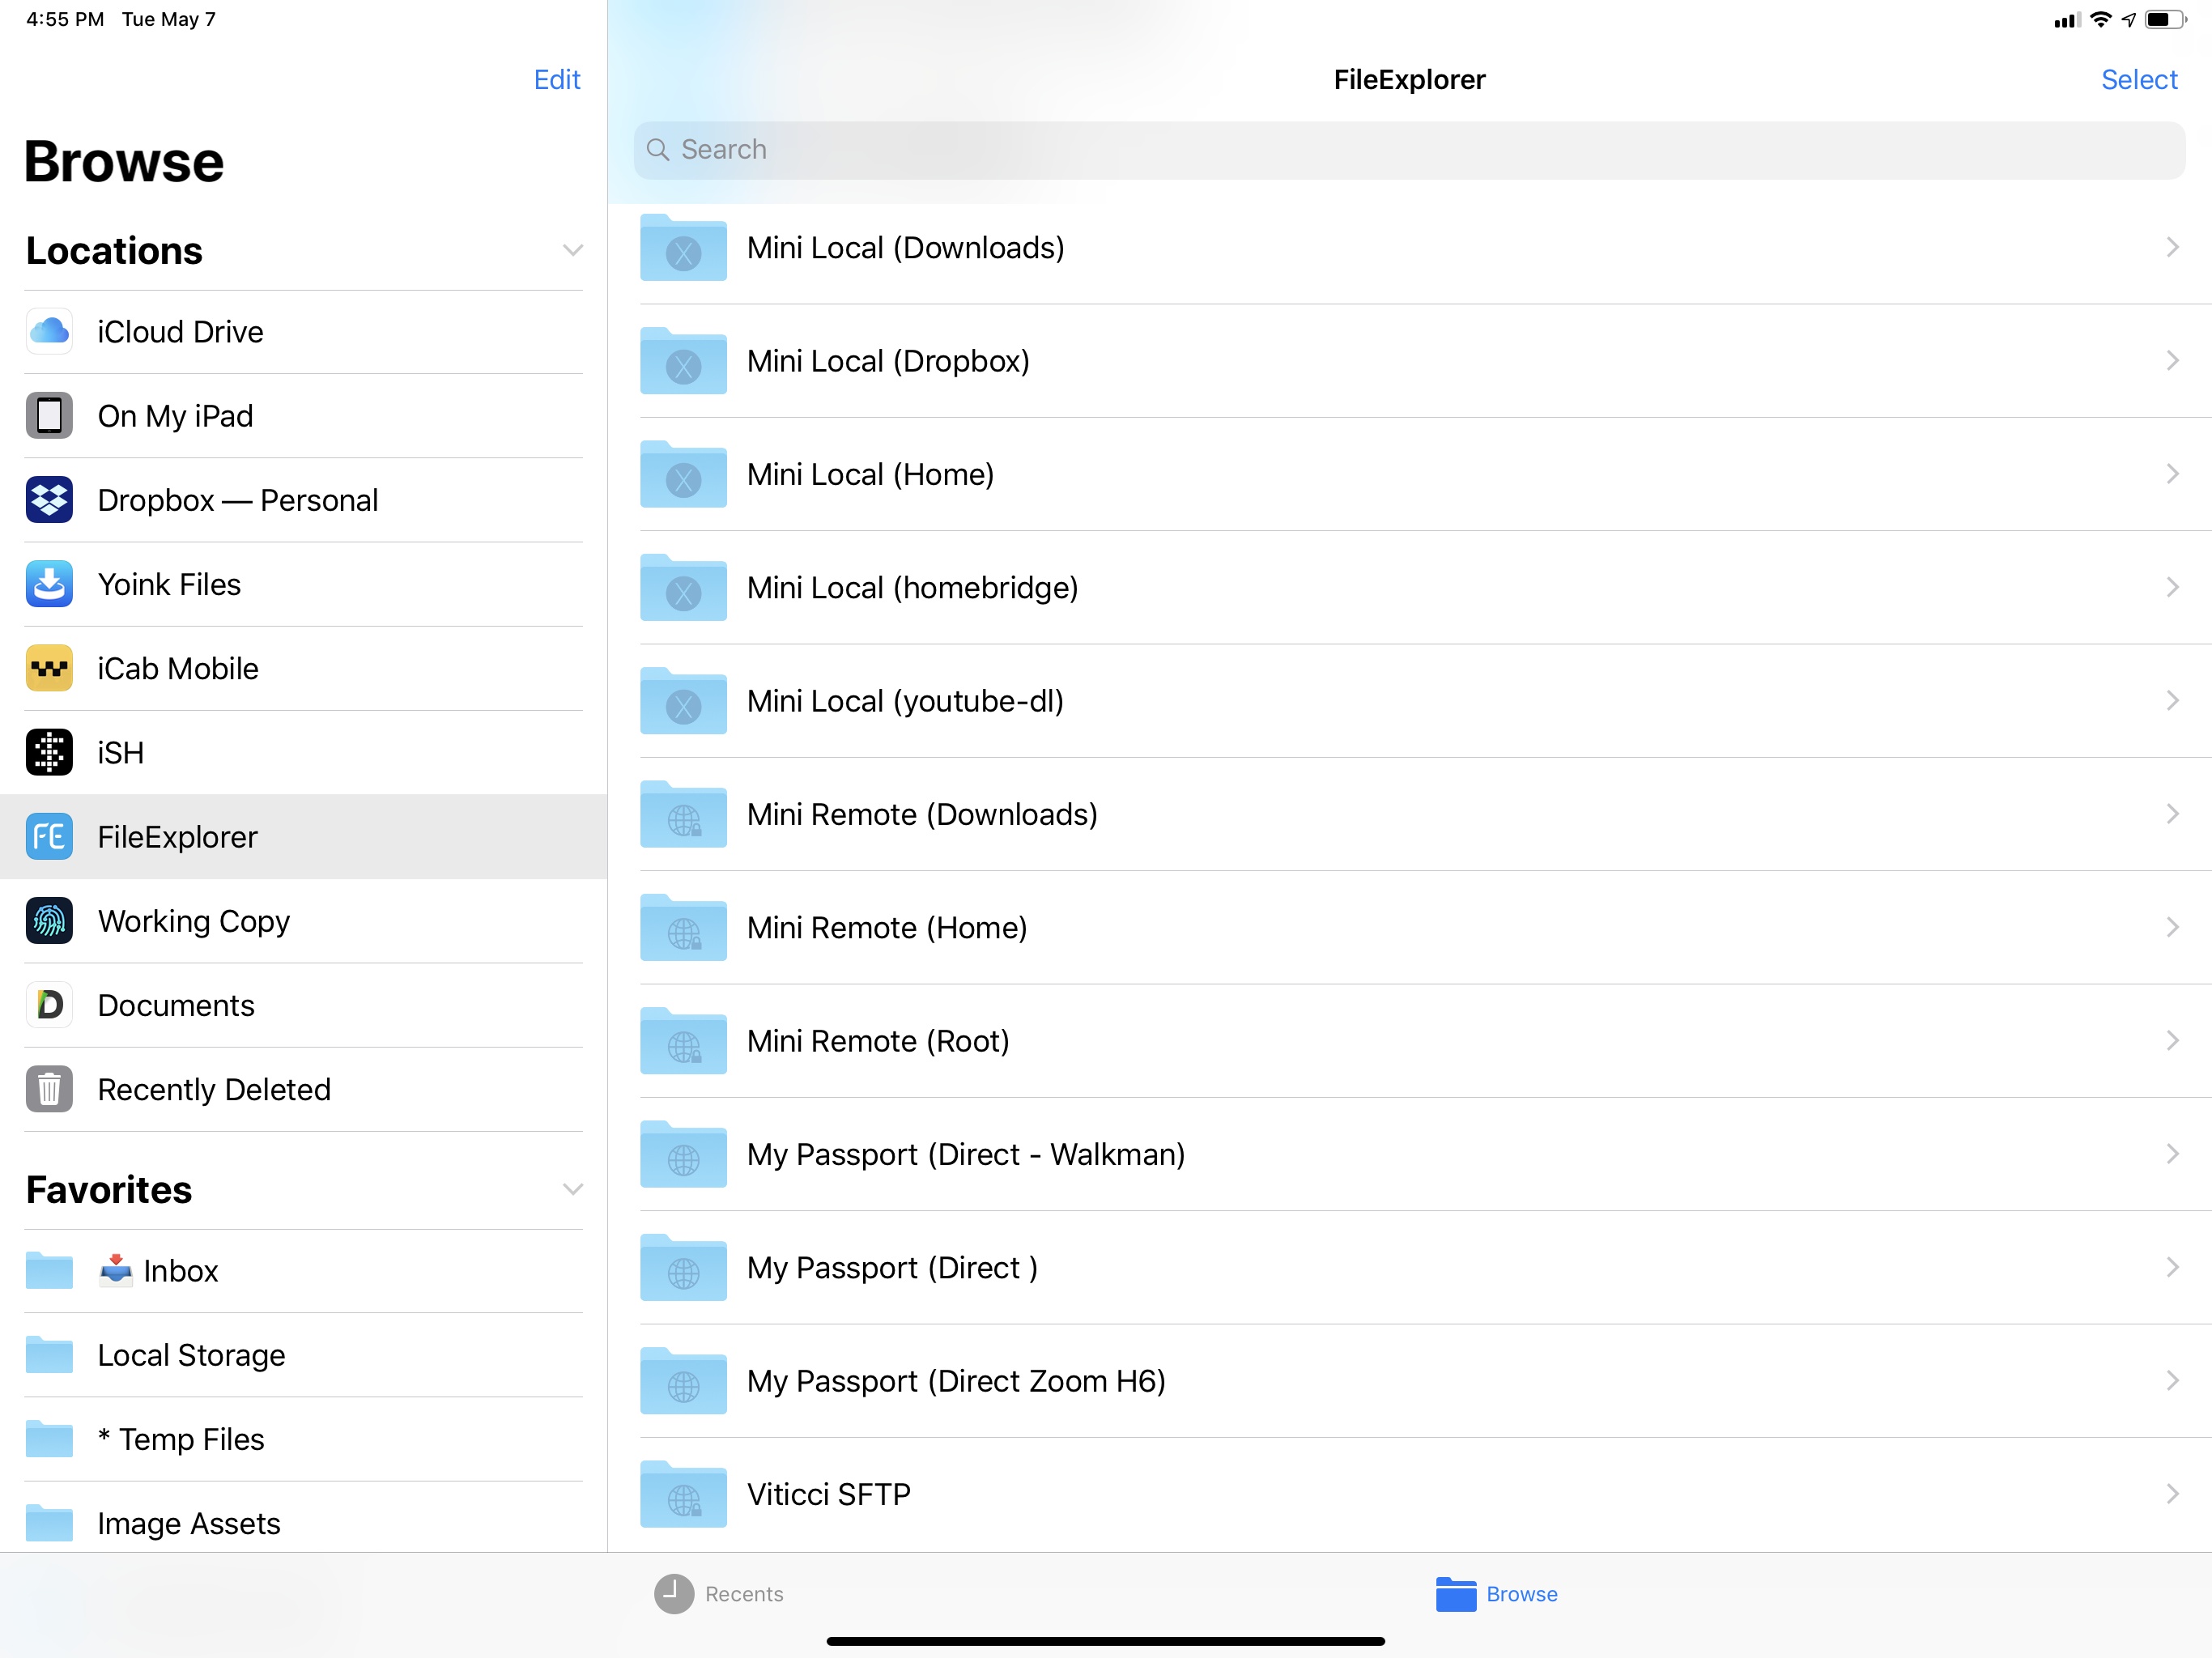
Aside from the cables, headphones, and microphones we’re using, there are two main differences between Snell’s setup and mine: I use a USB-C hub to power every connected accessory via the iPad Pro, and I transfer files from SD cards to the iPad Pro using a Western Digital external wireless drive that I can access from the Files app or FileExplorer on my iPad Pro.
One of my priorities when researching this iPad Pro podcasting setup was that I only wanted to use one external power source. Both the Zoom H6 and USBPre 2 can be powered via USB; the USBPre 2 had to be plugged into the iPad Pro anyway, but, in order to make the setup as portable as possible, I wanted to ensure the Zoom wouldn’t require its own wall charger as well. For a few weeks, I used the OWC USB-C dock I first covered here; OWC’s portable dock supported power delivery via USB-C up to 60W and it came with two USB-A ports I could use to power the Zoom H6 and USBPre 2 at the same time. I’ve found that 60W is enough to power the 12.9” iPad Pro, USBPre 2, and Zoom H6 without having to change the USBPre’s phantom power settings; with OWC’s portable dock acting as a hub connected to the iPad Pro, all I needed to do was connect accessories to it and take advantage of its power delivery passthrough using Apple’s 61W USB-C power adapter.
Over the past month, I’ve acquired a new USB-C hub that works better for my needs than the OWC dock: Kingston’s 7-port Nucleum USB-C hub. The Nucleum is the only USB-C hub I’ve found to date that supports power delivery up to 60W and that also comes with an additional USB-C port for data transfers to bus-powered devices. Most USB-C hubs only come with one USB-C port to be used for power delivery; the Nucleum has a power delivery USB-C port on the left side and another USB-C port on the right to connect any other device via a USB-C data cable. Plus, it offers two standard USB-A ports, separate SD and microSD card readers, and HDMI out.20

Why all the fuss for an extra USB-C port? It’s so I can pick up the USBPre 2 from my desk (where it’s connected to the Mac mini via a USB-B to USB-C cable) and use it with the iPad Pro without taking a separate USB-B to USB-A cable. A small convenience, yes, but I’ll take all the cable-saving techniques I can get when dealing with this kind of setup. I mean, you’re seeing these pictures too.
The Nucleum has been a pleasant discovery. The hub has a premium feel to it (which cannot be said of other cheap USB-C hubs you can find from unknown brands on Amazon) and the cable’s thickness inspires confidence (although I wish it was a bit longer). Its support for 60W power delivery and multiple USB-A/C ports means the iPad Pro can truly be the center of this podcasting setup, which helps reduce the cable overhead involved in what’s already a fairly messy situation on my desk.
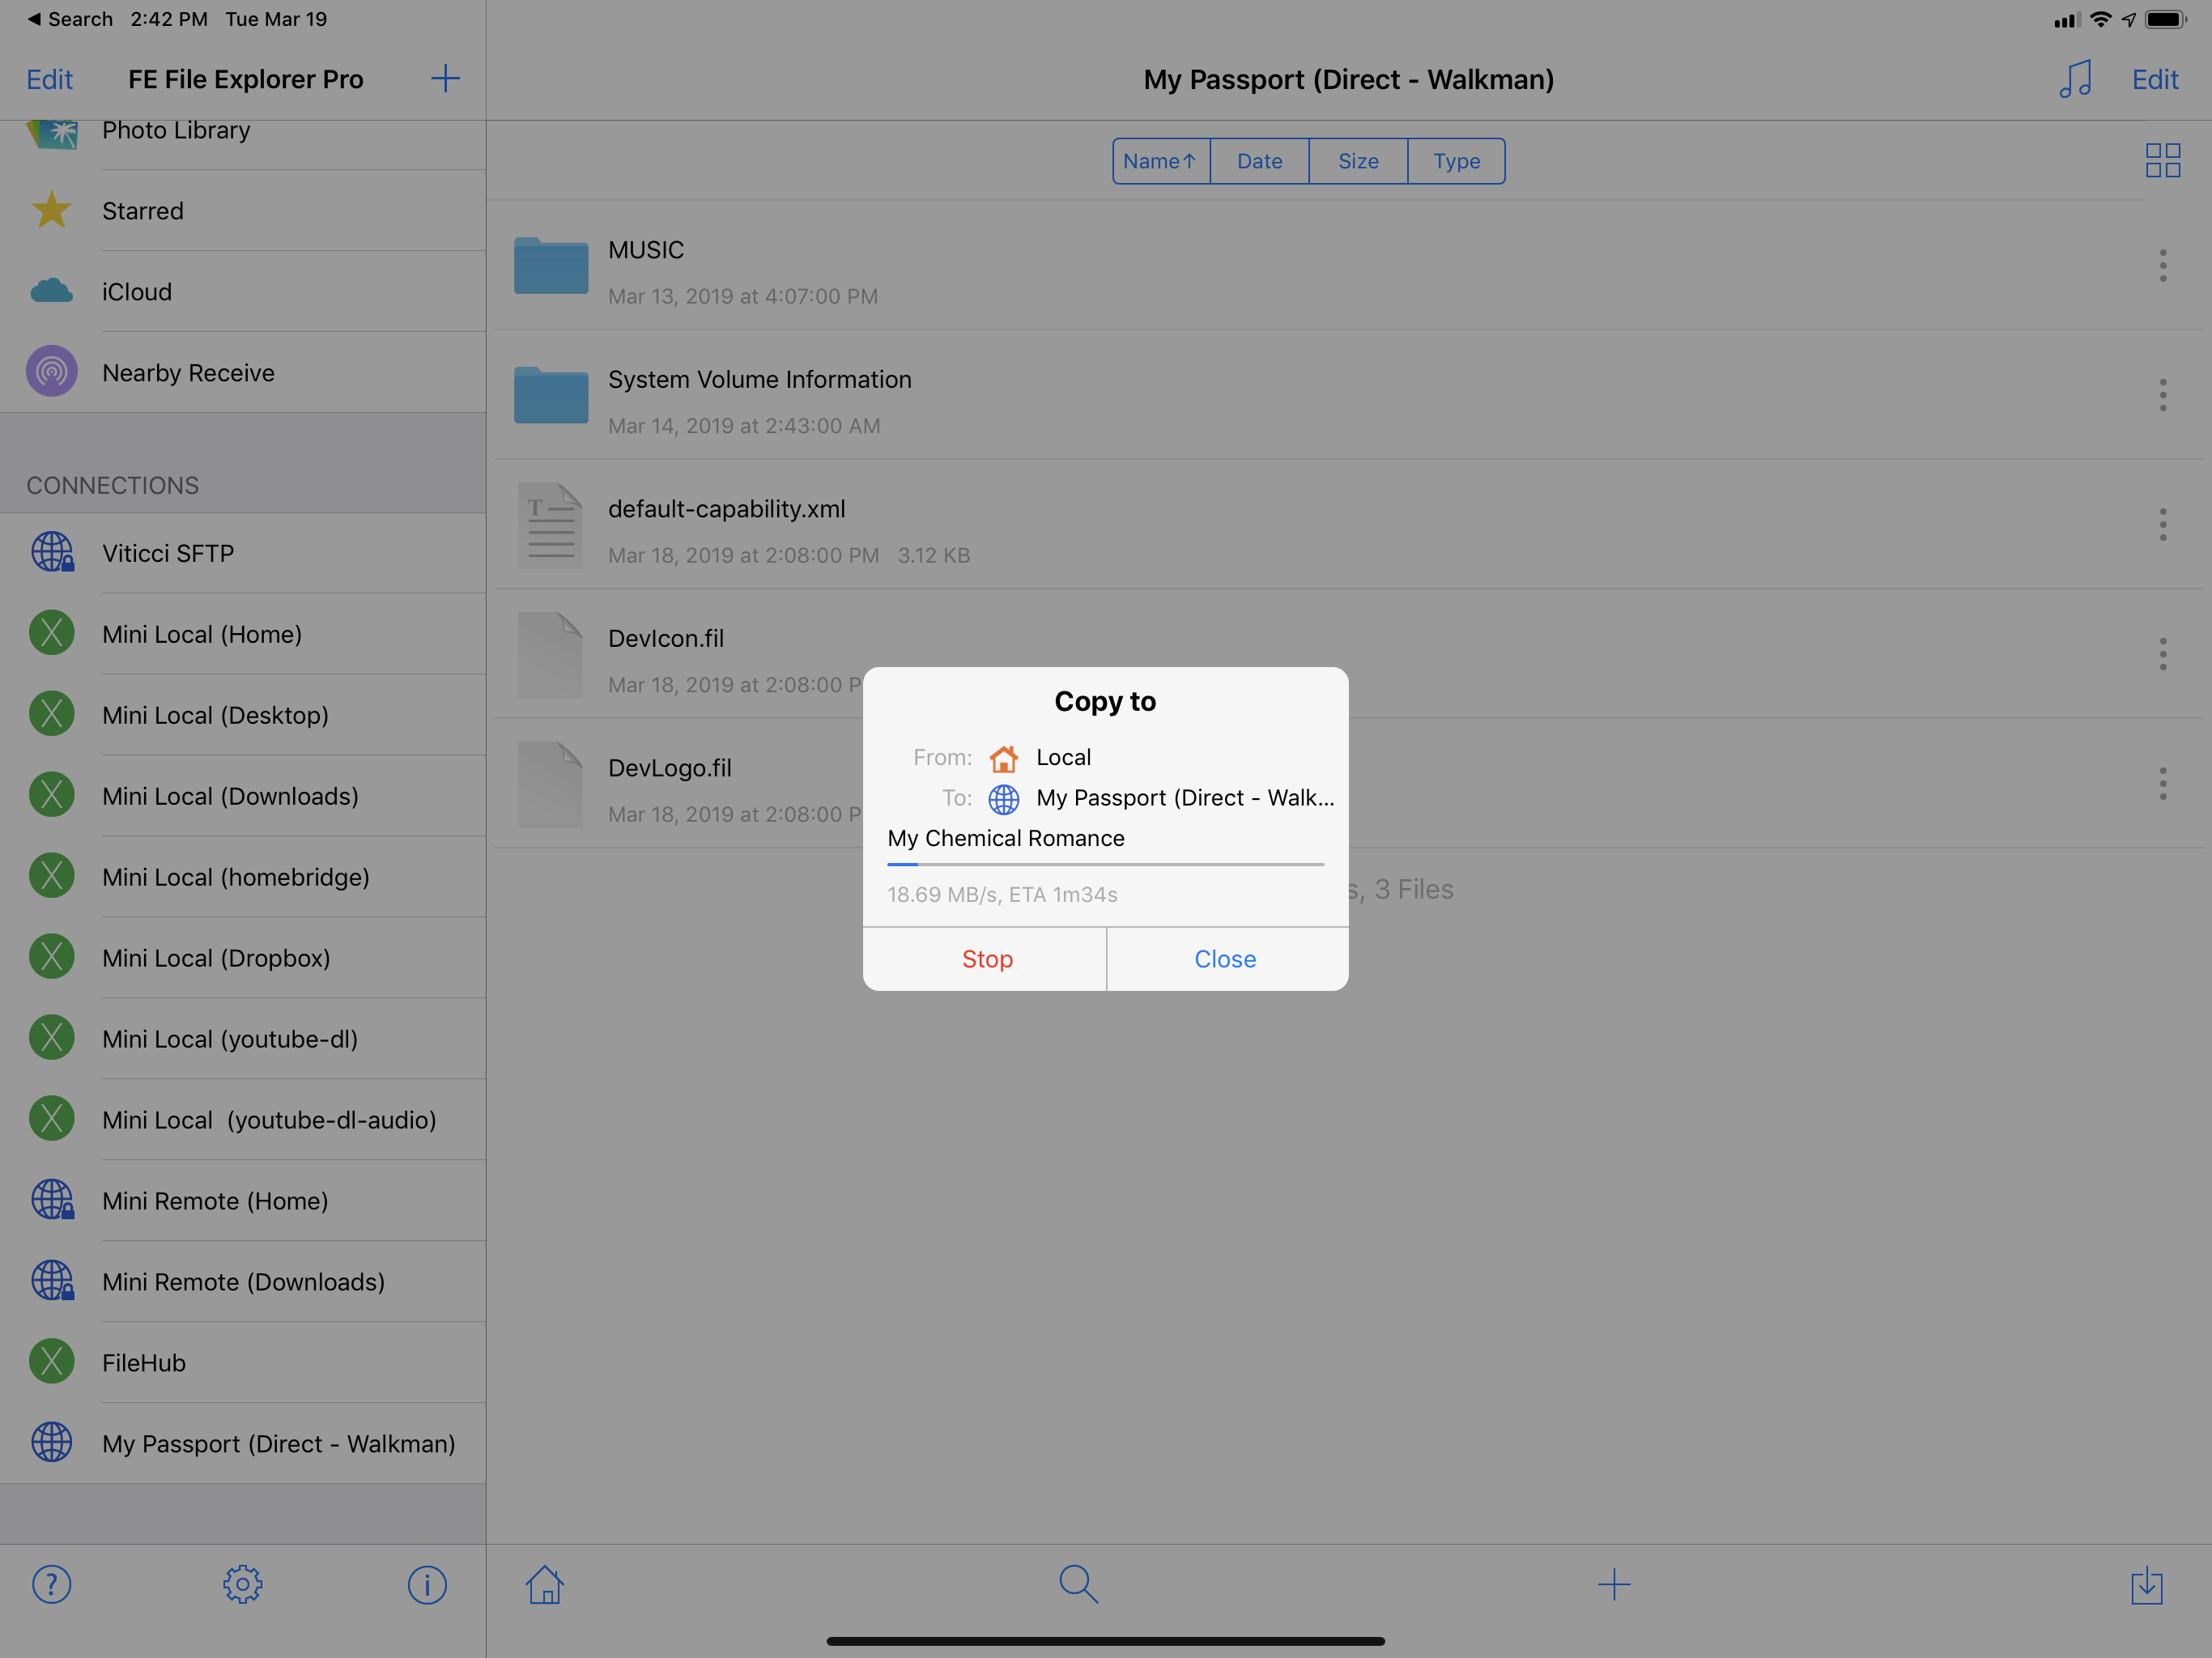
My second tweak to Snell’s setup is the external WiFi drive I’m using to transfer audio files saved from the Zoom H6 onto an SD card to the iPad Pro. At first I tested the Snell-recommended Kingston MobileLite G3, and I also ran a few tests with a similar product by RAVPower, but I was unhappy with their wireless transfer rates. When I’m done recording a podcast, I need to upload my local audio recording to Dropbox as quickly as possible; connecting to the ad-hoc WiFi networks created by either the Kingston MobileLite G3 or RAVPower FileHub required me to wait almost 15 minutes for a high-quality WAV file to be transferred from an SD card to my iPad Pro – a long wait I couldn’t accept.
After some research, I came across the Western Digital My Passport Wireless Pro, which has a better built-in WiFi antenna than those two smaller boxes and which can create a faster 5 GHz WiFi network to transfer files wirelessly from the box onto the iPad.
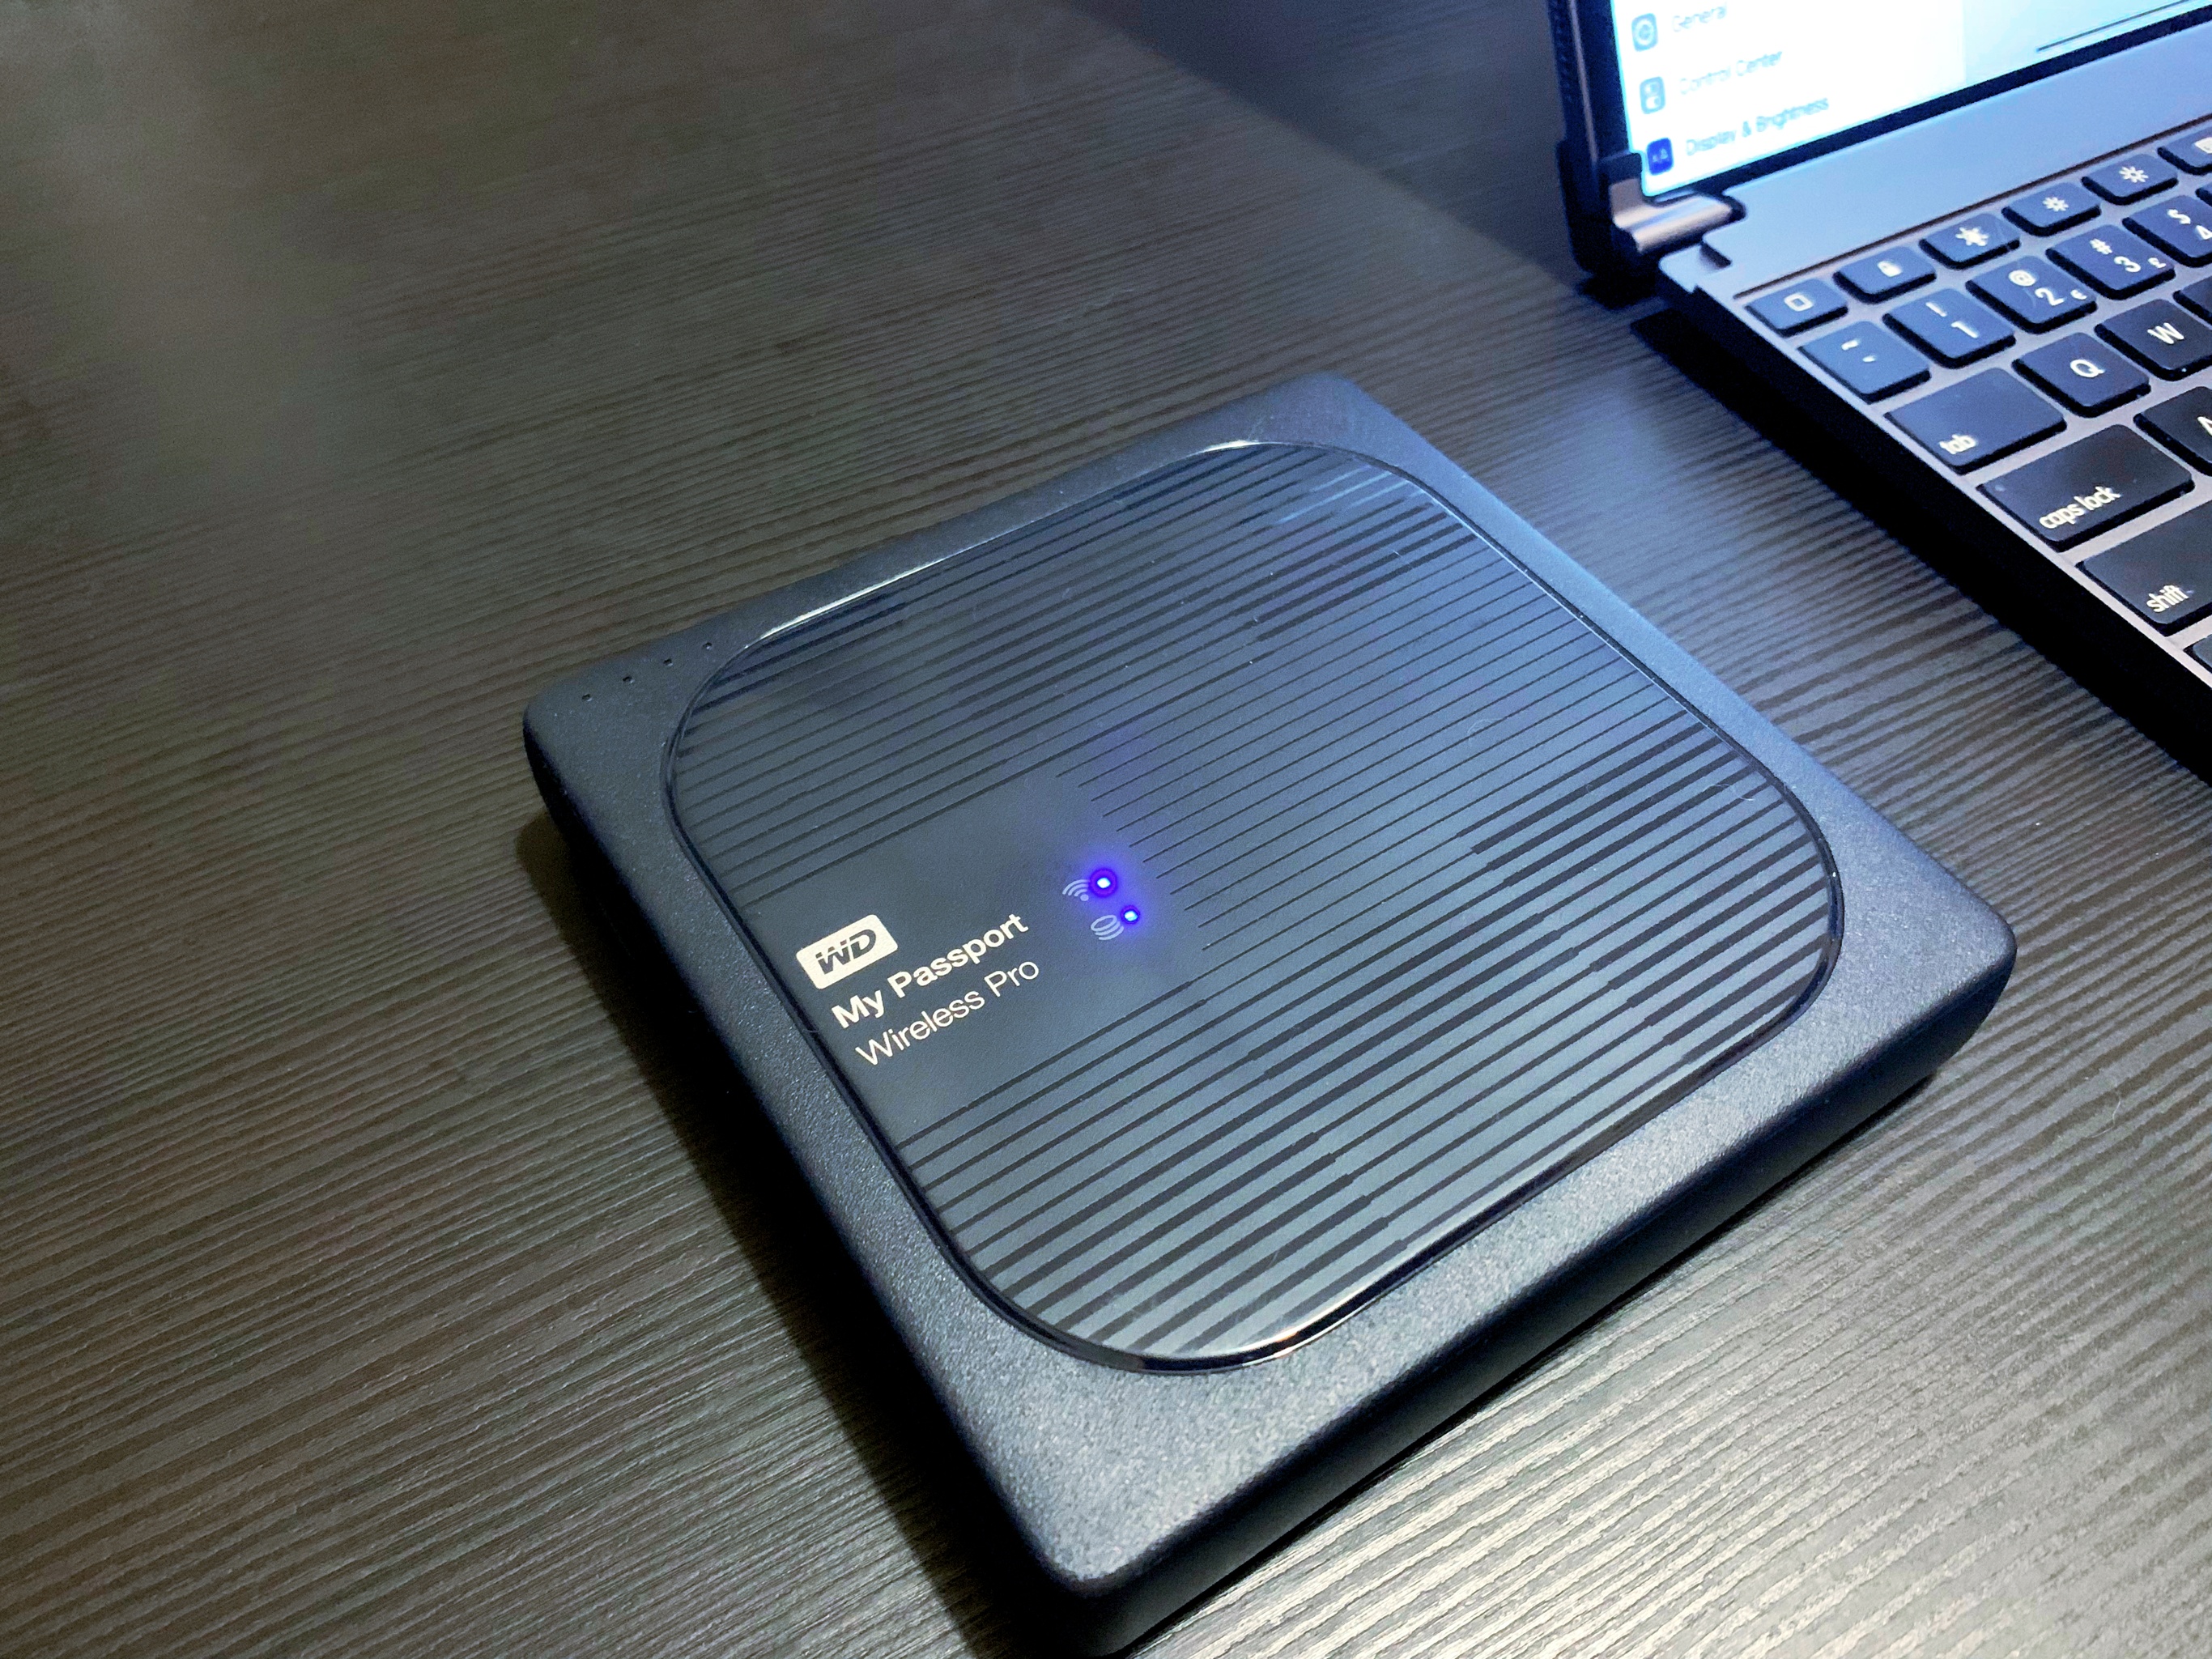
The underlying concept is similar: the My Passport Pro is a portable WiFi box that lets you access a filesystem wirelessly from an iOS device connected to its WiFi network. The My Passport Wireless Pro offers both built-in storage (up to 2 TB) and an SD card slot to expose the contents of SD cards plugged into the drive to other devices over WiFi. The combination of multiple storage options and its fast wireless network makes the My Passport Wireless Pro a popular option among photographers and YouTubers who want to transfer footage from an SD card onto an iPad Pro wirelessly while on the go. In my case, I just needed to transfer audio files quickly from an SD card onto my iPad.
At a basic level, here’s what I can do: once I’m done recording, I can take the SD card out of the Zoom H6, plug it into the My Passport Wireless Pro, and turn on the device. Once the drive has enabled its 5 GHz WiFi network, I can connect to it from the iPad’s Settings app, then use the WD My Cloud app to import a 500 MB WAV file in less than a minute and upload it to Dropbox. The entire process takes less than five minutes from pressing ‘Stop’ on the Zoom H6 to the uploaded file in Dropbox – but where’s the fun in a basic approach?
To speed up this process even further, I’ve created directory shortcuts in FileExplorer Pro to more easily connect to the My Passport Wireless Pro and import audio files stored on the SD card plugged into the drive. This is made possible by the fact that the My Passport Wireless Pro comes with a built-in FTP server that can be used to access the contents of the drive from any FTP client. As detailed by Western Digital on this support page, the My Passport Wireless Pro always uses the same IP address and exposes both its own storage21 and connected accessories such as SD cards via FTP. With this in mind, all I had to do was create a new FTP connection in FileExplorer Pro, using the name of the SD card as the initial path:
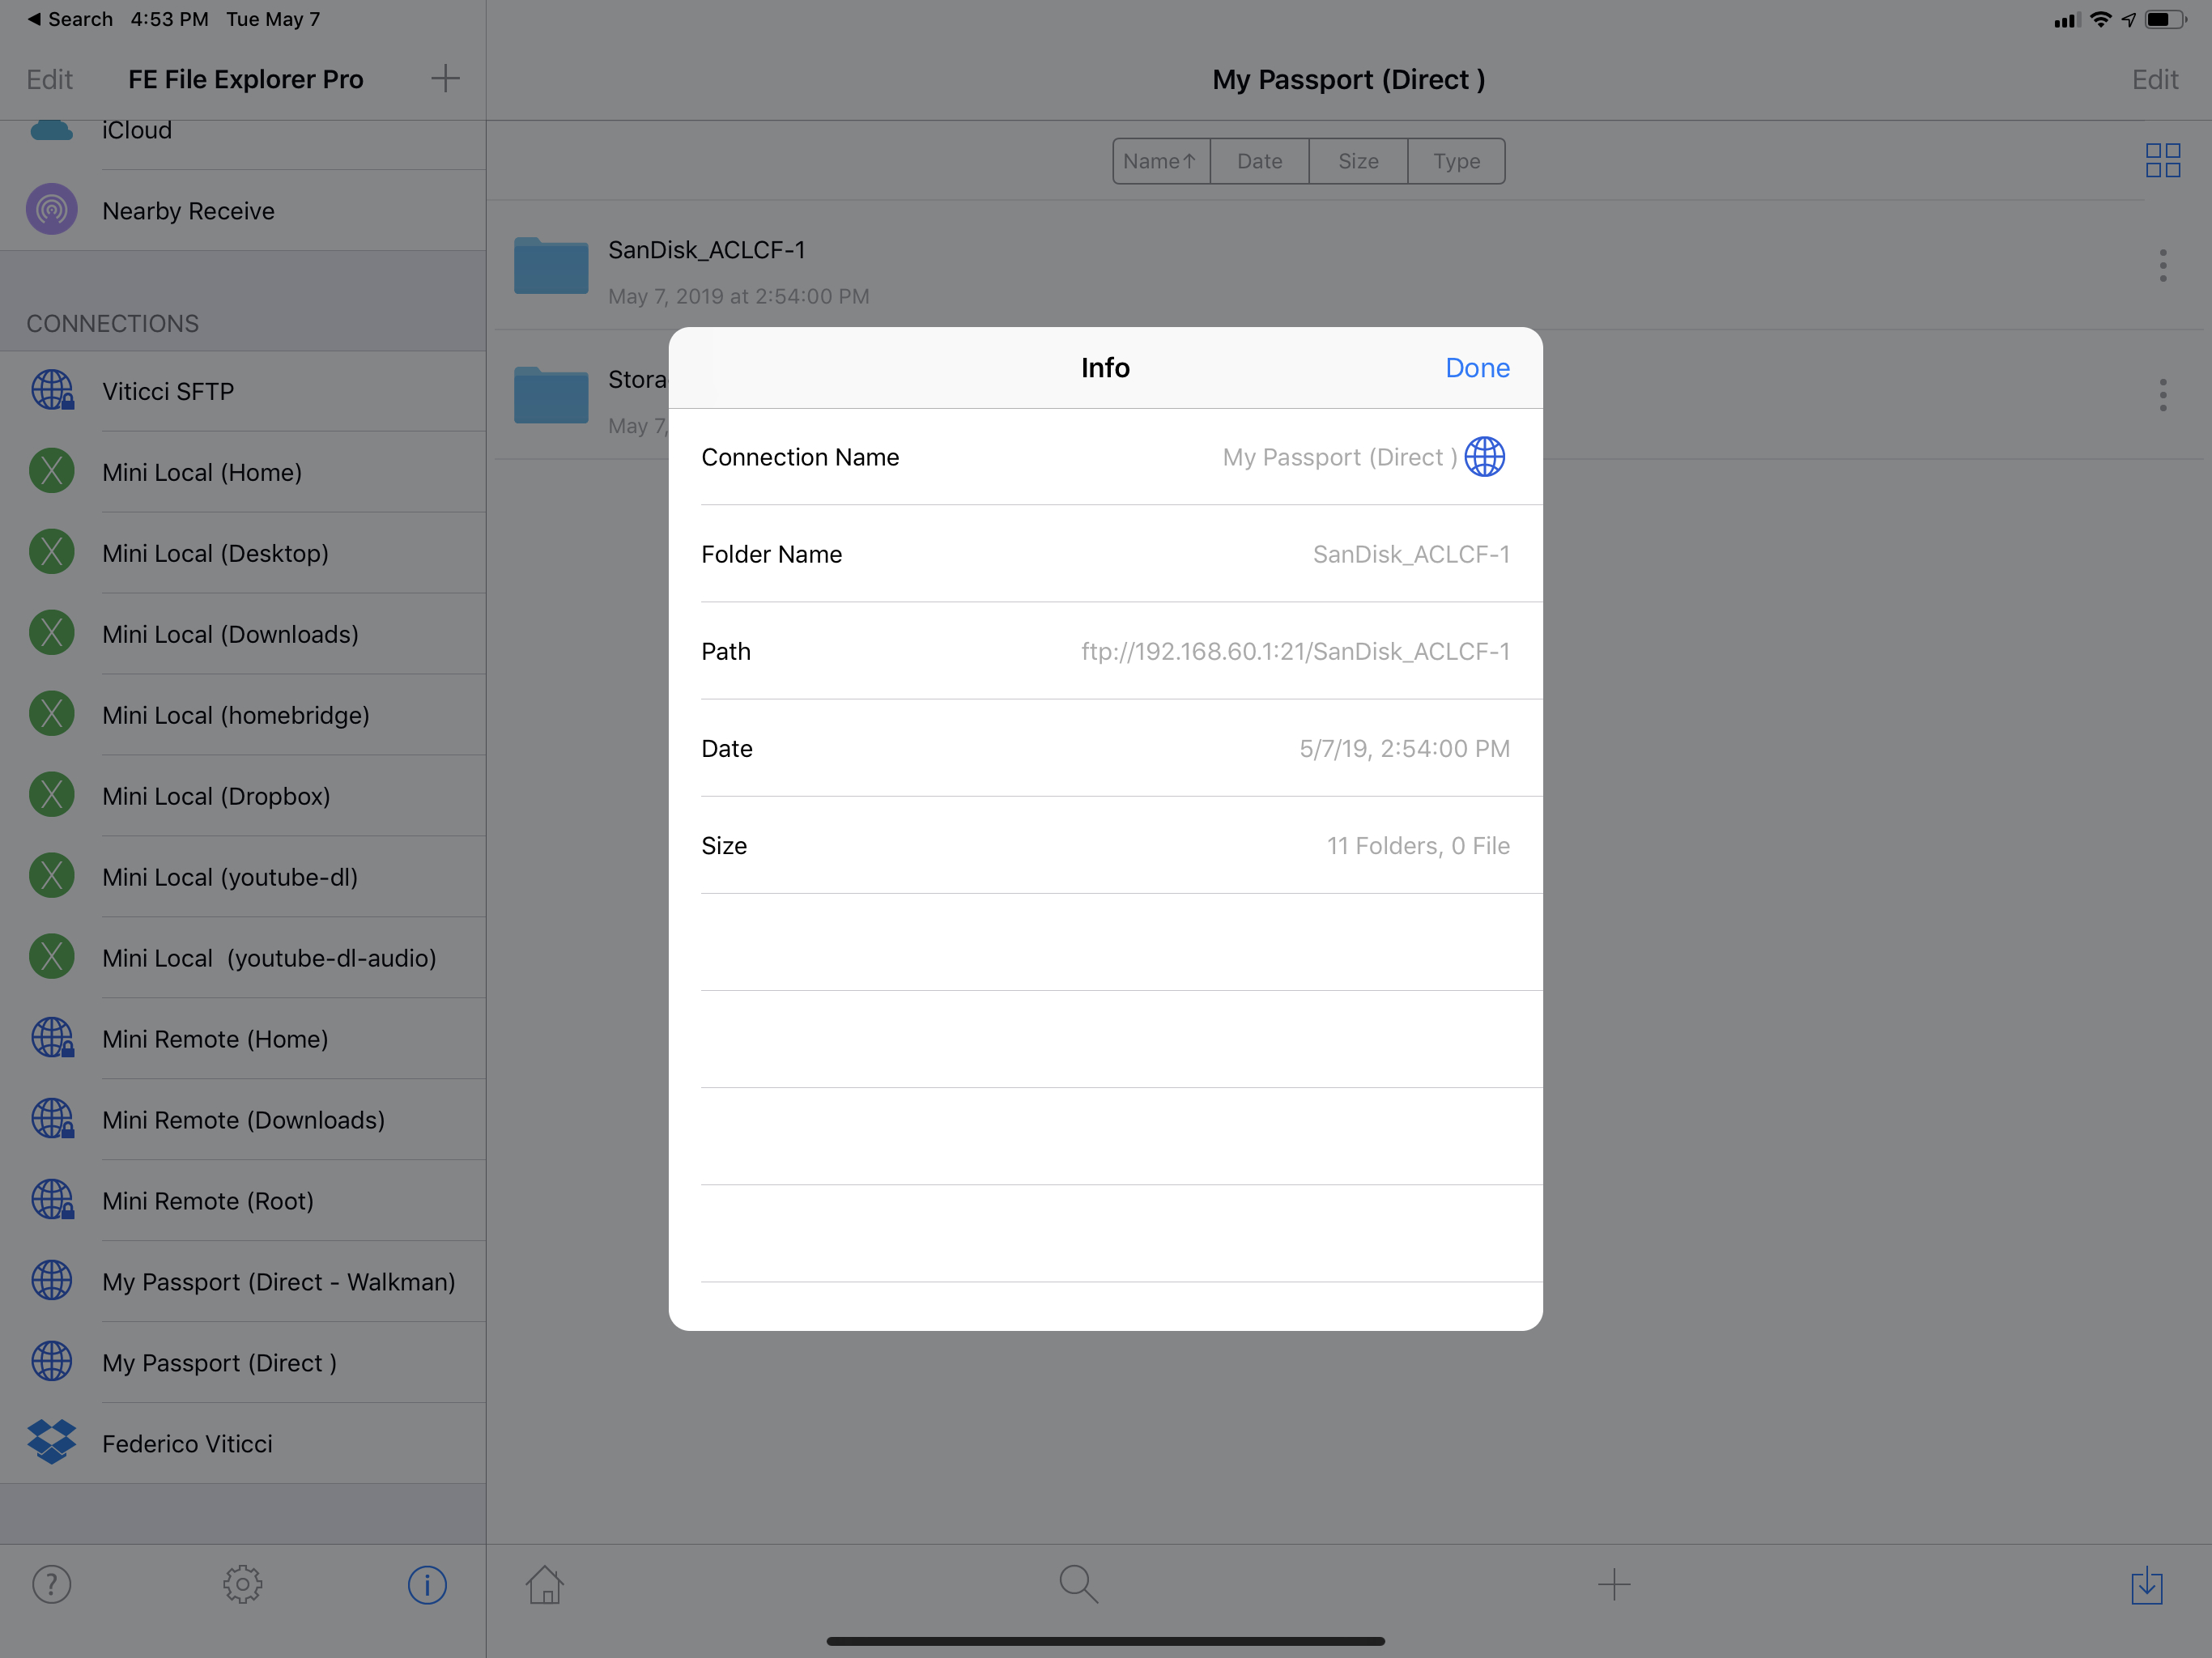
With this system, once I’m connected to the My Passport Wireless Pro’s WiFi network, I can open FileExplorer on my iPad Pro, tap a location in its sidebar, and I’ll be instantly taken to the SD card’s root directory where I can find the audio file saved by the Zoom H6 recorder.
As I explained in the File Management chapter, FileExplorer’s connected servers can be accessed from the Files app using its file provider extension; technically, this allows me to browse the contents of an SD card from iOS’ native Files app and document picker. As you can imagine, having external storage options available in Files just feels…obvious.
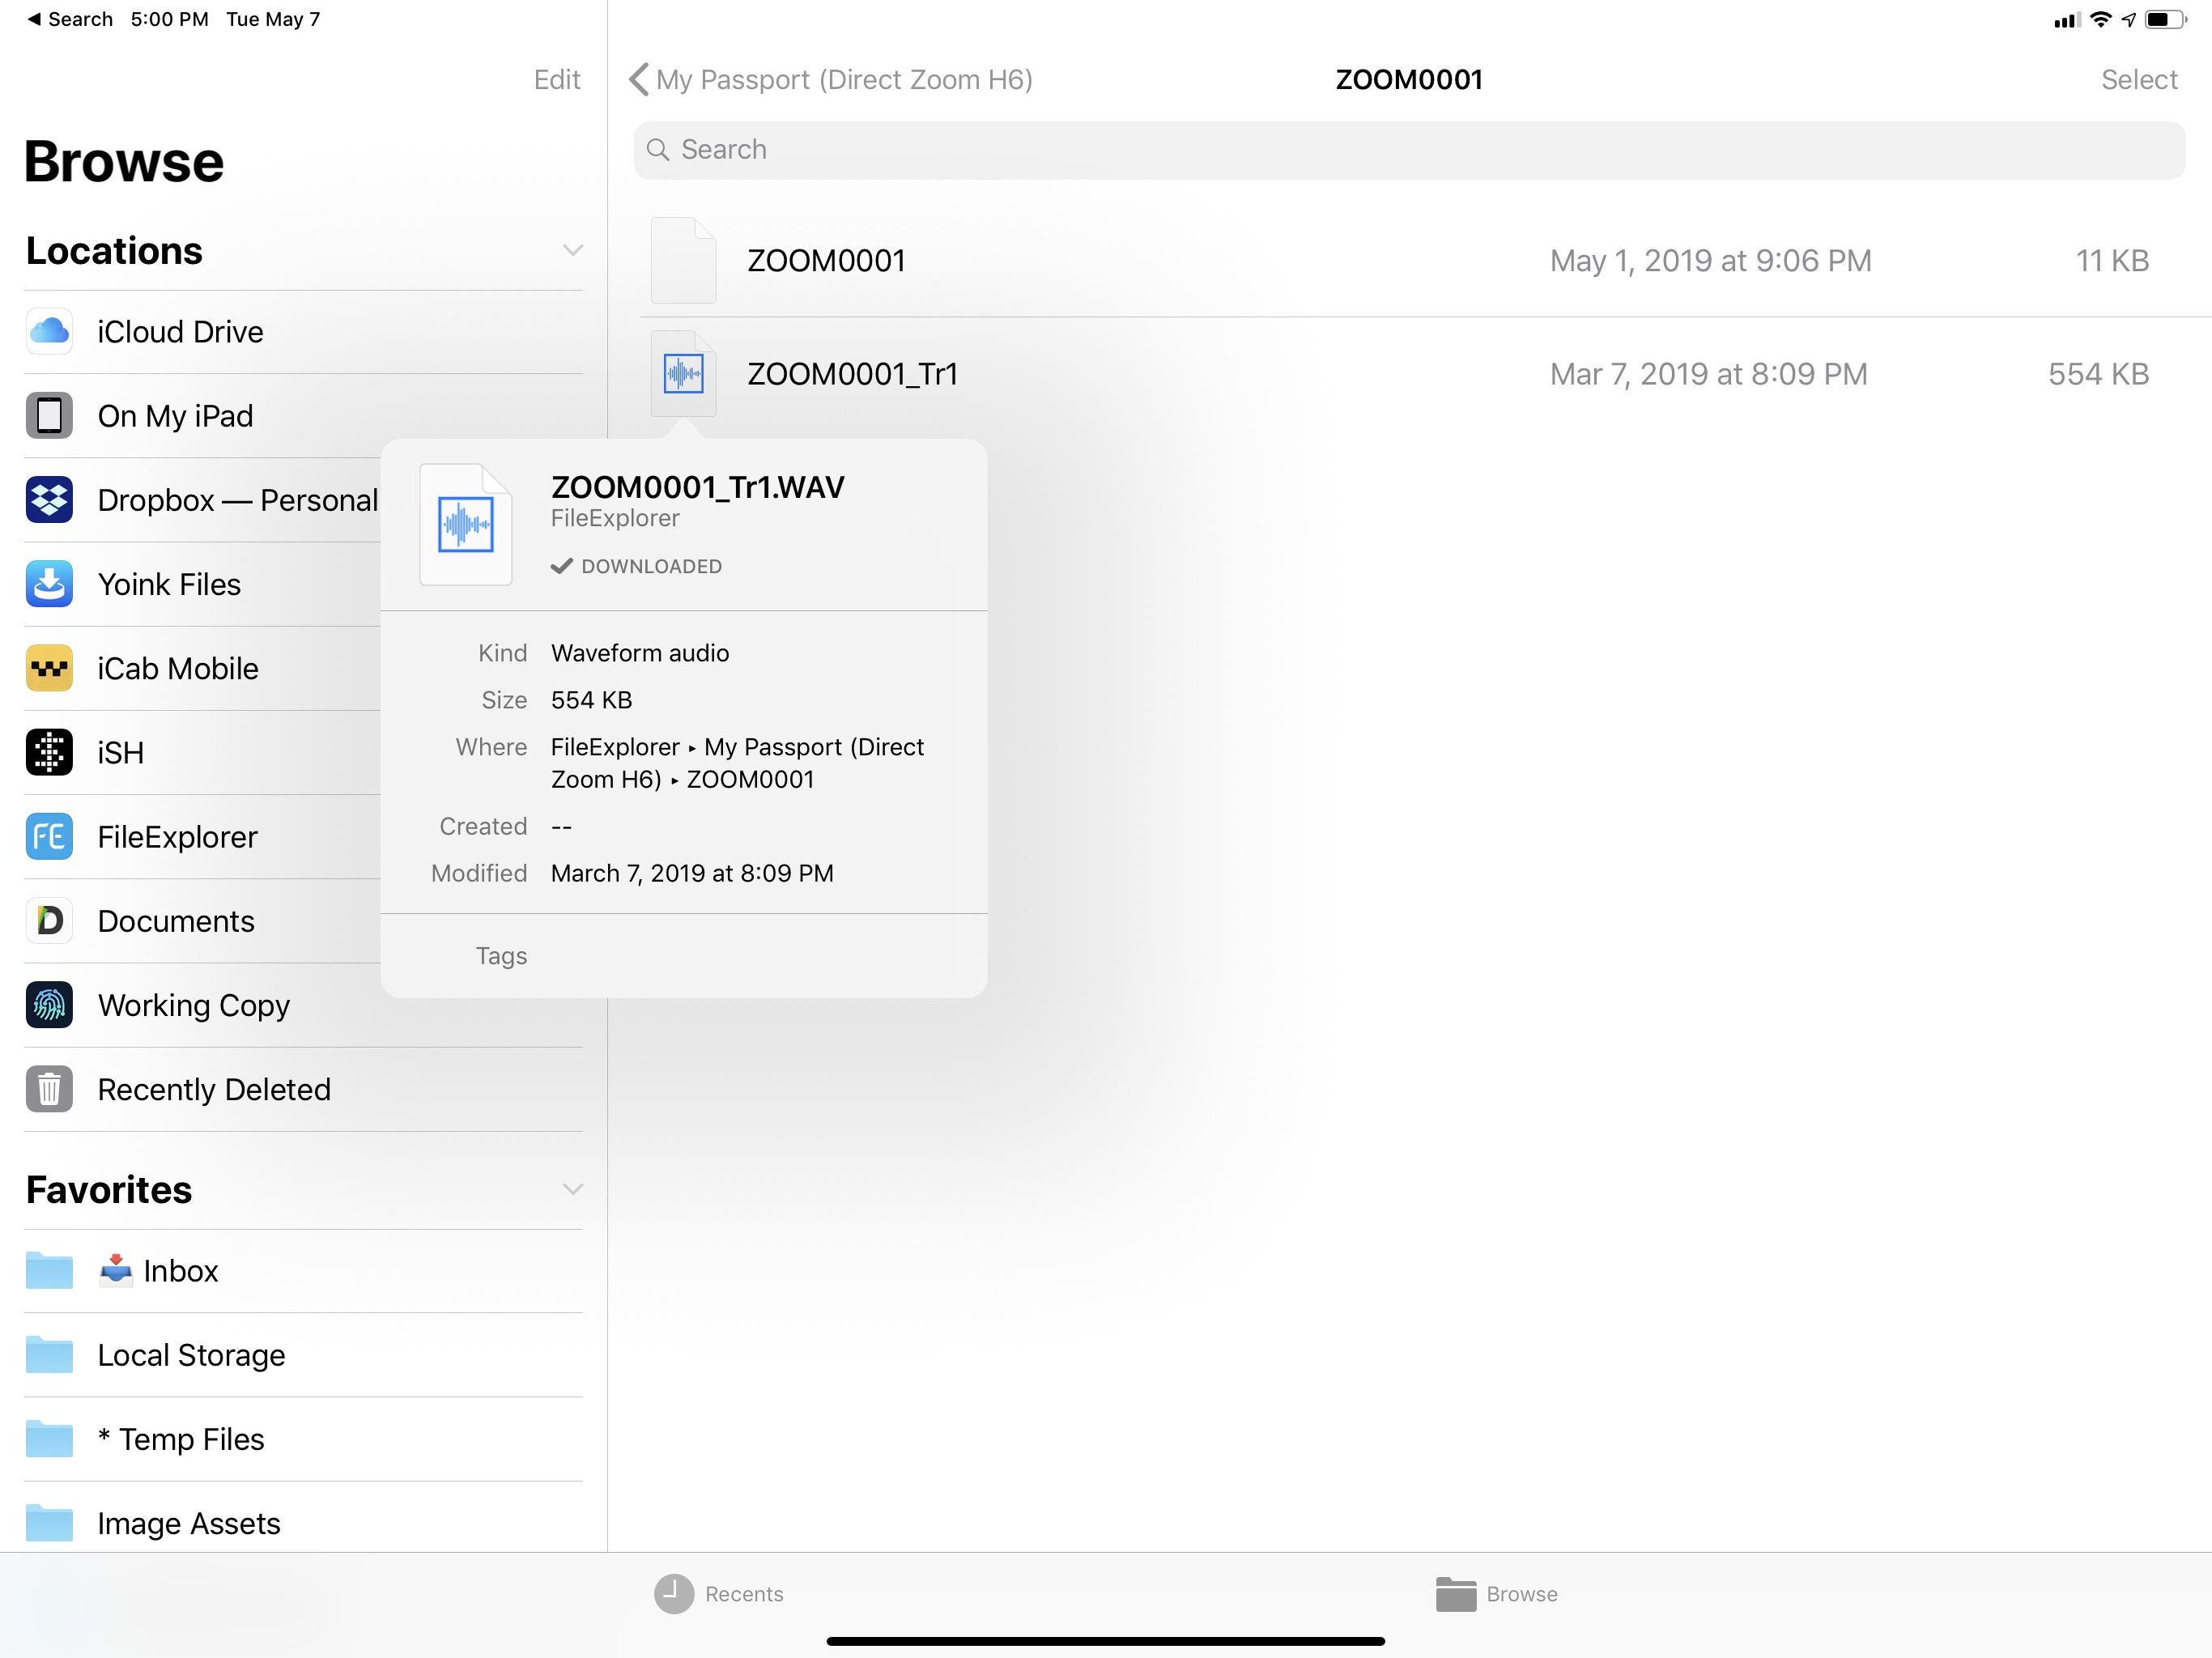
In this case, however, I prefer to browse and download files off SD cards using the FileExplorer app because downloading large audio files from Files via the FileExplorer provider does not show a progress bar (download progress is an API that FileExplorer could support). Downloading from FileExplorer shows a nice popup dialog with details on file size and average transfer speeds. The My Passport Wireless Pro’s network averages 18 MB/s download rates, which is a terrific improvement over the 2 MB/s transfers I was getting with the MobileLite G3 and FileHub.
Of course, this entire process would be much faster, cheaper, and easier if only I could plug an SD card reader into my iPad Pro and import audio files using the built-in Files app. USB-C was supposed to fix this madness: I shouldn’t have to buy an external drive that creates its own wireless network if I just need to import a single file from an SD card using an iPad Pro that comes with a USB-C port. This whole ordeal is, quite frankly, ridiculous. Still, it works, and it has allowed me to record podcasts and upload audio files without a Mac, so at least I’ve got that going for me, which is nice.
I’ve always wanted to have the option of recording podcasts from an iPad for the same reasons I like using the iPad for everything else: I may not always be able to sit down and record at my desk, and I prefer the iPad Pro as a general computing environment. I’ve already recorded a handful of episodes over the past couple of months when I was not at home; later this summer, when I’ll be at my beach house in July and August, I’ll be able to record from the iPad Pro without having to borrow my girlfriend’s MacBook.
Recording podcasts with this kind of workflow is a sort of litmus test for the iPad Pro’s external hardware capabilities. And do not mistake the fact that I found a way to produce a good final product for success: in its current state, the iPad Pro’s software has failed this test miserably, forcing me to jump through hoops and buy additional equipment just to do something as rudimentary as recording the local audio track of a connected microphone.
I may have an iPad Pro podcasting setup now, but it shouldn’t be this hard, and it shouldn’t take me 4,000 words to describe it. As a professional podcaster, proper support for external USB storage devices and audio input/output settings are features at the top of my iOS 13 wish list.
- If you're keeping track, one hasn't been announced yet. Hashtag Ticci Tease. ↩
- The Nucleum can't have it all in such a small package: USB-A transfer speeds are limited to USB 3.1 Gen. 1 (5 GB/s) and the HDMI port does not support 4K@60Hz – but then again, to the best of my knowledge, there's only one chunky accessory that supports that kind of HDMI mirroring to date. ↩
- The My Passport Wireless Pro comes in both SSD and standard hard drive versions. I have the 1 TB model with a regular spinning drive inside. ↩