Last month, after a long beta period I’ve participated in for the past few months, the official Obsidian app for iPhone and iPad launched on the App Store. I’ve covered Obsidian and my approach to writing my annual iOS review in it on both AppStories and Connected; because I’m busy with that massive project and an upcoming major relaunch of the Club (hint hint), I don’t have time right now to work on a proper standalone, in-depth review of Obsidian for MacStories. So, given my time constraints, I thought it’d be fun to do a multi-part series for Club members on how I’ve set up and have been using Obsidian as my Markdown text editor and note-taking app of choice.
Obsidian has a steep learning curve on all platforms: there are a lot of settings to choose from, and there’s an incredible third-party developer community responsible for hundreds of plugins that can fundamentally alter the functionality of the app. The recently-launched iOS and iPadOS also matches all the core functionalities of the desktop app, including the ability to install custom plugins, themes, and CSS snippets to customize the app’s behavior and look. As a result, it can be quite challenging to get started with Obsidian and know what to tweak in the app’s preferences.
I don’t know how long this series will take me to complete, but my hope is that by sharing practical examples of how I set up the app on my end, I can make it easier for Club members to get started with Obsidian and personalize it to their needs. What I do know is that Obsidian already is one of the most impressive app launches of 2021, and I have high hopes for this product as an extensible, completely customizable Markdown text editor based on plain text files. I haven’t felt this way about a text editor since Editorial’s first beta in 2012, and I’m going to have a lot of fun sharing my techniques, custom plugins, and tips for Obsidian.
Let’s dive in.
Sync and Plain Text Files
The basic truth you should know about Obsidian is the following: it’s a front-end for a folder full of plain text files, which can be stored anywhere on your filesystem, including any location of the Files app for iPhone and iPad. Obsidian creates a ‘vault’ (a database) that is a folder containing your plain text files. At a basic level, Obsidian doesn’t require you to customize anything; you can get started by pointing it to a folder of Markdown files, which the app will index and let you edit in-place. This is an important piece of knowledge to keep in mind since, for data portability purposes, Obsidian lets you export your documents by simply copying and pasting them from the Finder of Files app. There’s no hidden database format and no proprietary sharing features to worry about: ultimately, the vault is just a folder you can freely access at any point via your computer’s file manager.
When you create a vault in Obsidian for iPhone and iPad, you can choose to create it in iCloud Drive or your device’s local storage – the ‘On My iPhone’ or ‘On My iPad’ default file provider of the Files app. Now, I know plenty of people who have decided to store their Obsidian vaults in iCloud Drive and use Apple’s service for sync between devices, which has the advantage of seamless integration with the Files app and background sync privileges. I did that too initially, but, personally, I prefer using Obsidian’s custom Sync service, a $4/month (when billed annually) paid add-on that is enabled via one of the app’s built-in ‘core’ plugins. There are a few reasons why I like Obsidian Sync as an alternative to iCloud Drive or other syncing solutions on iOS:
- It’s end-to-end encrypted by default. You set a passphrase for sync, and data that leaves your device is always encrypted with it, so it can only be decrypted on other devices via your passphrase. It’s an additional layer of security that makes me feel safe about syncing sensitive article drafts between devices.
- Obsidian Sync can work with local storage on iPhone and iPad. If you use Obsidian Sync, you can store your vault in the Files app’s local storage, then rely on the Sync service to keep your vault synchronized between multiple instances of the app. No need to keep the vault in iCloud Drive, causing a redundant sync to occur and run into potential sync conflicts caused by iCloud Drive (which, unfortunately, are still far too common).
- It comes with a built-in 1-year version history. While iCloud Drive is an “invisible” service that doesn’t let you look at what’s going on behind the scenes, with Obsidian Sync you can inspect the full sync activity, which is a log of all the changes pushed to and fetched from Obsidian’s servers. The log lets you see all individual changes to files and understand if a specific file caused a sync error or conflict; it’s available in Options ⇾ Sync, which you can access by pressing ⌘, or by tapping the gear icon in Obsidian’s left sidebar. Additionally, you can view the full version history for individual documents and restore previous versions with a single tap. You can find this in each document’s ‘More Options’ panel (the vertical three-dot button in the upper right corner) under ‘View version history’.
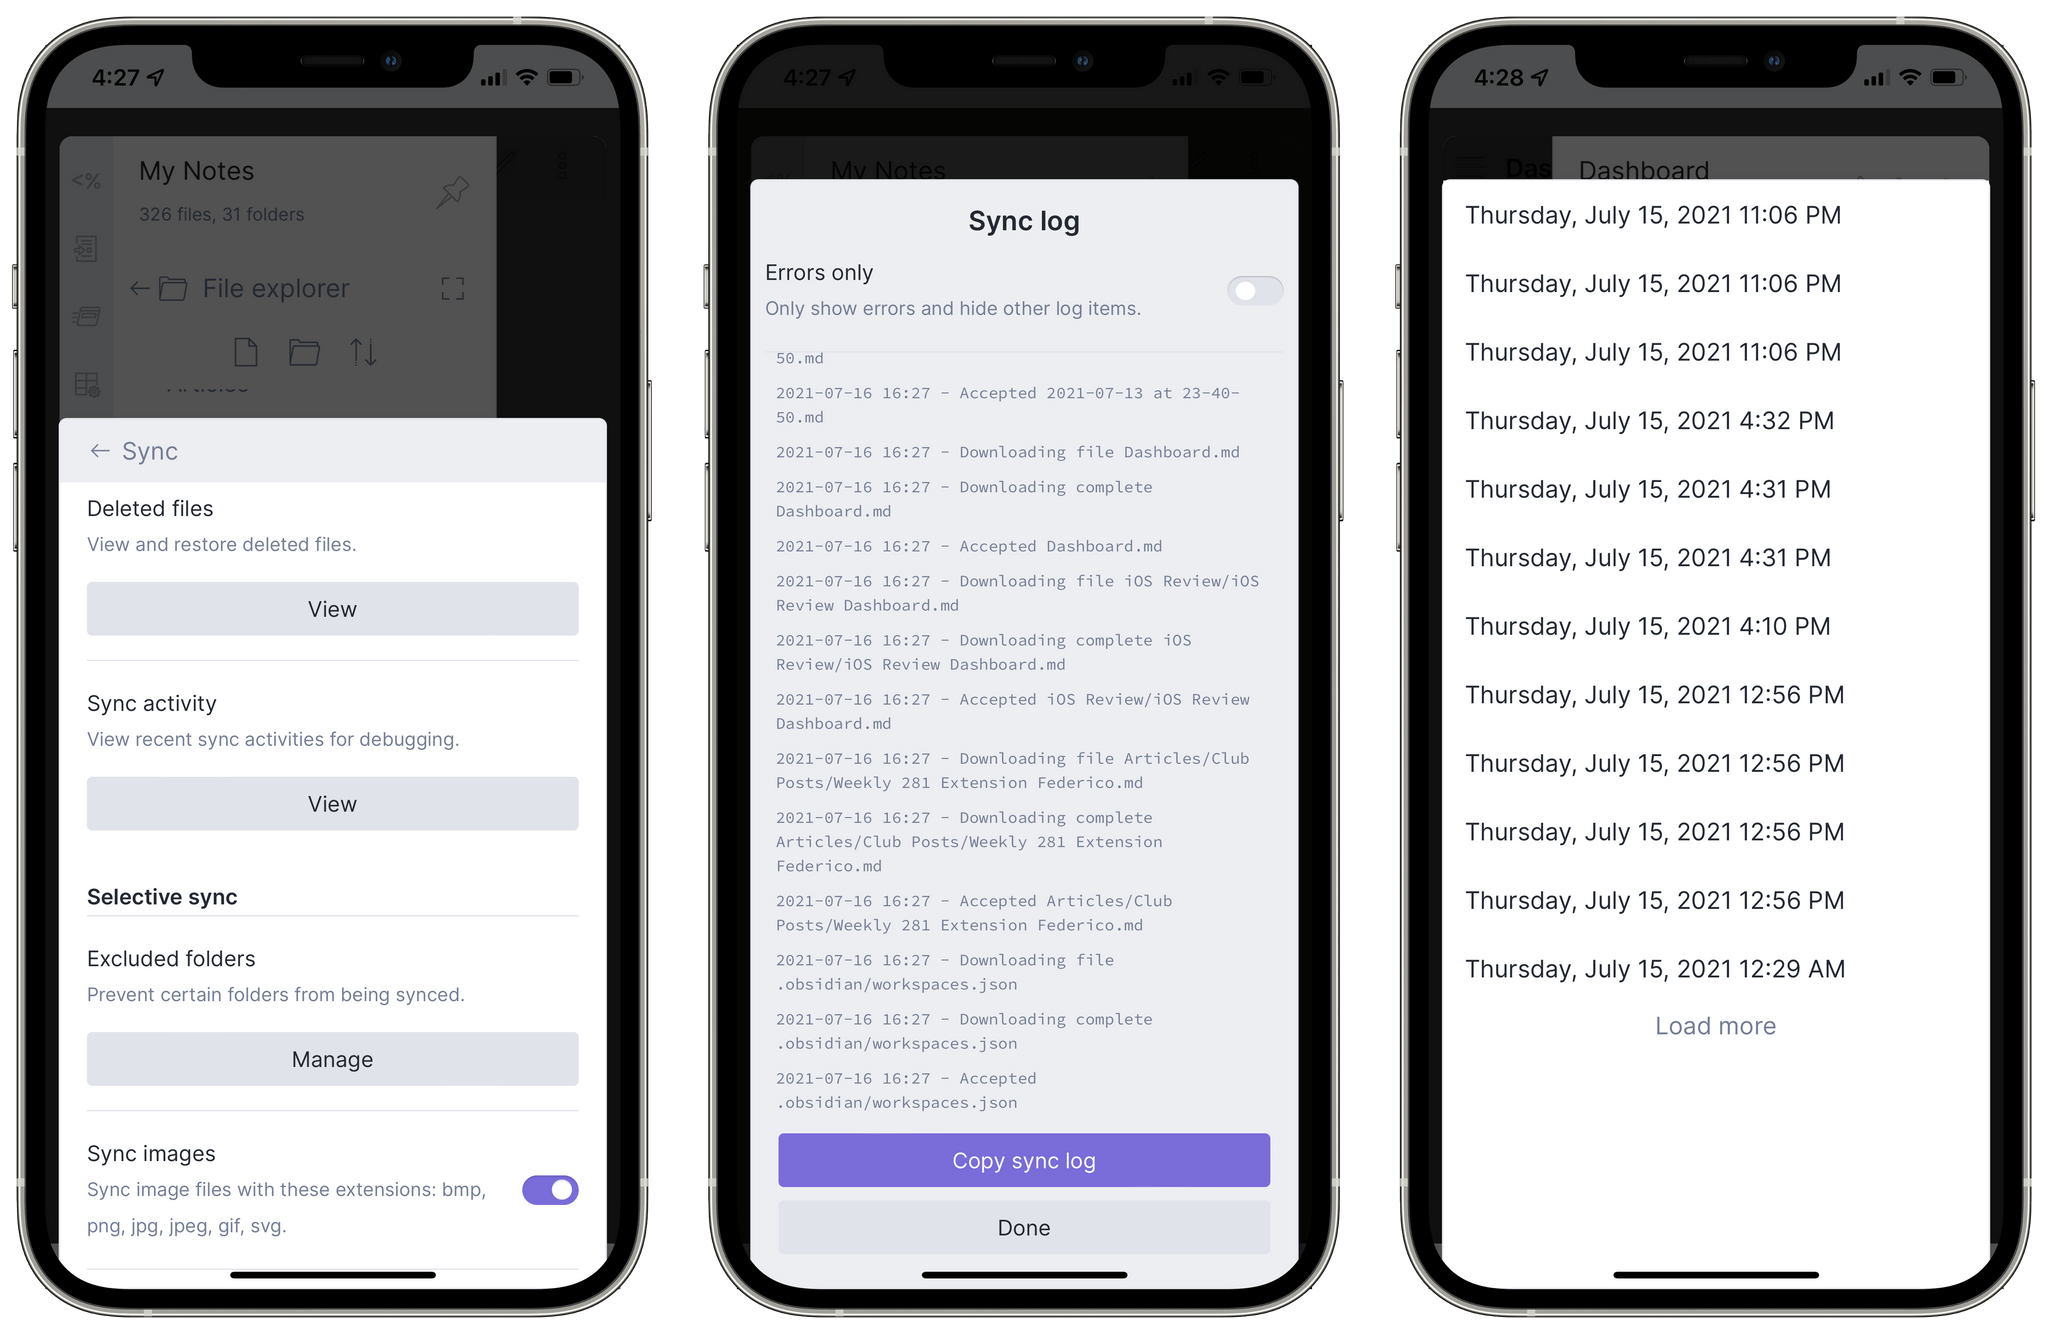
In my experience over the past few months, Obsidian Sync has been rock-solid and, more importantly, blazing fast. Plain text files have the benefit of being extremely lightweight, so the combination of speedy sync and being able to view a raw sync log has given me the peace of mind I never really had with iCloud Drive. It’s similar to Dropbox in this regard, but it’s end-to-end encrypted, and it can work as a layer on top of local storage on both iPhone and iPad. I highly recommend signing up for this additional service if you’re interested in these sync features.
As I’ll explore in a future installment of this series, choosing to go with the local storage + Obsidian Sync route creates additional complications for accessing Obsidian’s hidden metadata and configuration files. I’ve come up with a Shortcuts-based solution for this as well, which I’m going to explain later on.
Core Plugins
Obsidian can be best described as a modular note-taking app and text editor based on an extensible plugin architecture. There’s an open API for developers of plugins, which are based on web technologies (HTML, JS, and CSS) and tap into Obsidian’s hybrid nature as an Electron app. The app’s web-based nature is obvious enough: the UI is odd and non-standard in a lot of places; in the Mac version, you can inspect the app’s whole interface with a web inspector reminiscent of developer tools found in Safari and Chrome:

This is, I believe, the most important trade-off to understand right away about Obsidian: what it lacks in native, HIG-compliant interactions and design conventions, it makes up for with a fully customizable editing environment that lets anyone make plugins, themes, and even CSS snippets to modify the app’s appearance and functionalities. If Obsidian doesn’t have something you want, you can make it yourself – or found someone else’s plugin that does the job for you. From this standpoint, it’s reminiscent of Sublime Text, which never came to iOS and iPadOS.
Cleverly enough, the Obsidian creators themselves based key functionalities of the app on this plugin architecture and made certain features ‘core plugins’ you can enable in the app’s settings. Core plugins are different from third-party plugins, which are called ‘community plugins’ and are the ones you can browse inside the built-in gallery in Obsidian (for those that have been vetted by the Obsidian community) or manually install as files. You’d be surprised to see how many “obvious” features of Obsidian are actually core plugins you can optionally disable. Here’s a list of the highlights:
File explorer. If you want to browse the file and folder structure in your vault, you can enable the file explorer as a plugin in the left sidebar. I paired this with the ⌘⇧E hotkey on my iPad.
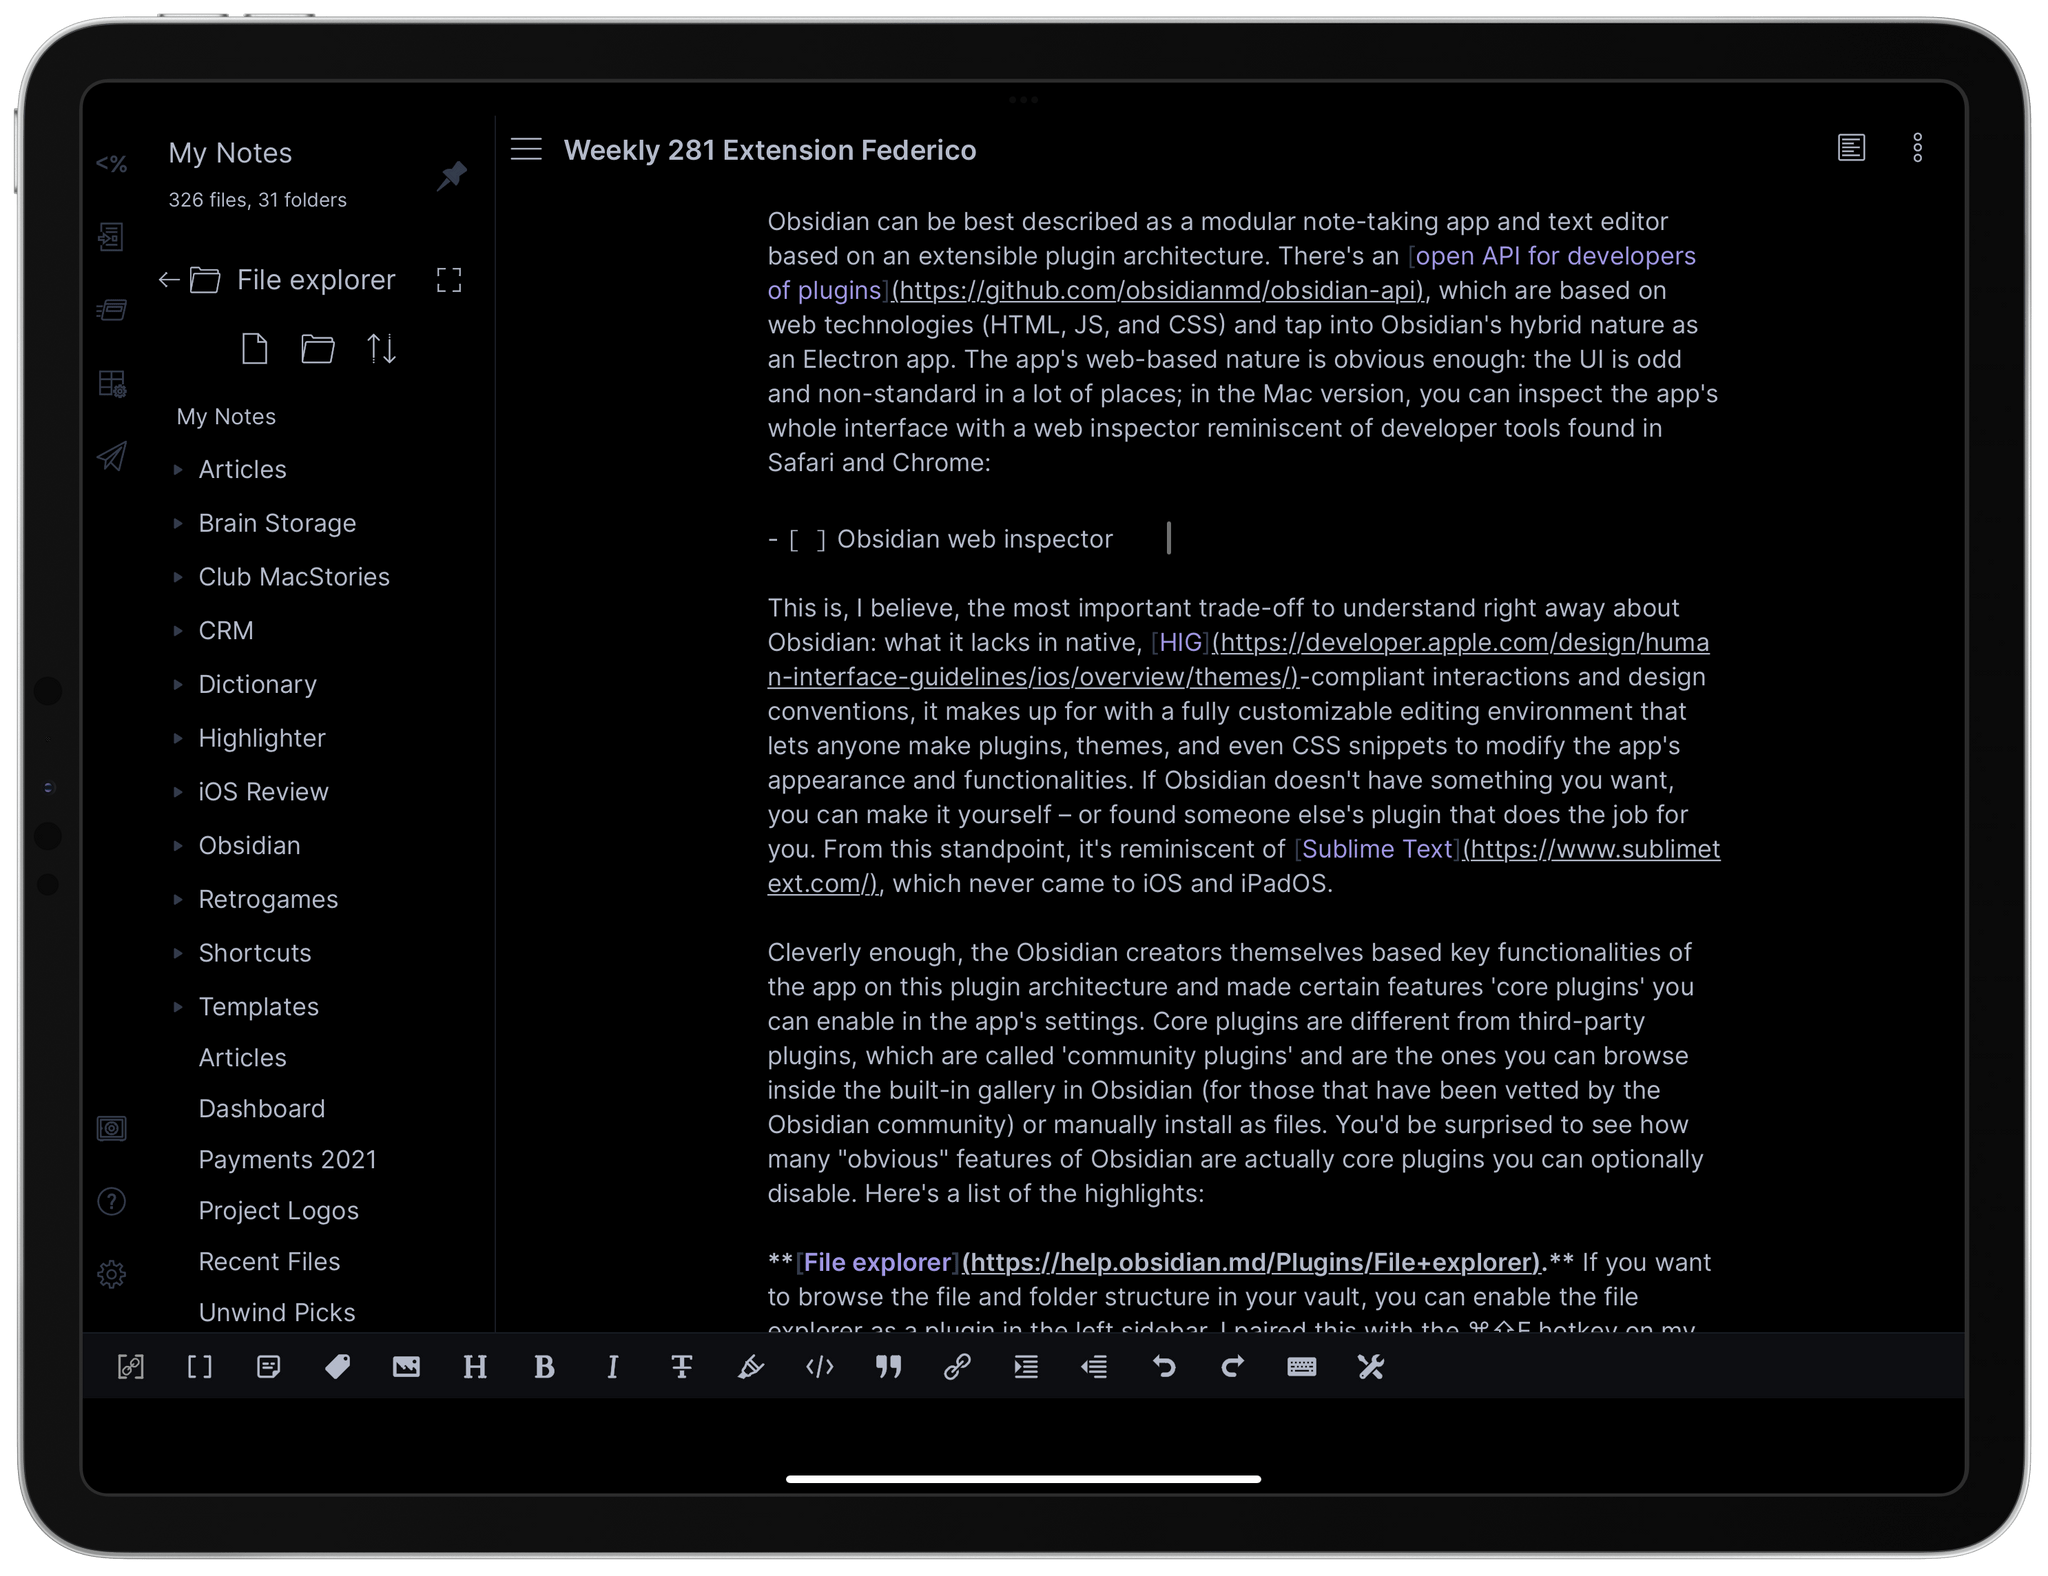
Search. The ability to search for text across all text files in your vault is also a core plugin that adds a new item to the left sidebar. I gave this the ⌘⇧F hotkey.
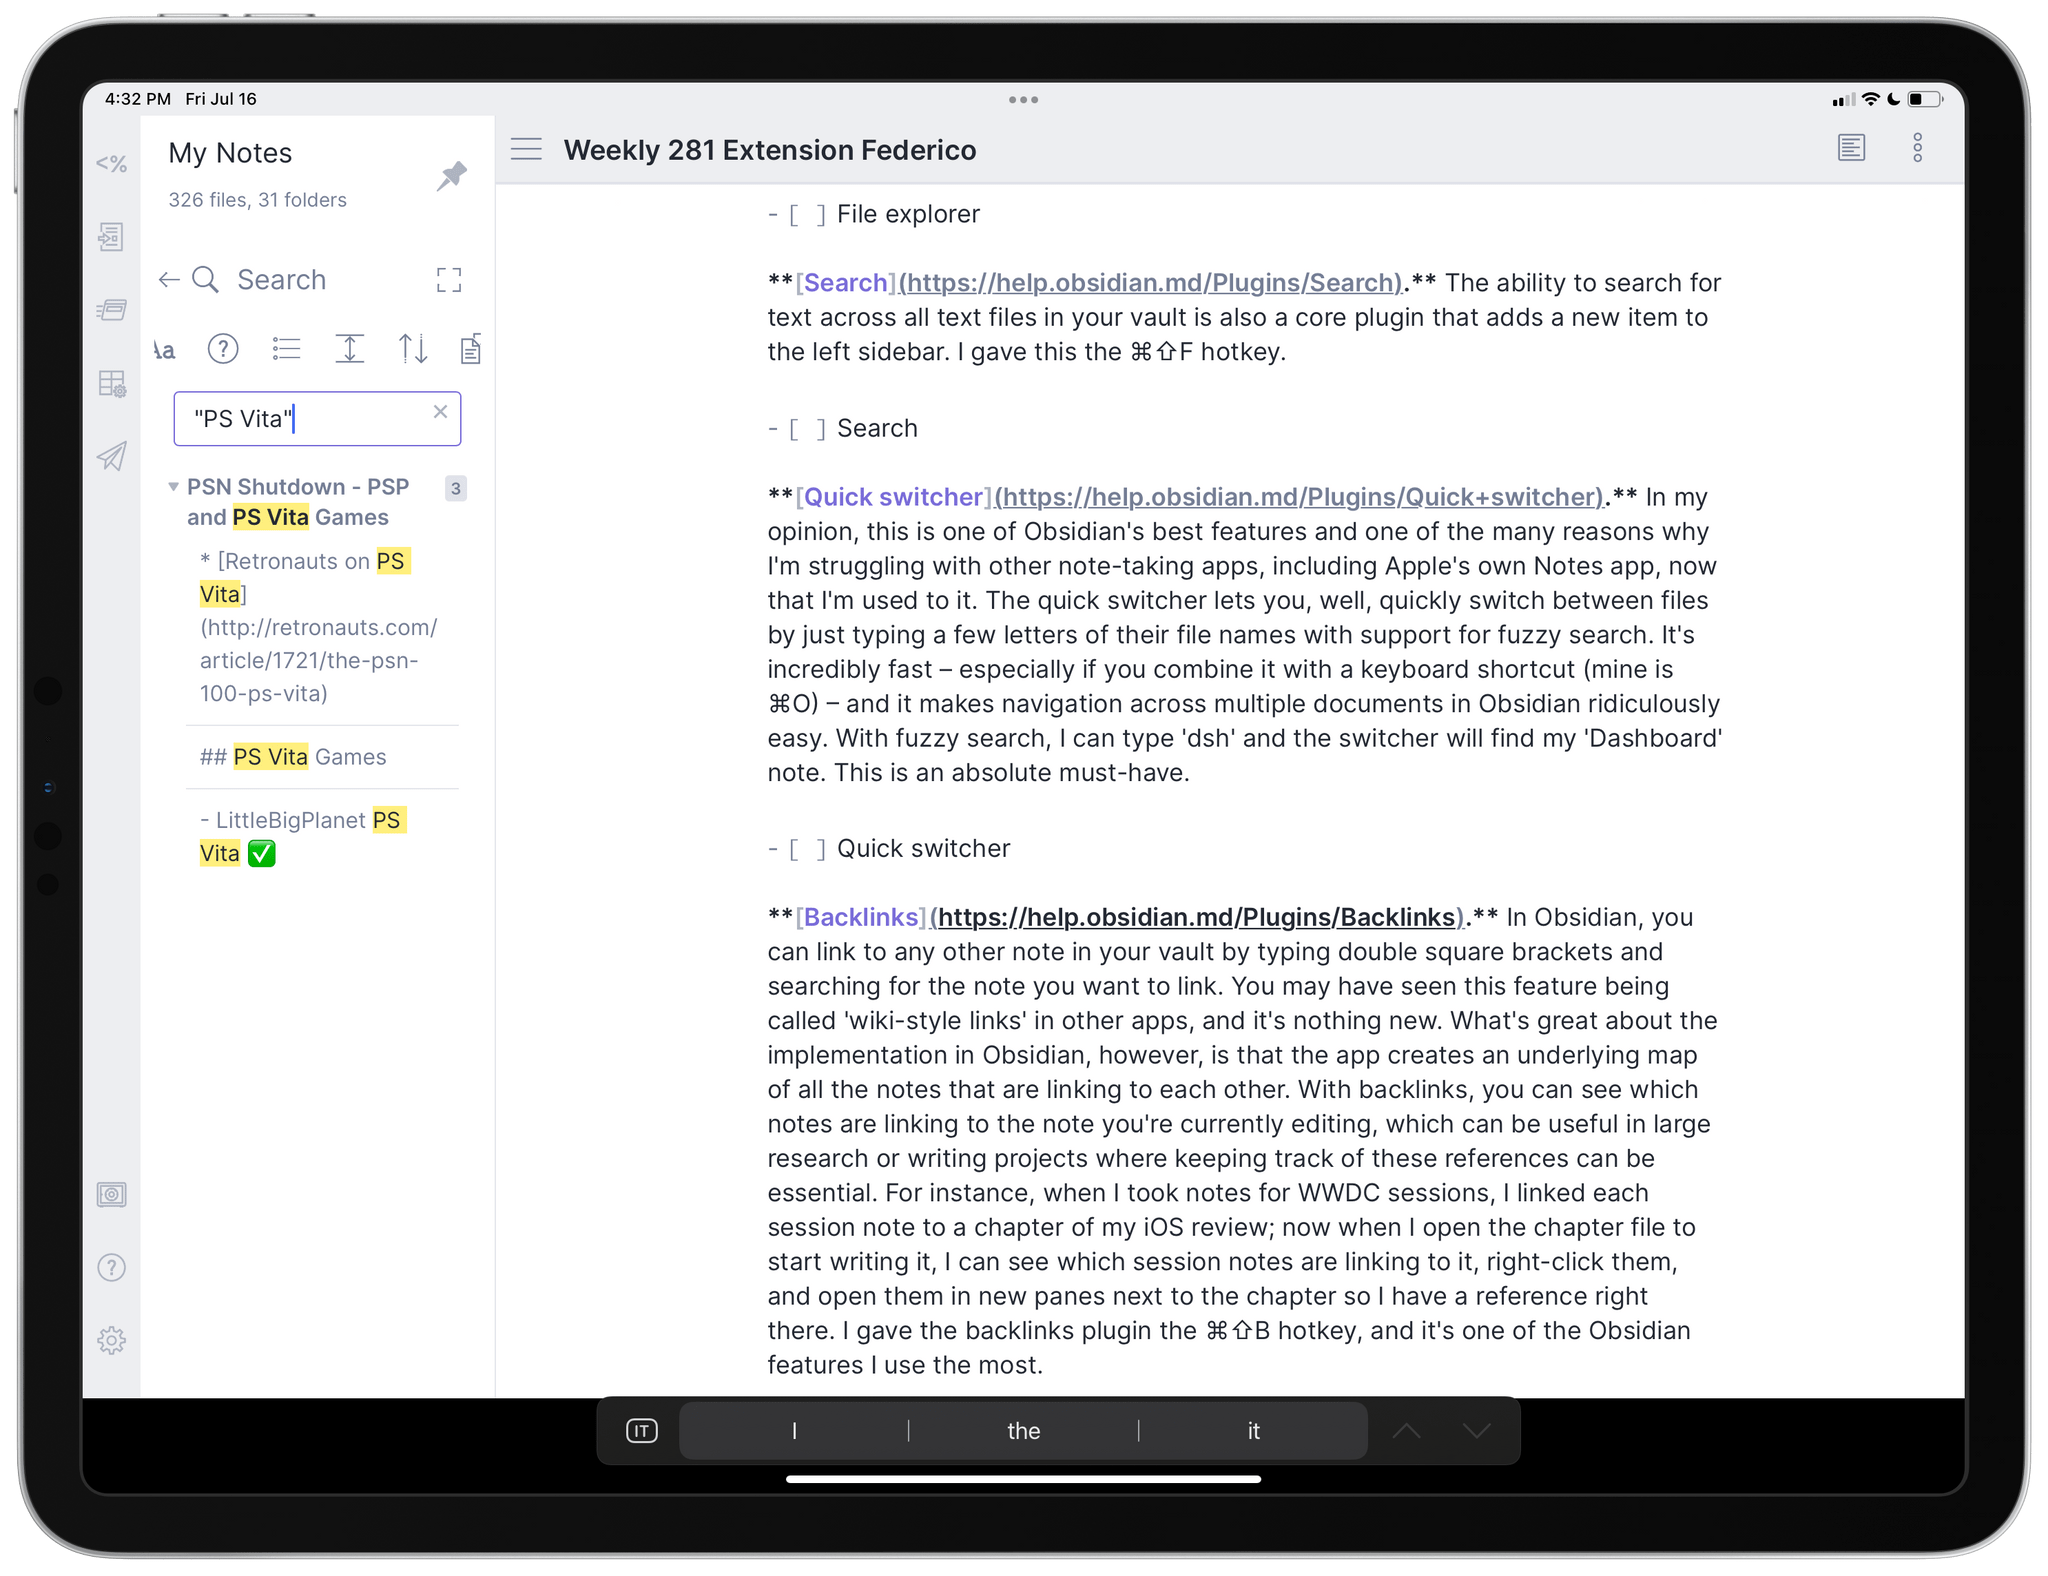
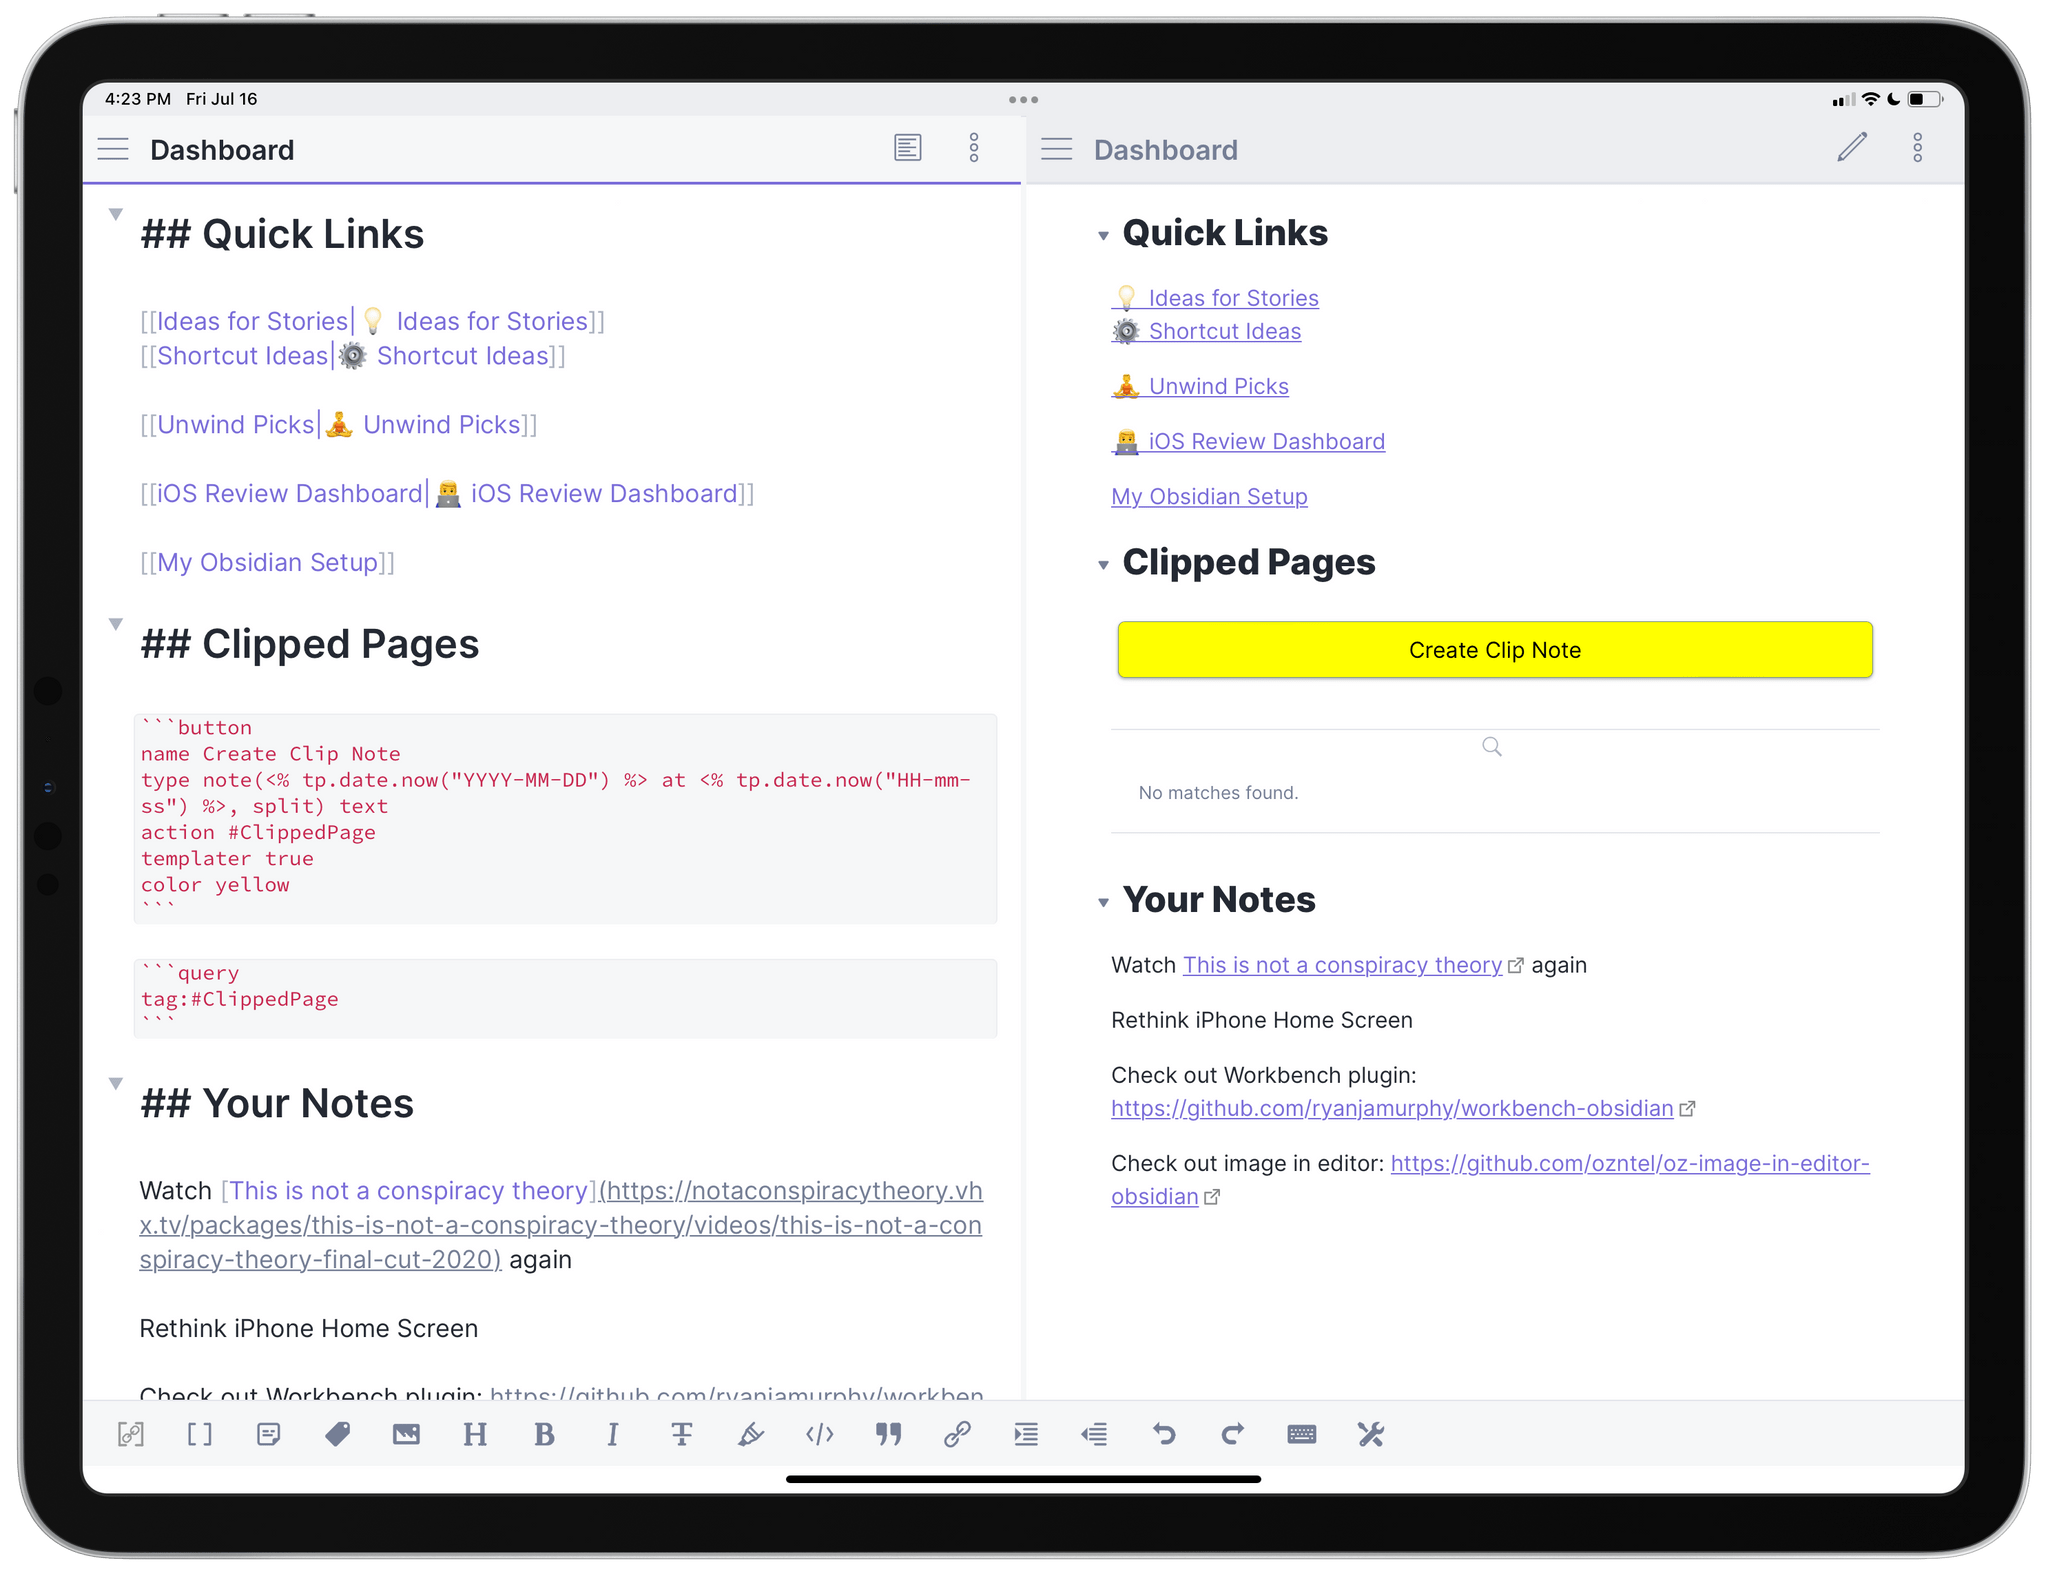
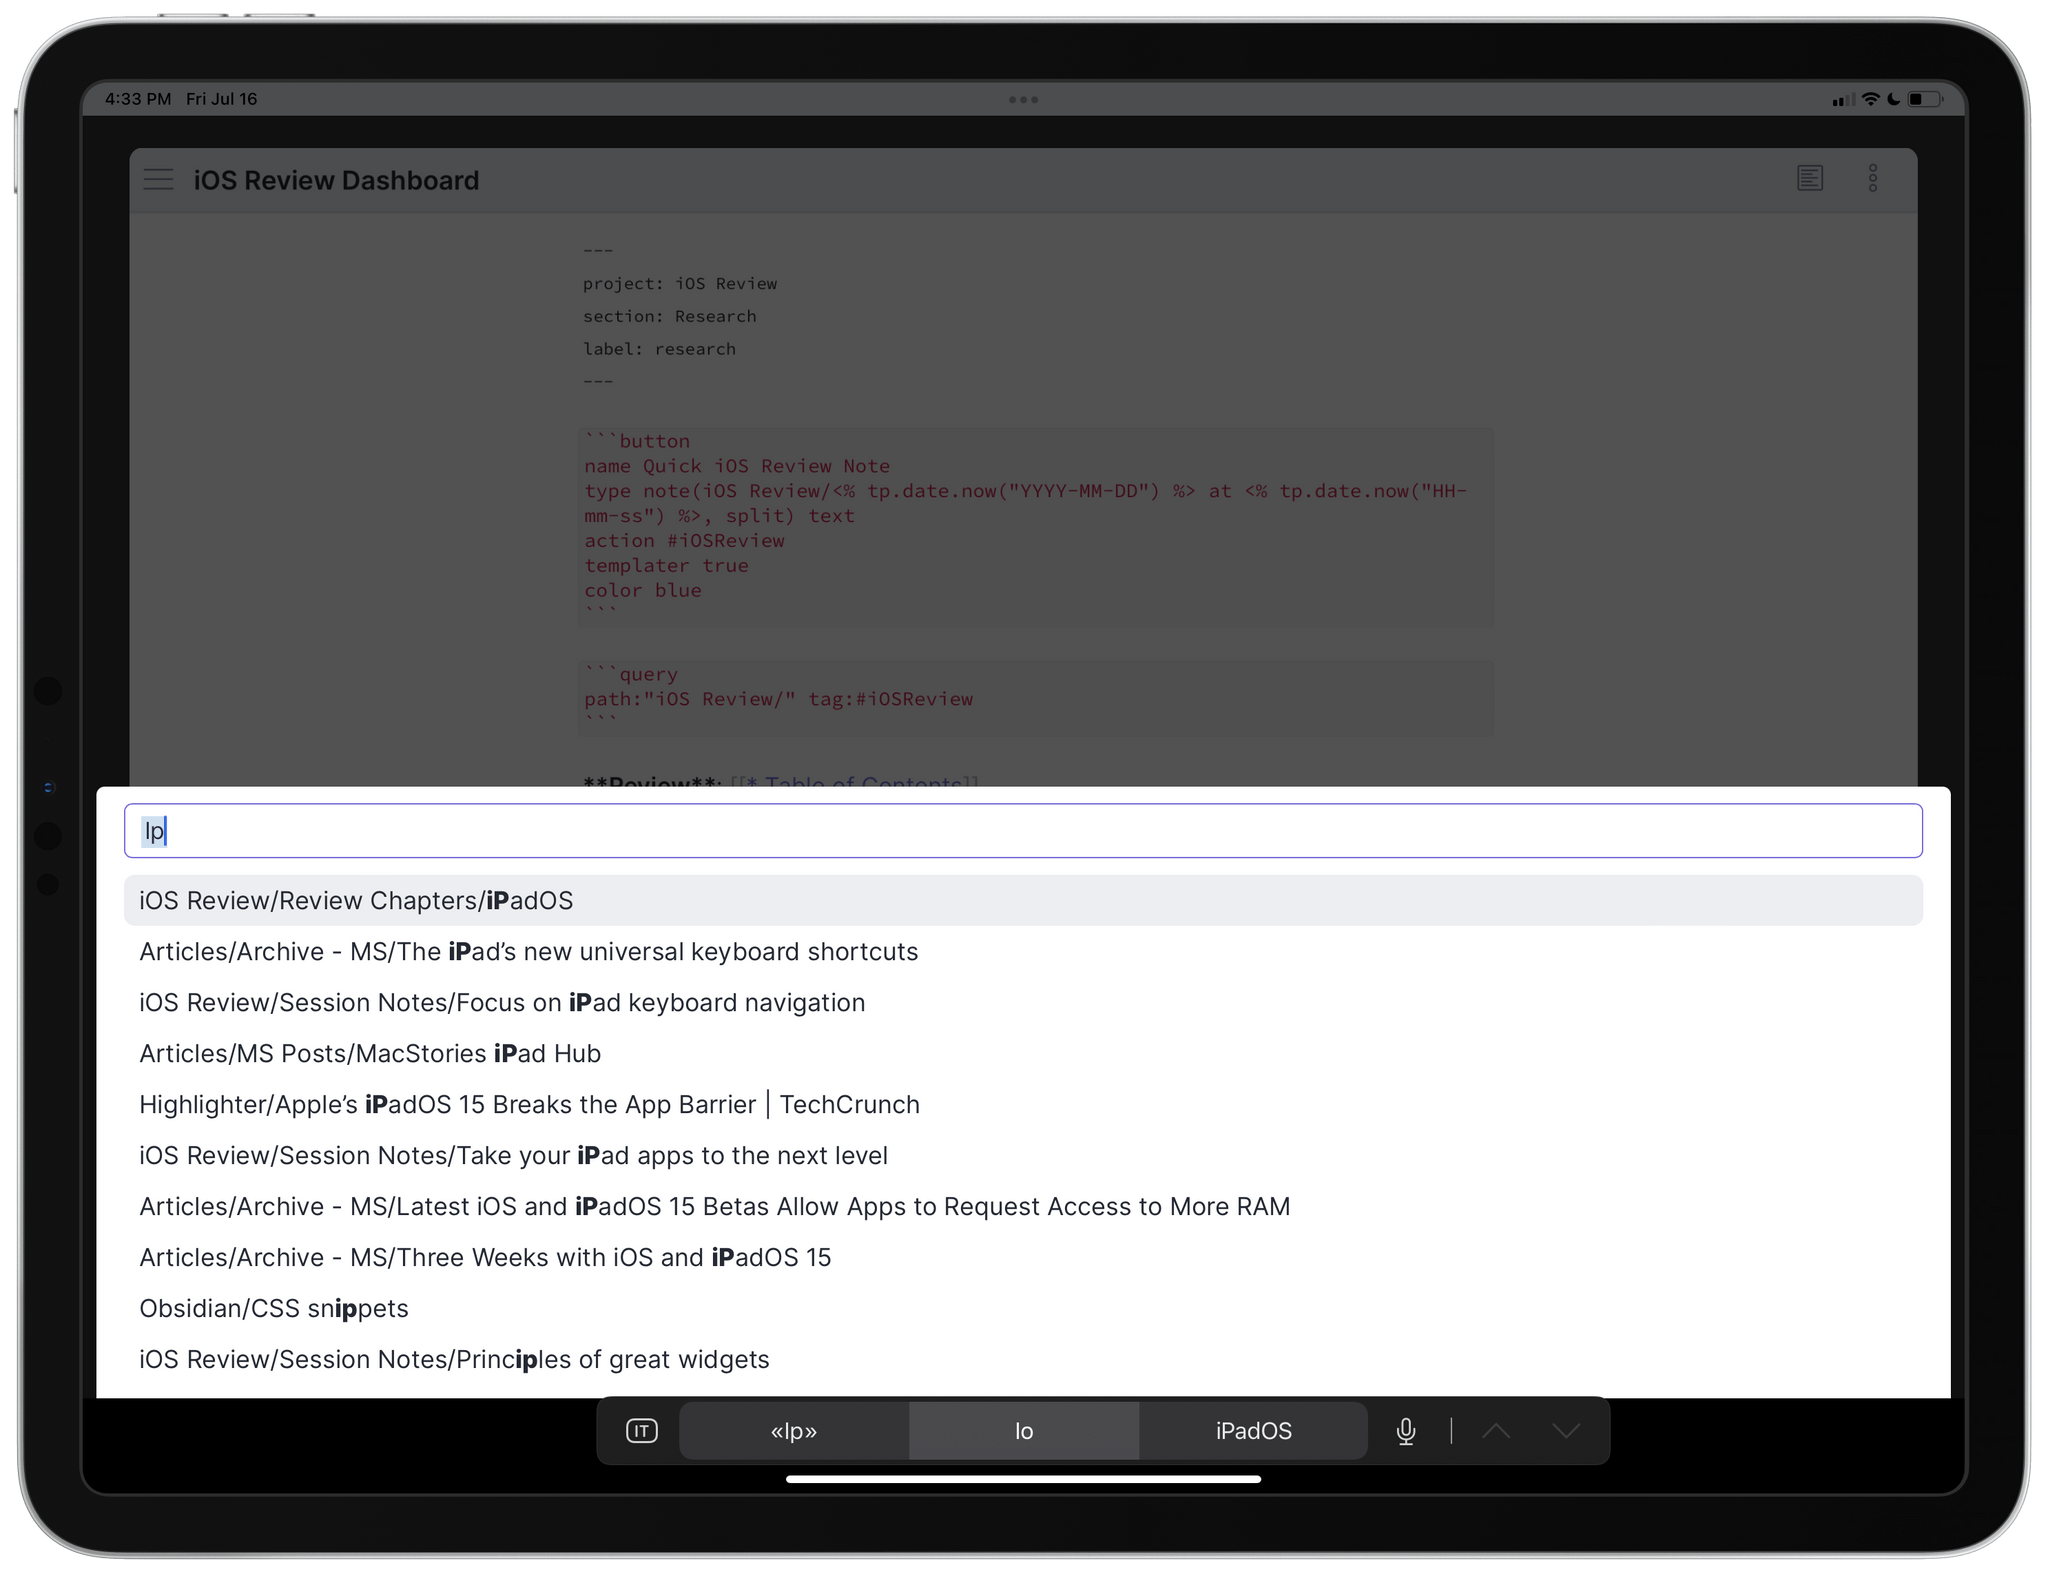
Quick switcher. In my opinion, this is one of Obsidian’s best features and one of the many reasons why I’m struggling with other note-taking apps, including Apple’s own Notes app, now that I’m used to it. The quick switcher lets you, well, quickly switch between files by just typing a few letters of their file names with support for fuzzy search. It’s incredibly fast – especially if you combine it with a keyboard shortcut (mine is ⌘O) – and it makes navigation across multiple documents in Obsidian ridiculously easy. With fuzzy search, I can type ‘dsh’ and the switcher will find my ‘Dashboard’ note. This is an absolute must-have.
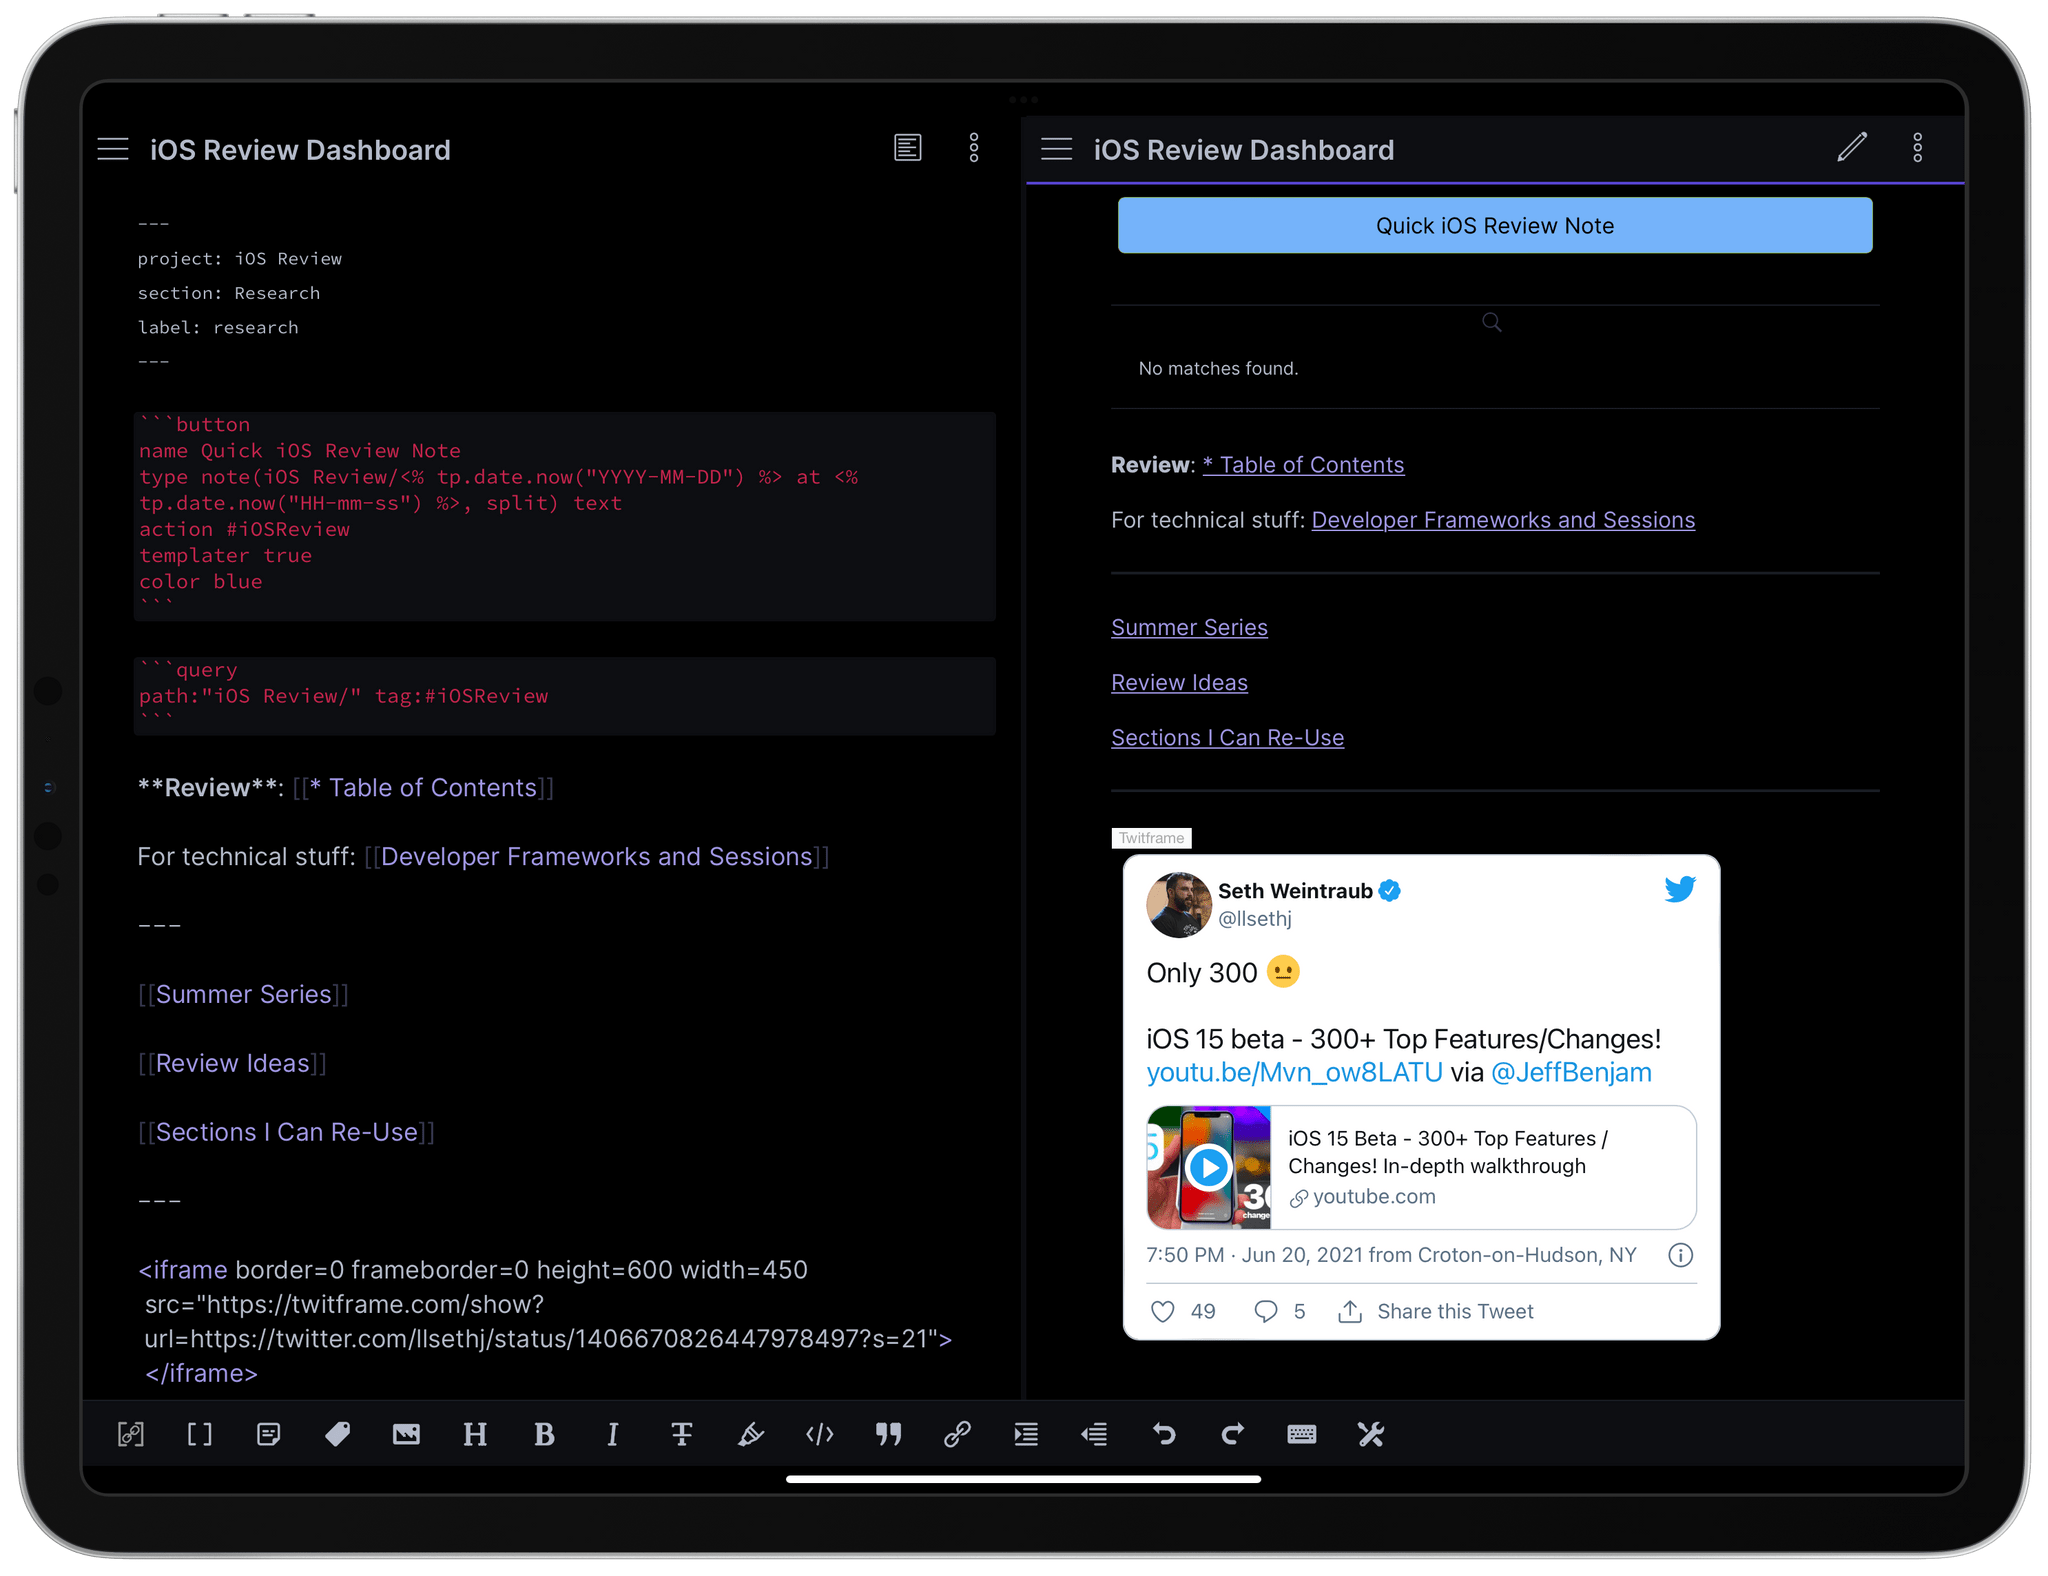
Backlinks. In Obsidian, you can link to any other note in your vault by typing double square brackets and searching for the note you want to link. You may have seen this feature being called ‘wiki-style links’ in other apps, and it’s nothing new. What’s great about the implementation in Obsidian, however, is that the app creates an underlying map of all the notes that are linking to each other. With backlinks, you can see which notes are linking to the note you’re currently editing, which can be useful in large research or writing projects where keeping track of these references can be essential. For instance, when I took notes for WWDC sessions, I linked each session note to a chapter of my iOS review; now when I open the chapter file to start writing it, I can see which session notes are linking to it, right-click them, and open them in new panes next to the chapter so I have a reference right there. I gave the backlinks plugin the ⌘⇧B hotkey, and it’s one of the Obsidian features I use the most.

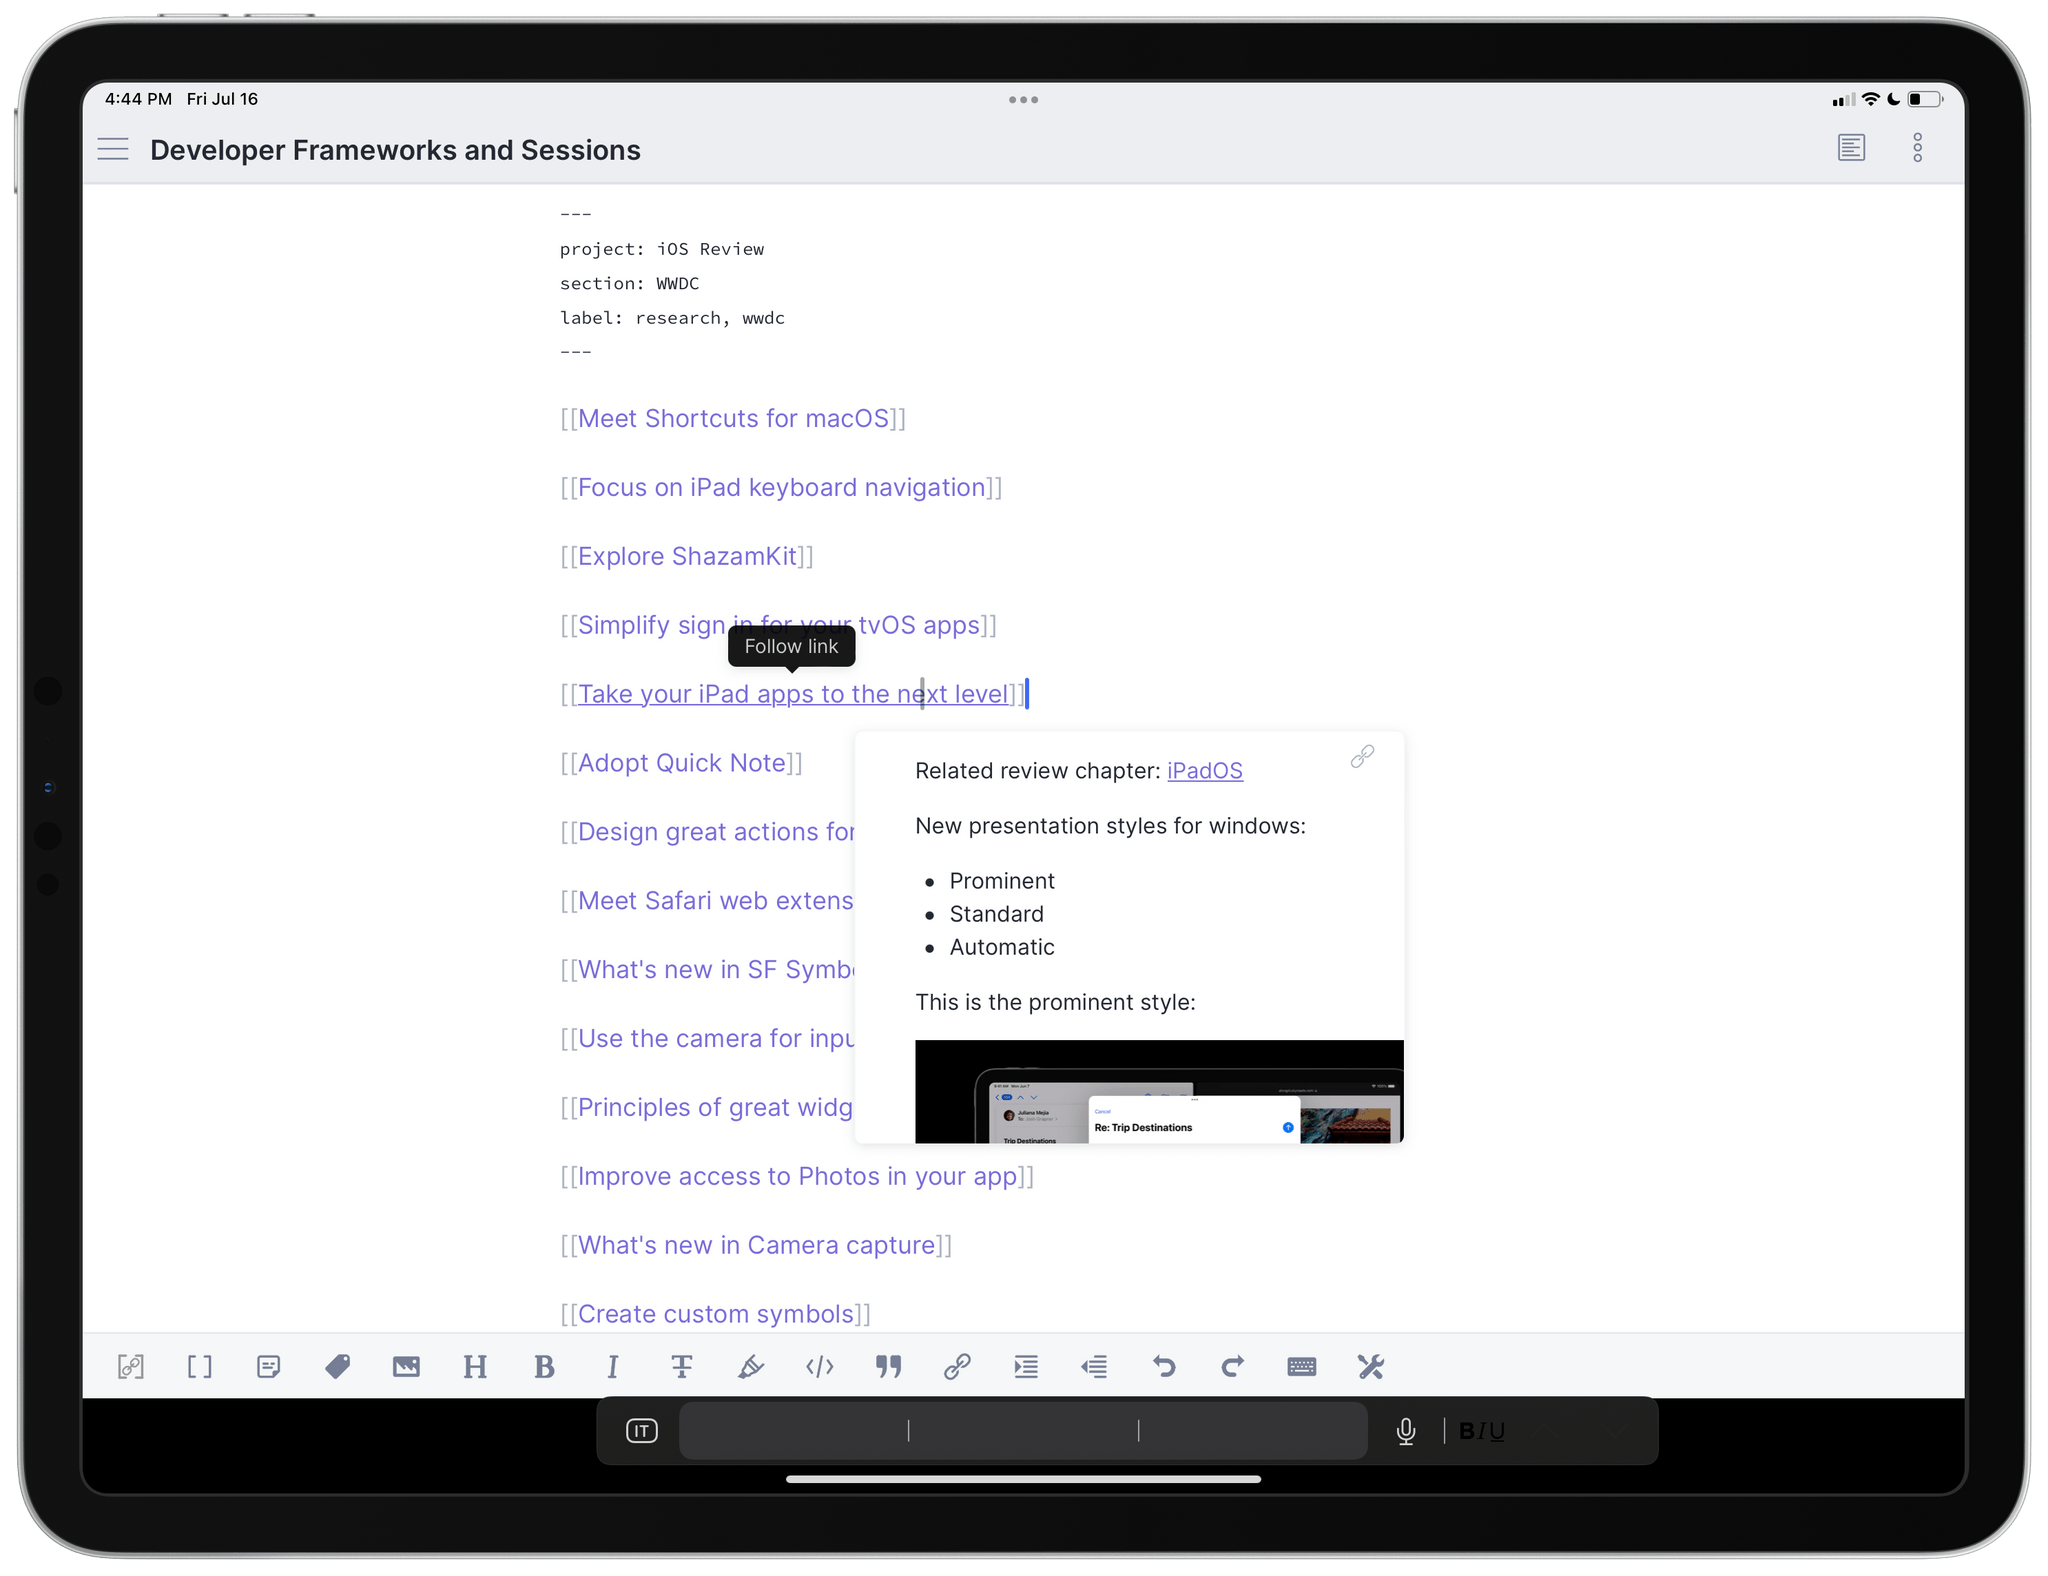
Page preview. You may have seen this feature in Craft before: with the page preview plugin, when you hover with the pointer over a [[Linked Note]] and hold the ⌘ key, you’ll see a floating popup with a preview of the linked item. I find this a great addition for those times when I don’t fully remember what a linked note is about.
Command palette. One of the (many) unique features of Obsidian is the fact that each plugin, in addition to visual modifications, can also install one or multiple commands you can search and trigger with the keyboard. For instance, the backlinks core plugin I covered above installs two commands – ‘Show backlinks pane’ and ‘Open backlinks for the current file’. When you hear people like me say that they’ve assigned keyboard shortcuts to features in Obsidian, it’s because those features are commands you can find in two places: under Options ⇾ Hotkeys in settings, and in the command palette.
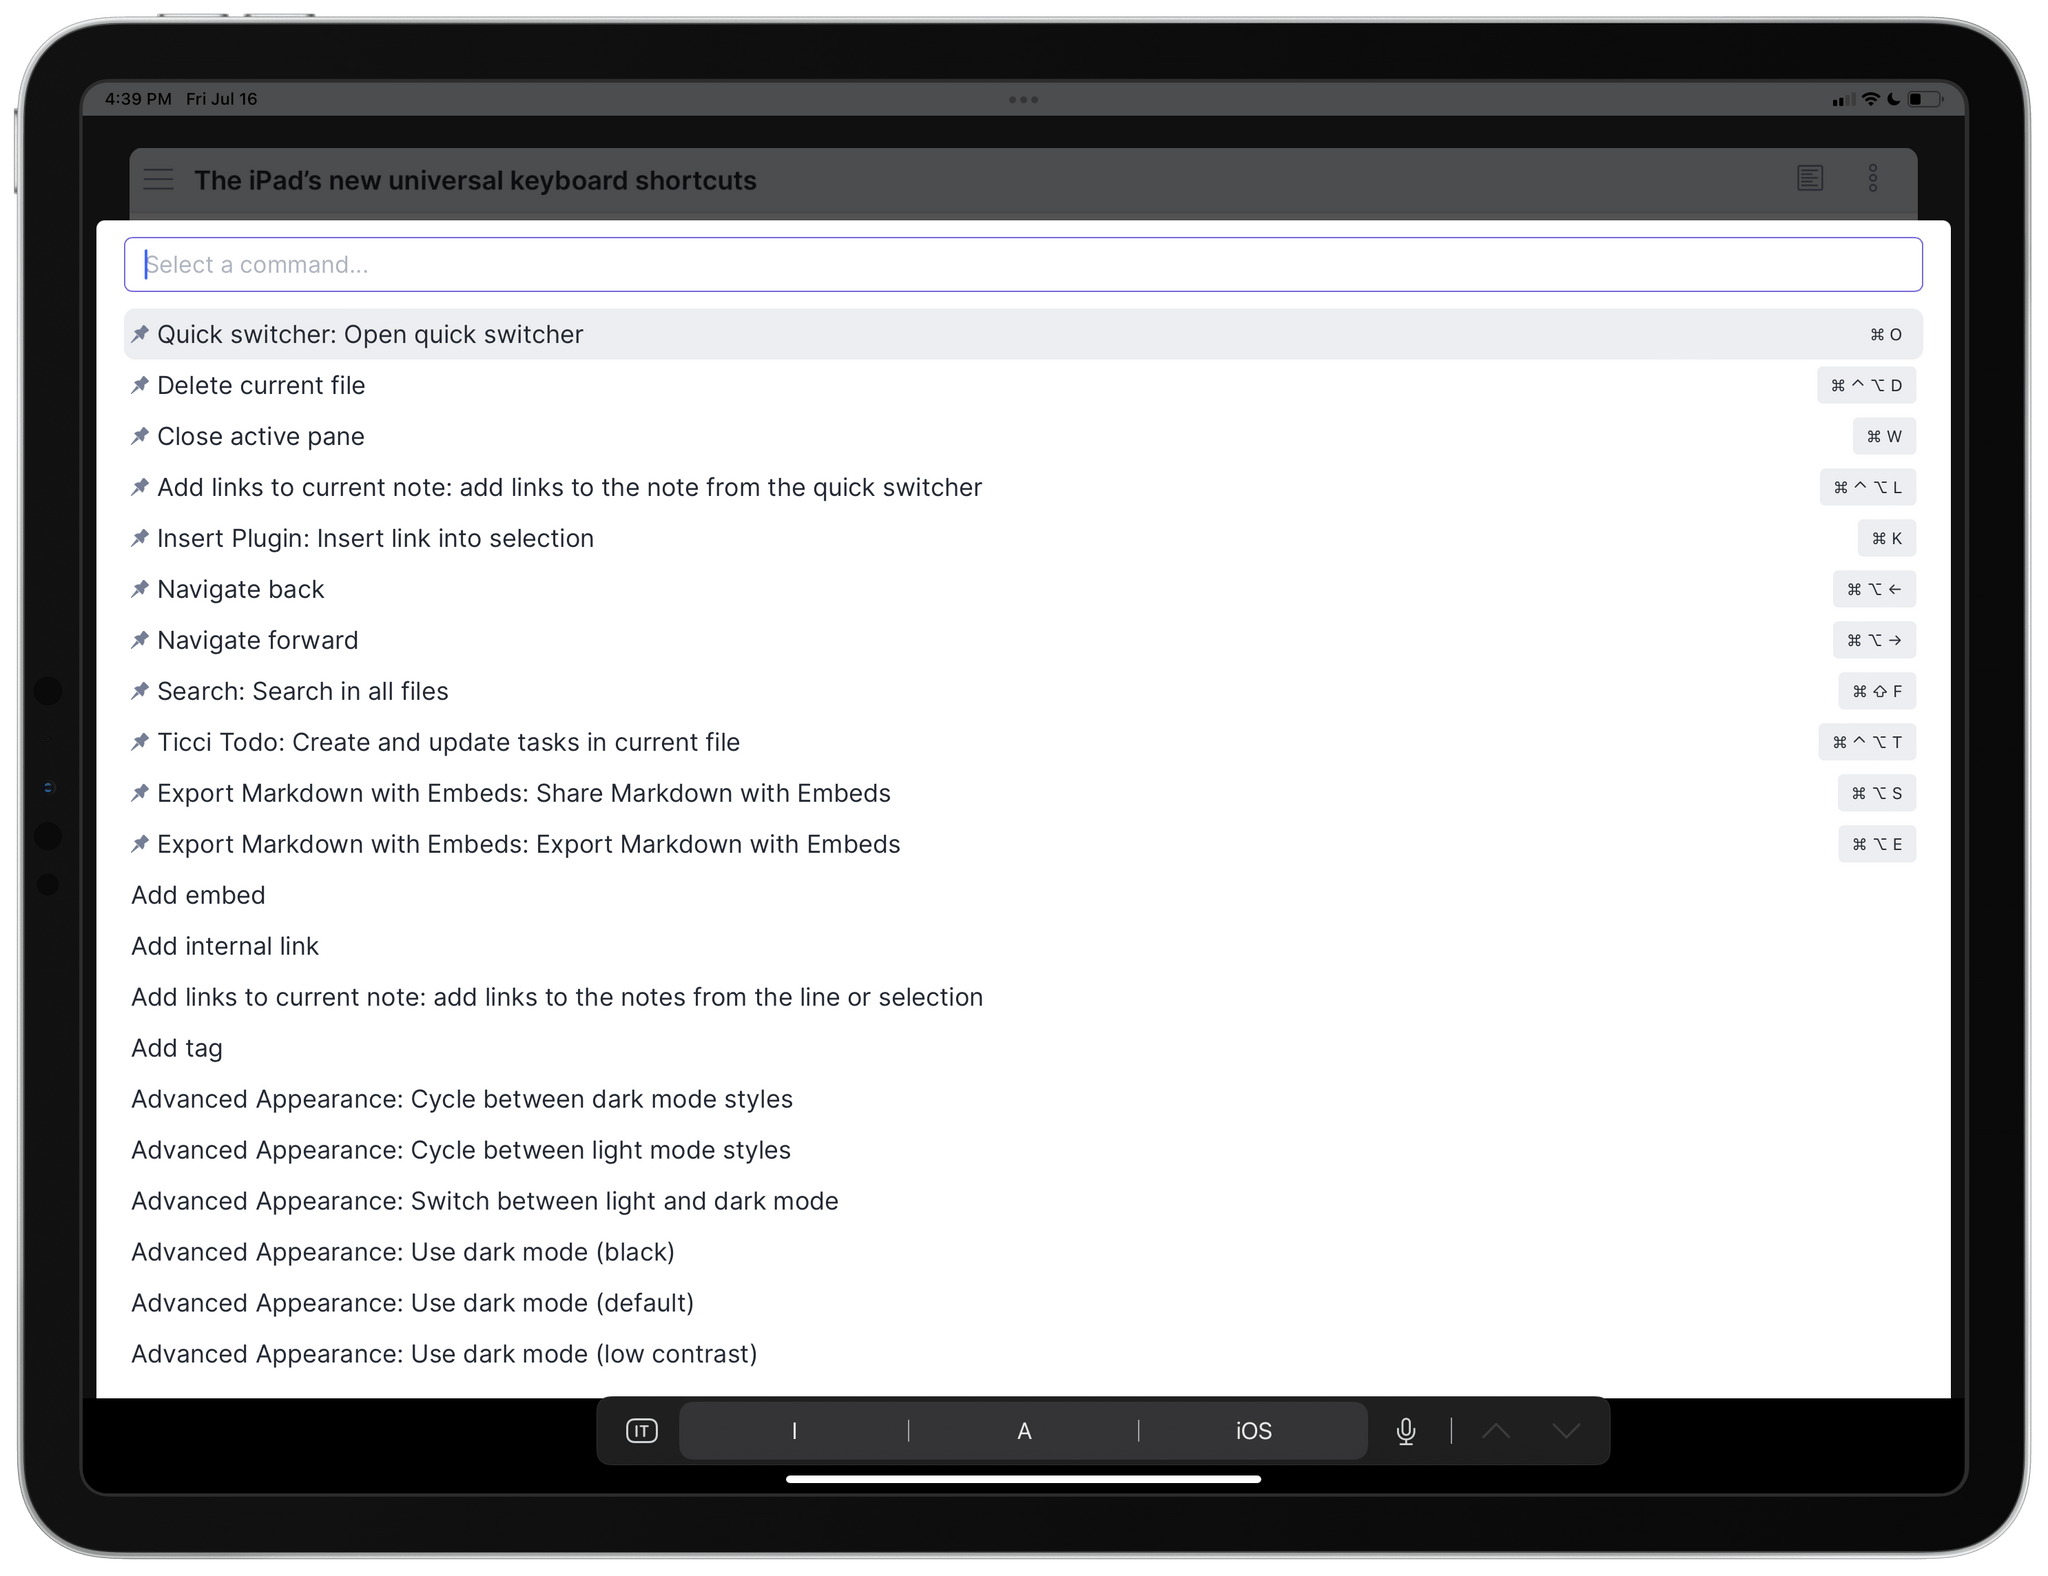
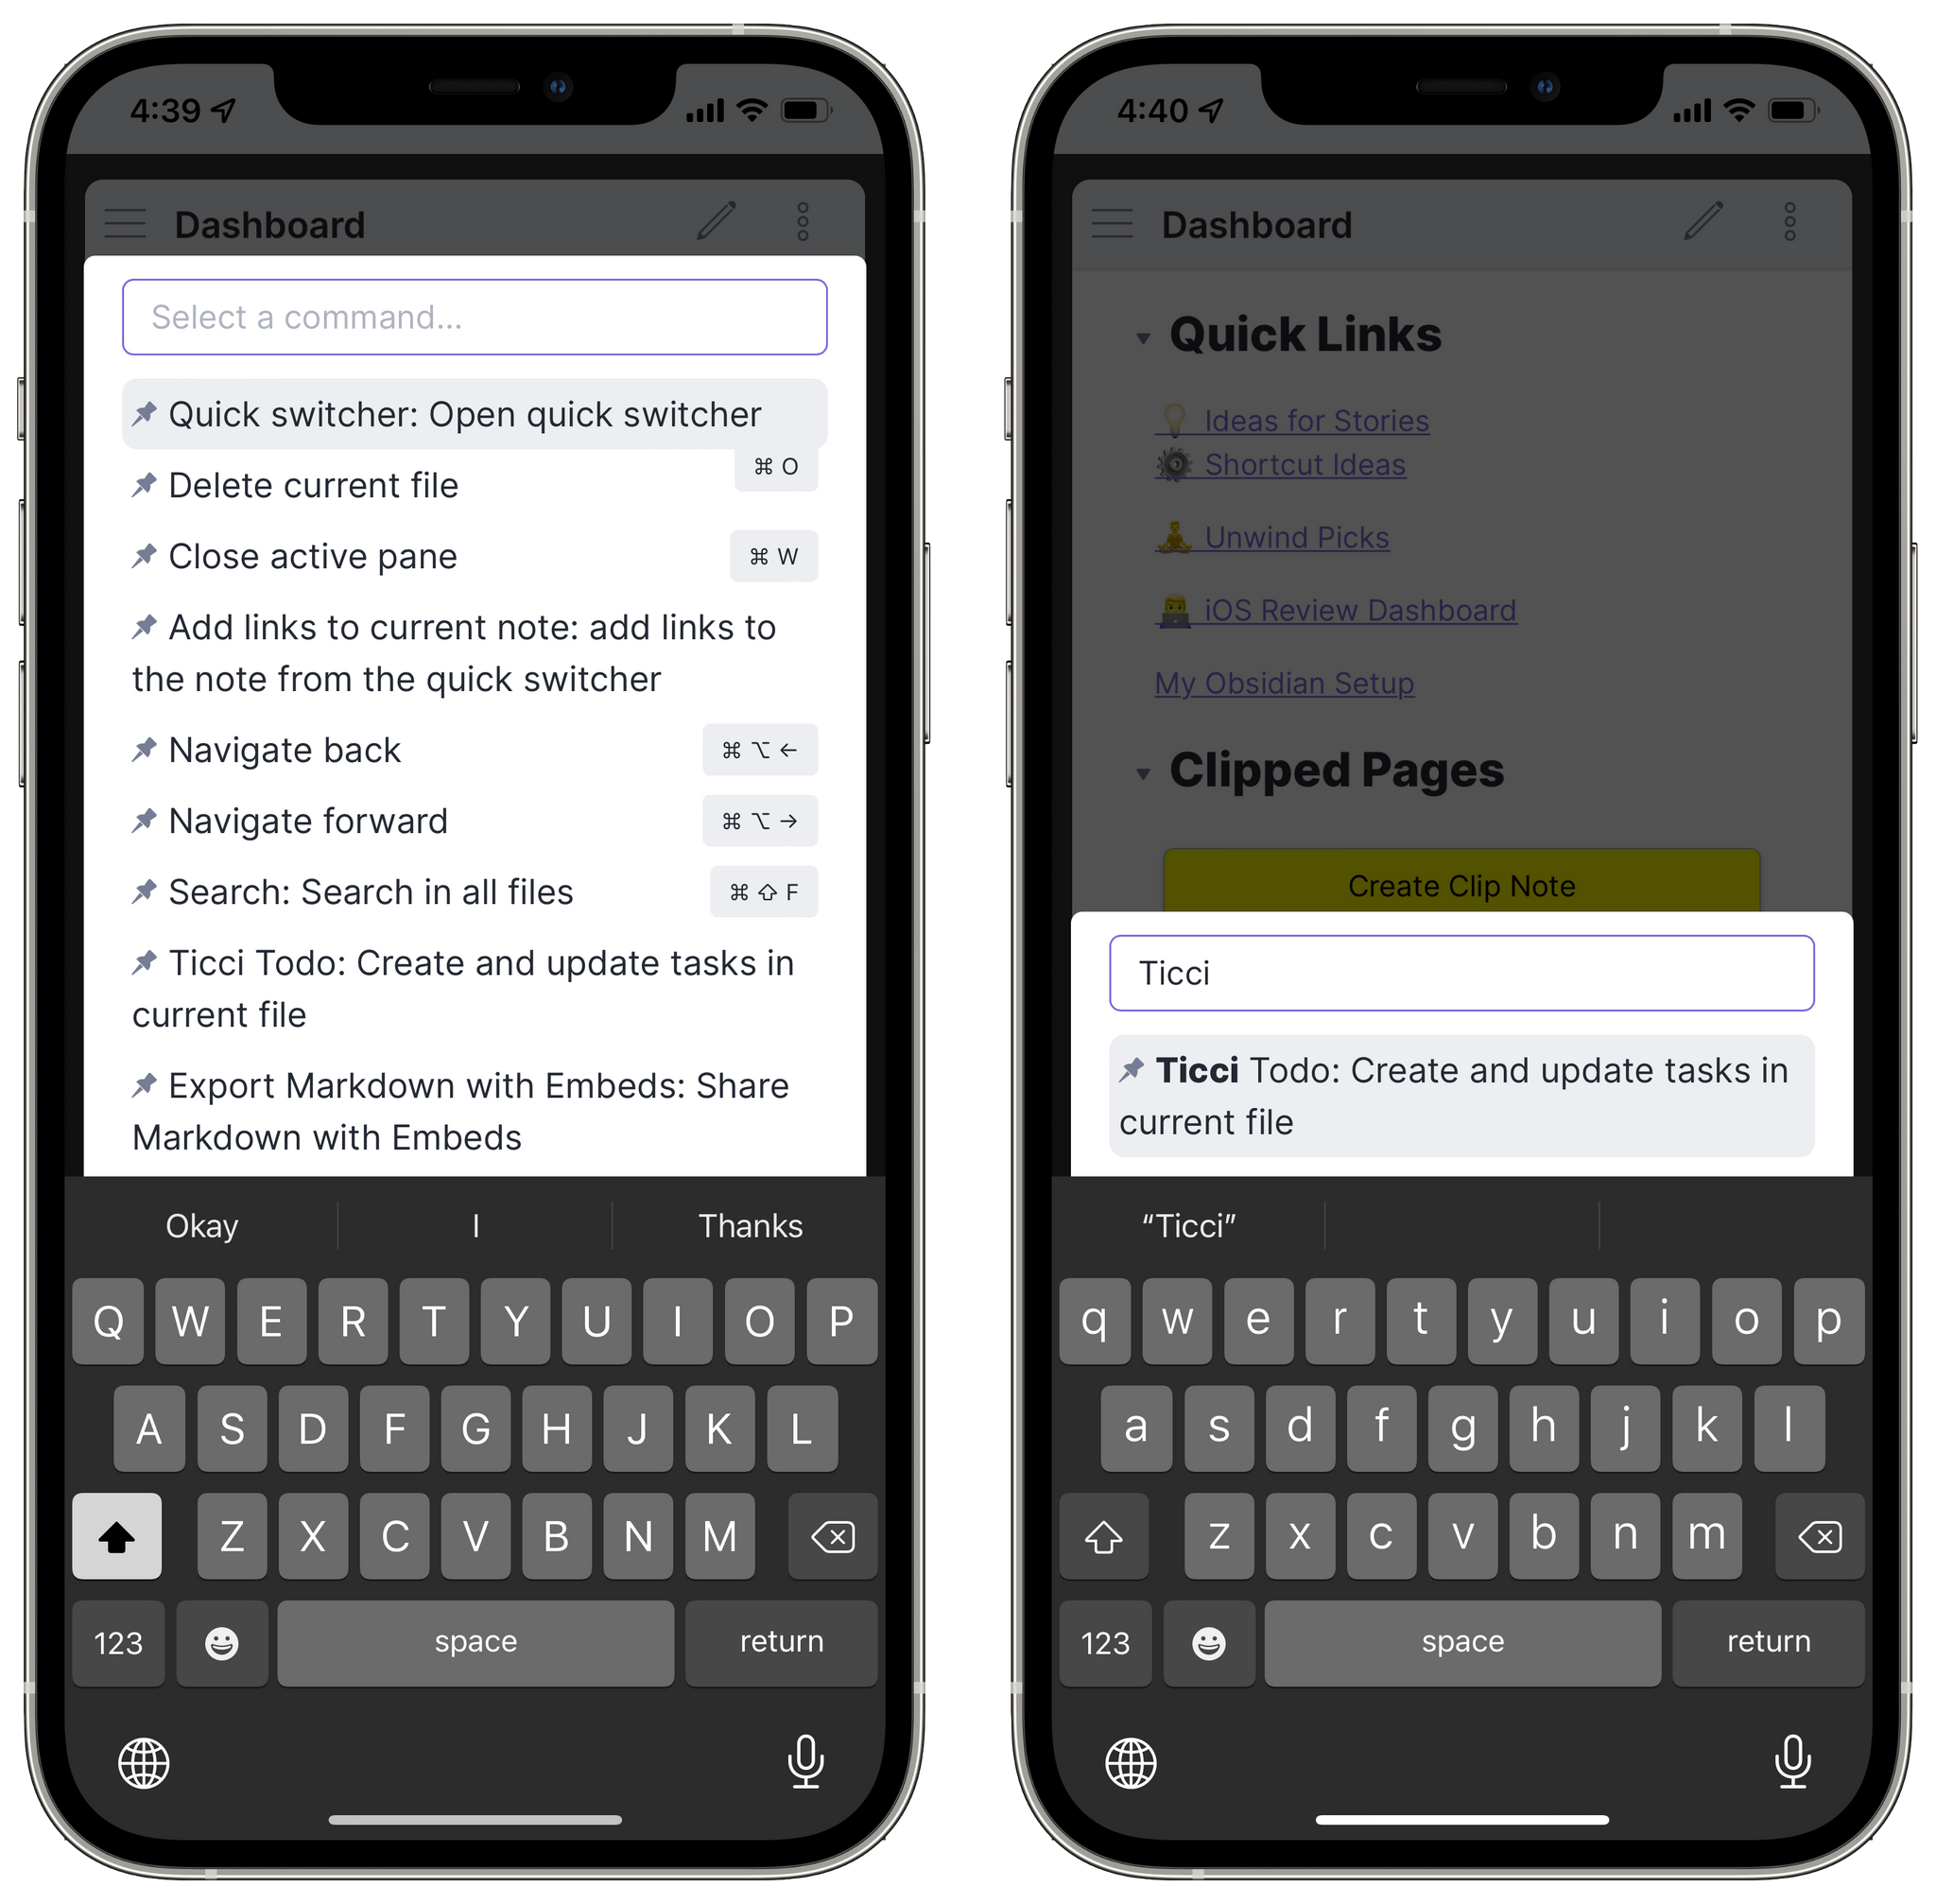
The command palette is the quick switcher, but for commands: it lets you search for any available command by name with fuzzy search, and when you’ve found the one you’re looking for, you can press Enter to trigger it. I assigned ⌘P to the palette, which I use dozens of times each day to activate different features of Obsidian. The command palette shows you hotkeys you’ve assigned to commands, and, even better, lets you pin frequently used commands to the top of the list for fast access. You can pin any command by visiting Options ⇾ Command palette and searching for any command available in the app. I think pinned commands are especially handy on iPhone, where the lack of a hardware keyboard makes searching for commands by name slower.
Open in default app. The ability to share the current document via the share sheet in Obsidian is itself a core plugin called ‘Open in default app’. Once triggered (my hotkey for it is ⌘D), the plugin will share the current note as a Markdown file with any compatible extension in the share sheet, including contact suggestions for iMessage and other communication apps.
As I mentioned above, these are just highlights from the list of core plugins; there are many more core features of the app that can be optionally enabled/disabled such as a tag pane, daily notes and Zettelkasten prefixes, a word count, an outline sidebar, and more. I don’t use all of them, and there are others I plan to cover more in depth in future installments of the series. Overall, however, I find this modular approach (unsurprisingly) fascinating since it allows different users to build deeply different setups in the same app, which is something I’ve never seen done before in any other Markdown text editor for iPhone and iPad.
Workspaces for Notes
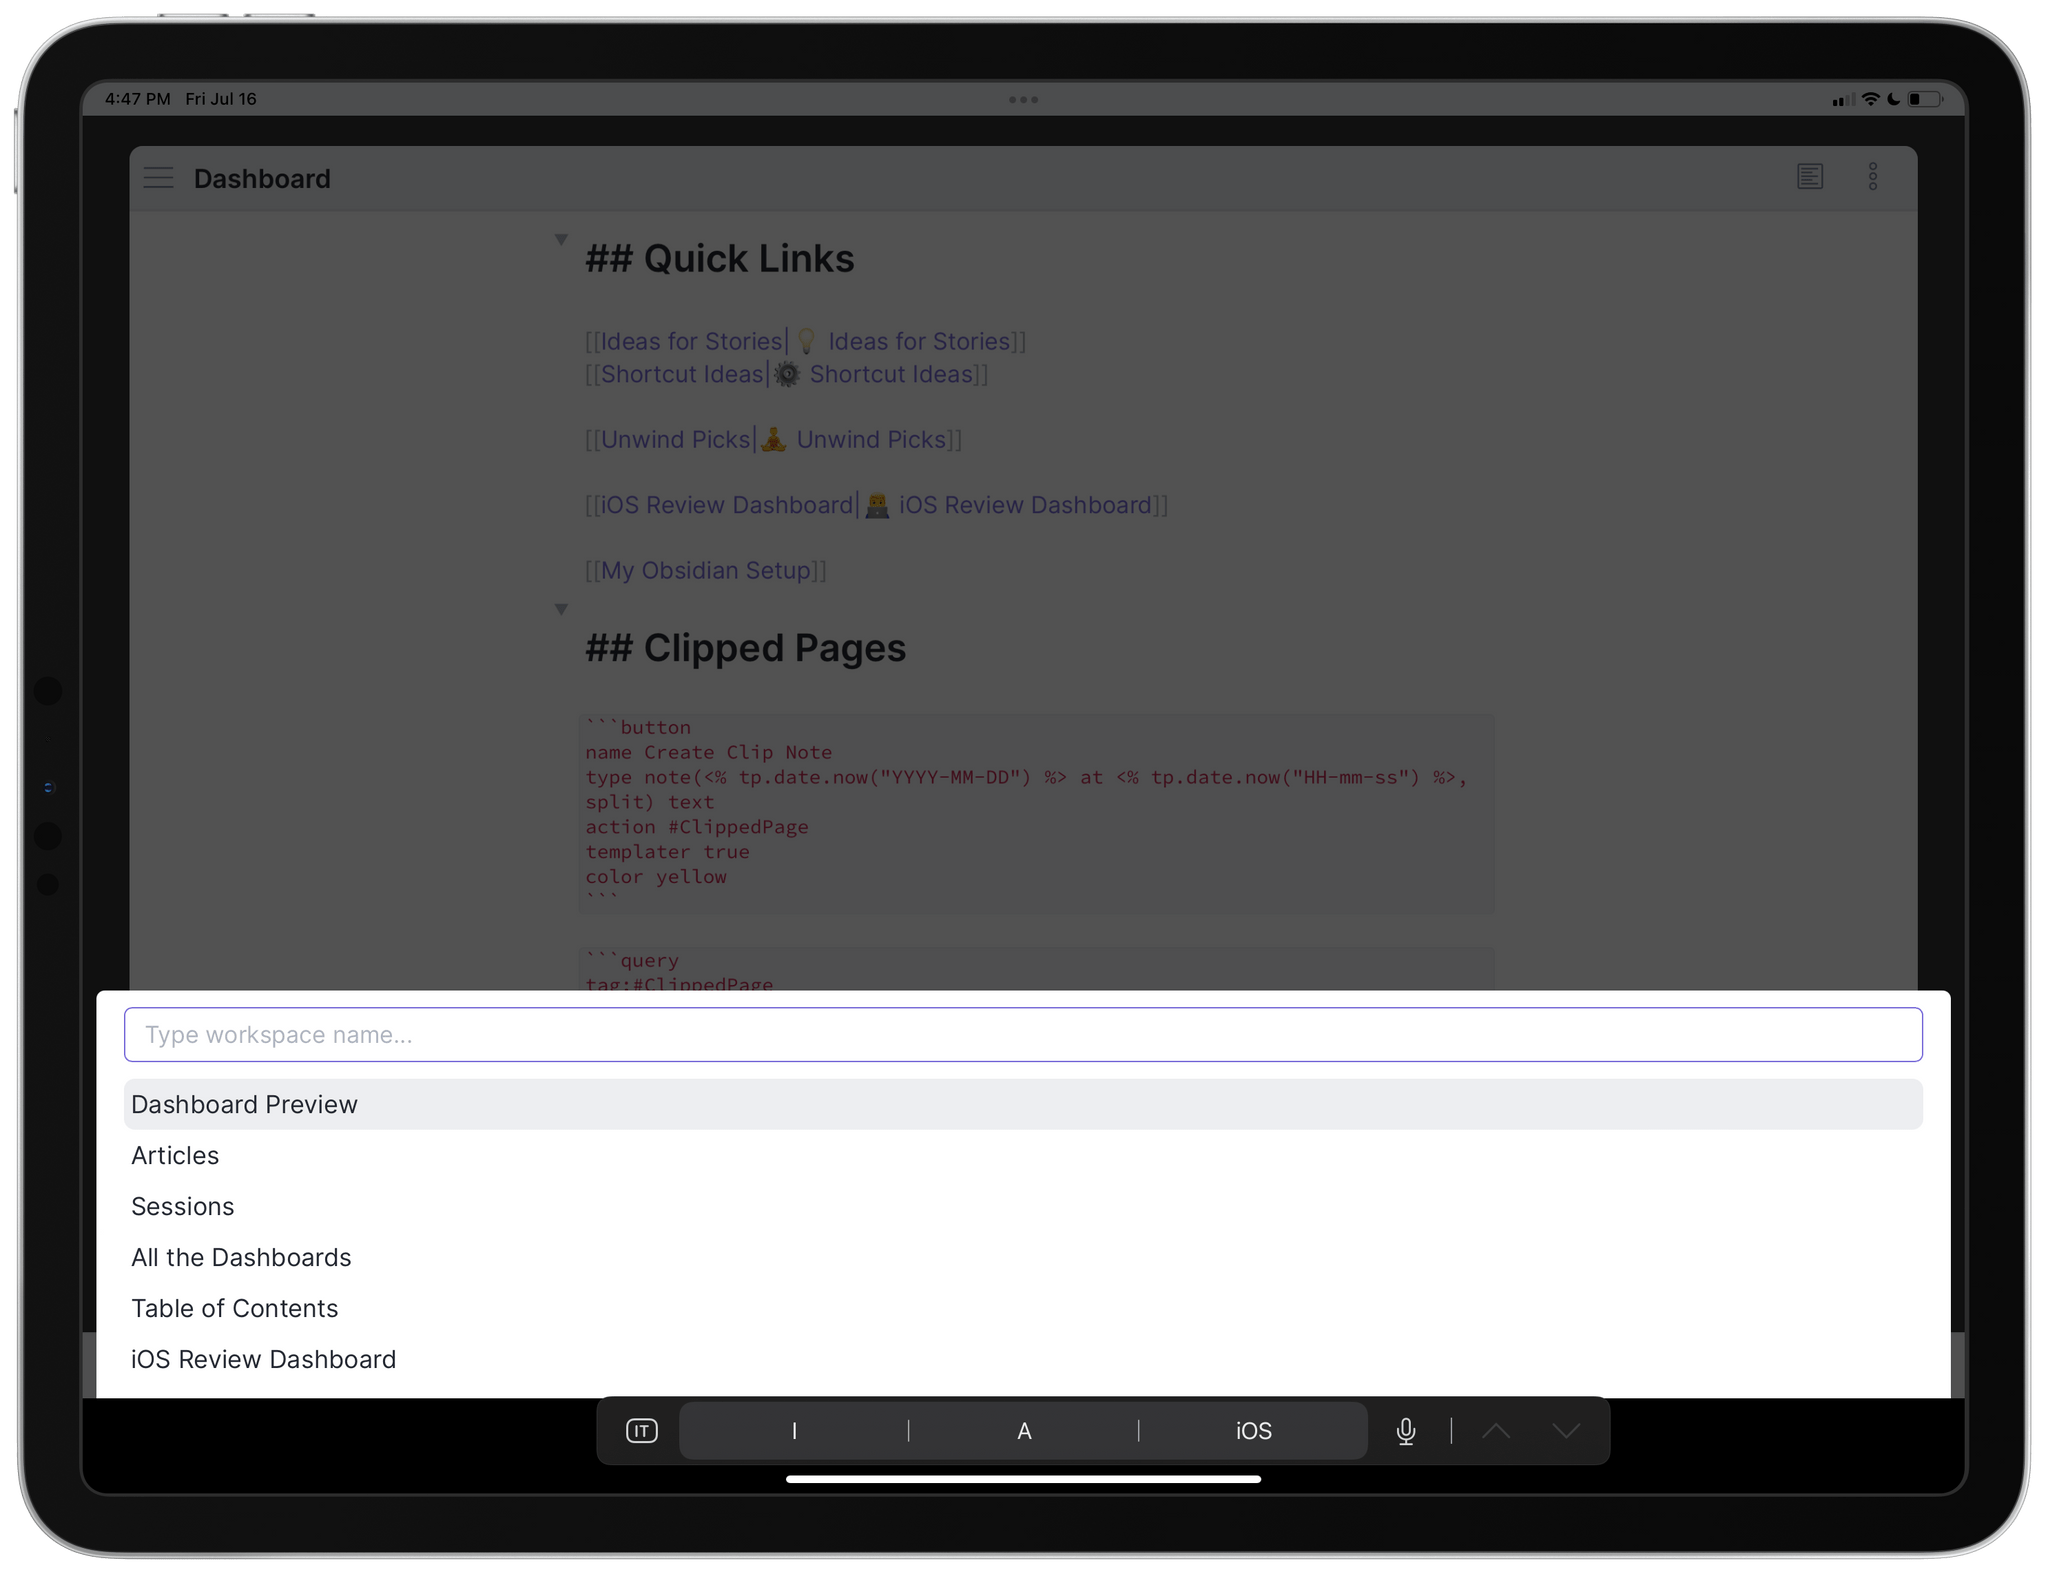
There’s one core plugin in particular I want to cover today since it has had a profound impact on how I navigate Obsidian and switch between different modes in the app: workspaces. With the workspaces core plugin, you can save the current layout in Obsidian – the files, panes, and sidebars you have open – and reload it at any point, restoring it exactly as you left it. This is not the “bookmarking” functionality you may have seen in other text editors that let you reopen frequently used files with a single keystroke: what I mean is that you can create a workspace displaying four different notes at once, each set to editor or preview mode, save it, then instantly recreate it whenever you want.
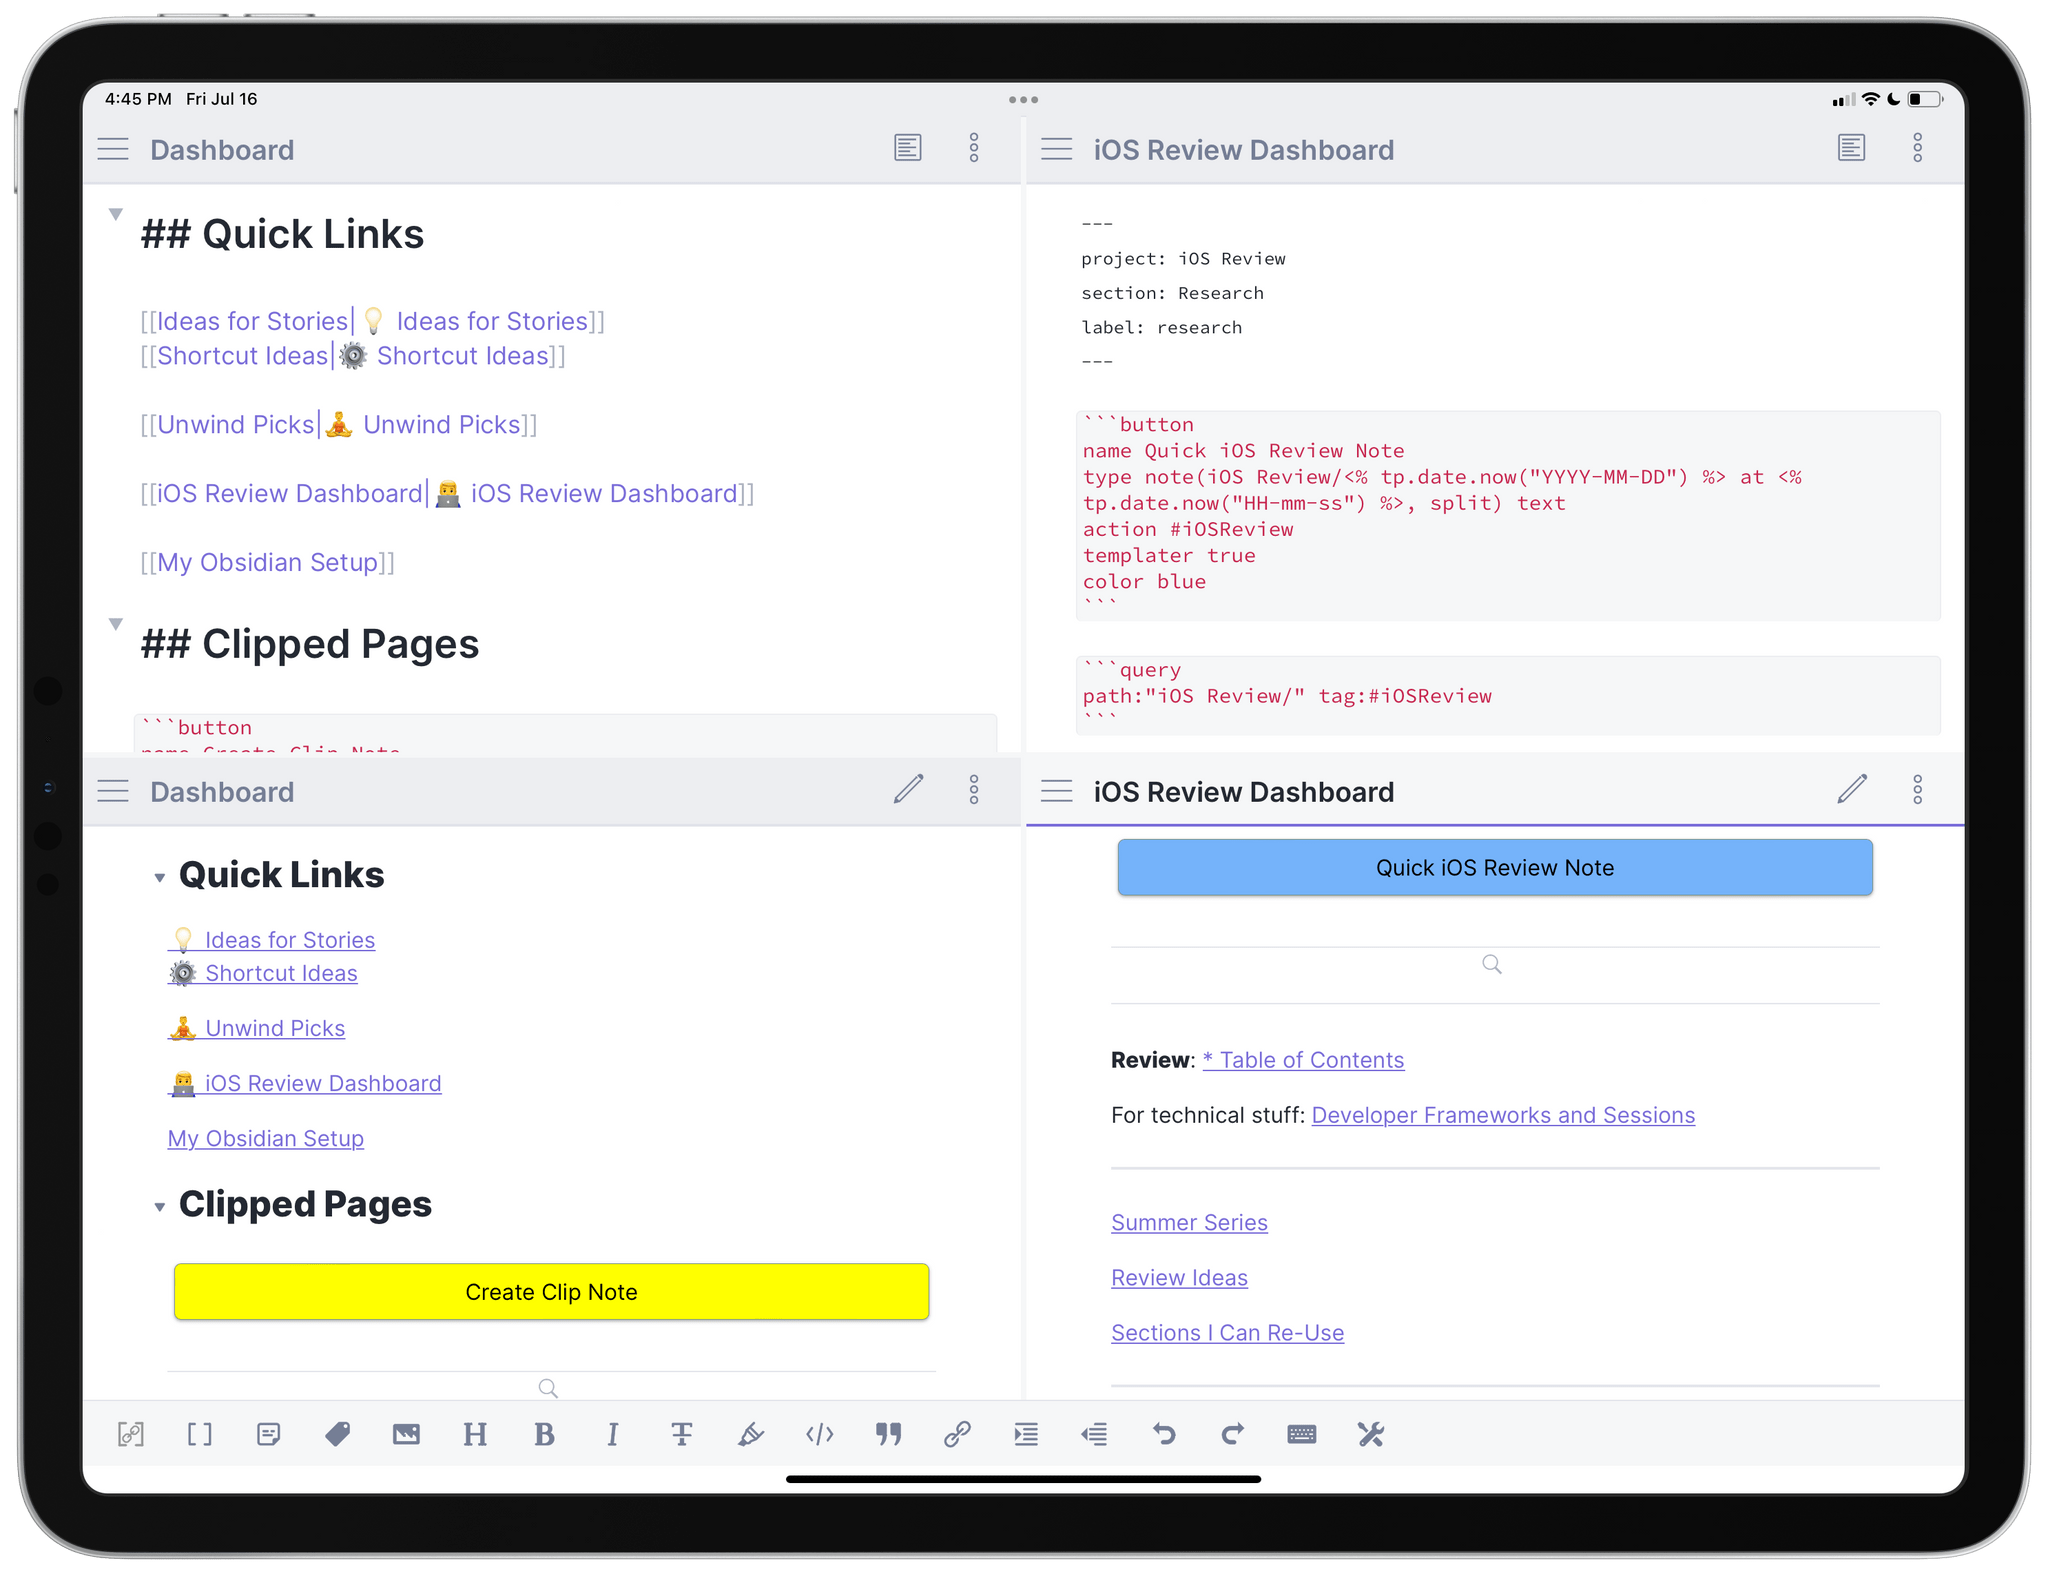
The ability to create workspaces for specific layouts and combinations of notes has changed how I take notes, organize research material, and write in Obsidian because I can now quickly switch between ‘templates’ without manually opening new panes and sidebars every time. The workspaces plugin installs a command called ‘Manage workspaces’ that lets you save the current layout of the app as a named workspace as well as delete existing workspaces; then, you can use the ‘Load workspace’ command to switch to a previously-created workspace, which will be instantly recreated in the UI.
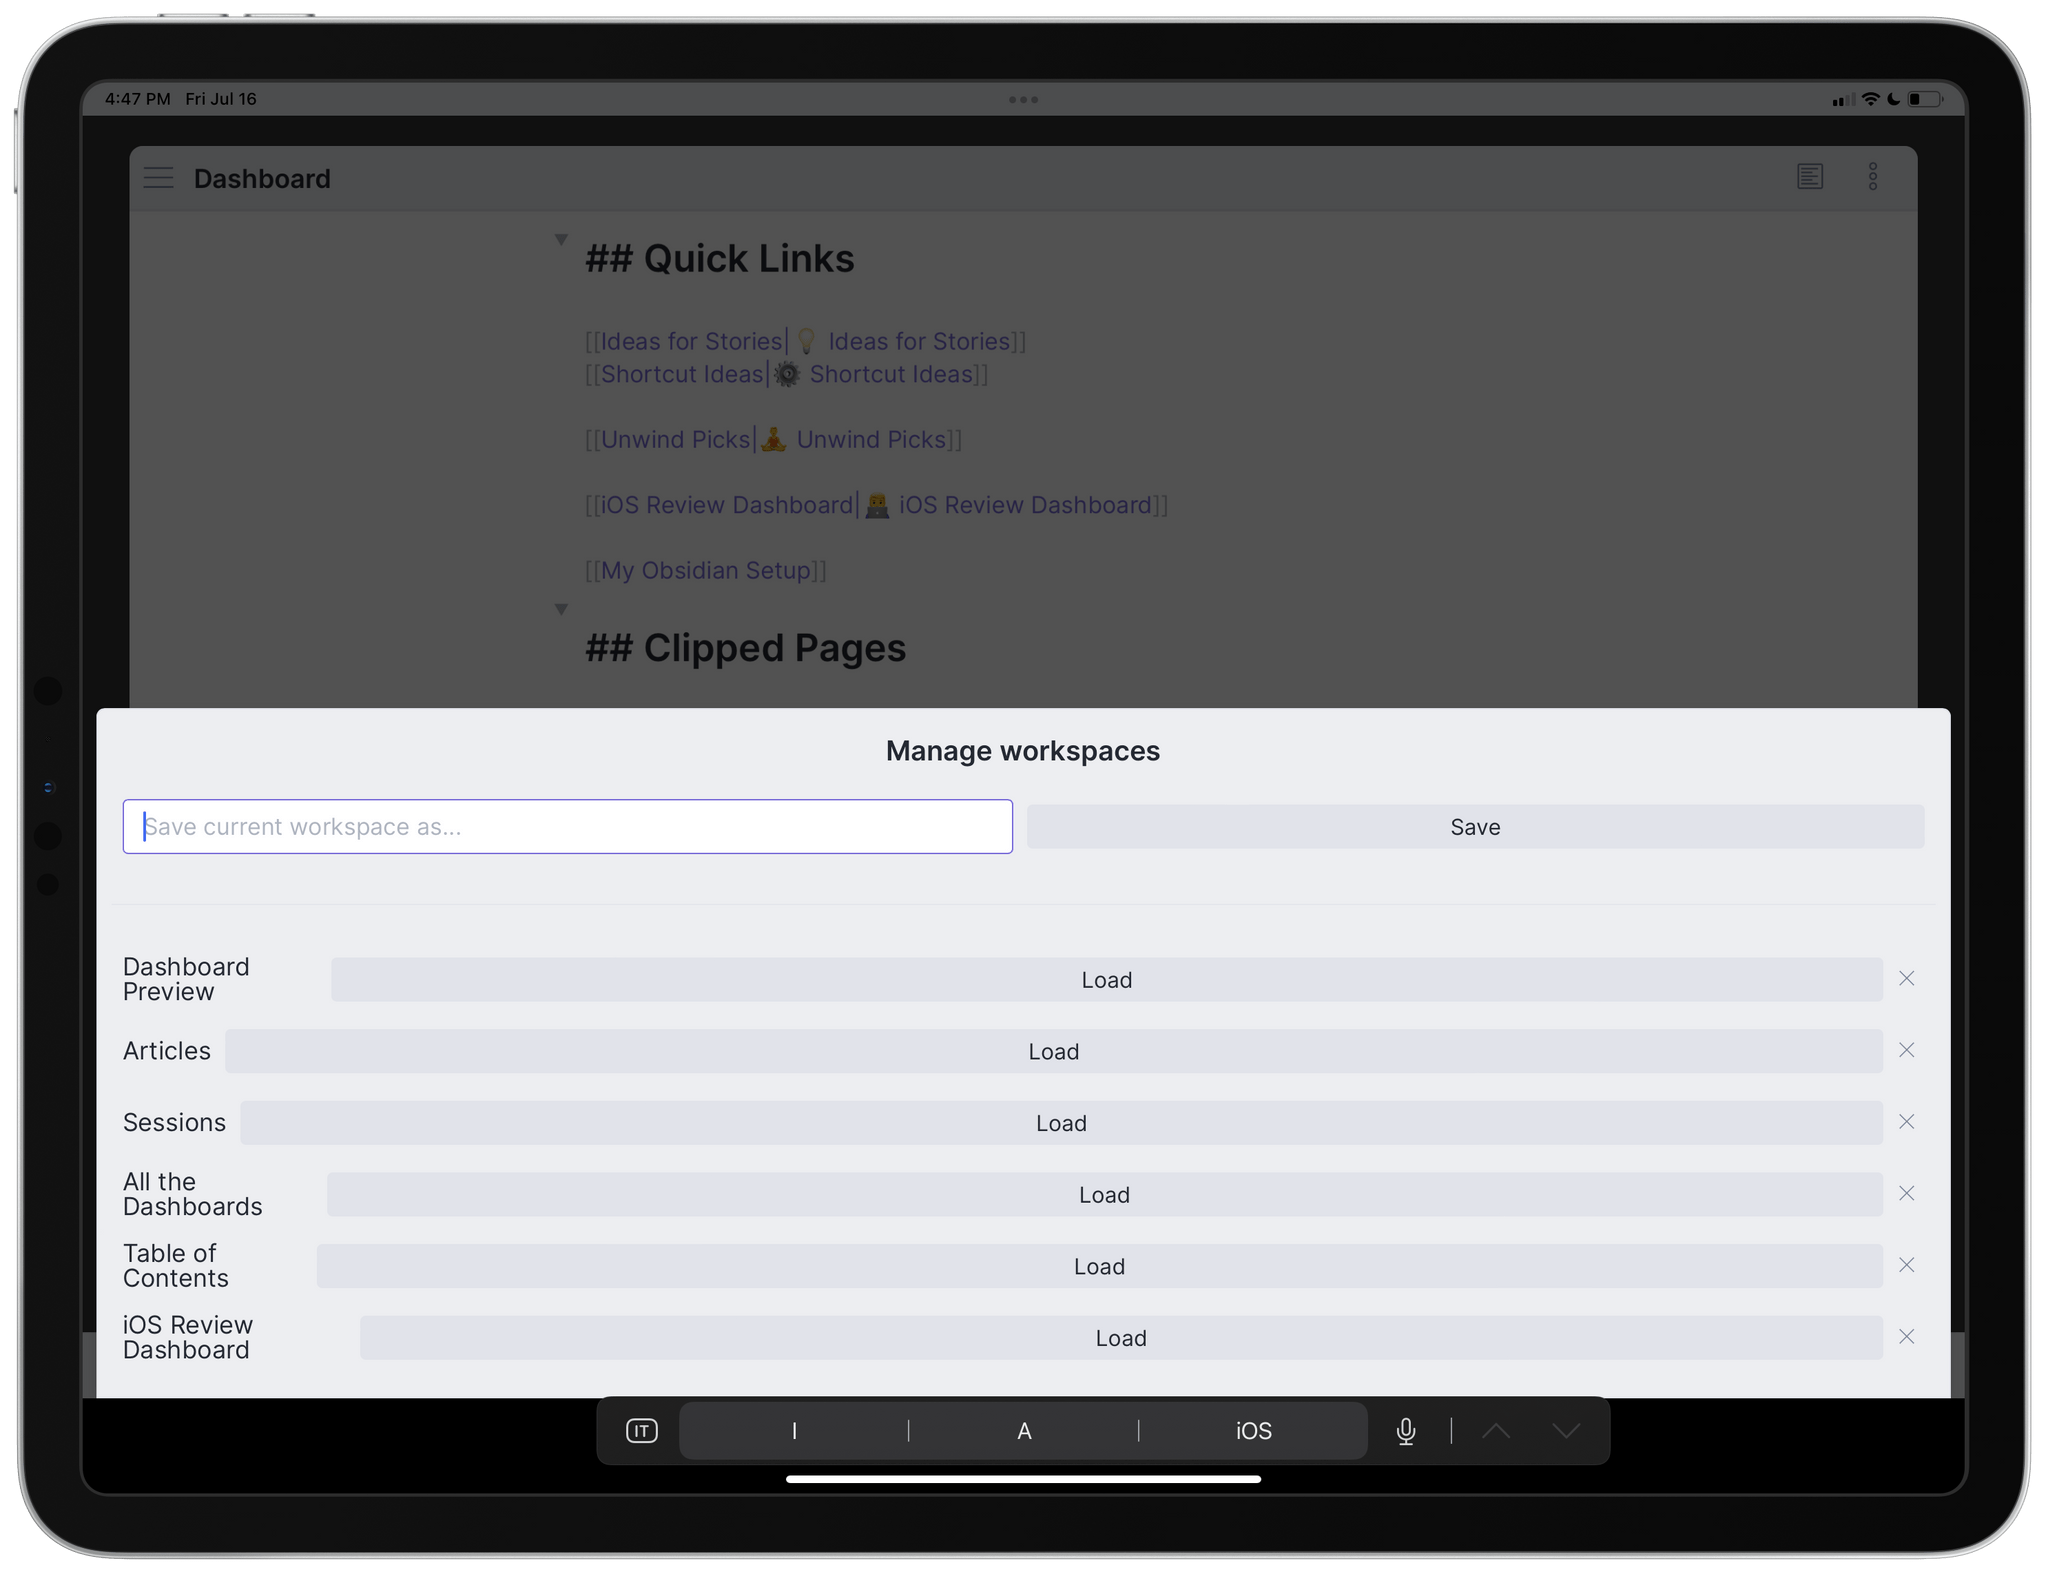
I assigned the ‘Load workspace’ command to the ⌘⌥L shortcut, and it’s become second nature for me at this point to jump between different “modules” of note-taking and writing in Obsidian via this system.
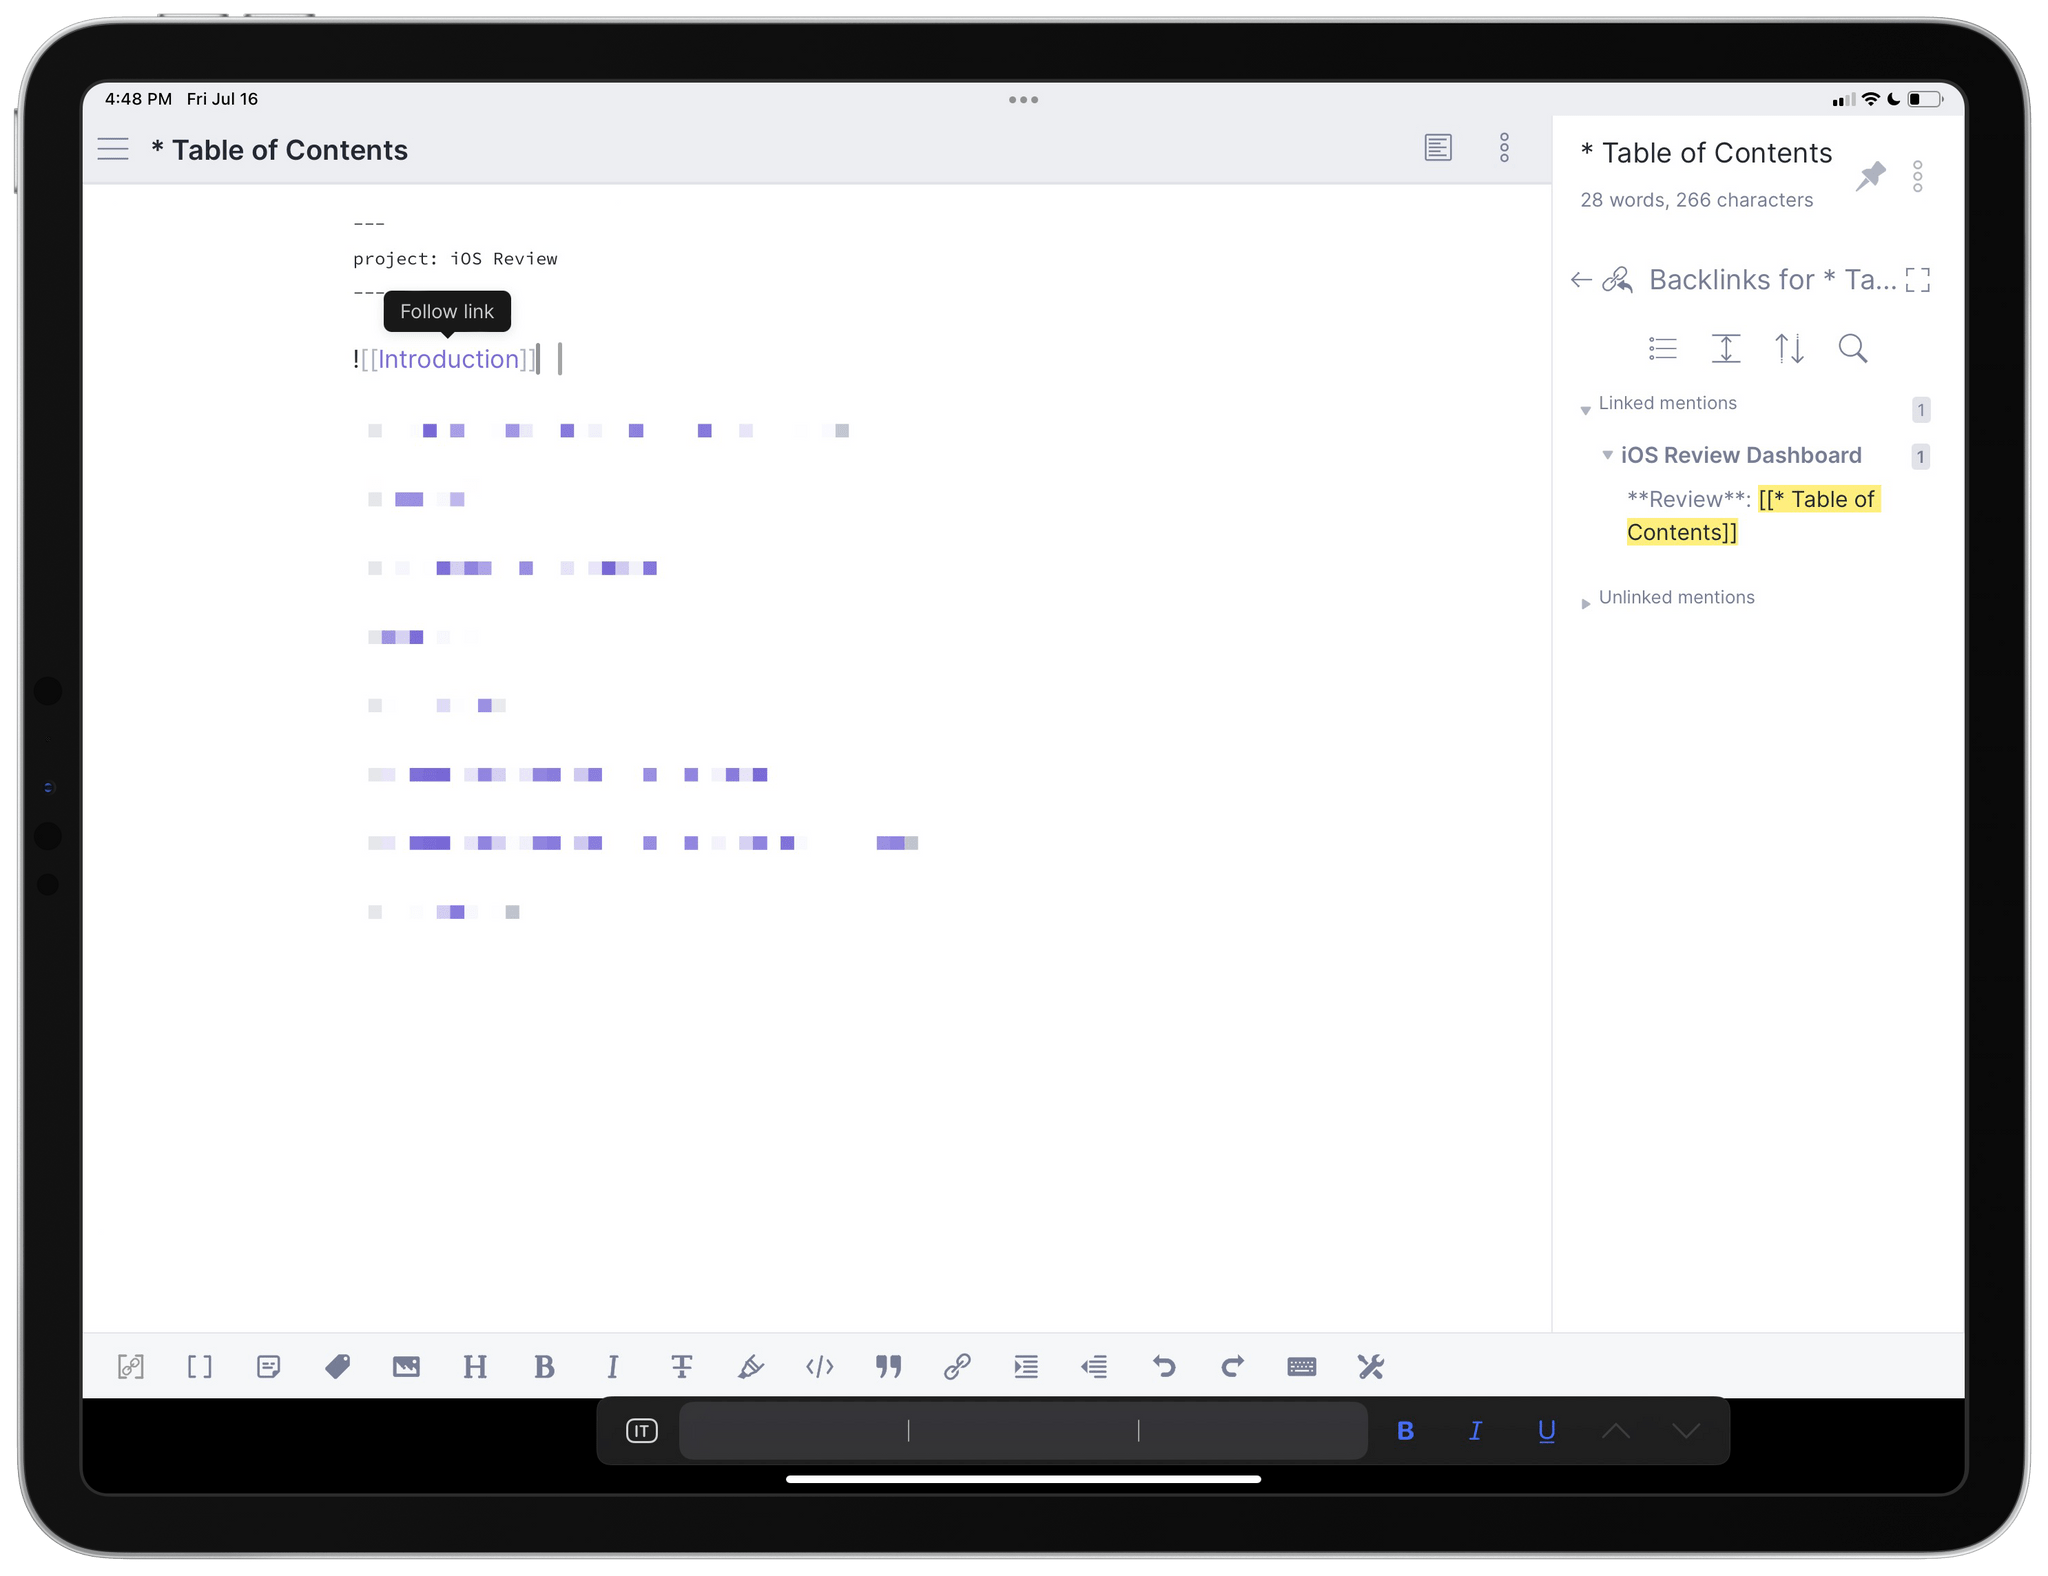
A good example of the flexibility of workspaces is my Table of Contents note for the iOS review. When I open this document, it’s because I want to write one of the chapters of the review; as I noted above, when I do that, I want to see backlinks for the chapter I’m working on so I don’t miss notes that mention it. To make this process easier, I created a workspace that shows the Table of Contents note in editor mode and the backlinks pane as a pinned sidebar, which is something you can do in Obsidian for iPad and Mac by clicking the pushpin icon at the top of any sidebar. This way, when I open the Table of Contents note, I can select the chapter I want, follow the link to navigate to it, and the pinned backlinks pane will update automatically to show me notes that reference the chapter I just opened. It’s research bliss, and I love it.
Other Settings
There are so many settings in Obsidian, many of them specific to plugins (each plugin comes with its own preference pane for additional options), it’s impossible to cover them all in a single story. There are some features of the ‘Options’ screen I want to focus on more in depth in the next installment (such as the mobile quick action), but here’s a list with my recommendations for key settings you should consider right away:
- Editor
- Spell check: enabled
- Readable line length: enabled
- Auto-pair brackets: enabled
- Auto-pair Markdown syntax: enabled
- Smart indent lists: enabled
- Fold heading: enabled (this lets you fold entire headings in a document, which simplifies navigation for long notes)
- Fold indent: disabled (this creates an outliner-like mode for lists, which I do not like in a Markdown editor)
- Default new pane mode: editor (so you can start writing immediately when you open a new pane)
- Files and Links
- Automatically update internal links: enabled (with this option, if you change the name of a note you’ve linked somewhere else, the link will be automatically updated there too)
- Default location for new notes: Same folder as current file (this way, if you create a new note while you’re editing a note in a specific sub-folder, the new note will be created there instead of the app’s root folder)
- Default location for new attachments: In subfolder under current folder (in Obsidian, you can save all kinds of file attachments in your vault, including images; I prefer to keep my attachments in folders named ‘Assets’ that are automatically created inside the folder I’m currently working in when I save a new attachment for the first time)
Well, I think that’s enough material to get started with Obsidian for this first installment of the series. I have a long list of topics, writing workflows, plugins, and custom shortcuts I want to cover, and I believe this is going to be a fun journey for Club MacStories members.
In the meantime, if you have questions, doubts, and tips about Obsidian and the kind of content I should cover, I’d love to hear from you.