I’m not an artist by any stretch, so when I started poking around Adobe’s Fresco, the drawing and painting app for the iPad and iPhone, I approached the app with trepidation. I shouldn’t have.
Fresco is undeniably a ‘pro’ iPad app. The app has a deep set of sophisticated features and integrations with Adobe’s other Creative Cloud apps and services. However, the app is also designed to scale with its users, meeting them where they start and growing with them, whether they are absolute beginners or seasoned pros.
Adobe accomplishes this in a couple of ways. The first is with Fresco’s business model. I’m sure many people who see an app of Fresco’s caliber assume it must be part of an expensive subscription, but it’s not. The app is free, and although there are benefits that only come with a Creative Cloud subscription, their absence from the free version of the app doesn’t detract from its core experience. You can go a long way with the free version, which makes it excellent for beginners and a good way for Adobe to attract new users.
Free is powerful, but it only goes so far. The second reason Fresco works for a broad spectrum of users is the app’s design. From the spot in the app to which every user is taken when they open their first canvas to the many ways to learn and draw inspiration from experienced users, Fresco’s thoughtful design provides a focused approach to drawing and painting that works for users at all levels.
Ultimately, it’s Fresco’s design that convinced me that this was a review I should write. I’m as guilty as the next person of assuming apps like Fresco are only for pro users. I’ve been pleasantly surprised to find that that’s not true for Fresco. So let’s dive into what makes Fresco such a good place to start if you want to try drawing and painting with your iPad and iPhone.
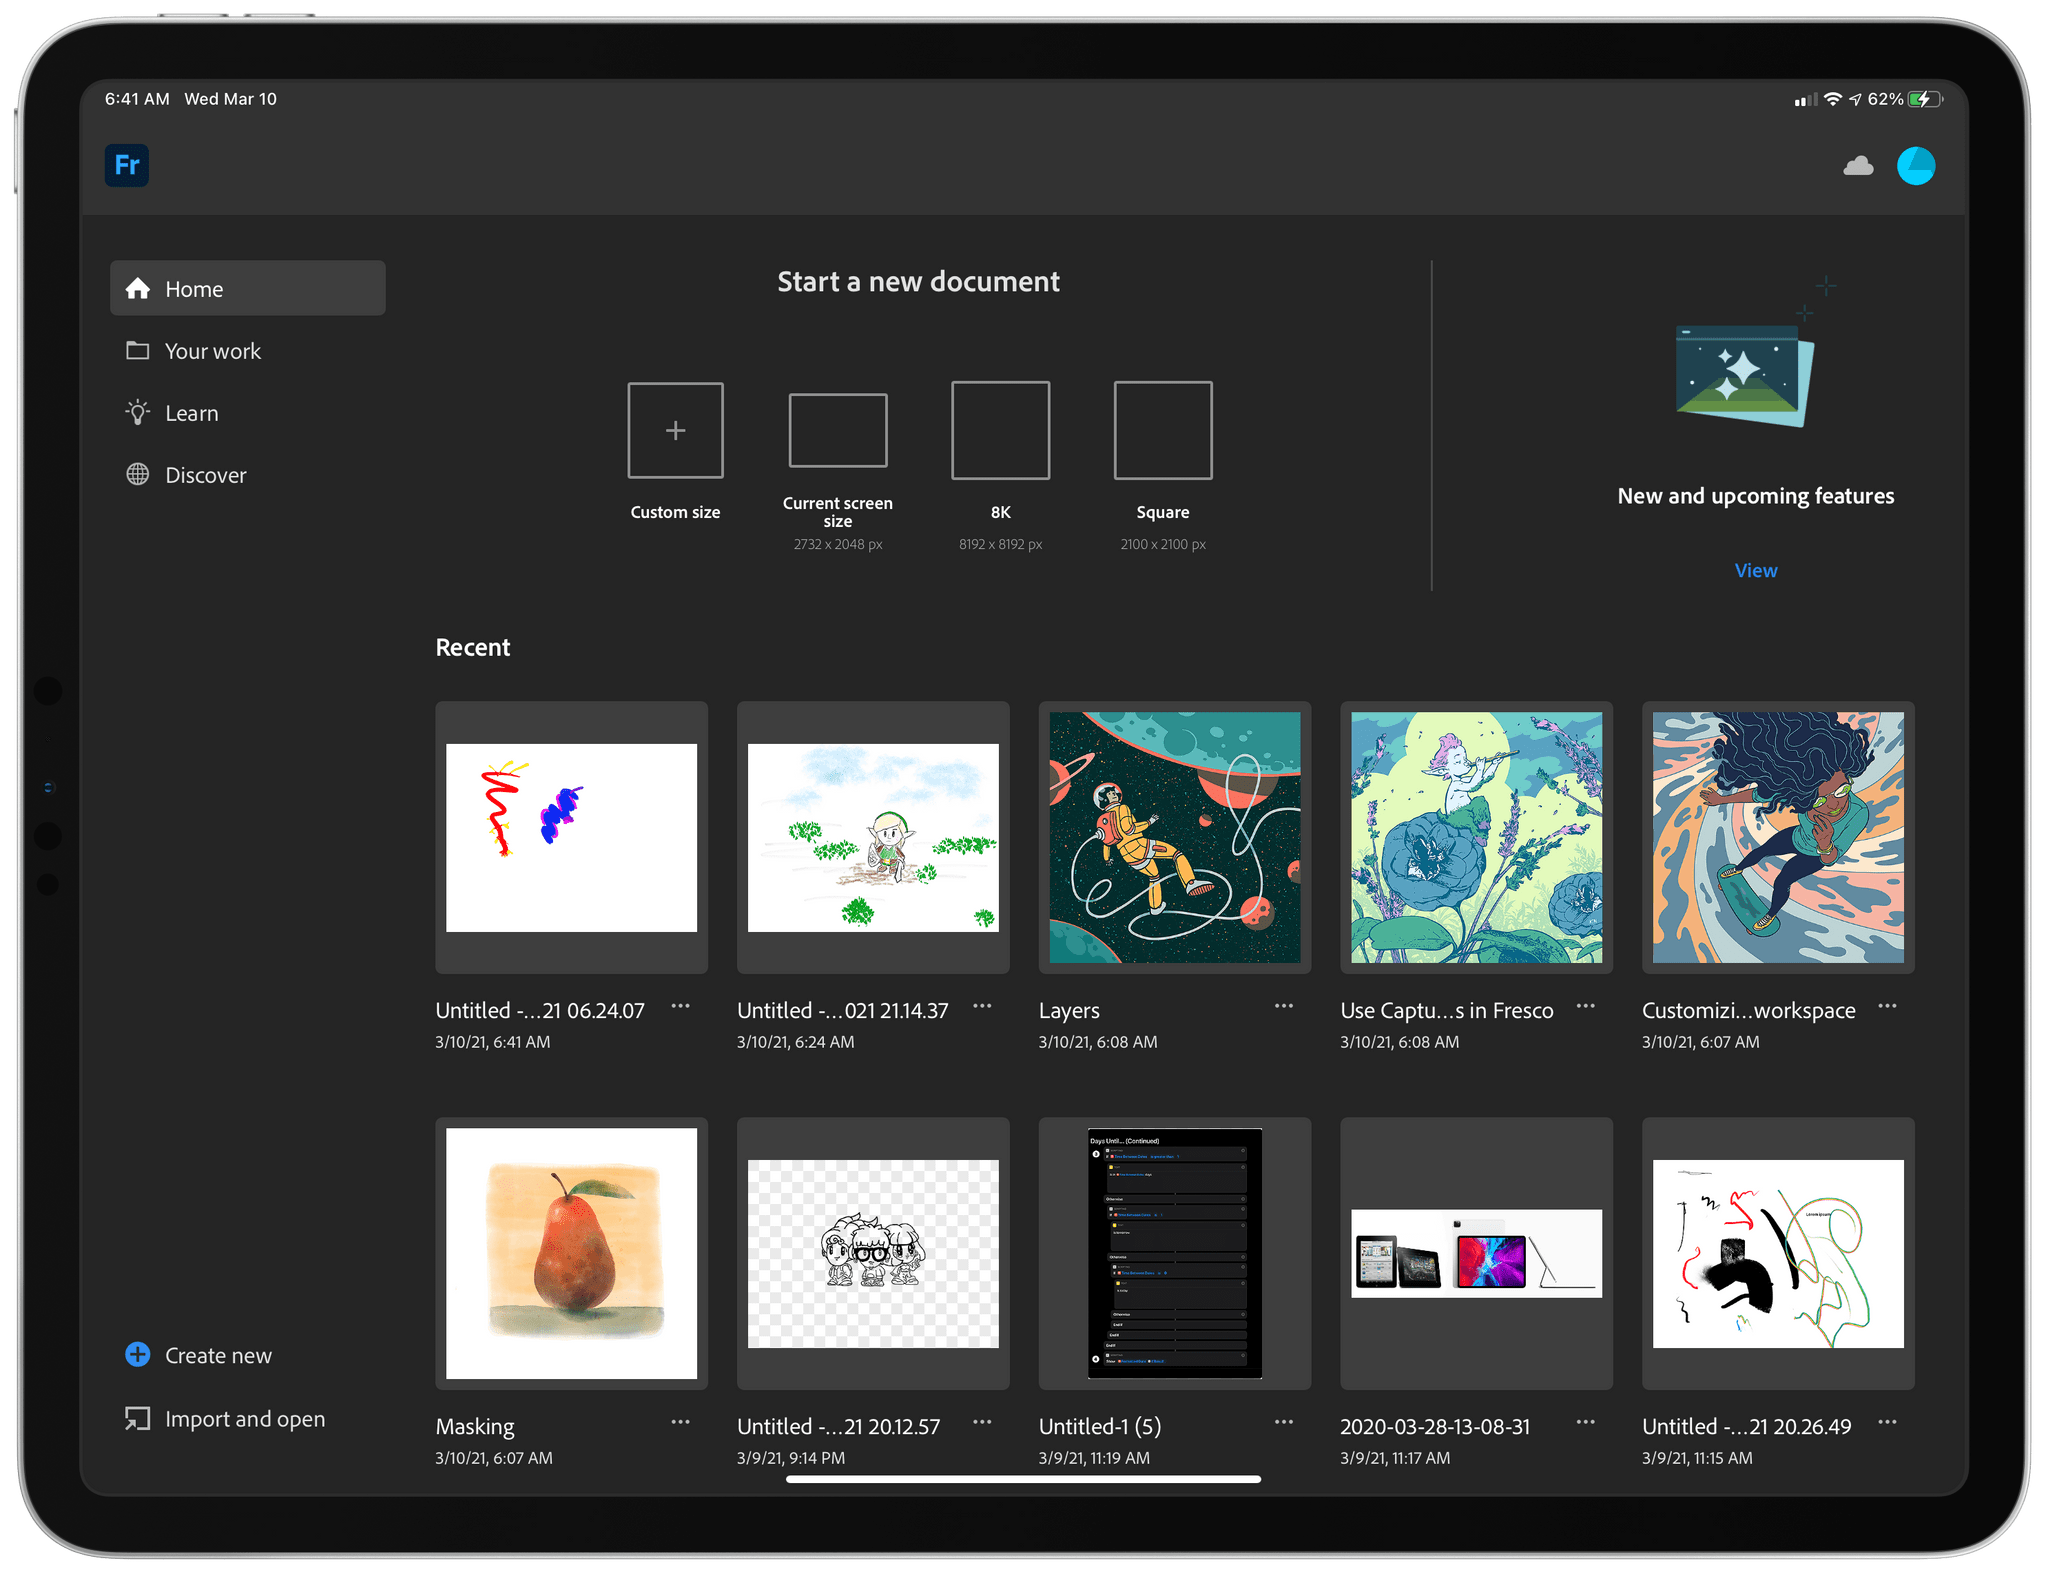
Fresco’s home view is where you start a new project, pick up where you left off with an old one, and learn to use the app. I’ll return to the home view in a bit, but I want to dive right into drawing and painting. To start a new project, pick a template under the ‘Start a new document’ section of the home view. There are a few templates, plus a button to create a custom-sized canvas, which reveals more templates and controls for dialing in a precise size. If you’re a beginner, though, ‘Current screen size,’ which fills the screen of the device you’re using, is a good place to start.
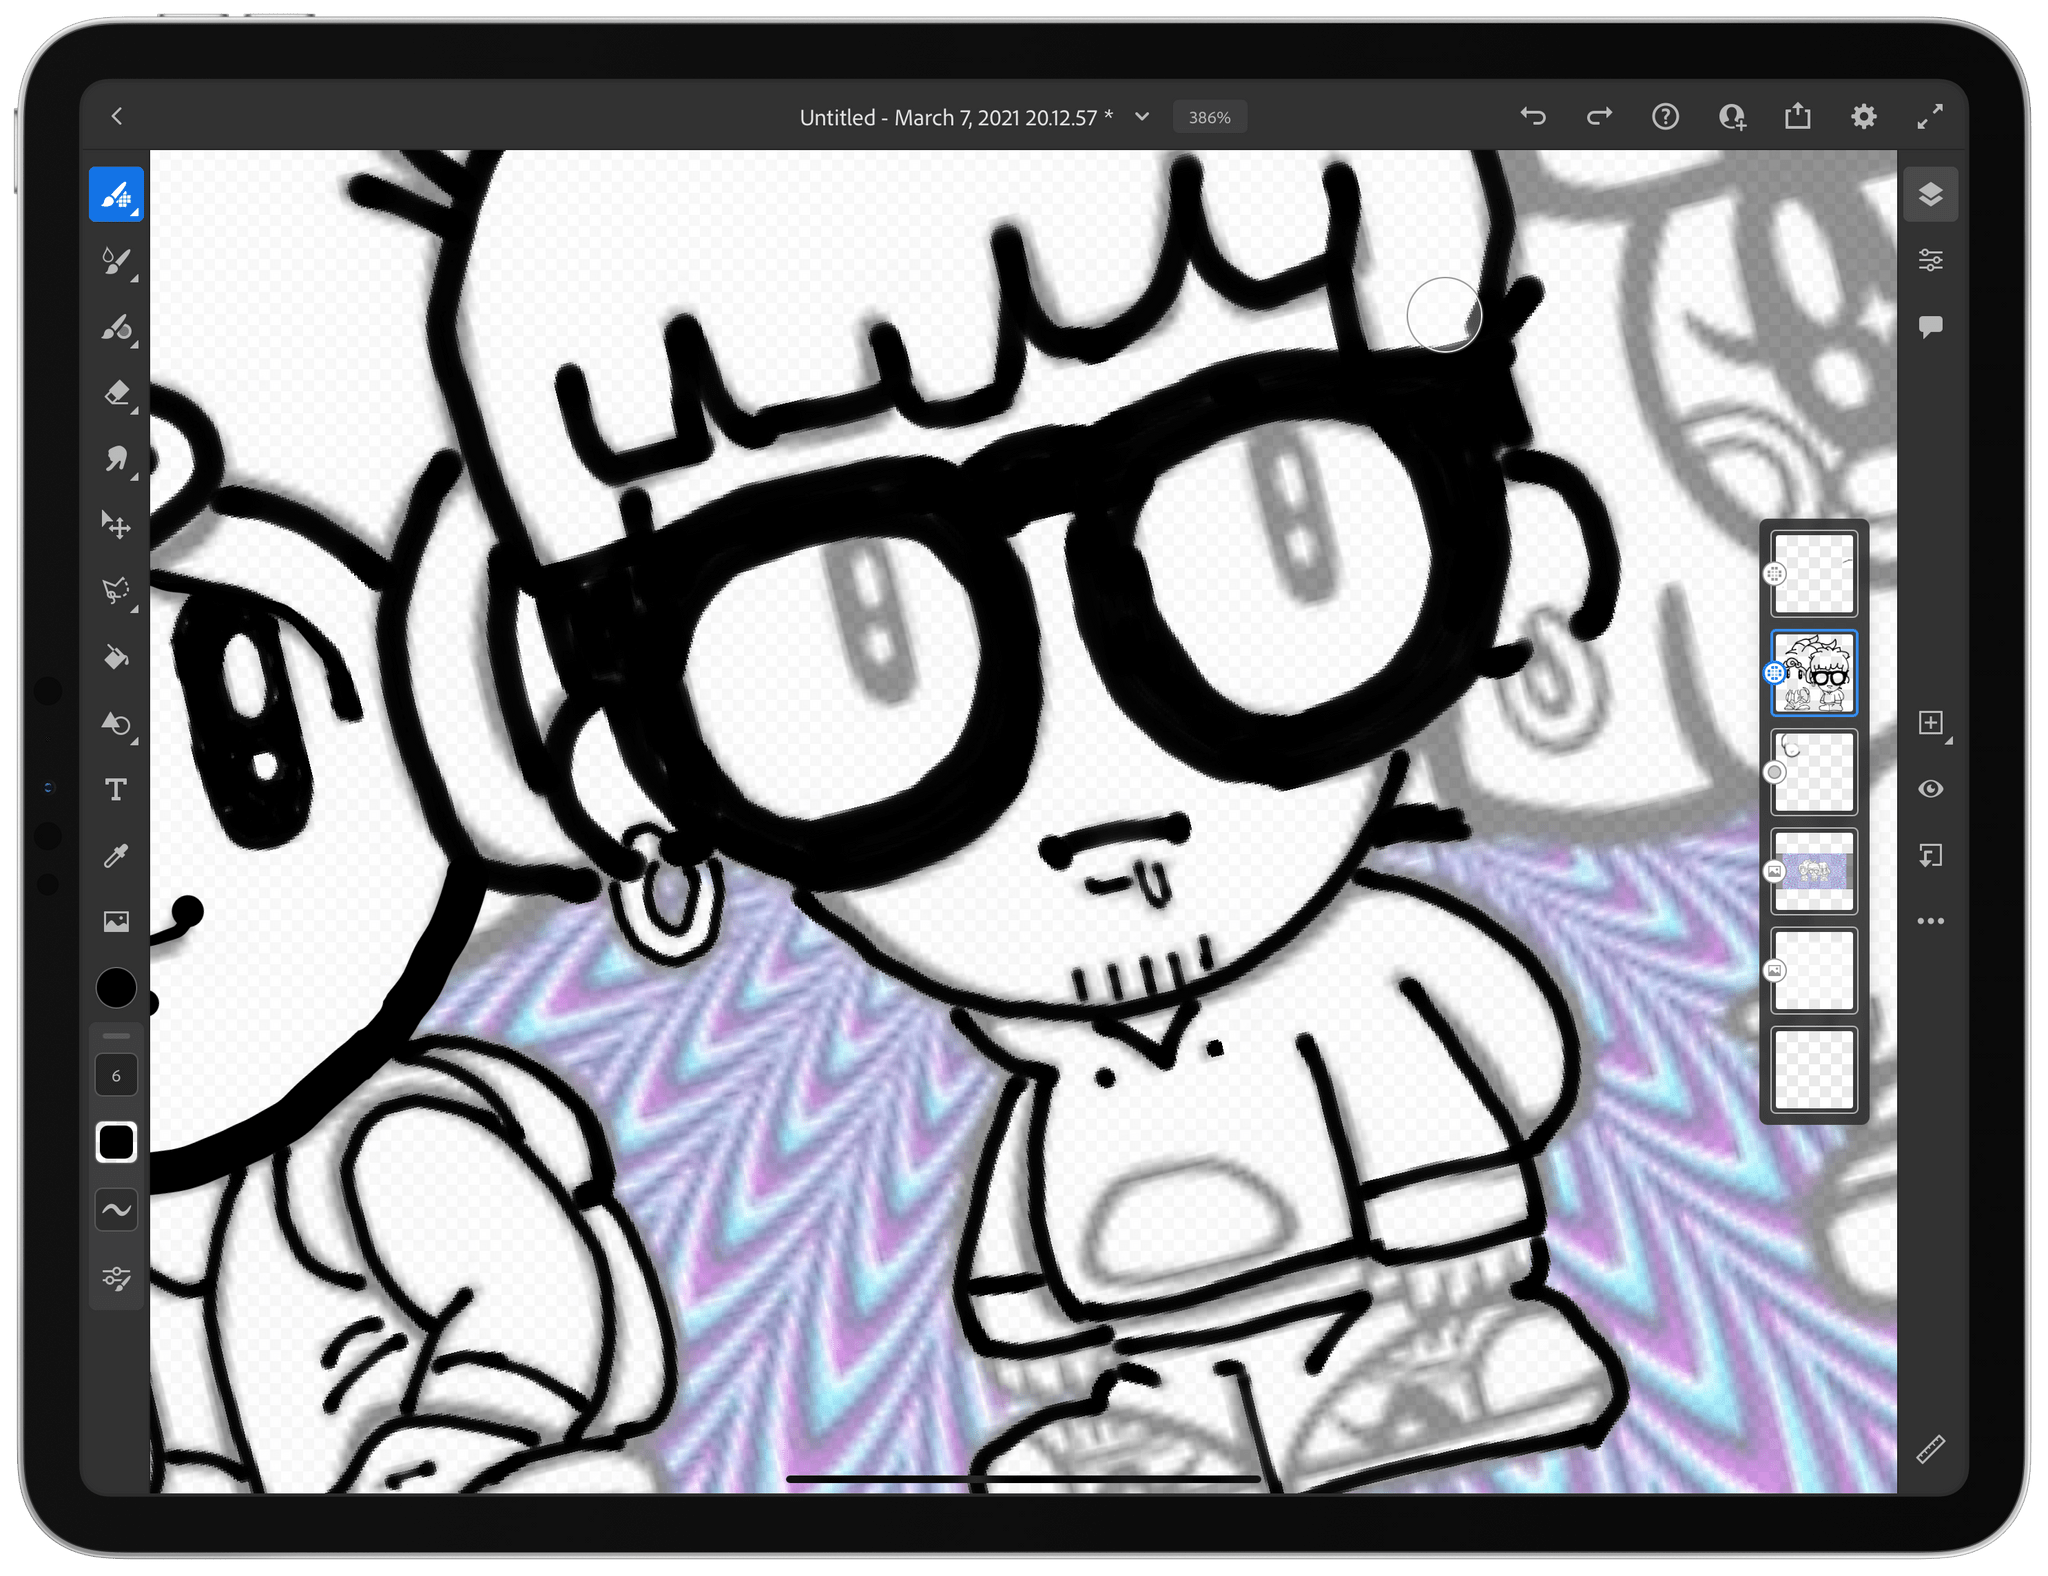
When you pick a canvas size, Fresco opens a blank document with a default white background. You’ll see a toolbar with a vertical strip of buttons on the left side, the top one of which is selected. Along the right side, you’ll see more controls and thumbnails for your document’s layers. The two strips of tools can be flipped around to better accommodate left and right-handed people from the app’s settings, which are accessed from the toolbar along the screen’s top edge.
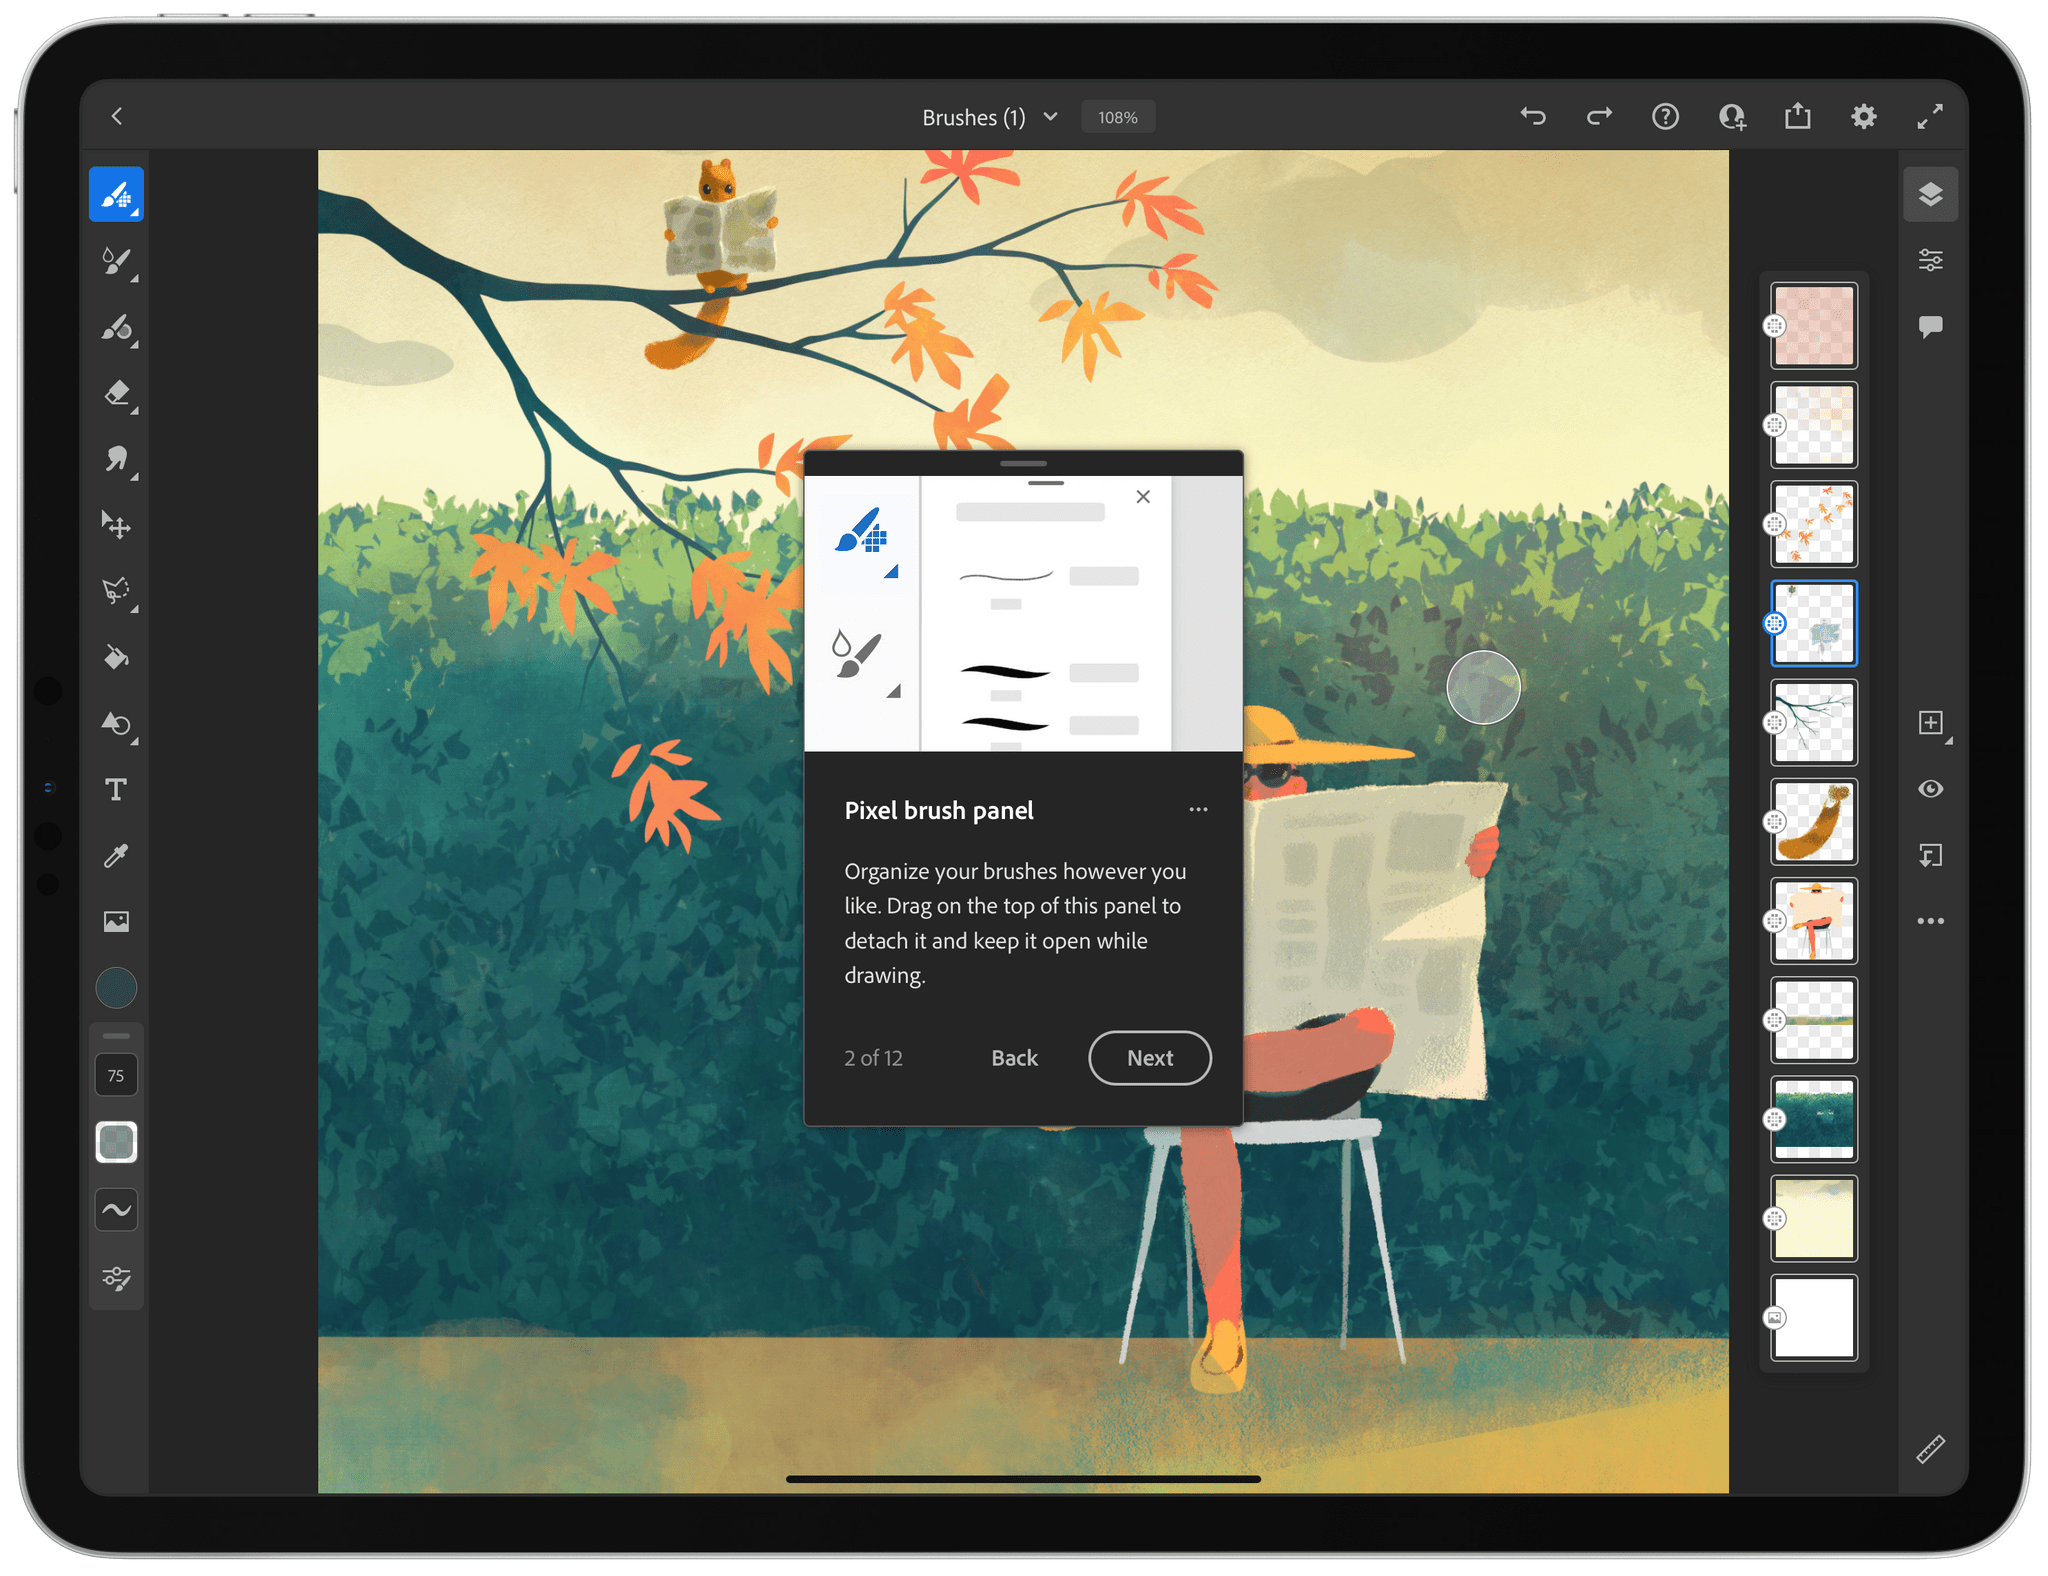
If you don’t change the defaults, you’ll see three brush tools at the top of the strip along the left side of the screen. The first one, which is the pixel brush tool, is selected. Tapping it opens a panel that shows you the currently-selected brush and a list of the many categories of available pixel brushes.
The brush categories are listed alphabetically, and you’ll notice that the last one, ‘Sketching,’ is selected. If you tap on it, you’ll see that the pencil brush is selected, confirming what the top portion of the panel reports. This is a small but important touch. Every new document begins with the same tool selected, meaning you can start sketching immediately regardless of whether you have any idea of what the other buttons in Fresco do.
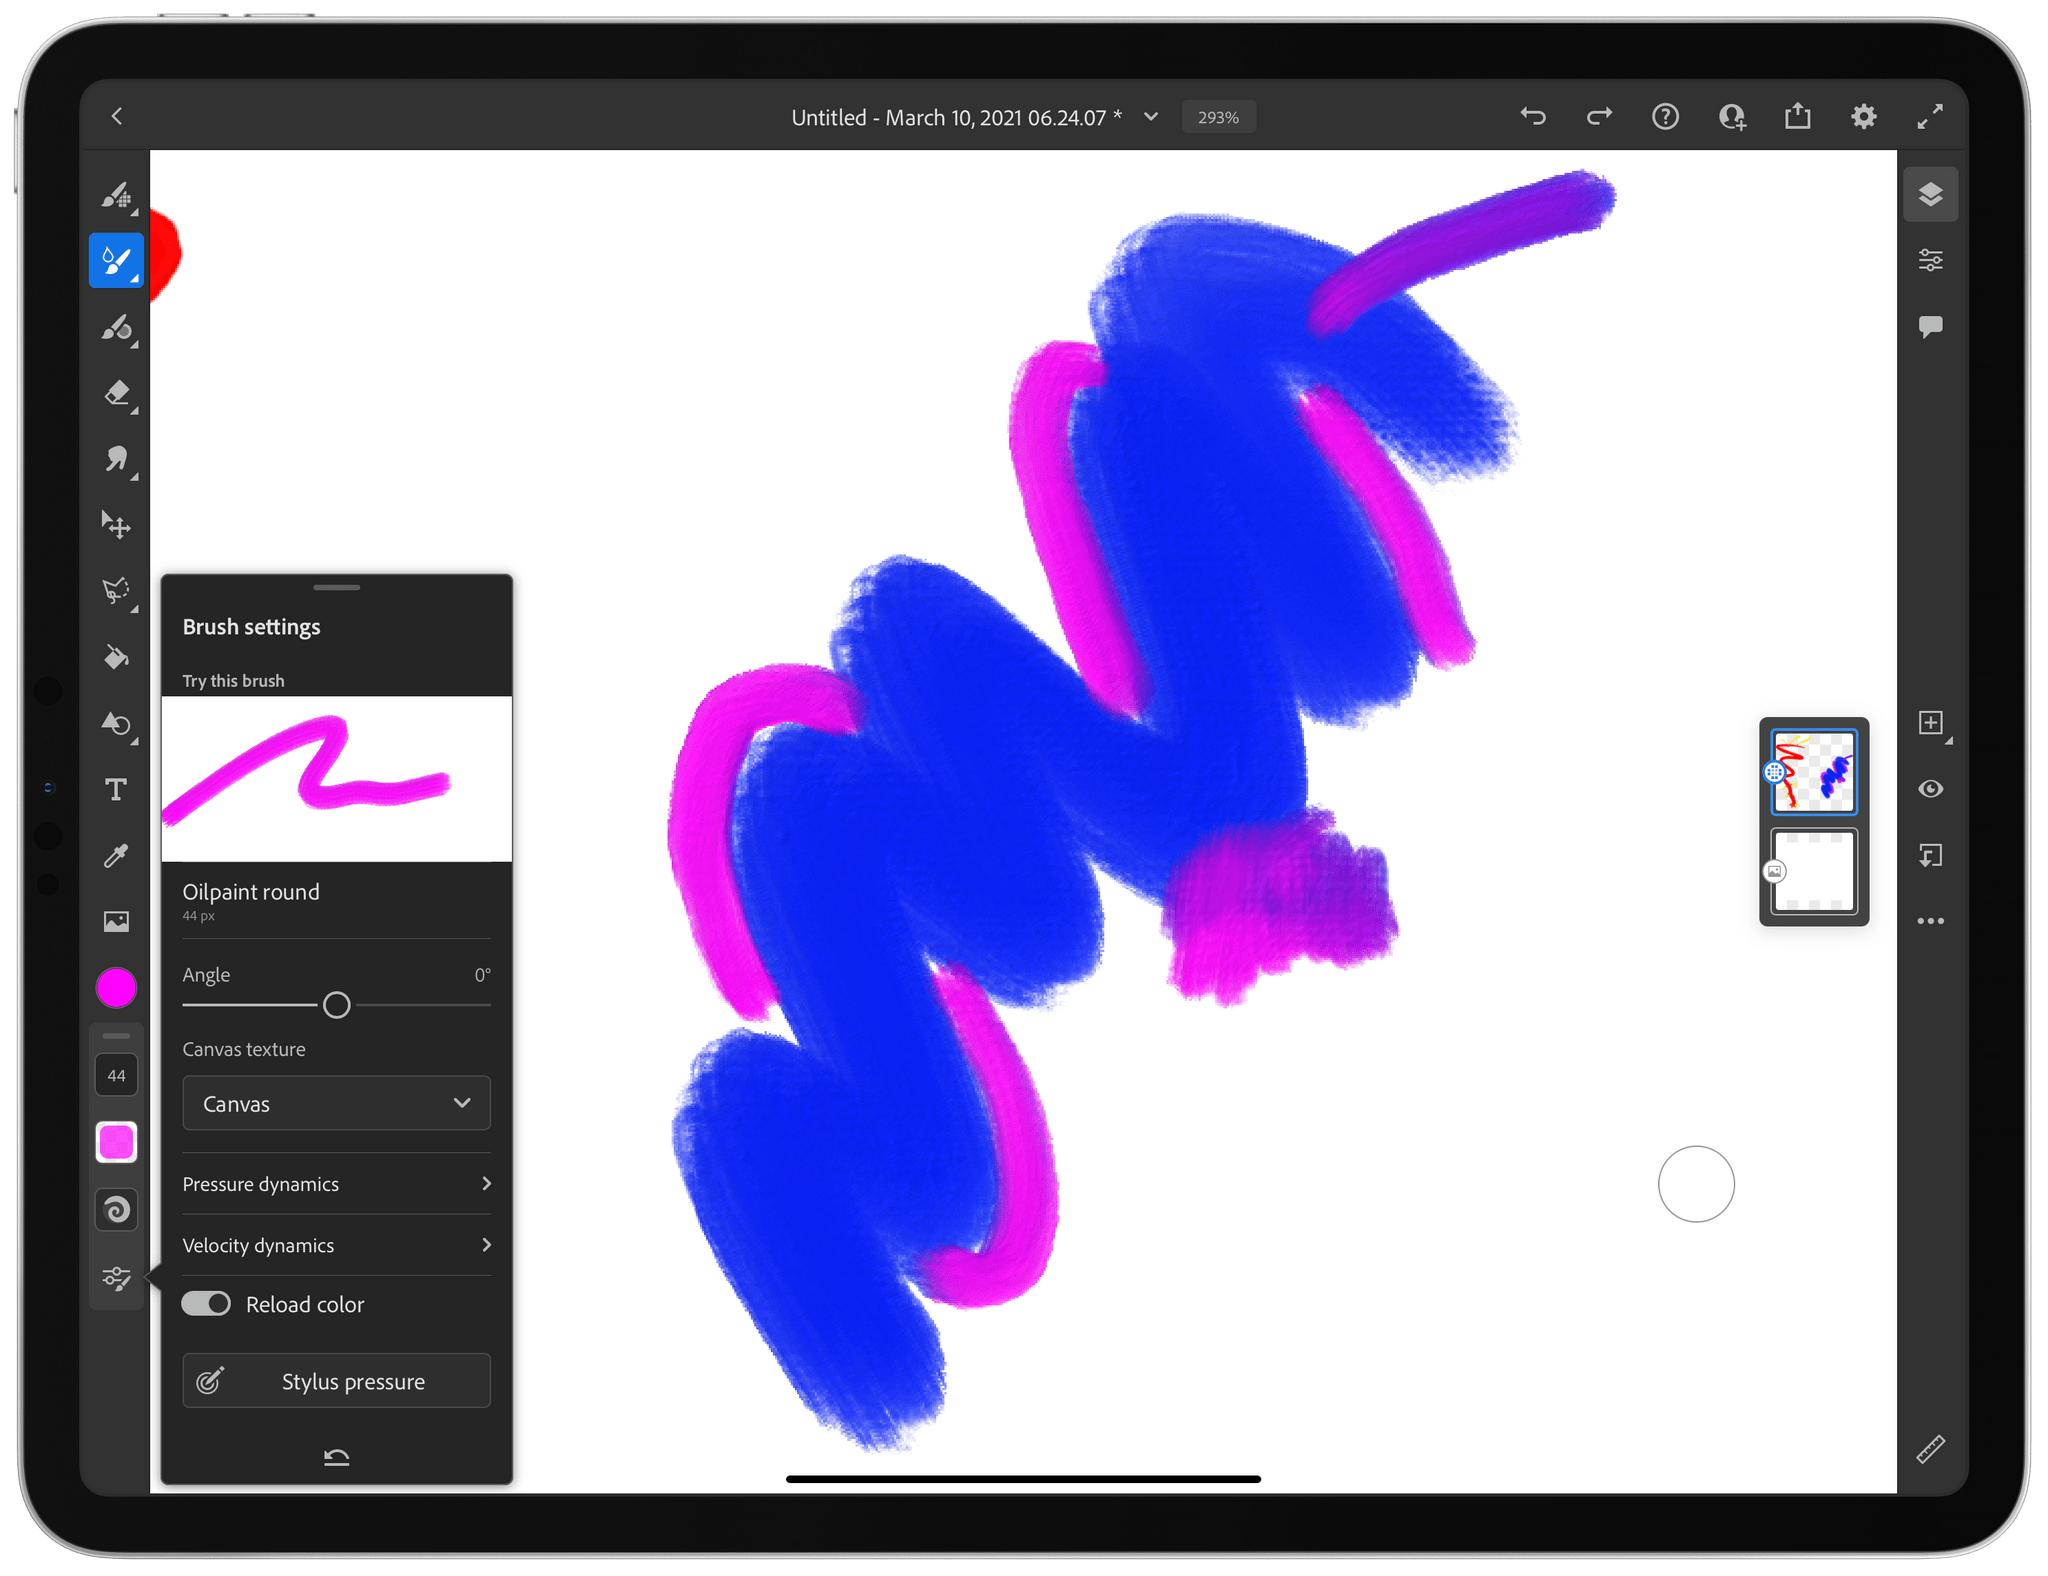
Another aspect of the brush panel that I enjoy is that it can be detached from the toolbar by dragging it away by the drag indicator at the top of the panel. Once it’s dragged away from the toolbar, the brush panel hovers over your canvas until you dismiss it. That makes it easy to experiment with multiple brushes without the frustration of having to open the brush panel repeatedly.
The color panel and brush buttons at the bottom of the toolbar can also be detached, so they hover indefinitely over the canvas. Like the brush panels, hovering the color panel has the advantage of allowing you to rapidly test colors. Moving the brush options buttons away from their docked position at the bottom of the toolbar allows you to place them closer to the portion of the canvas on which you’re working, making frequent, small adjustments easier. Brush settings can be detached, too.
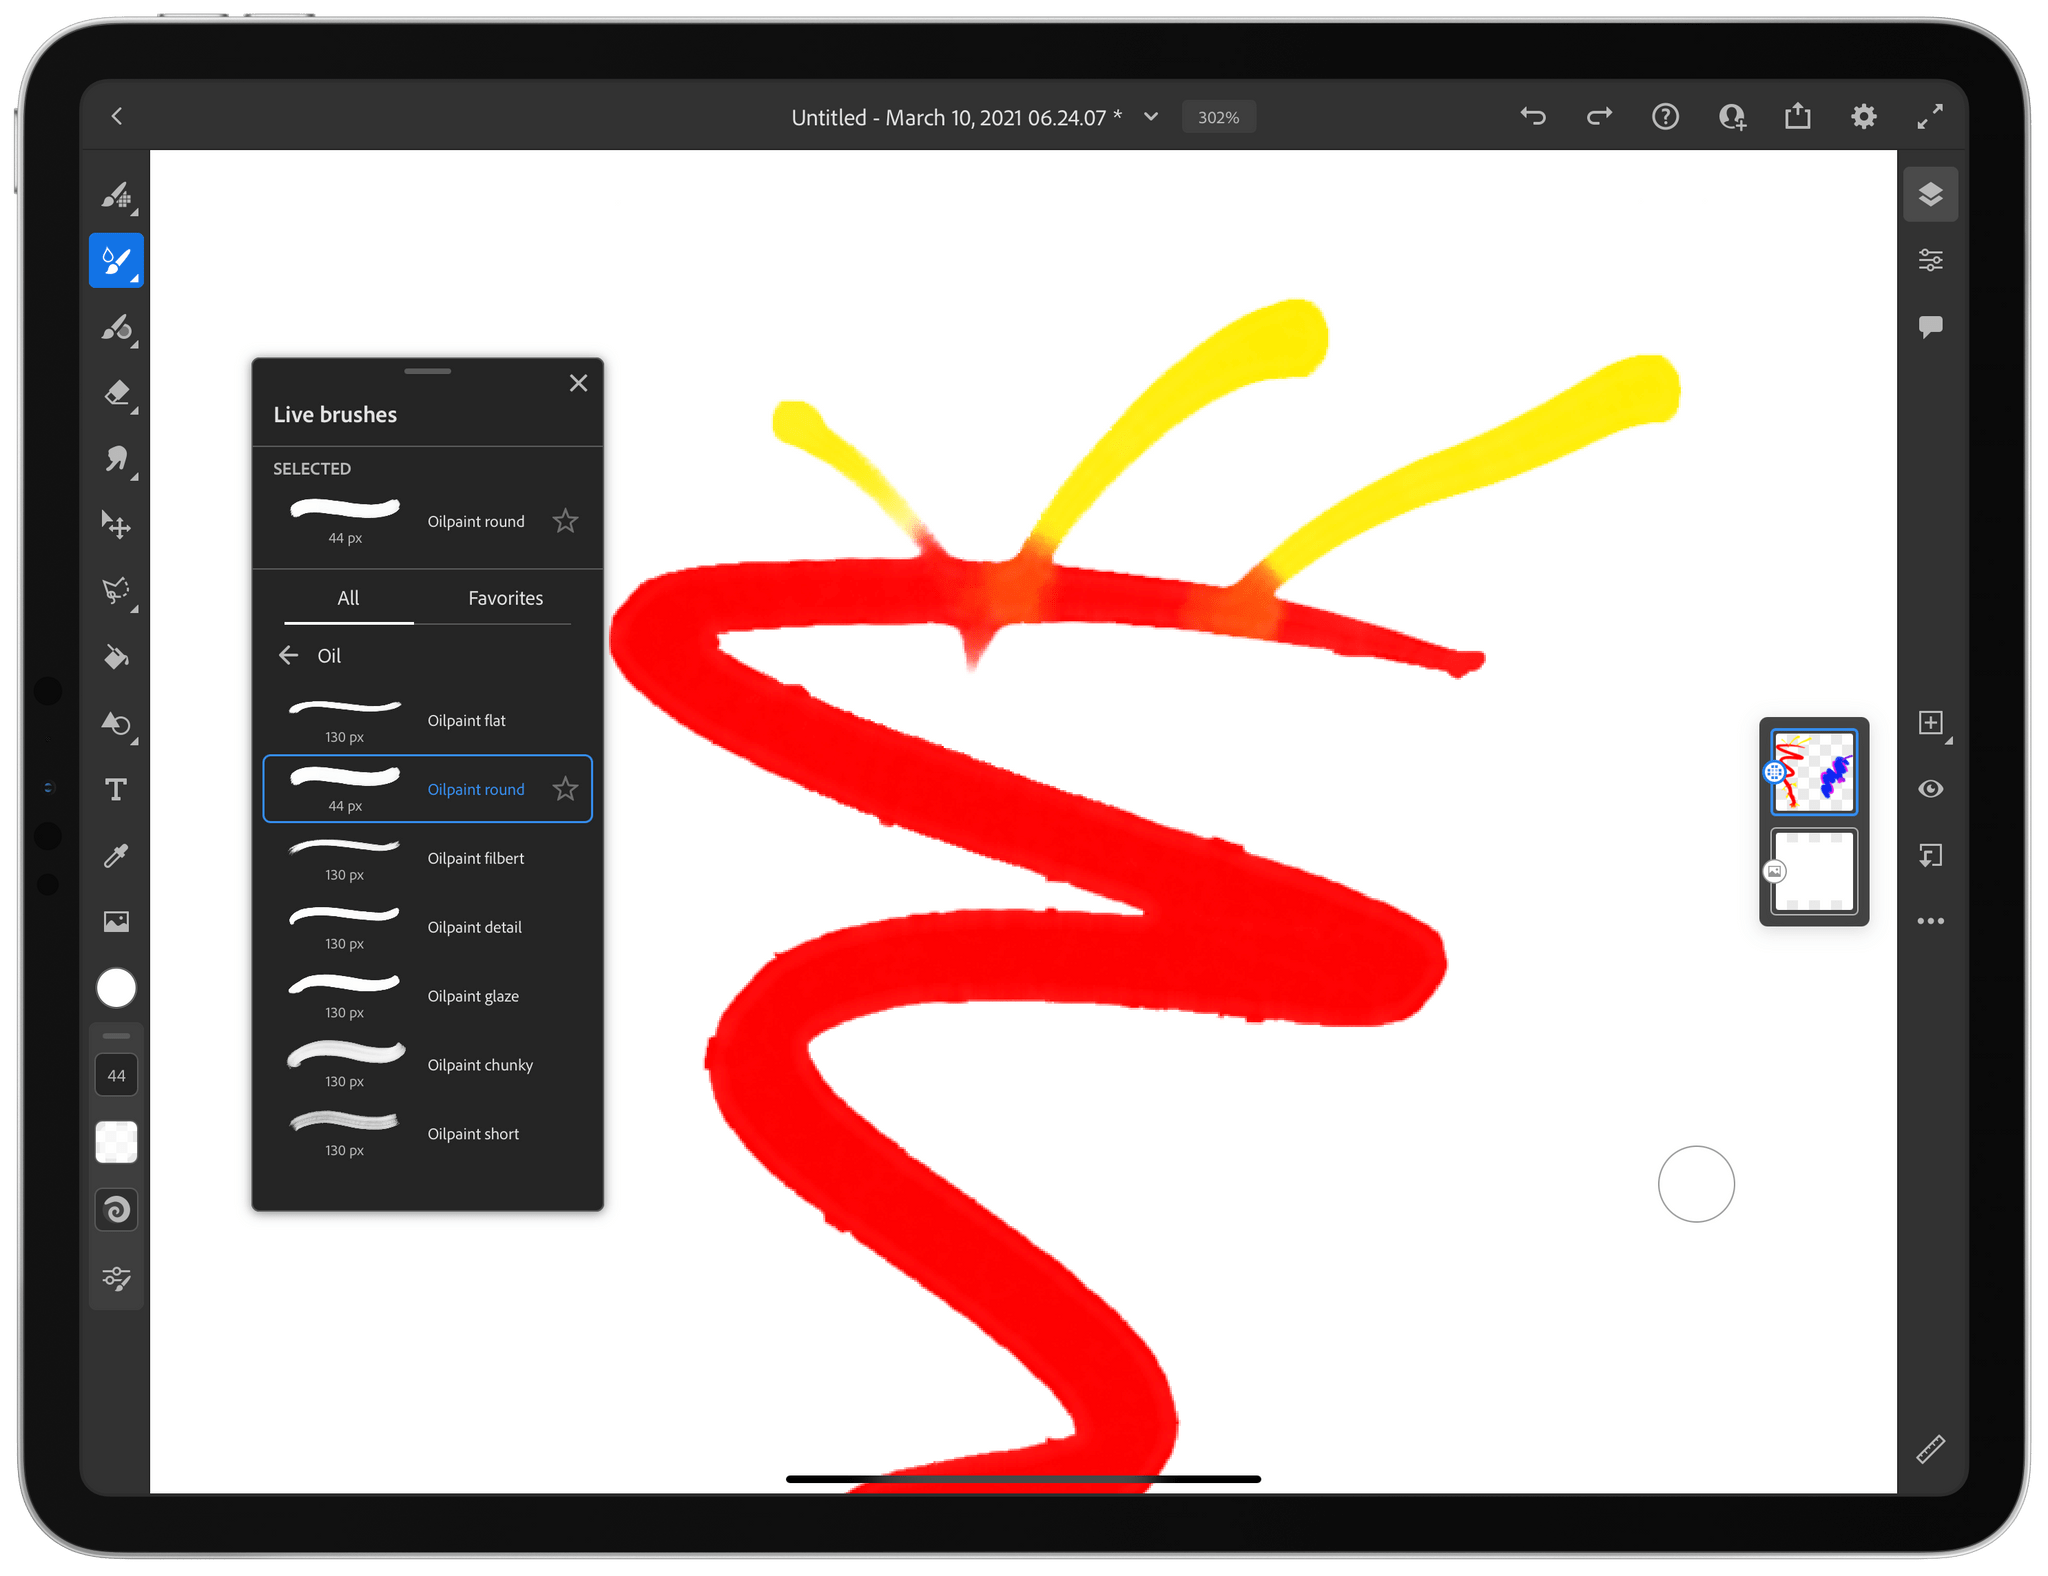
Returning to Fresco’s brushes for a moment, there are dozens available. Along with pixel brushes, Adobe offers live brushes and vector brushes. Pixel brushes include various media types like pencils, pens, markers, charcoals, pastels, and many more. To help wrangle the large collection, you can mark brushes as favorites and limit the brushes list to those.
Live brushes use Adobe’s Sensei AI technology to simulate watercolor and oil painting. These brushes are among my favorites. The pigment of watercolor brushes spread the way it would using real paint, water, and paper. Oils behave like real-world oil paints, too, complete with realistic brush strokes across the canvas and color mixing. Of course, every aspect of these and the other brushes are highly customizable, too. You can adjust things like the stroke’s width, the pigment and water flow on the brush, right down to the pressure, shape, and other dynamics of how the brush behaves as you move the Apple Pencil across an iPad’s screen.
The final type of brush is vector brushes, which, because they create vector graphics, can be scaled as big or small as you would like without impairing their resolution.
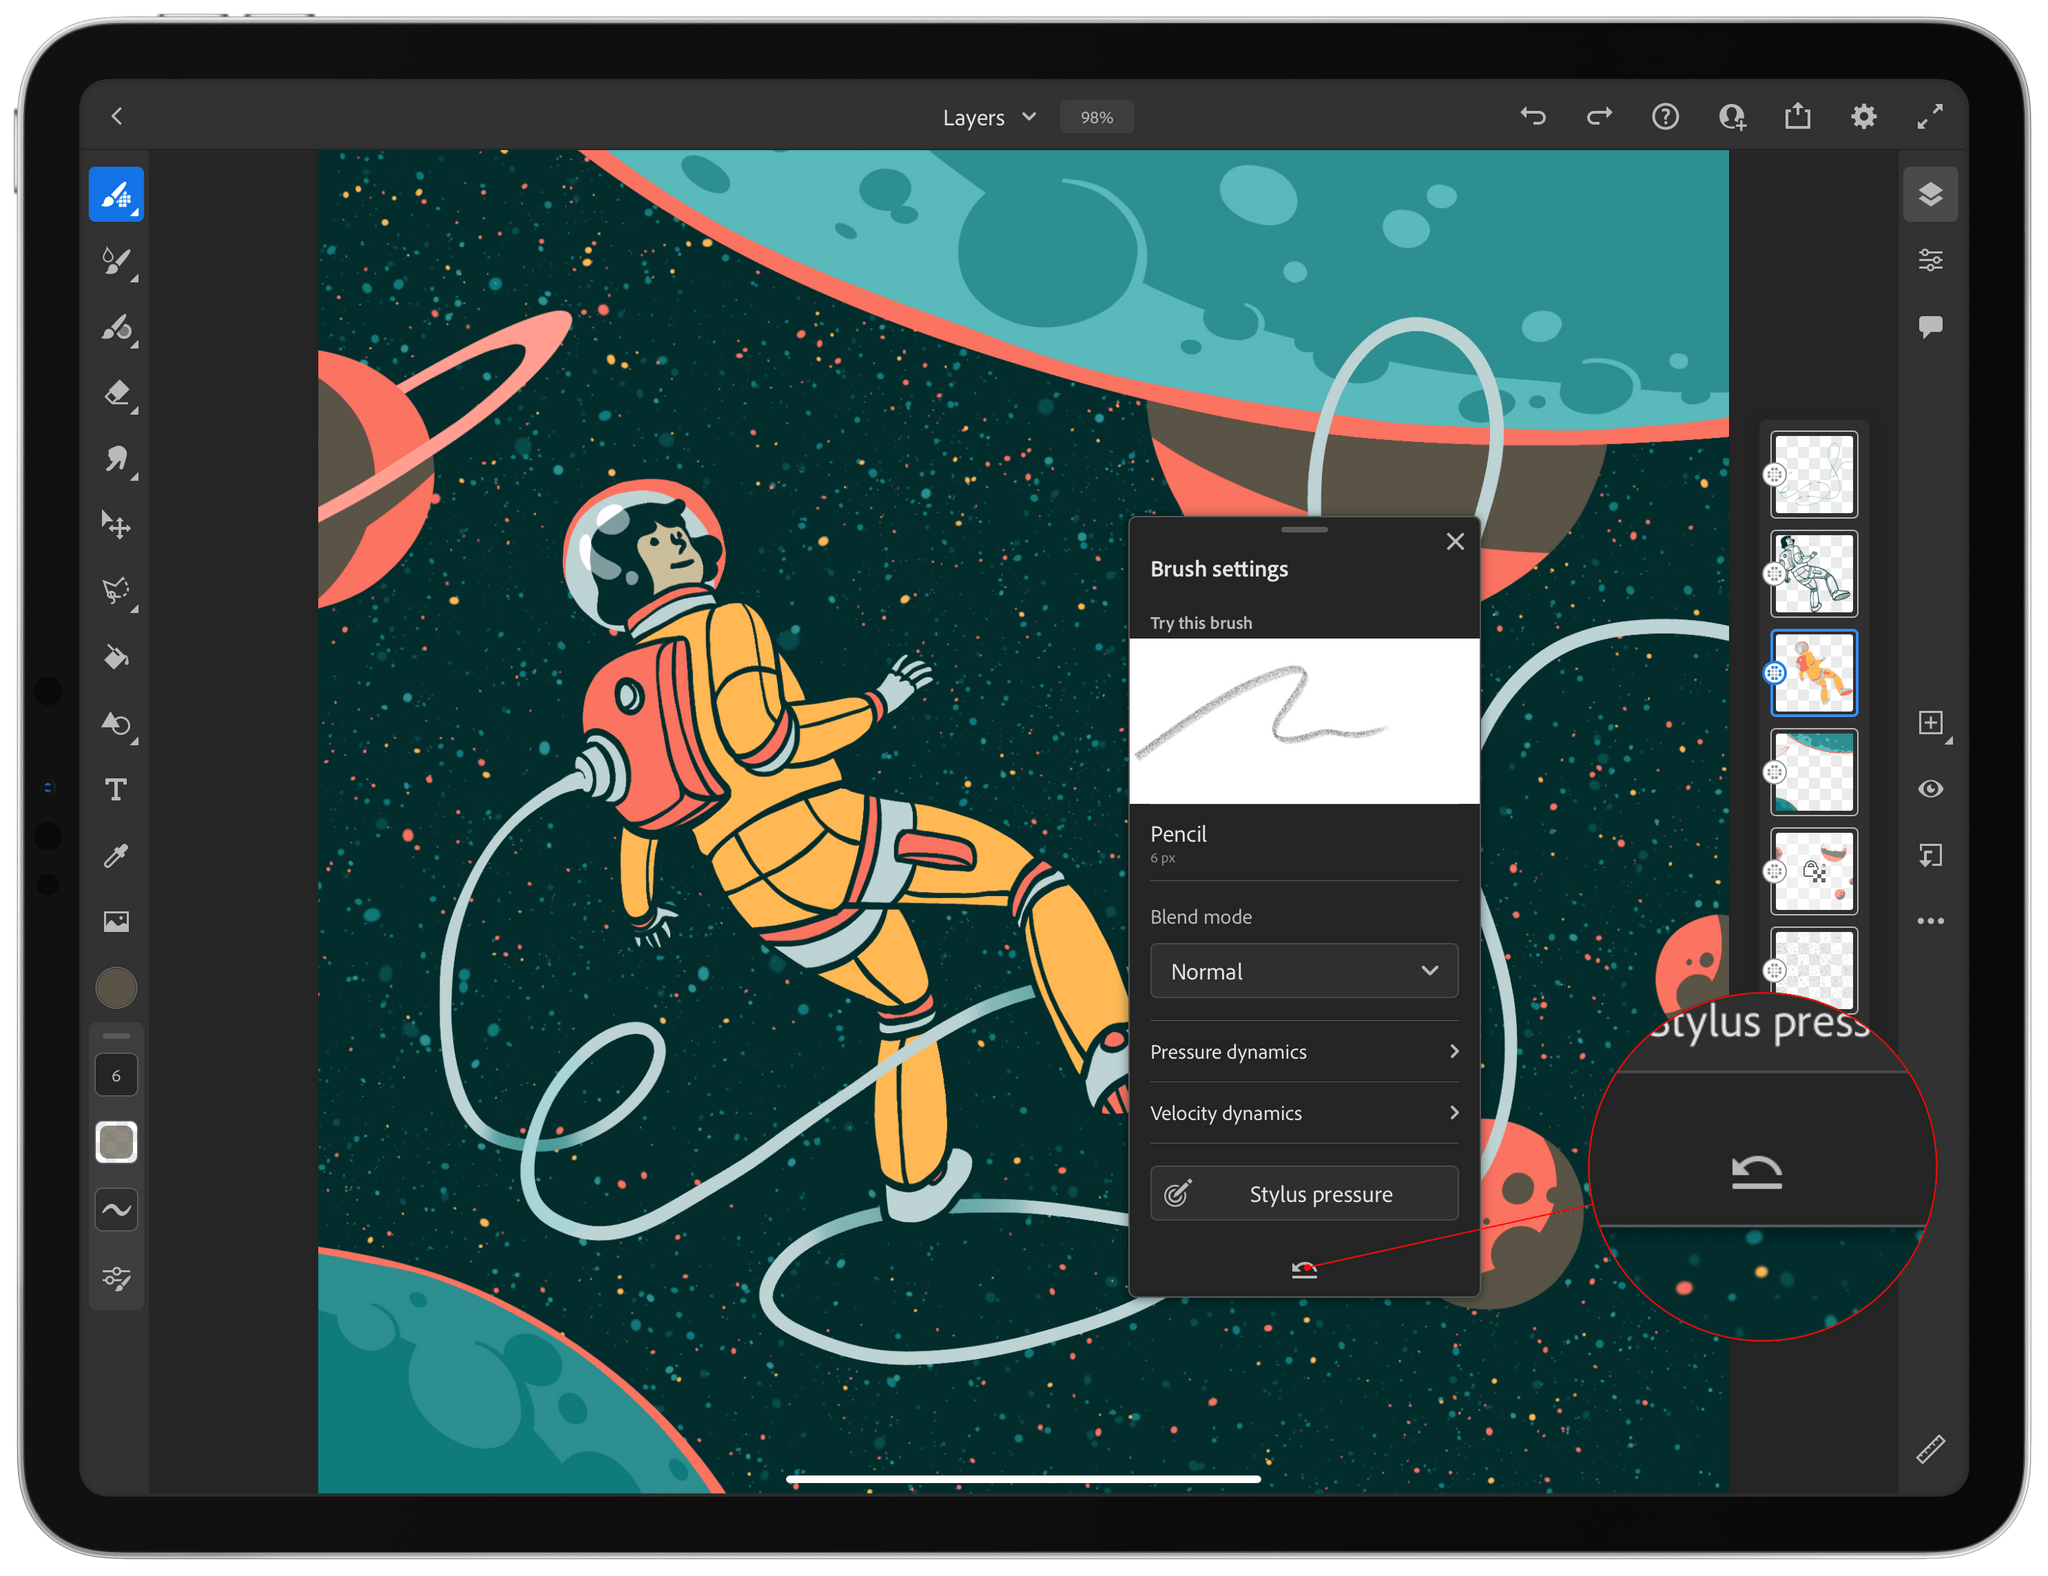
I’ve barely scratched the surface of how you can customize brushes, but as impressive as the possibilities are, I’m more impressed with the fact that the details stay out of your way. Once you’ve selected a brush, the core options like brush size and smoothing are always available, but the other options are tucked away behind the brush settings button until you want to explore them. I also like that when you decide to experiment with brush settings, you can always return a brush to its default state with the tap of the button at the bottom of the brush settings panel. It’s a do-over button that encourages exploration and experimentation without any concern that you’ll get the app’s settings in a state you can’t figure out how to undo.
If you’ve worked with other drawing and painting apps, you’ll see additional familiar options along Fresco’s toolbar. Many buttons have a little triangle in the corner, indicating that tapping on it twice reveals more tools. For example, tap the eraser tool that’s right below the three brush buttons twice, and you’ll see Fresco’s nine erasers, each of which has different properties that can be modified. Below the eraser tool is the smudge tool, with dozens of customizable brushes to spread and blend pigment across the canvas.
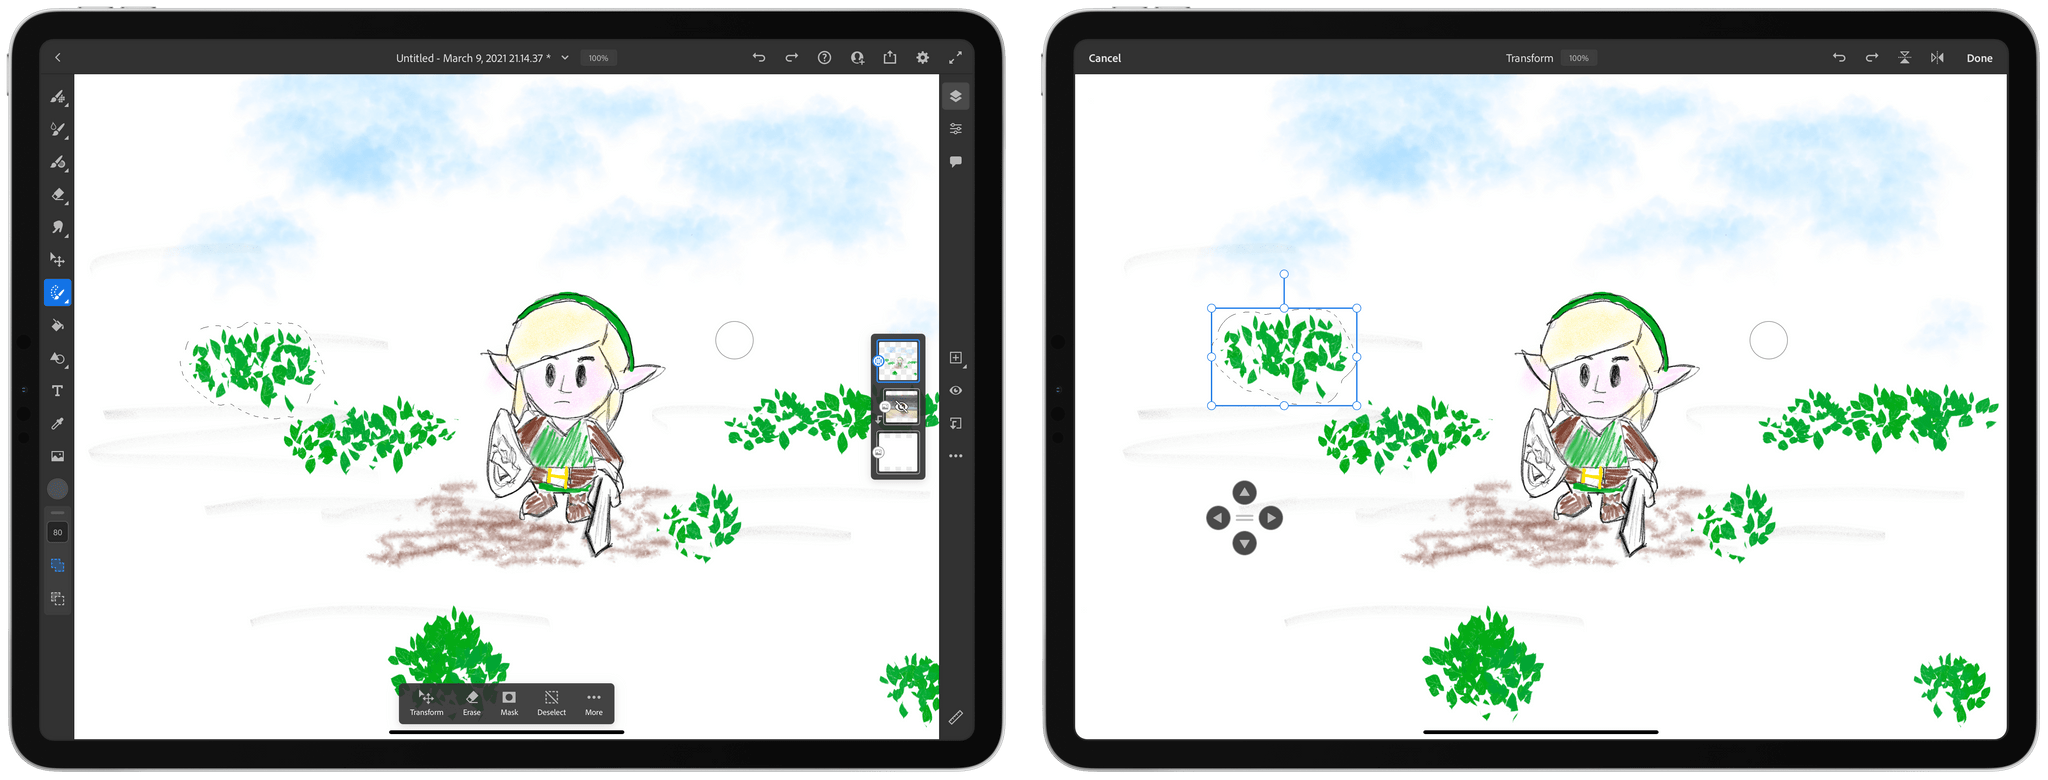
The transform tool is next and allows you to resize and rotate your artwork. The tool is modal, meaning that except for layers, your other tools disappear when transform is invoked, replaced by your art framed by a bounding box used to manipulate your creation. When transform is selected, a nudge tool also appears that you can use to move your artwork one pixel at a time.
The lasso allows you to draw a selection or tap from point to point onscreen to create a polygonal selection. You can also ‘paint’ to create a selection or create a rectangular or elliptical selection.
Fresco features several other tools, such as a fill tool for filling a region with color, a shape-creation tool, and a text tool. The text tool alone provides access to thousands of typefaces with fine-grained controls that appear when you add text to the canvas. That’s a design pattern you see with other tools like the shape tool too. Tool-specific options only appear when that tool is used, eliminating what would become a cluttered mess otherwise.
There are two other aspects of the toolbar worth mentioning: the color picker and the image import tool. Like brushes, the color picker panel can be detached from the toolbar, so it hovers onscreen. From here, you have access to the color wheel, opacity, controls for hue, saturation, and brightness, recent colors used as well as sets of thematic swatches, and any colors stored in your Creative Cloud library. Each section of the panel can be collapsed, too, if you need to conserve space.
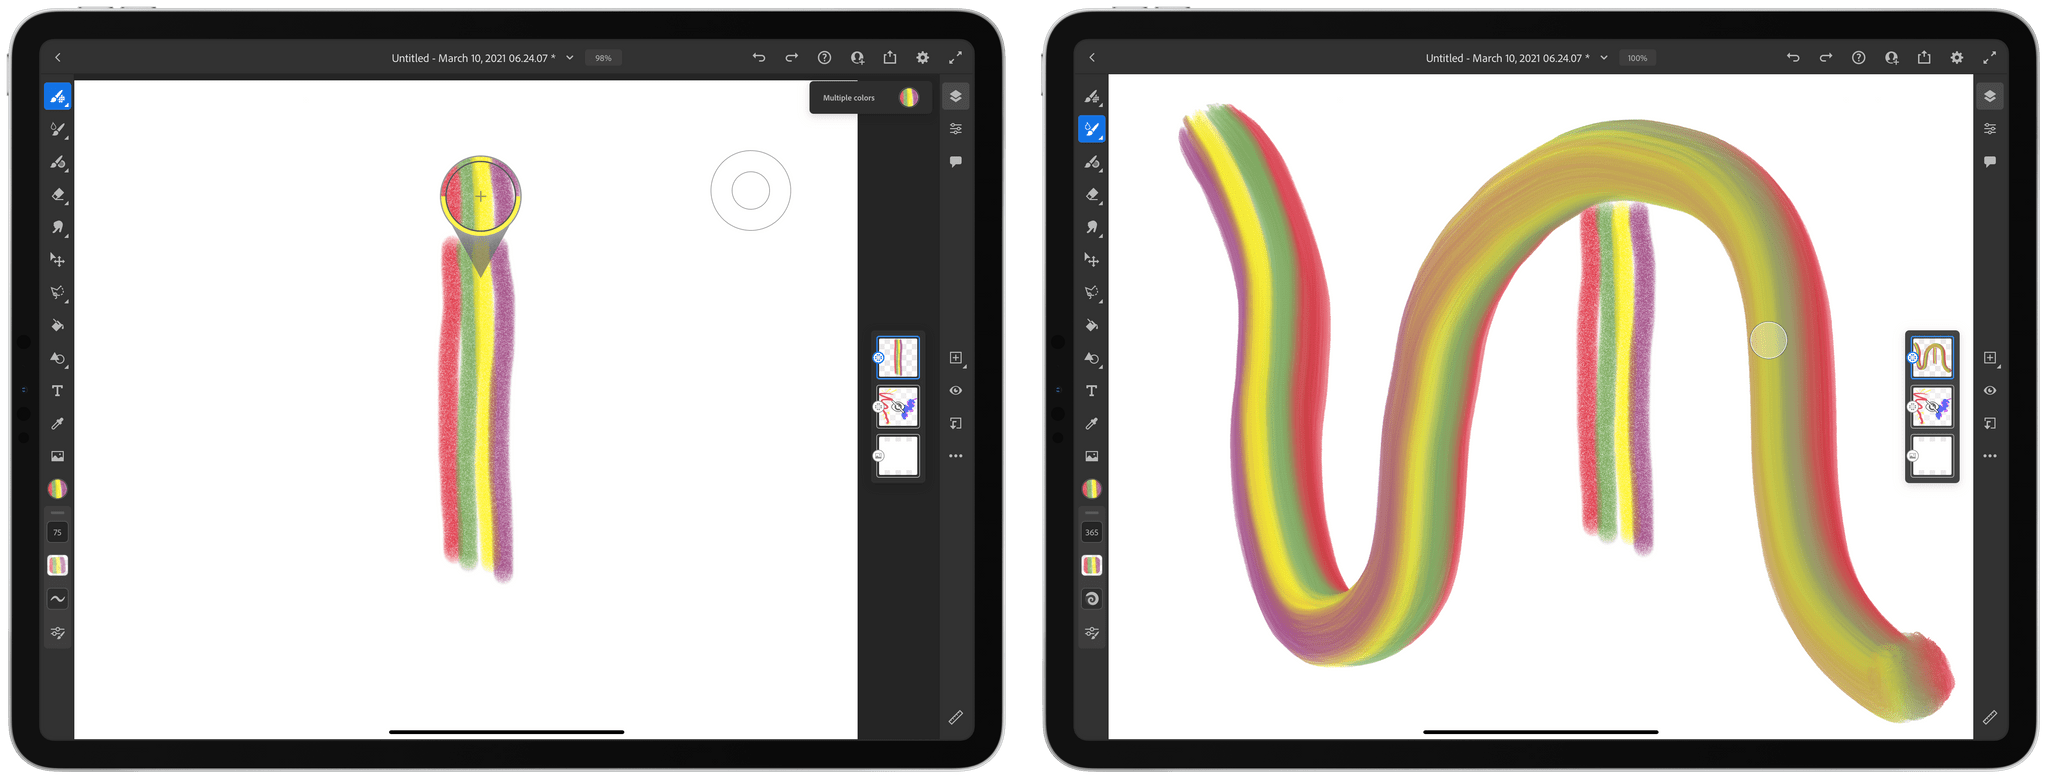
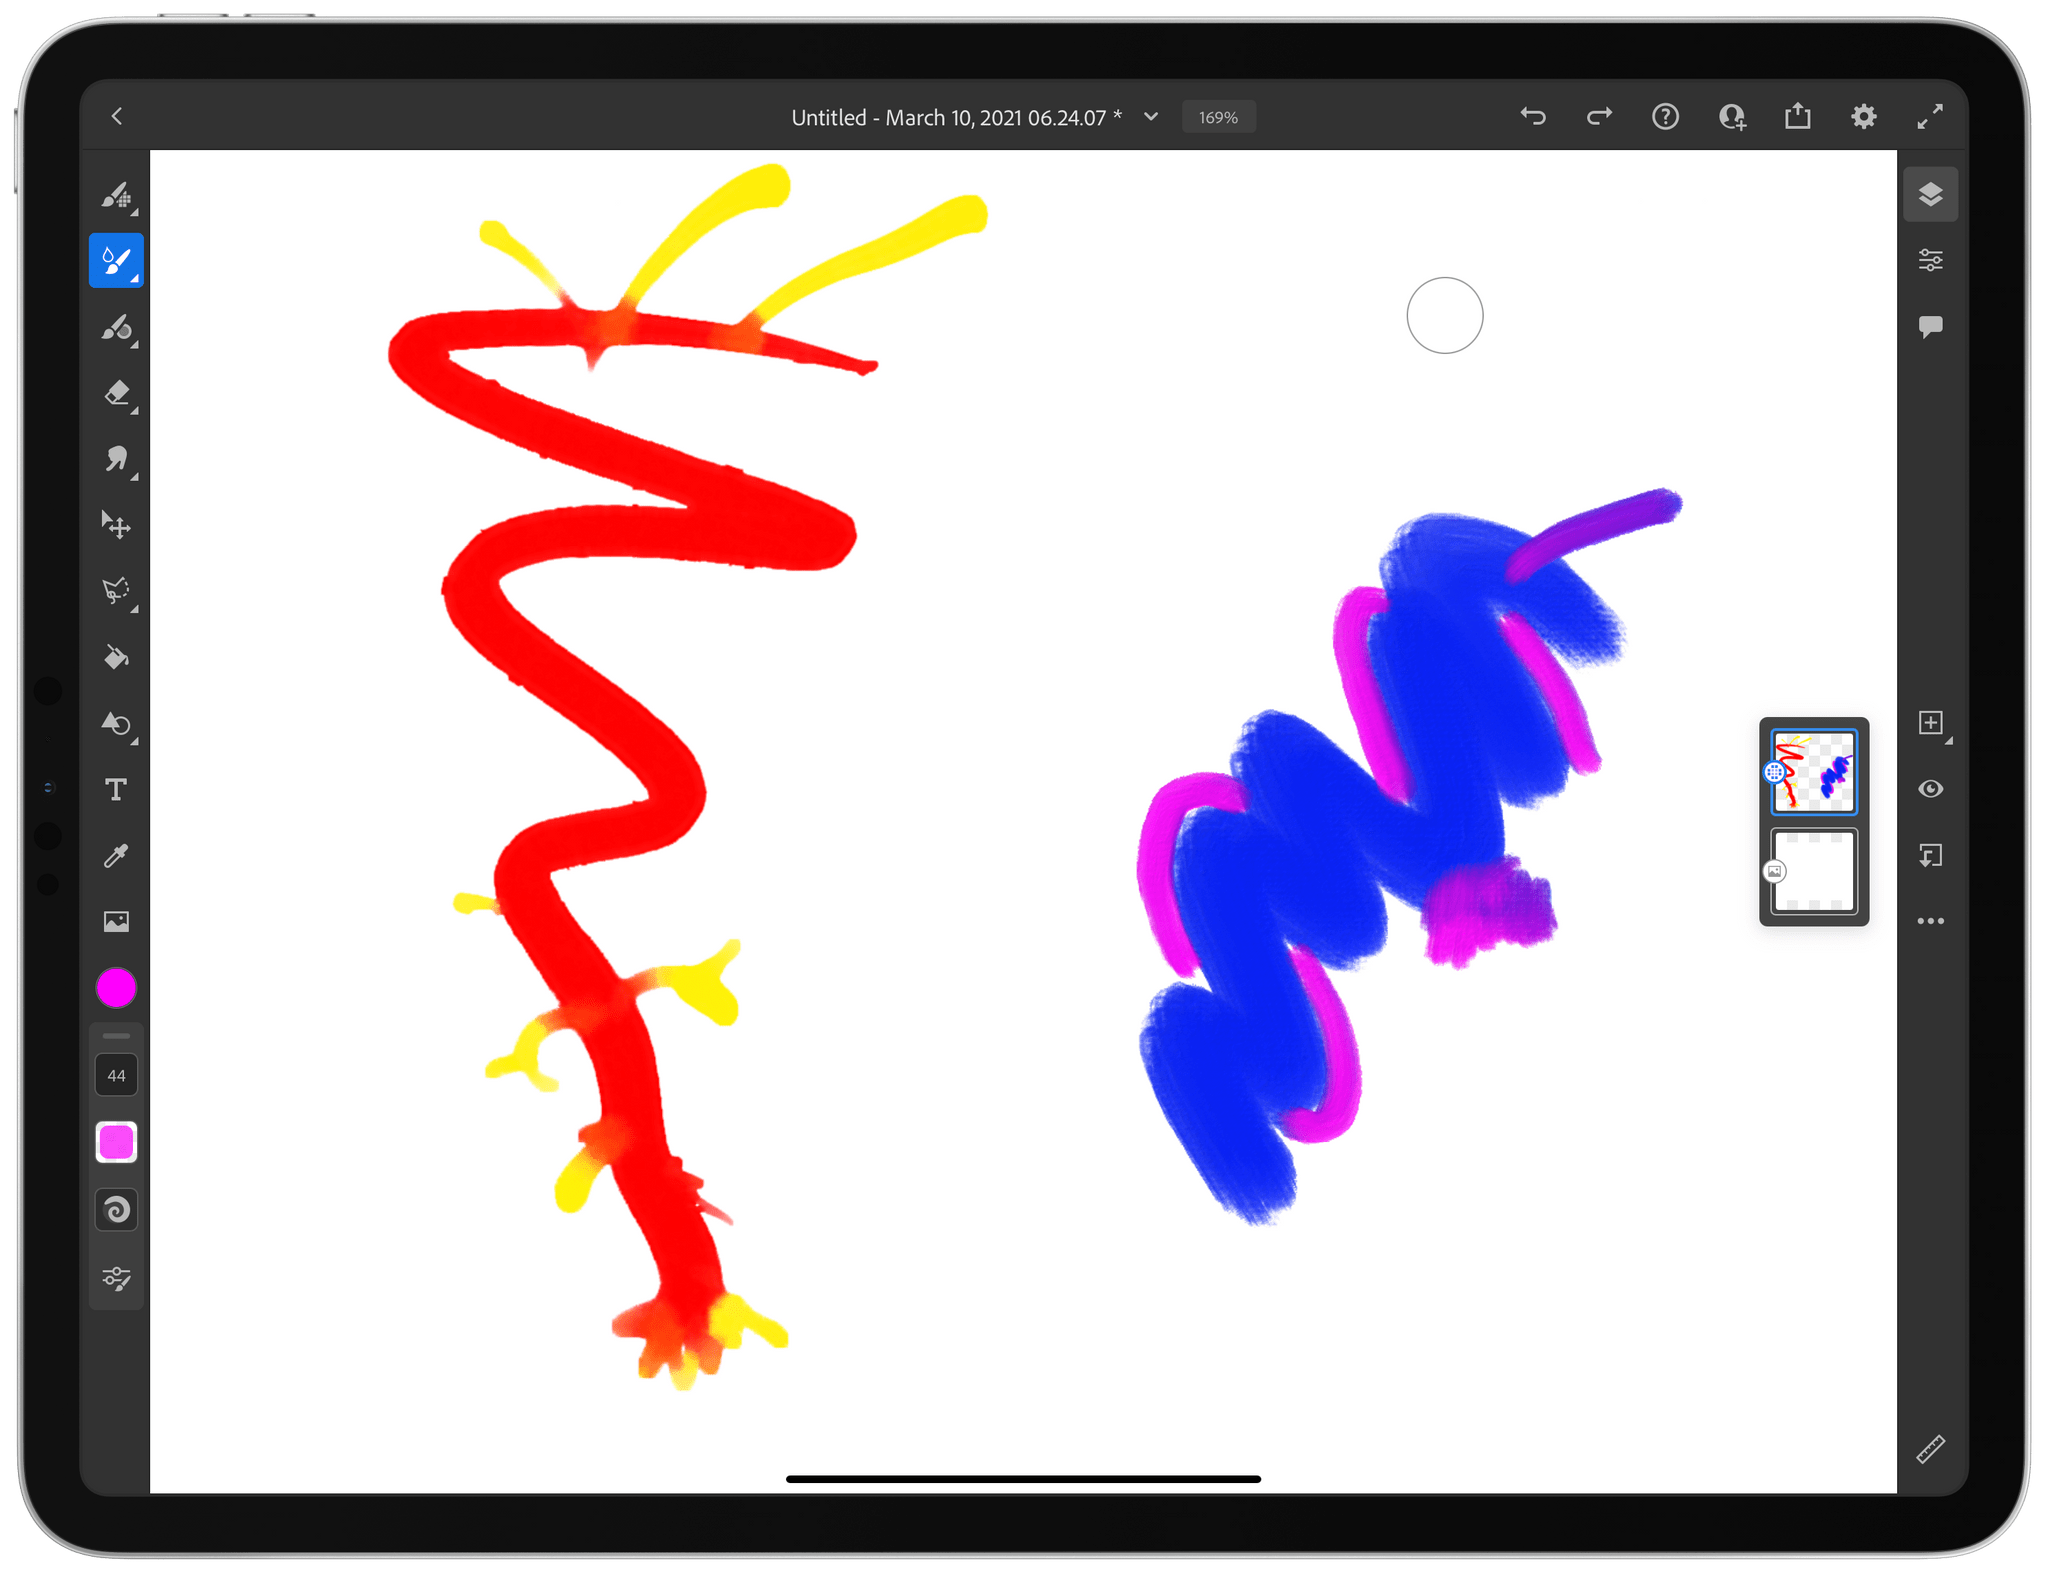
With the Touch Shortcut button, I selected four colors created with the pencil brush that I could then paint with using an oil brush.
One of Fresco’s neater tricks is its eyedropper tool, which works in tandem with the color picker. There’s an eyedropper button in the toolbar, but you can also activate and select it by tapping and holding on the canvas. Combining that gesture with the Touch Shortcut modifier button that covers onscreen at all times captures multiple colors and patterns, allowing you to draw and paint with more than one color simultaneously.
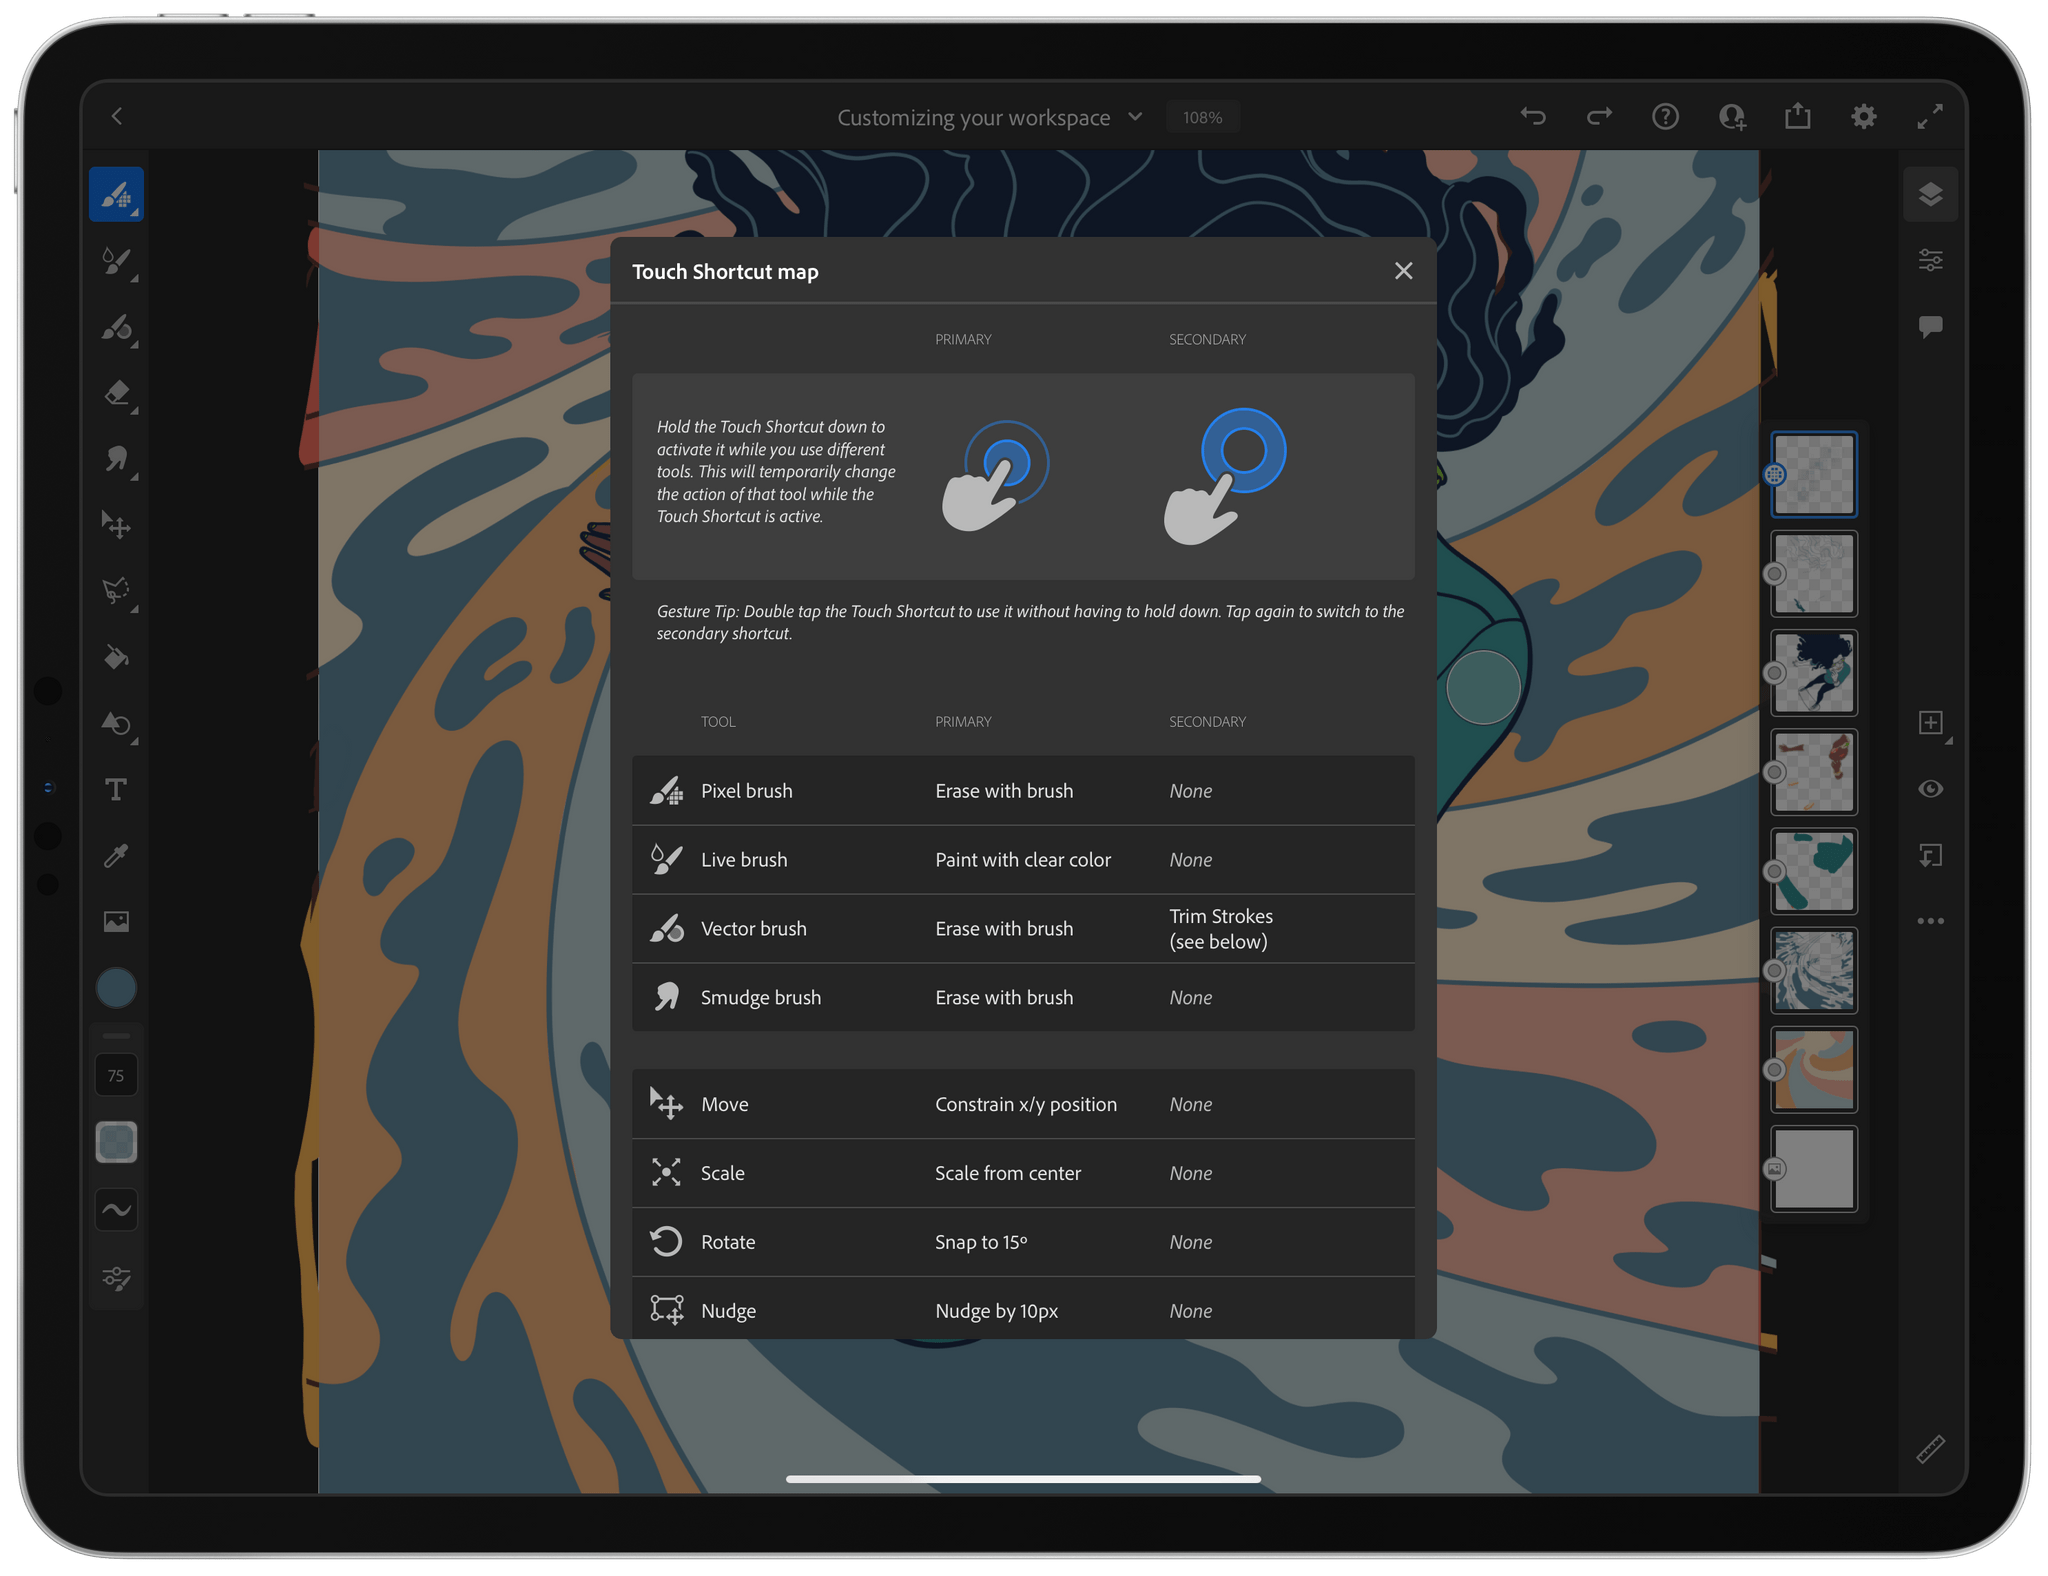
The Touch Shortcut button is one of the secret weapons of Fresco and Adobe’s other iPad Creative Suite apps for the iPad. The button works a lot like a modifier key on the Mac, extending the behaviors available when interacting with onscreen elements. There’s a long list of functionality that the Touch Shortcut activates in Fresco’s help view, including erasing with any of the pixel, vector, or smudge brushes, and painting with clear color, along with aspects of most of the other tools I’ve already covered. In some cases, features have a secondary modifier action that can be activated by tapping the Touch Shortcut and dragging a short distance, which provides a visual cue that the secondary action has been enabled. To avoid holding the Touch Shortcut the entire time you’re doing something, you can also double-tap, locking it.
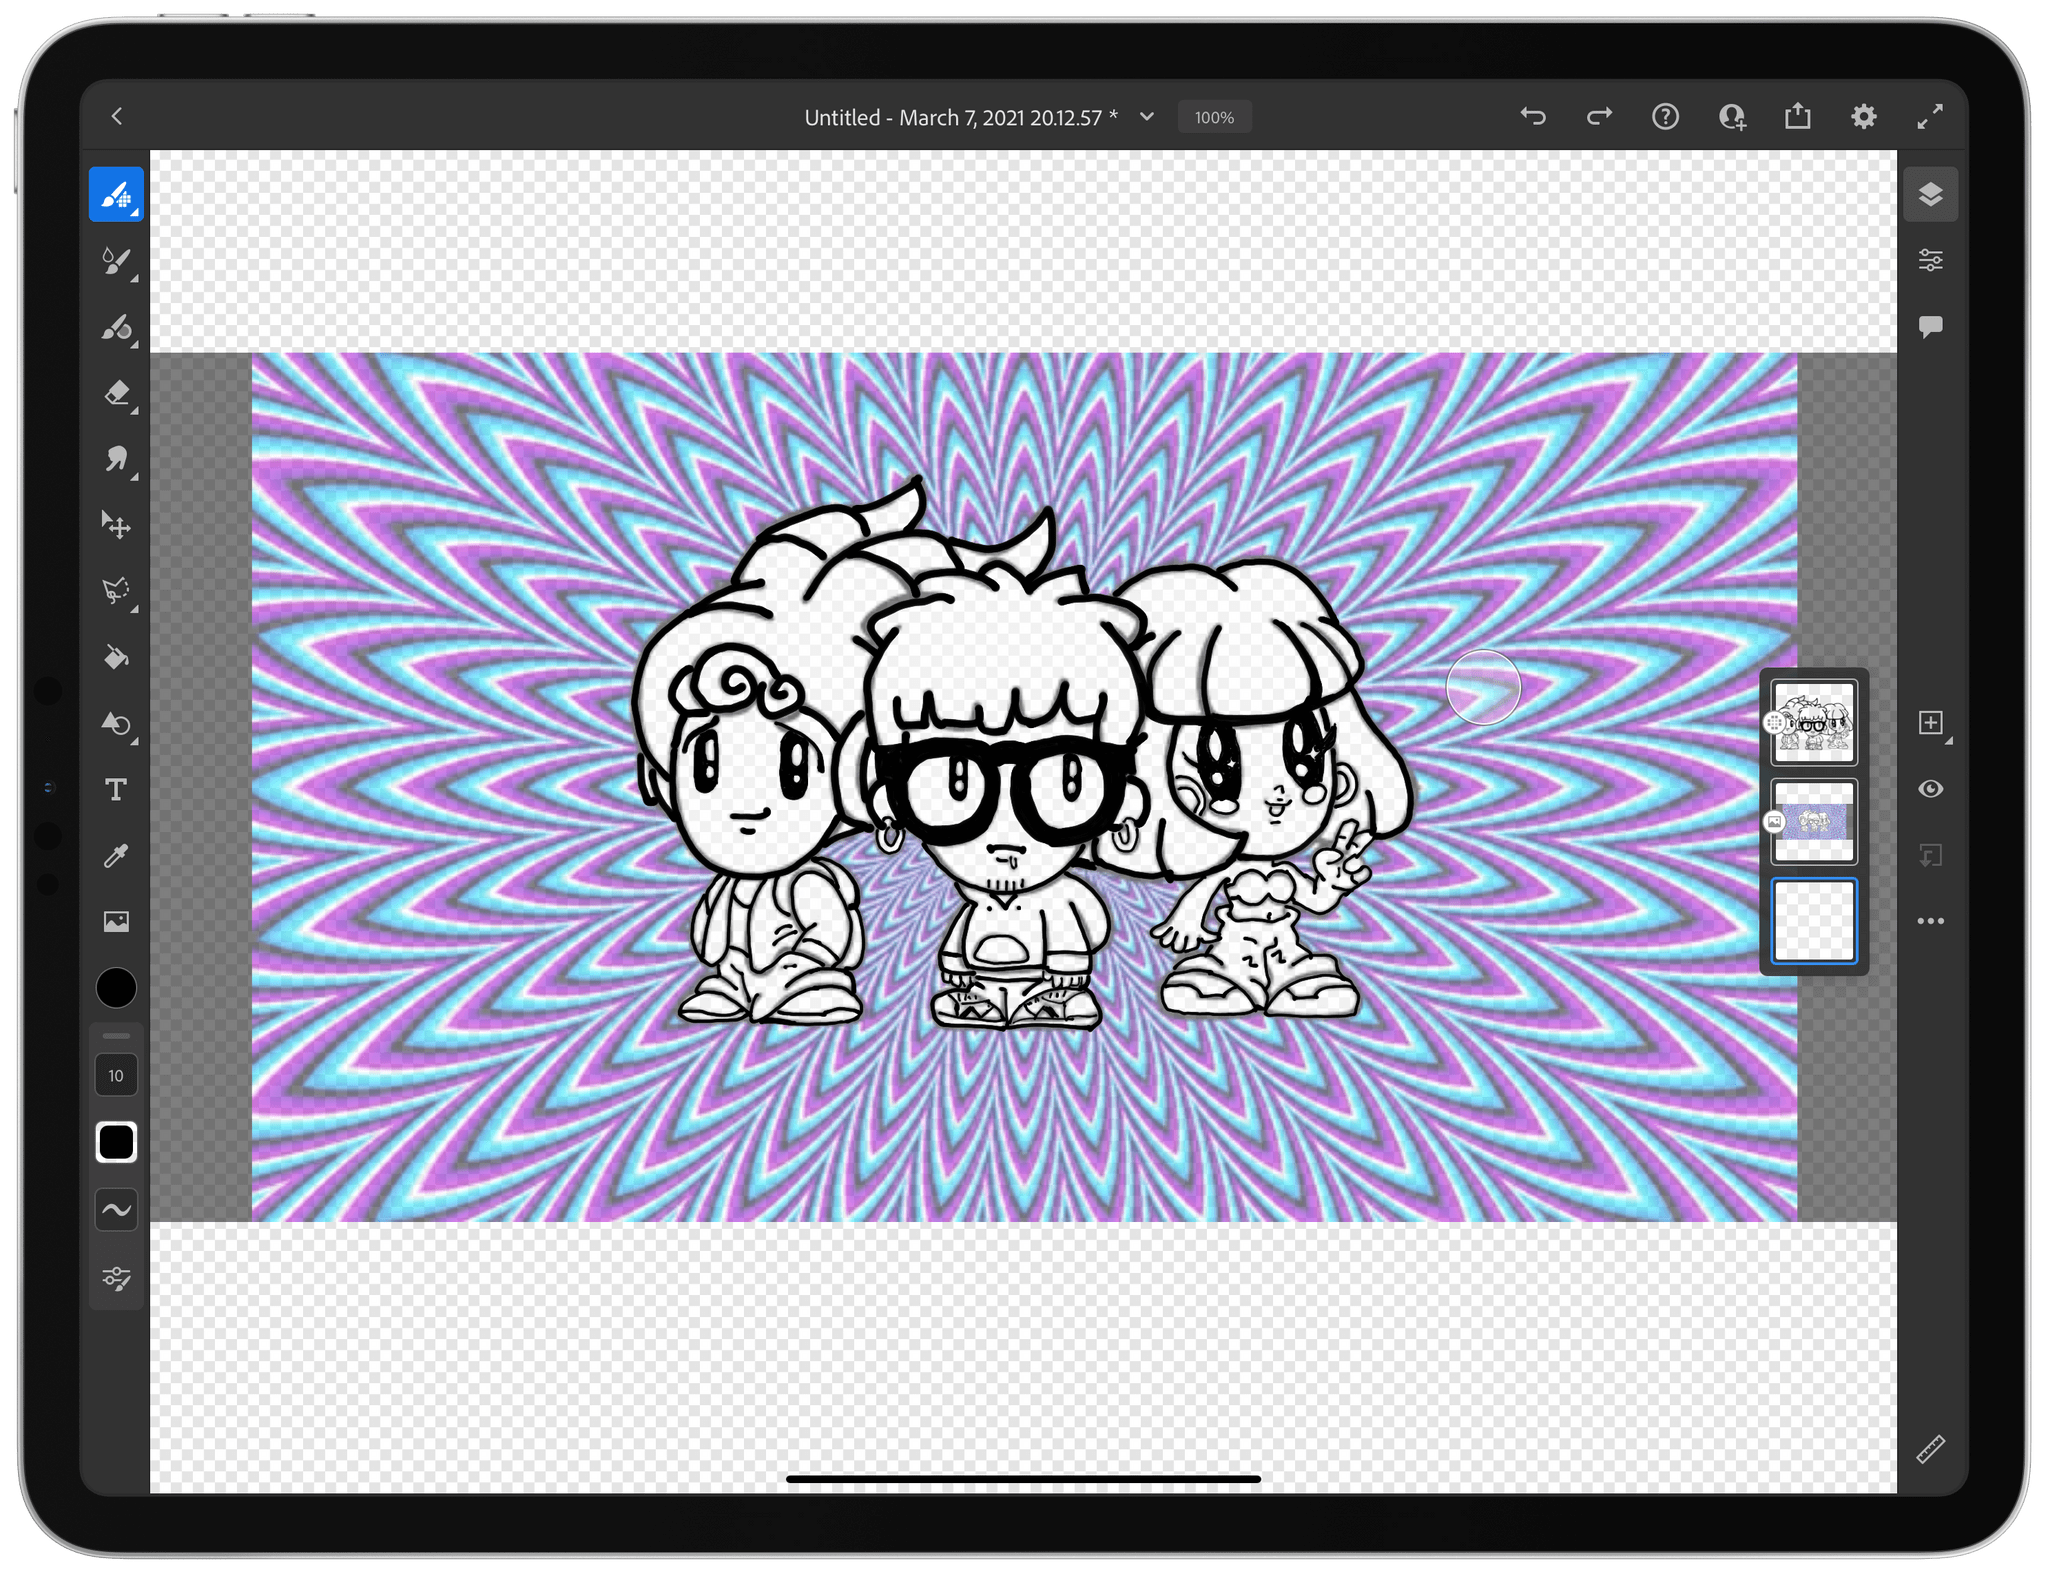
The image import tool is worth mentioning, too, because it’s terrific for beginners. If you want to use a photo or other image for reference to guide your drawing or painting, you can take a photo or import one from your photo library, your Adobe Creative Cloud storage, or the system file picker. The image is imported as a separate layer that you can drag to the side of the canvas to guide your artwork. Alternatively, you can reduce the opacity of the layer above your image and trace over it. Fresco can even transform the image into pixels allowing you to manipulate them with the app’s brushes, pushing and pulling the colors of a photo with oil or watercolor brushes to transform it into a painterly creation.
The toolbar that lives along the right side of Fresco’s canvas by default is dedicated to managing and manipulating layers and masks, as well as adding comments to documents shared with others. Next to the layers tools, there’s a stack of thumbnails representing each of your artwork’s layers, which can be toggled on and off with a tap of the button near the top of the toolbar. Each thumbnail has iconography to indicate whether it’s a pixel, vector, text, or other kind of layer and reflects whether a mask has been applied.
For anyone just starting out, my advice is when in doubt, start a new layer. There is no limit to the number of layers you can add to Fresco, and adding layers provides flexibility to make changes to portions of your artwork without affecting other parts. The options for working with layers and masks are extensive and beyond the scope of what I want to cover for people who are new to Fresco, but they are worth poking around to see what is possible.
Another excellent way to explore layers, masks, and everything else Fresco can do is its extensive learning options. Returning where we started with Fresco’s home view, don’t skip over the app’s Learn tab. Here, you’ll find hands-on tutorials that walk you through the app’s primary features using example art. That allows you to not only follow along with Adobe’s tips, but also try them yourself, which I found to be a fantastic entry point into the basics of the app. There are ten video tutorials covering a range of topics too.
Beneath the Learn tab, is the Discover tab, which collects live streams and stream replays created by Adobe and Fresco users. If you set up a Behance account, you can stream as you draw or paint too. I haven’t streamed myself drawing, but I have watched a couple of streams and found that they help eliminate the mystery of how different artwork I like is created, providing useful tips along the way.
Discover also includes a section of artwork submitted by users. There is a lot of excellent artwork featured, which is a terrific source of inspiration. Also, if you find an artist whose work you like a lot, you can follow them.
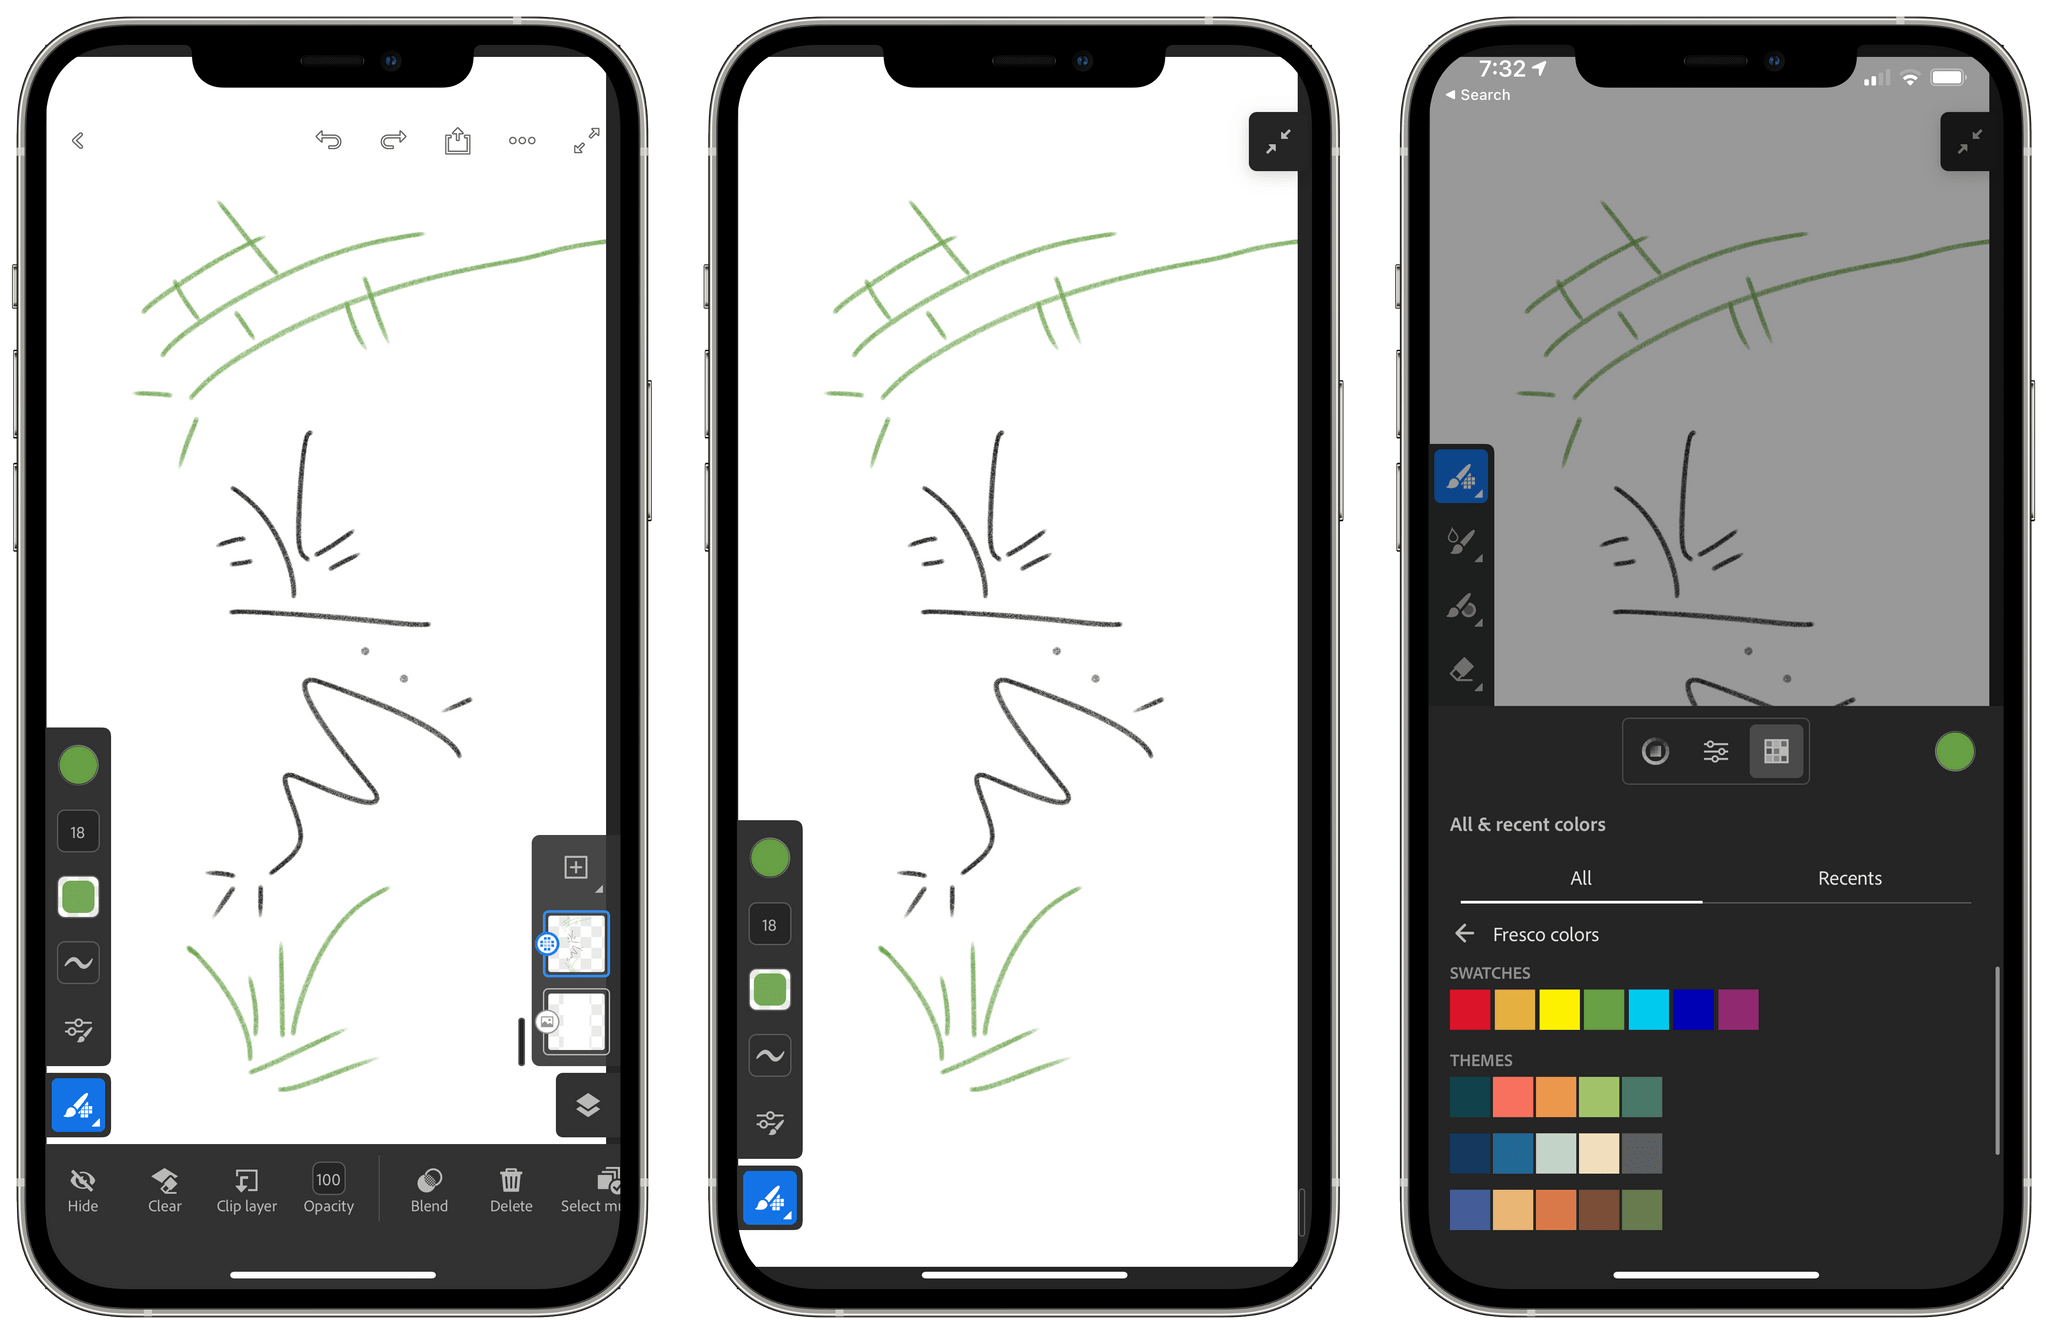
Turning up the smoothing of brushes when using Fresco on the iPhone makes drawing with your finger look nicer than it might otherwise.
I’ve focused most of this review on the iPad, but Fresco is available on the iPhone too. Given a choice between drawing on an iPad or an iPhone, the iPad wins every time because of its greater screen real estate and the Apple Pencil, but Fresco is surprisingly useful on the iPhone. In both versions of the app, there’s a double arrow button in the top right corner of the screen that hides most of Fresco’s UI, freeing up canvas space that is especially valuable on the iPhone.
When you’re using Fresco on the iPhone, you don’t have the benefit of the Apple Pencil’s precision. Still, the vast majority of the iPad app’s features are available here, making it an interesting on-the-go option. Coupled with Capture, Adobe’s app for collecting and creating visual elements with your device’s cameras, you can collect colors and build brushes and shapes to use in Fresco. The iPhone app also serves as a nice place to start roughing out ideas, and because everything syncs via Creative Cloud, you can refine your work later on your iPad.
In addition to syncing across Fresco versions via Creative Cloud, you can open Fresco documents in Photoshop for iPad and vice versa. You can also send Fresco documents to Illustrator for Mac, share links to documents with others, publish to Behance, and export in a variety of file formats. There’s room for more extensive integration with other Adobe apps, like Illustrator for iPad, but the existing integration is nonetheless impressive.
When I step back from Fresco, I’m reminded of videogames. Decades-old videogame genres all have their own shorthand – conventions developed over time that long-time players have internalized. That can make it hard for newcomers to get started, but the best games understand this and walk a careful line that makes them accessible to new players without frustrating those who are already familiar with the genre.
Fresco does the same thing. This is a powerful pro tool that can do some amazing things in the hands of an experienced artist. However, Fresco is also an app for doodlers and novices. The more complex tools are readily available, but they are kept out of the way until you need them or want to experiment with them. That lowers the intimidation factor for newcomers without making the tools too hard to access for pros.
I don’t mean to suggest that there isn’t plenty that can be gained from putting in some time learning what Fresco can do. A little knowledge of Fresco’s tools goes a long way, which Adobe understands judging from its excellent tutorials. Still, the hurdle to getting started is a low one, which I appreciate.
If you’re intrigued by Fresco, just start sketching, switch up your brushes to see how different ones look, and play with the brush settings and colors. Over time, poke around the other corners of the app and watch a couple of tutorials. If you want to go deep on every aspect of the app, which I did, watch Adobe Senior Design Evangelist Kyle T. Webster’s excellent two-part series on using Fresco that was part of Adobe MAX late last year. Also, take in some of the artwork and livestreams created by other users because that’s an excellent way to get a sense of what is possible with the app.
No matter your experience level or approach, though, Fresco is a fantastic example of what a professional-level app that has been designed with touch in mind from the get-go can achieve. Especially on the iPad Pro’s large screen, Fresco is one of the best examples of what the tight integration of advanced hardware and software, coupled with excellent design, can achieve. It’s impressive what Adobe has built with Fresco. Judging from past updates and the pace of development of Fresco and Adobe’s other apps, I expect we’ll see a lot more from Fresco in the coming months. In the meantime, though, grab your Apple Pencil and start doodling. It’s a lot of fun.
Adobe Fresco is available on the App Store as a free download.