This Week's Sponsor:

LookAway

It helps you take regular breaks from your Mac to rest your eyes, without breaking your flow.


Posts in reviews

iTunes and App Store Reminders with Recall

I don’t like some of the changes of the new App Store in iOS 6. That’s not a secret. But there is a single annoyance that goes way back before the iOS 6 days, all the way to when the App Store was relatively new in late 2008 and I got my first iPhone: the lack of a wish list.

I use the Wish List feature of iTunes a lot on my computer. Because I use iTunes mainly for buying apps and checking for updates, I rely on the Wish List to save interesting apps and games to check out later. However, I’ve dropped the occasional song or movie in the Wish List too.

The iTunes Wish List is simple and effective.

Too bad it doesn’t work on iOS devices.

While there have been some rumors on dedicated wish list features coming with an iOS update, in its current state the App Store (and iTunes Store) can’t use your iCloud account to sync items you’ve added to your wish list.

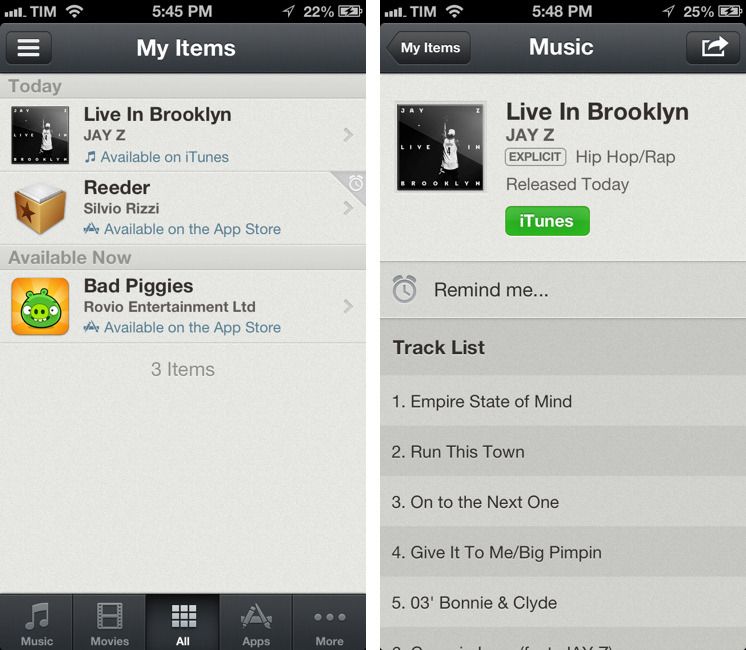
Recall by Overcommitted is not a wish list replacement in the sense that it’ll provide you with a list that syncs across devices. For that, I still use (and recommend) AppShopper, which is just phenomenal when it comes to tracking app updates and price drops with push notifications. Instead, Recall is about “never forgetting iTunes recommendations again”. It provides an alternative interface for the iTunes and App Stores, allowing you to save recommendations and create reminders for them. Read more


Best MultiMarkdown Previews On iOS

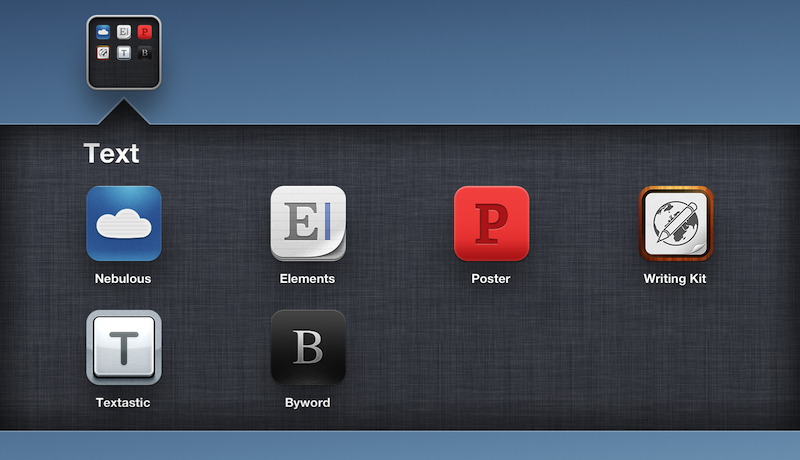
As a quick follow-up to my Nebulous Notes post on MultiMarkdown macros, I decided to put together a quick representation of how various apps I have tested handle MultiMarkdown previews on iOS.

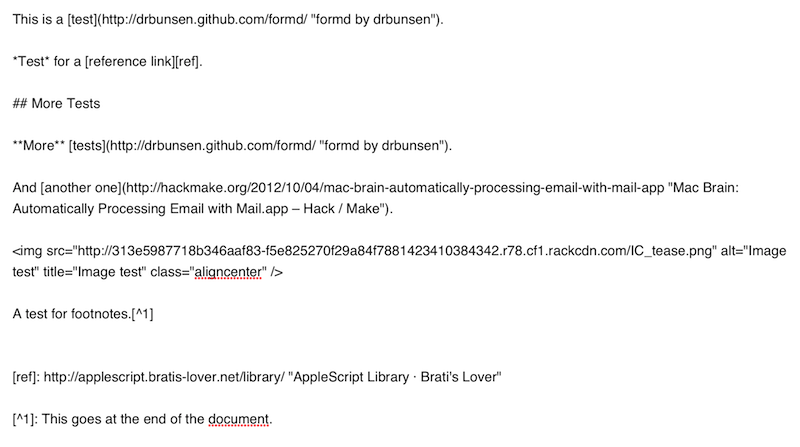
For reference, this is the text I previewed in each editor:

It’s a mix of regular Markdown (reference, inline links, bold and italics, section headers), MultiMarkdown (footnotes) and regular HTML (the centered image). I always write with this combination of syntaxes because that’s how articles end up on MacStories. The mix is also a good stress test to see how an app can handle various implementations of Markdown and HTML simultaneously.

Read more


Sakura Quick Math

I’ve always been bad at mathematics. It’s not that I don’t like the subject per se: I prefer words.

However, as they teach you in school, numbers are important. Some would argue our universe is made of numbers and mathematic relationships between their entities. Personally, I’d be fine just being able to jot down a quick addition or subtraction and having the result in my head without pulling out my iPhone’s calculator. The meaning of the universe can wait.

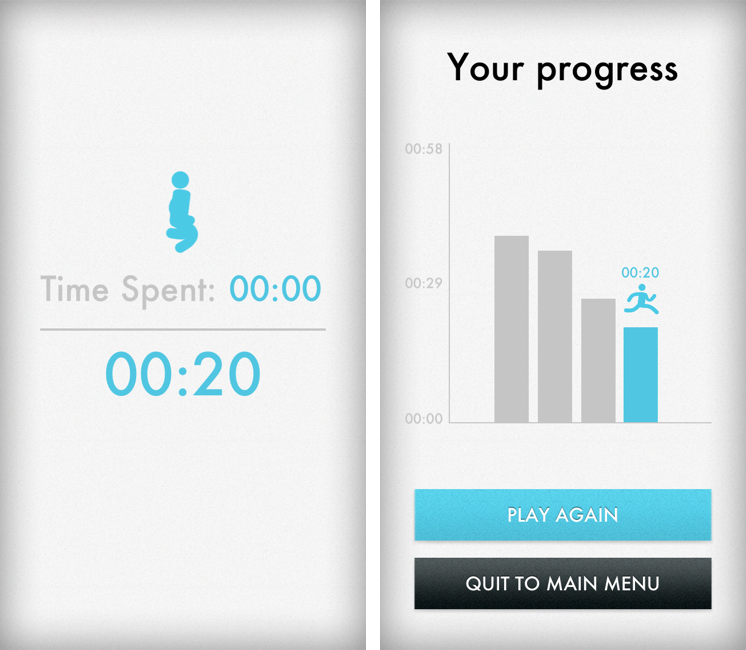
I think Sakura Quick Math is an interesting experiment for kids who want to improve their arithmetic skills for schools, as well as people like me who are way past high school and are often reminded that they’re terrible at calculations. Sakura Quick Math combines a clean, typography-oriented UI approach with the personal goal of getting better at stuff like additions, multiplications, divisions, and so forth.

Sakura Quick Math is perfect for students in grades 3, 4, 5 & 6 or those people who want to improve their all round mathematics ability. Multiple difficulty levels allow the app to grow with your skills. Developed in partnership with several schools, teachers and psychologists, with dedicated practice Quick Math should improve mathematics skills.

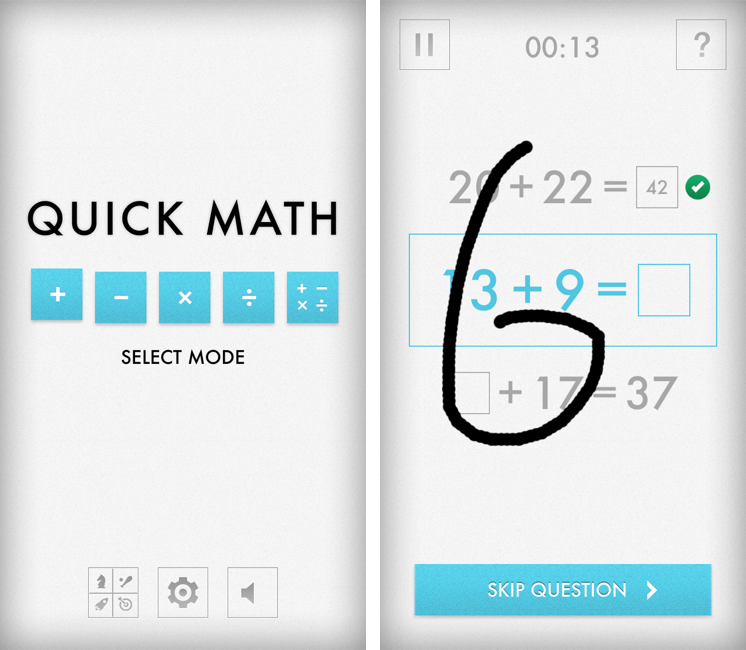
I like the app for a variety of reasons. It’s a game, but it’s also an educational tool; it reminds me of the Brain Age/Brain Training “games” that were so popular on the Nintendo DS a few years ago. Just like Brain Age, Sakura Quick Math takes advantage of the platform it runs on with a fully touch-based interaction. Through built-in handwriting recognition, the app “understands” the numbers you’re writing on screen. In my tests, I’ve found the app to be really clever at figuring out my scribbles, though it sometimes hung on “4” and “9”. However, it was just a matter of getting how the app wanted those numbers to be written (tip: don’t lift your finger off the screen).

There are various difficulty levels for five modes. The main screen allows you to pick one of these modes, disable sounds, or open the Settings to adjust the handwriting recognition method. You can also check out Game Center leaderboards if you want to feel bad about yourself.

When you’re playing, you have to be fast in writing your answer, as shorter times is what you’re going after. You can write anywhere on the screen, and you can clear your answer with a two-finger swipe if you’re not sure about it. Otherwise, the game will take a correct answer as soon as it’s entered. You can skip questions, or end games and go back to the main screen. The app has a nice selection of sound effects and it displays records on a chart that puts the focus on “getting better” rather than “beating someone else”. It’s a subtle but important difference.

I’ve found Beginner to represent an enjoyable challenge, but then again I’m bad at this kind of stuff, as I said above. You’d probably want to look at the Advanced level for the last mode, which mixes everything in a single game.

Sakura Quick Math looks good, is fun to play, and it’ll probably make my rusty brain a little less old when it comes to arithmetics. Plus, it’s only $0.99 on the App Store, so check it out if you’re looking for something different than the usual Angry Birds or Temple Run-style game.


Uniconsole: Copy & Paste Unicode Characters and Symbols

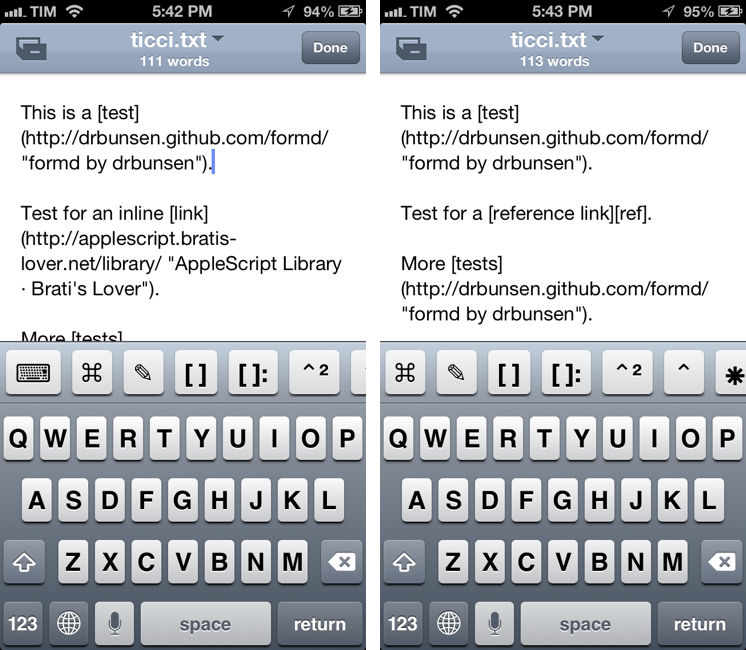
In putting together my Nebulous Notes macros, I ended up having to choose icons for the buttons that would sit on top of my keyboard. As you can see from my screenshots, I’m using specific Unicode characters that add a touch of personality to the interface. I copied those characters using Uniconsole.

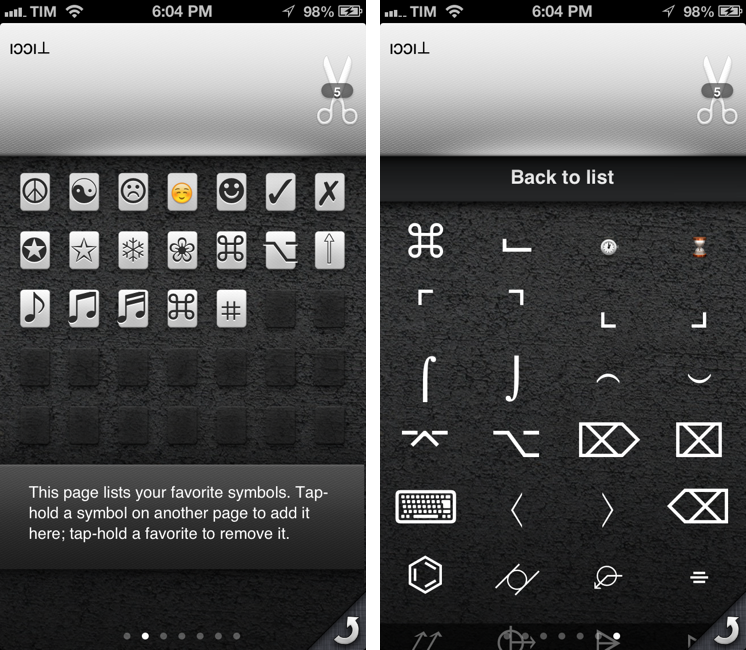
Uniconsole is a very simple, do-one-thing-well $1.99 app that runs on the iPhone and iPad. It fully supports iOS 6 and the new iPhone 5 display. Uniconsole lets you copy “unconvential” Unicode characters and symbols of various kinds and alphabets. While you can find these for free on the web, Uniconsole provides a nice interface to switch between alphabets and sections, save favorites, and copy them to the iOS clipboard. You can copy single characters or multiple ones at once; on iOS, you can bring up the native share sheet by tapping and holding on the scissors icon in the text box.

There are various pages of default symbols and characters; by swiping all the way to the right, you can access sections, including:

  • Dingbats
  • Arrows
  • Shapes
  • Letters
  • Technical
  • Currency
  • Old and New Emoji
  • Mathematical

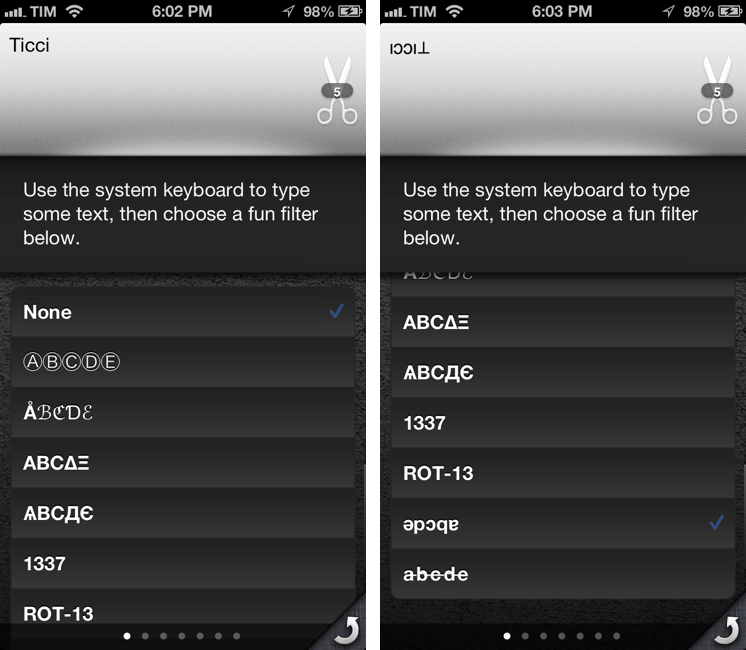
The selection is very rich, and the app is easy to navigate. There’s also a dedicated page that lets you type anything with the system keyboard, and apply a “fun filter” to your text. Filters include things like flip upside down or custom strikethrough.

Uniconsole does one thing extremely well, and while the characters and symbols it collects can be found online with a bit of research, I’ll take the convenience of a Universal app over wasting my time looking for a Unicode arrow any time. If you’re looking for this kind of functionality, $1.99 is money well spent for Uniconsole.


Faster Markdown Editing with Nebulous Notes Macros

I have written about Nebulous Notes before. Back in August, I posted an overview of my workflow with the app, plain text, and Markdown:

Combining Nebulous’ support for text substitution and cursor position macros has enabled me to achieve a powerful workflow when it comes to writing in Markdown. For instance, I can select words I want to turn into inline links, and have the app automatically wrap them between square brackets, and paste the contents of my clipboard (the link) to the right. To copy Markdown-ready links, I use my own bookmarklet. Or if I want to create a list, I can hit a button that inserts an asterisk and a space. Or again, if I need to create a text file with a format that OmniOutliner recognizes correctly, I can indent items with Nebulous’ $tab and $cursor macros.

Since then, a major 6.0 update to the app has been released, which, in my opinion, deserves another look. For the occasion, I’ve put together a few videos showing how I use the macros I have created for easier and quicker Markdown (more specifically, MultiMarkdown) formatting. The videos were recorded on a Mac using QuickTime capturing an AirPlay Mirroring session through Reflection. I have embedded them here using the video tag supported by most modern browsers (video files are encoded in MPEG-4). For Firefox users, there’s a fallback to Theora .ogv files (converted using ffmpeg2theora). I will also make my macros available for download at the end of this post. Read more


Getting Google Maps Back On iOS 6

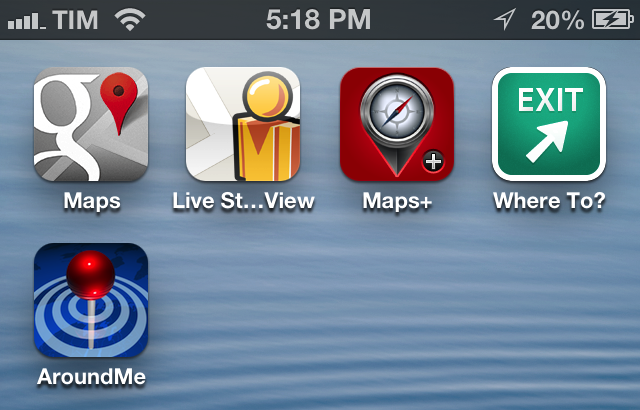
Since the release of iOS 6, I’ve been looking for apps and services to get Google Maps functionality back on my iPhone and iPad. While not as integrated as the previous Maps app of iOS 5, I’ve settled on a combination of various tools to access Google Maps for those times when Apple Maps fail me (unfortunately, most of the time in my area). Read more


Netbot: Tweetbot Reborn for App.net

Today, App.net gets its best iOS third-party client to date, and, unsurprisingly, it comes from Tapbots. Netbot is now available on the App Store for iPhone and iPad.

What’s not surprising isn’t simply the fact that Tapbots released an app that sets the bar higher for the competition; at first, it’s the fact that Netbot is basically Tweetbot re-engineered to work for App.net. Read more


60 Mountain Lion Tips

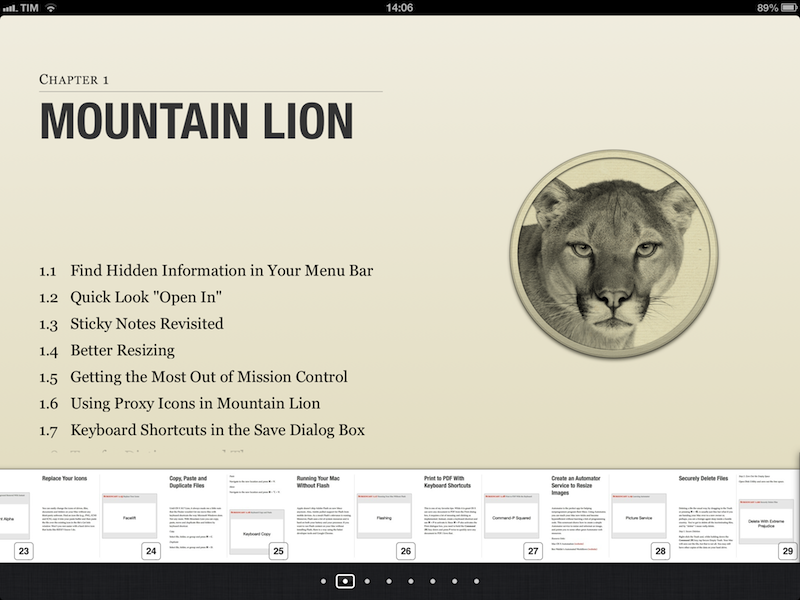
Published today, 60 Mountain Lion Tips is the latest entry in the MacSparky Field Guides series. Co-authored by Brett Terpstra and David Sparks, the book stands out for its clever use of iBooks 2.0 features (though a PDF version is also available) and embedded screencasts. There are 53 screencasts with 1.5 hours of video for a total of 60 tips organized in sections like Mountain Lion, Keyboard, Mail, and more.

I was able to read the iBooks version on my iPad, and, as usual, everything’s just great. I’m a big fan of David’s screencasts (see here and here for examples), and the format of this new book makes for a quick consumption that, however, doesn’t lack in depth. The tips are laid out clearly on the left side as text (assuming you’re reading in landscape mode, which lets you see more of a page), and screencasts are available as video thumbnails on the right. Both text and video are clear, concise, and to-the-point. David and Brett do the voiceover, and the quality of the videos doesn’t disappoint – they are compressed, but not too much, so they’re still pleasant to watch on the Retina display. The videos contain both voiceover and system audio, as well as on-screen tips for keyboard shortcuts and menus.

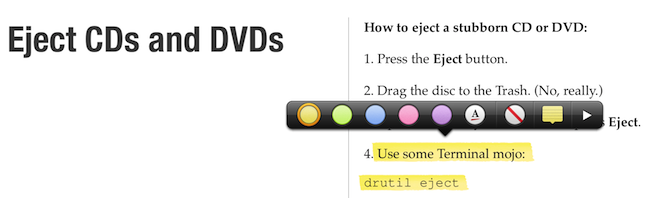
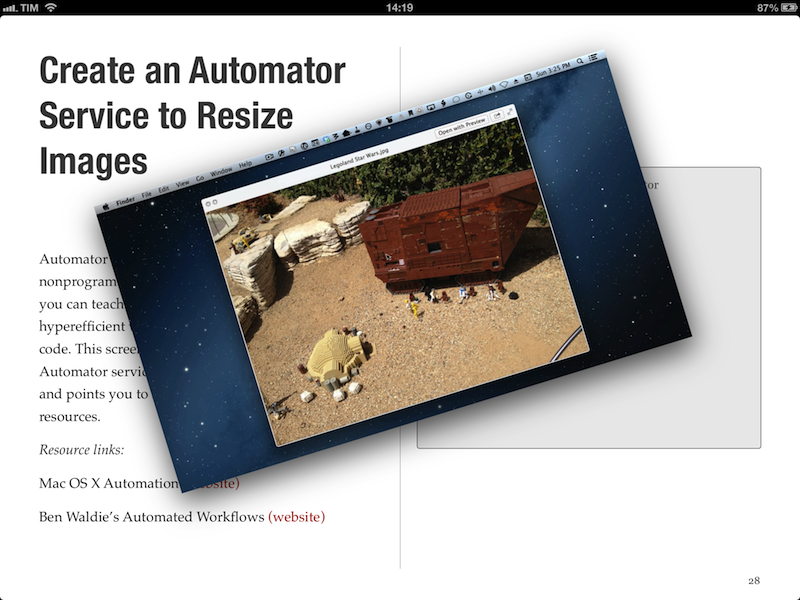
The layout of the book is clean, and, like David’s previous Field Guide, compliant with the design standards of iBooks Author. For instance, you can navigate from a page to a chapter by pinching out, you can access a dedicated page for notes and highlights, and you can watch videos inline. Similar to Push Pop Press’ old physics engine, you can also “move” videos on the screen as they play. It’s not that useful, but it’s very cool.

More importantly, 60 Mountain Lion Tips is easy to read and, in just a few hours, I actually got a lot out of it. We had our own Mountain Lion tips in our first eBook, and yet this book taught me a few OS X tricks I didn’t know about. I especially appreciated the section on third-party app tips, which many roundups usually don’t cover (we didn’t).

60 Mountain Lion Tips is only $6.99. Check out the website here for more information and a link to the separate PDF purchase.


Drip Makes Sharing Large Files Simpler

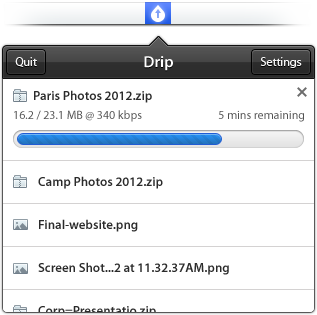
I recently discovered Drip, a new small menubar filesharing app developed by Scott Savarie (@ScottSavarie) and Florian Denis (@Olotiar), released last month. After I got to take a look at it, I think I maybe know where the drop-down menu redesign in the latest Dropbox beta introduced yesterday got partly inspired by. Drip is a small, really useful tool for sharing large files quick and completely without hassle.

Drip uses the servers of hosting service sendspace to store files. Sendspace offers a completely free data plan (called sendspace Lite) with which users can upload files sized up to 300 MB which are available for download for 30 days starting from the time of the newest download; after this period of time they get deleted. The free plan is ad-powered, so you need to click through some ads if you download a file from the sendspace website. But this is the only disadvantage: as far as I know from the sendspace FAQs, there ist no upload limit in total for free users. Perfect for quick, temporary file sharing of smaller, but also suited for quite large files. If you want to upload even larger files and store them for a longer time on sendspace, you can sign up for a Pro or Premium account which support larger file sizes and higher download bandwidth (see detailed plan information here).

Drip is your desktop companion for Mac if you use sendspace. Download it for free from the app website, install and launch, and you can immediately start uploading files. There is no signup needed, new users automatically are connected to a free sendspace account without having to login. If you want to be more flexible with using the free account (maybe you want to use the web upload interface) or if you are a Pro/Premium user, you can enter your login data for sendspace in app’s preferences (I’ll come to them in detail in a bit).

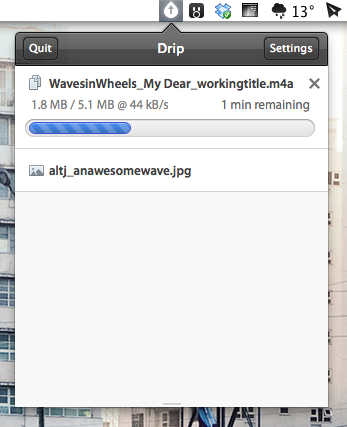
Uploading files works just like you would expect it: drag the file you want to upload for sharing onto the menubar icon, drop it, and it gets uploaded. If the upload is finished, the related sendspace.com download link is automatically copied to you clipboard for sharing.

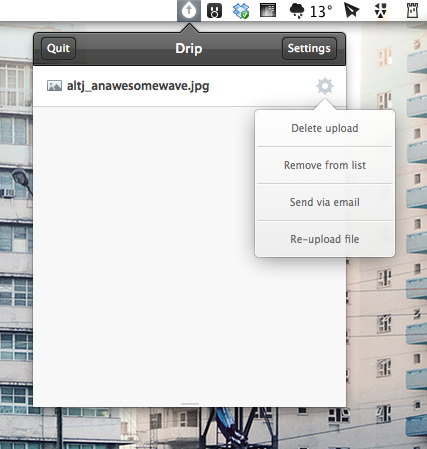
If you drop a file onto Drip’s menubar icon or if you click on it, a really great-looking drop-down menu appears listing the last uploaded files. You can change its height to view more elements without scrolling using a small draggable element at the very bottom of the list — I state this feature, since the dragging indicator is designed a bit too small in my opinion and is hard to aim at. You can click on any file in the list to copy its download URL again. Using the preference icon which always appear when you hover over a file list element you can do even more actions. The drop-down menu which appears when you click on it (my personal UI highlight of Drip) offers you to delete the upload, remove the file from the list to keep Drip uncluttered, automatically share the file download link with your default email client, or re-upload the file if you need a new link for any reason.

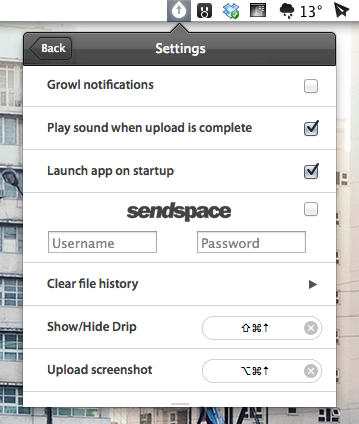
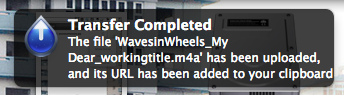
As you can see, Drip is very versatile, but still drop-dead simple to use. It also features extensive settings to make it work just like you want it to. You can bring them up by clicking the settings button in the top right corner of the main drop-down menu. Apart from the aforementioned sendspace account login panel, you can also activate Growl notifications (see example below), set up upload completion sound, clear the whole file list, or let the operating system start Drip at launch. However, the best option available in the settings are the shortcuts. Besides the standard one to bring up the app window, you can also set a custom shortcut for uploading the last screenshot you took, a truly great feature for quick thought sharing or reporting bug fixes.

After I researched a bit about the current free data plans of sendspace, I decided to make Drip my default app for quick, temporary file sharing. I had accounts for Droplr and Cloudapp in the past, as well as a free Dropbox account. But non of those services supports large file uploads (or they didn’t work like with Cloudapp), or in case of Dropbox I had to intricately delete unused files to free space for new ones. With Drip, all this hassle is gone (at least for now). It’s not just a new app supporting another web hosting service in the game, version 1 is already a serious competitor for apps like Droplr and iCloud. I can’t wait to see if they manage to develop a fitting iOS client of it as well to have all the uploaded files and links available on the road. Currently, Drip is Mac-only. But if the app gets as popular as I think it will, this will surely change soon.

You can download Drip for free on the app’s website.