iPad Diaries is a regular series about using the iPad as a primary computer. You can find more installments here and subscribe to the dedicated RSS feed.
After several years without updates to a product that, somewhat oddly, “remained in Apple’s lineup”, the Mac mini was revived by the company last November with a major redesign geared toward pro users and designed for flexibility. As listeners of Connected know, one of the show’s long-running jokes was that I would buy my last Mac ever as soon as Apple released a new Mac mini1; when it happened, I took the opportunity to completely rethink my home office with a new desk, well-specced Mac mini, and 4K display that supported both modern Macs and iPad Pros via USB-C.
Effectively, I had never owned a desktop Mac until2 this Mac mini arrived. I always preferred portable Macs to workstations, and over the years I moved from a late 2008 MacBook Pro to a 2011 MacBook Air and, in 2015, back to the (now Retina) MacBook Pro again. Over the past couple of years, however, and particularly since the introduction of iOS 11, my penchant for Mac laptops started clashing with the realization that the iPad Pro had become my de-facto laptop. I was using a MacBook Pro because I thought I needed a portable Mac machine just like when I started MacStories in 2009; in reality, the iPad had been chipping away at the MacBook’s core tasks for a while. Eventually, I saw how my MacBook Pro had become a computer I’d open twice a week to record podcasts, and nothing more.
With the iPad Pro as my primary computer, the Mac’s role in my life evolved into a fixed environment that was necessary for multi-track audio recording and Plex Media Server. And as I shared on Connected on several occasions, I realized that my workflow in 2018 wasn’t the same as 2009 anymore: it no longer made sense for me to have a Mac laptop when what I really needed was a small, but powerful and extensible Mac desktop. That’s why I started waiting for a new Mac mini, and my wishes were granted with the 2018 relaunch of the mighty desktop machine.
For the past three months, I’ve been busy setting up the Mac mini and optimizing it for the tasks that inspired its purchase. I bought external SSD drives (these two) to use for Plex and Time Machine backups; I set up a homebridge server to add unsupported accessories to HomeKit (such as our 2017 LG TV) and turn iTunes playlists into HomeKit scenes; I rethought my podcasting setup (I now have a Zoom H6 recorder and a taller microphone stand) and arranged my desk to make it easier to use the same UltraFine 4K display with the Mac mini and iPad Pro (I just need to plug in a different USB-C cable). Because this Mac mini is fast enough to handle 4K transcoding for Plex without breaking a sweat, I started using youtube-dl to enjoy 4K YouTube videos on iOS devices with the Infuse or Plex apps. I’m trying to take advantage of a powerful, always-on Mac server in any way I can, and I’m having lots of fun doing it.
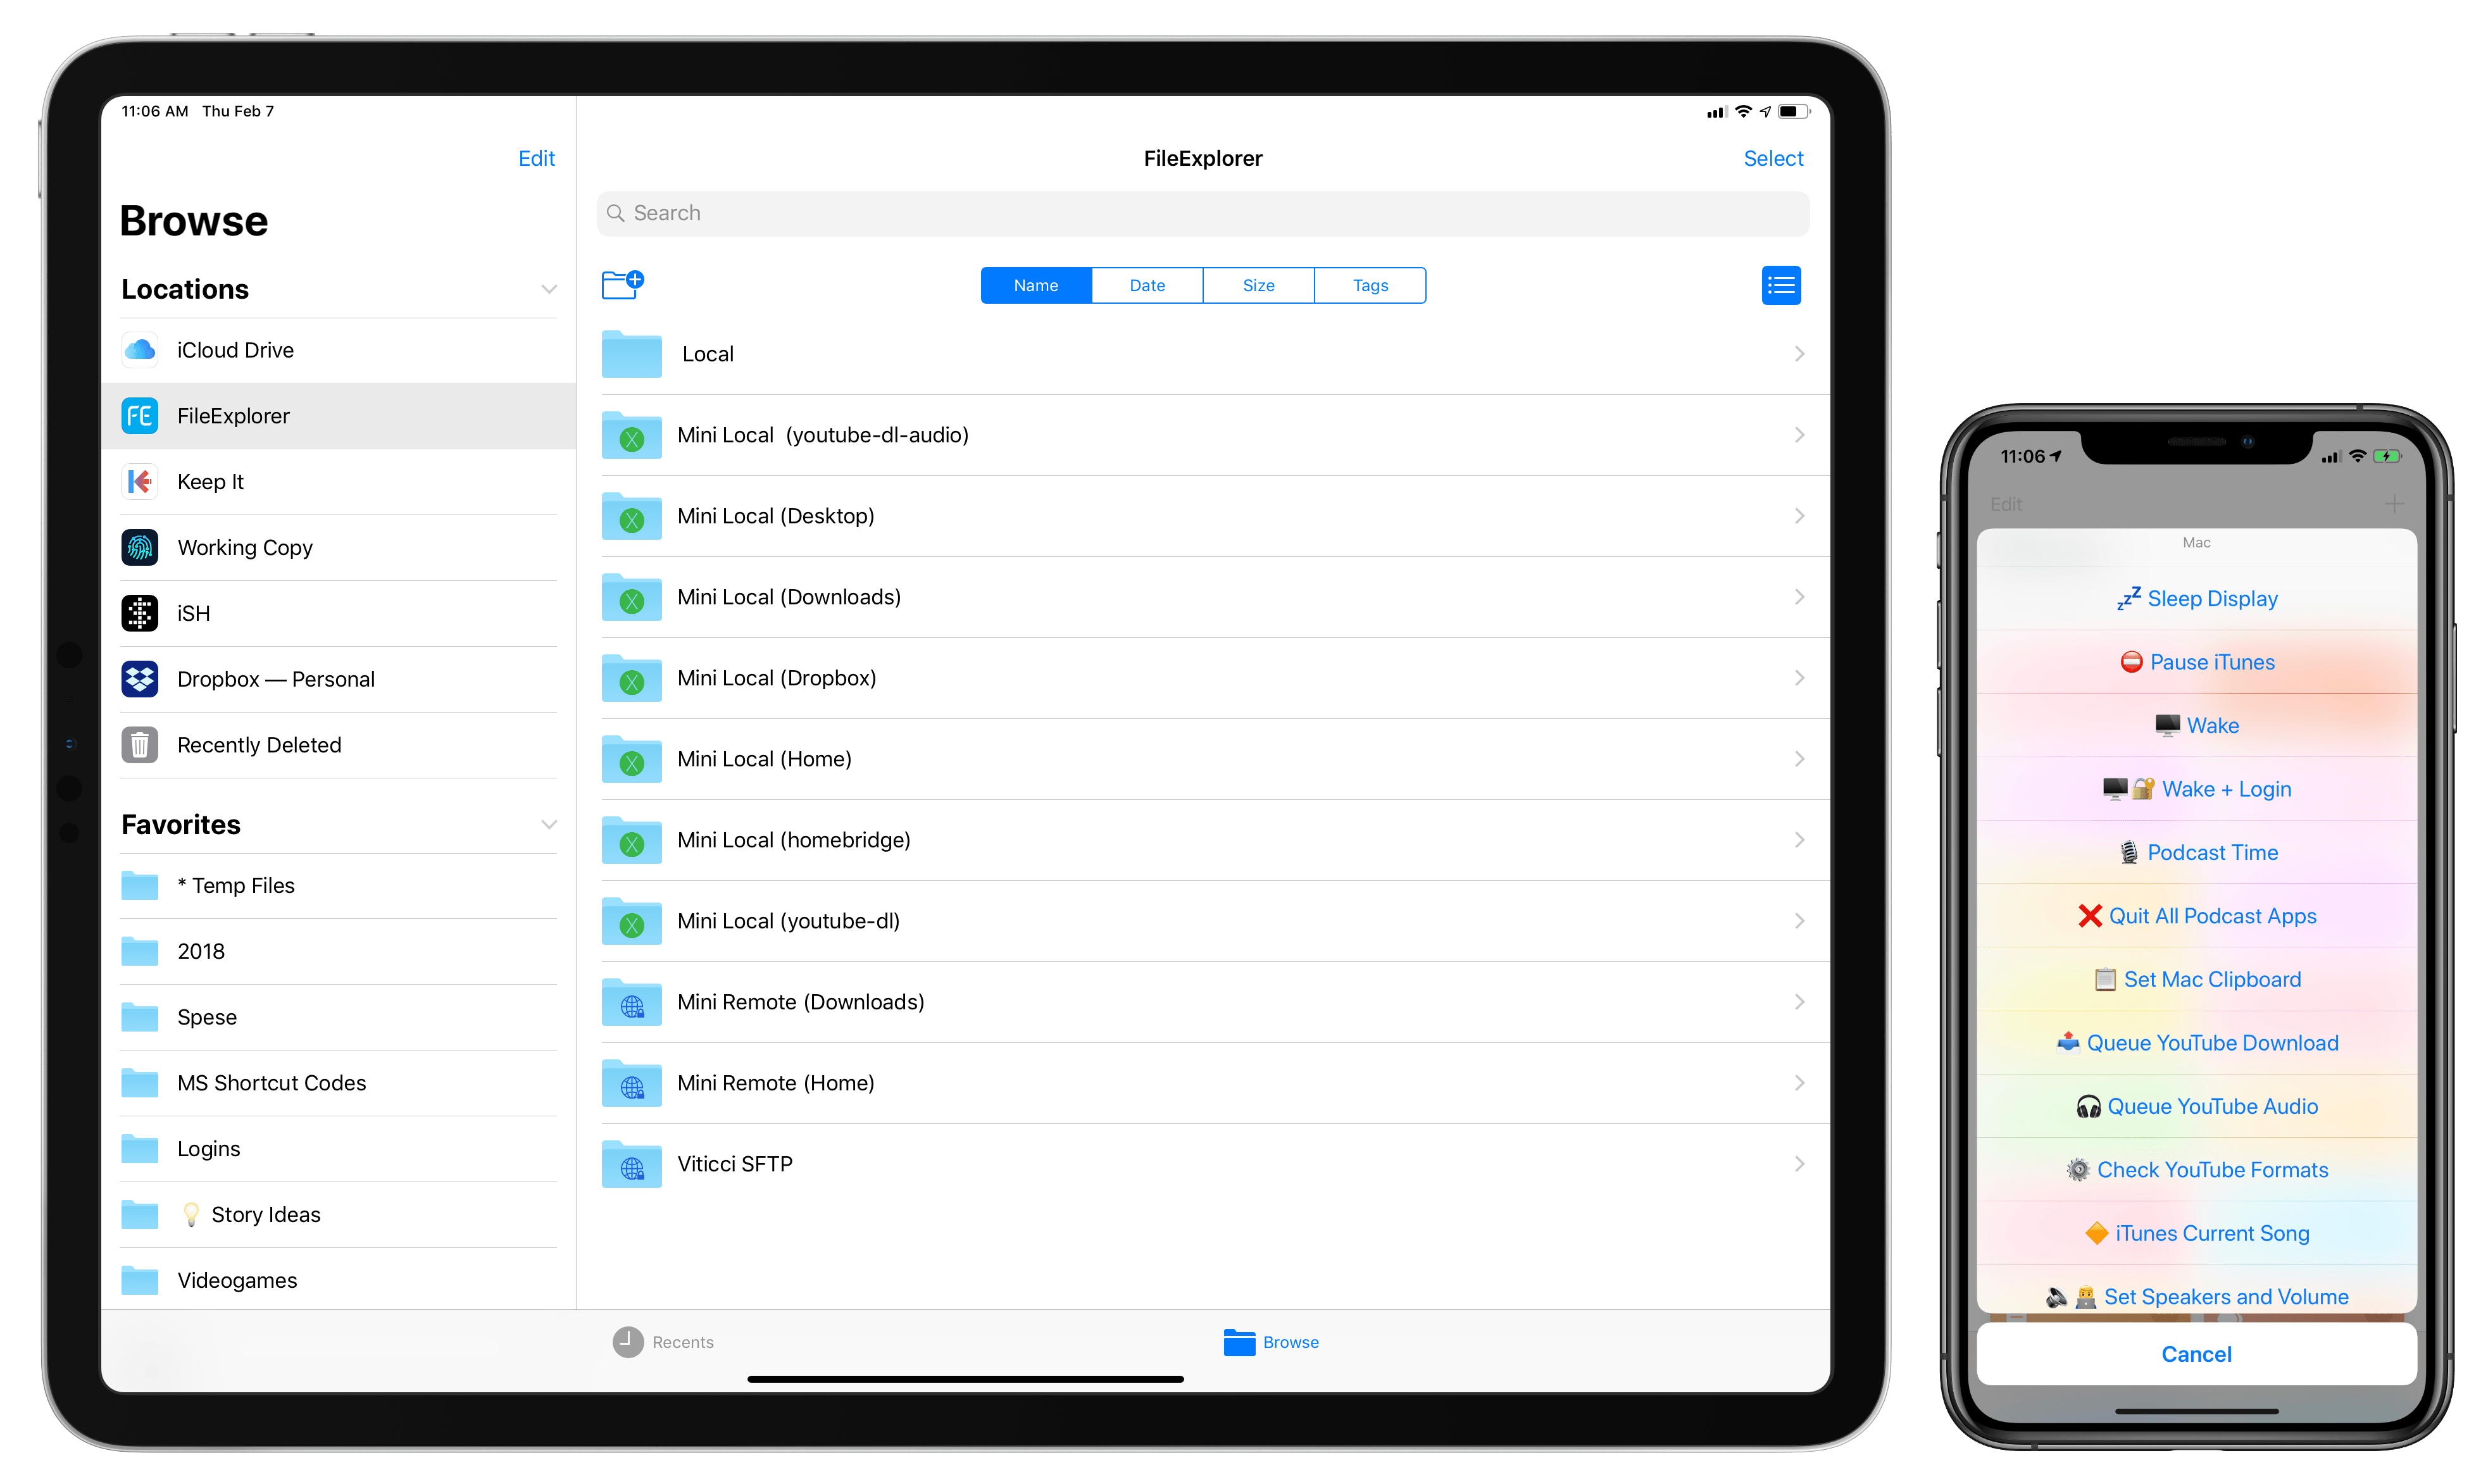
This doesn’t change the fact that the iPad Pro is my main computer, and that I want to interact with macOS as little as possible. Aside from recording podcasts using Mac apps, I rely on the Mac mini as a server that performs tasks or provides media in the background. Any server requires a front-end interface to access and manage it; in my case, that meant finding apps, creating shortcuts, and setting up workflows on my iPad Pro to access, manage, and use the Mac mini from iOS without having to physically sit down in front of it.
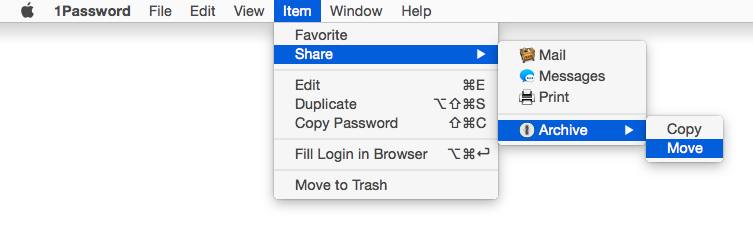
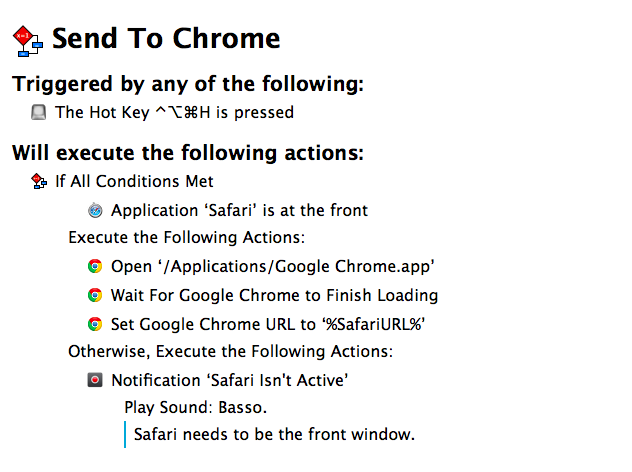
In this multi-part series, I’m going to cover how I’m using the 2018 iPad Pro to access my Mac mini both locally and remotely, the apps I employ for file management, the custom shortcuts I set up to execute macOS commands from iOS and the HomePod, various automations I created via AppleScript and Keyboard Maestro, and more. Let’s dive in.
- It was funny because everybody thought the Mac mini line was done. ↩
- Many years ago, I did use an iMac for a few months. However, I never considered that machine truly mine – it was set up at my parents' house (where it now sits unused) and I worked on it for a while until I moved in with my girlfriend a few months later. ↩