Taking good-looking screenshots on the Apple Vision Pro isn’t easy, but it’s not impossible either. I’ve already spent many hours taking screenshots on the device, and I thought I’d share my experience and some practical tips for getting the best screenshots possible.
Although I’ve only had the Apple Vision Pro for a week, I’ve already spent a lot of time thinking about and refining my screenshot workflow out of necessity. That’s because after I spent around three hours writing my first visionOS app review of CARROT Weather and Mercury Weather, I spent at least as much time trying to get the screenshots I wanted. If that had been a review of the iOS versions of those apps, the same number of screenshots would have taken less than a half hour. That’s a problem because I simply don’t have that much time to devote to screenshots.
Taking screenshots with the Apple Vision Pro is difficult because of the way the device works. Like other headsets, the Apple Vision Pro uses something called foveated rendering, a technique that’s used to reduce the computing power needed to display the headset’s images. In practical terms, the technique means that the only part of the device’s view that is in focus is where you’re looking. The focal point changes as your eyes move, so you don’t notice that part of the view is blurry. In fact, this is how the human eye works, so as long as the eye tracking is good, which it is on the Apple Vision Pro, the experience is good too.
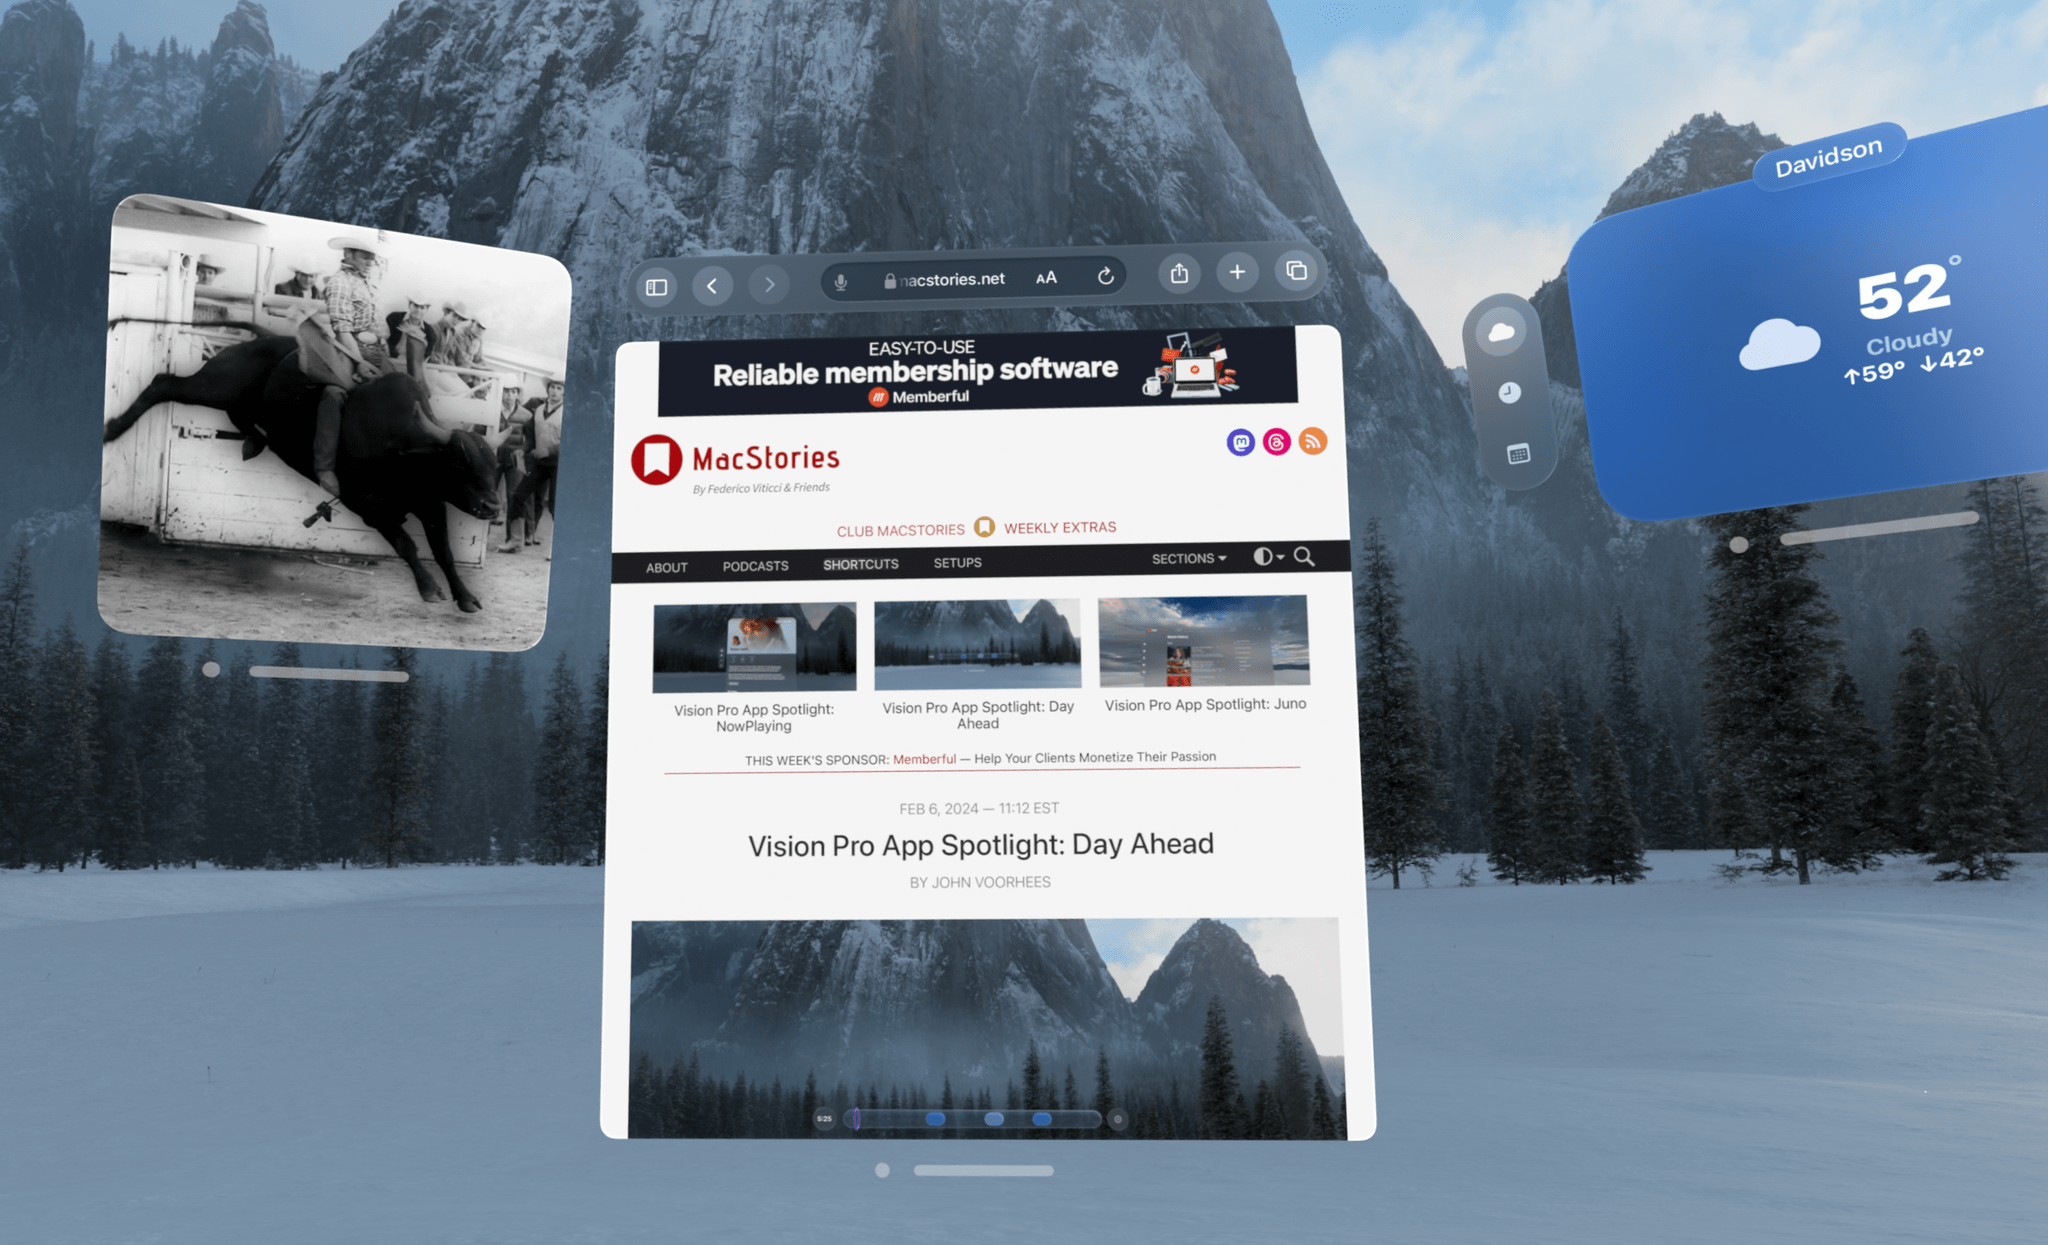
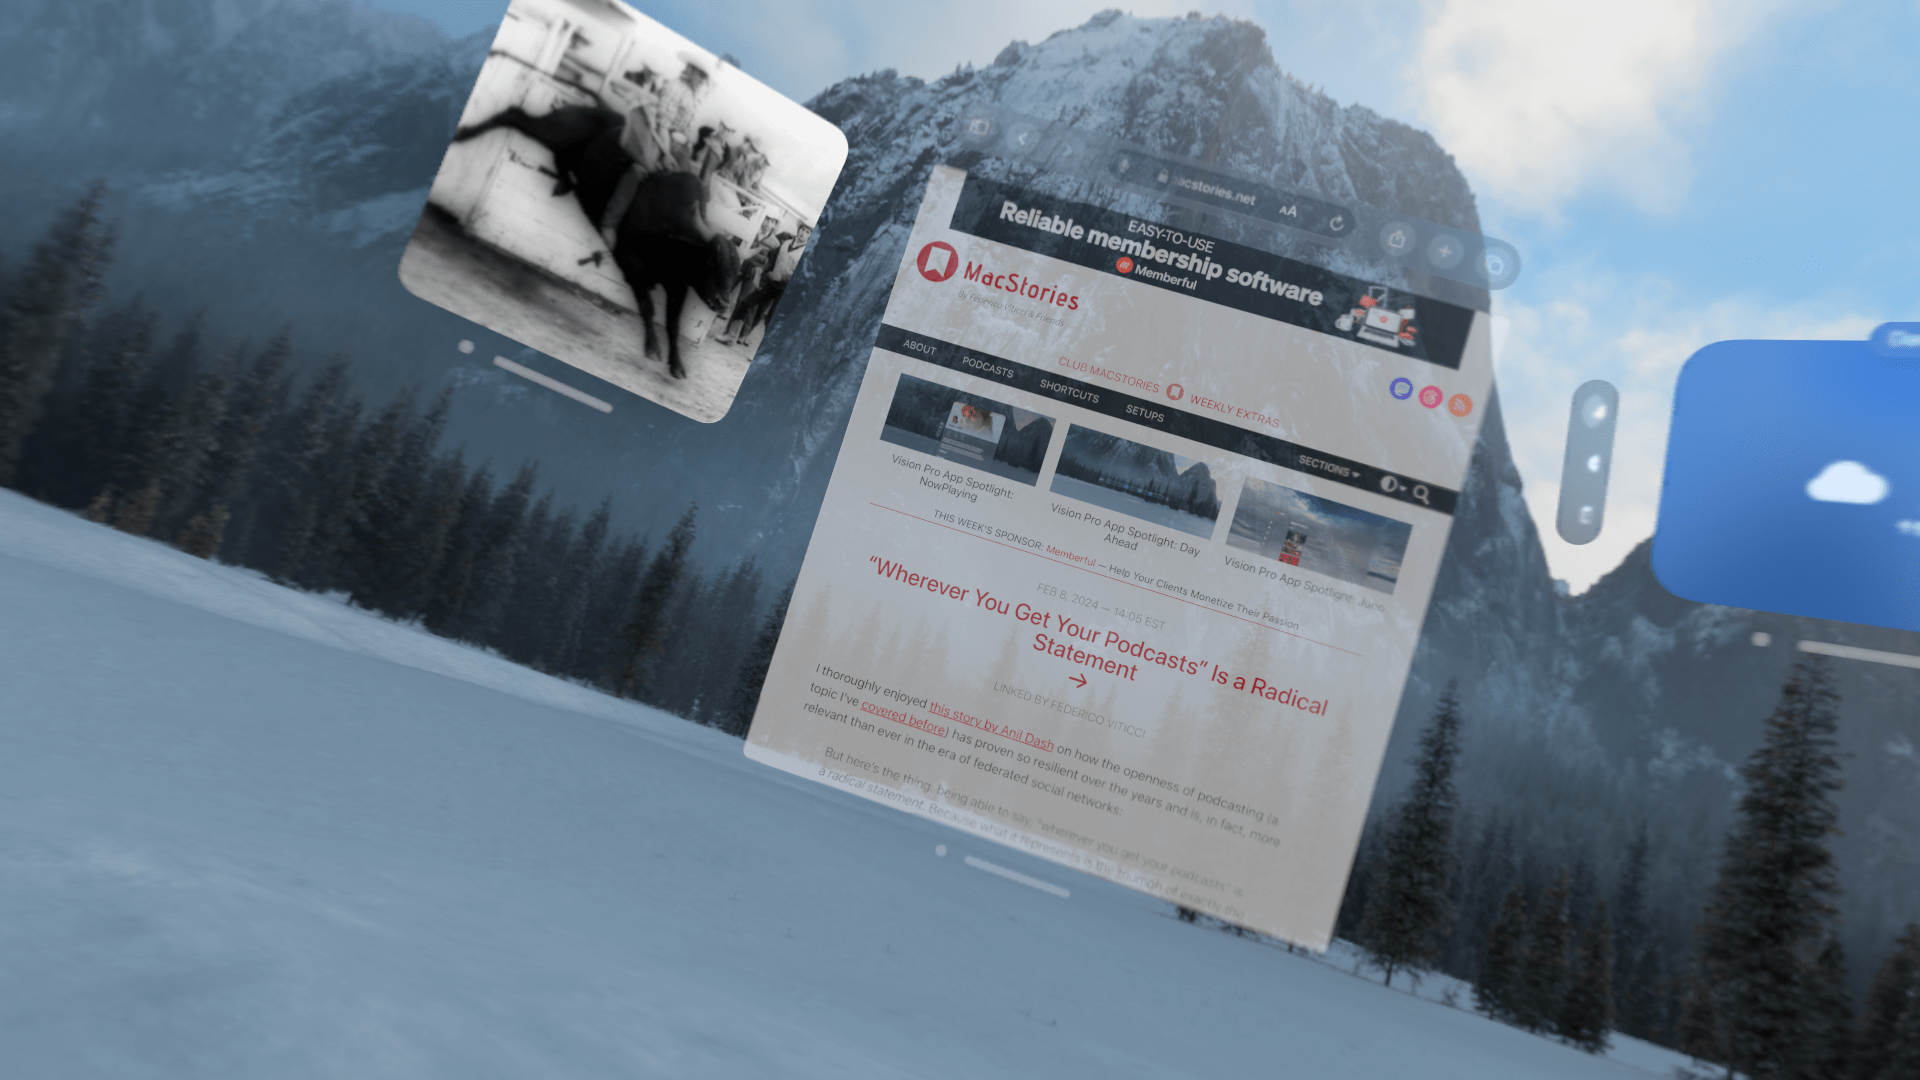
However, as well as foveated rendering works for using the Apple Vision Pro, it’s terrible for screenshots. You can take a quick screenshot by pressing the top button and Digital Crown, but you’ll immediately see that everything except where you were looking when you took the screen-grab is out of focus. That’s fine for sharing a quick image with a friend, but if you want something suitable for publishing, it’s not a good option.
Fortunately, Apple thought of this, and there’s a solution, but it involves using Xcode and another developer tool. Of course, using Xcode to take screenshots is a little like using Logic Pro to record voice memos, except there are plenty of simple apps for recording voice memos, whereas Xcode is currently your only choice for taking crisp screenshots on the Vision Pro. So until there’s another option, it pays to learn your way around these developer tools to get the highest quality screenshots as efficiently as possible.
If you’ve never used Xcode before, it can be a little intimidating to get started, but you only need to use a small fraction of its tools for taking screenshots, so it’s really not that bad. The first step is to download Xcode from the App Store. It’s a huge app, so it will take a while. Launch Xcode and ignore its splash screen that offers to start a new project. Instead, go straight to the Window menu and pick Devices and Simulators. Select the Simulators tab in the sidebar and install the Apple Vision Pro simulator. For more on how to do this, check out Apple’s extensive documentation.
Next, you need to pair your Apple Vision Pro with Xcode. There are two ways to do this: wirelessly and using the new Apple Vision Pro Developer Strap, a $300 dongle that requires a $99 developer account to purchase. I’ll get to how to capture screenshots using the Developer Strap below, which is the best way to take screenshots. However, for many people, the expense isn’t going to be worth it for screenshots, so I’ll start with the wireless option first.
Wireless Screenshots
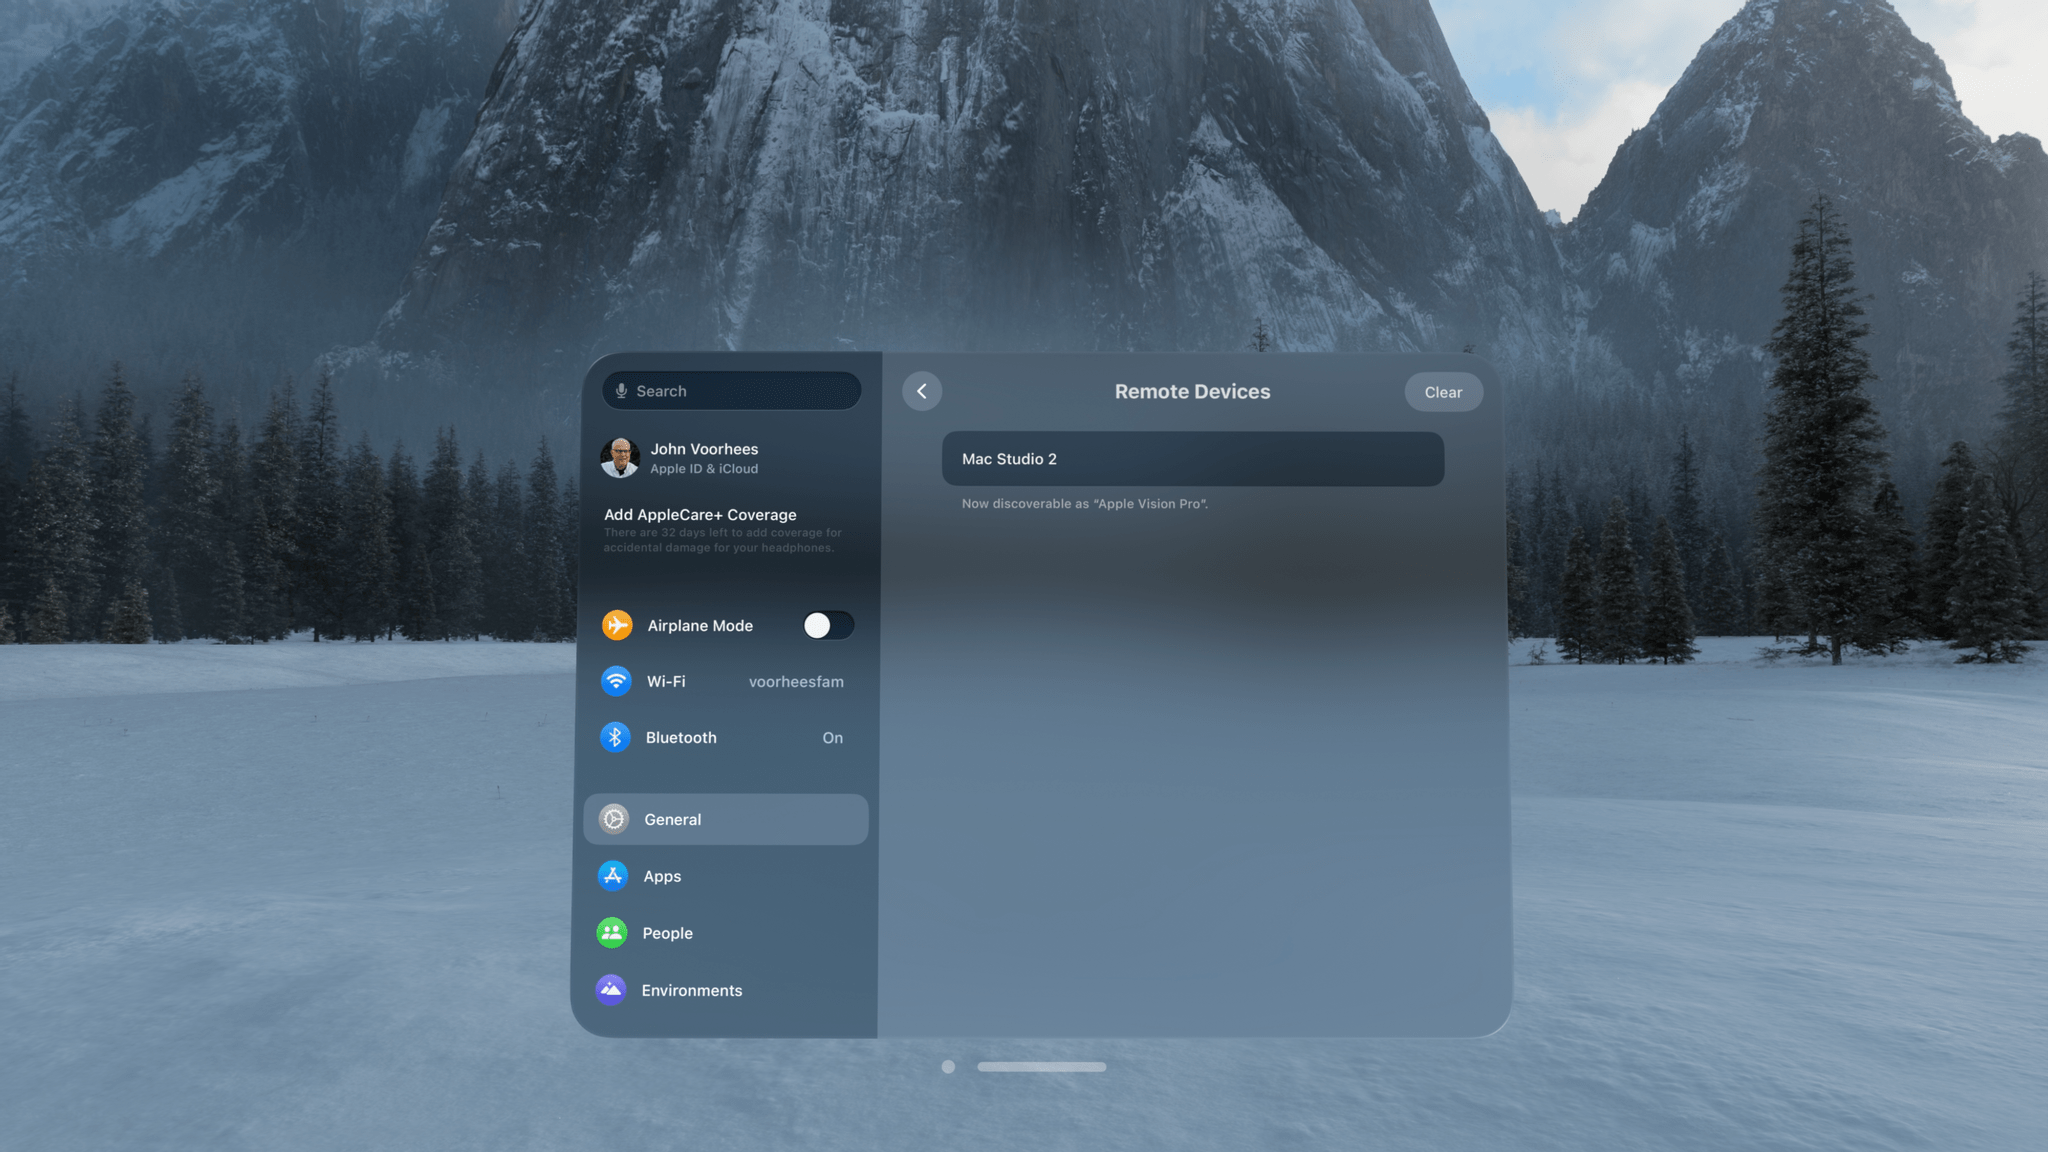
After pairing, your Mac will show up in the Vision Pro’s Settings app under the Remote Devices section of the General settings.
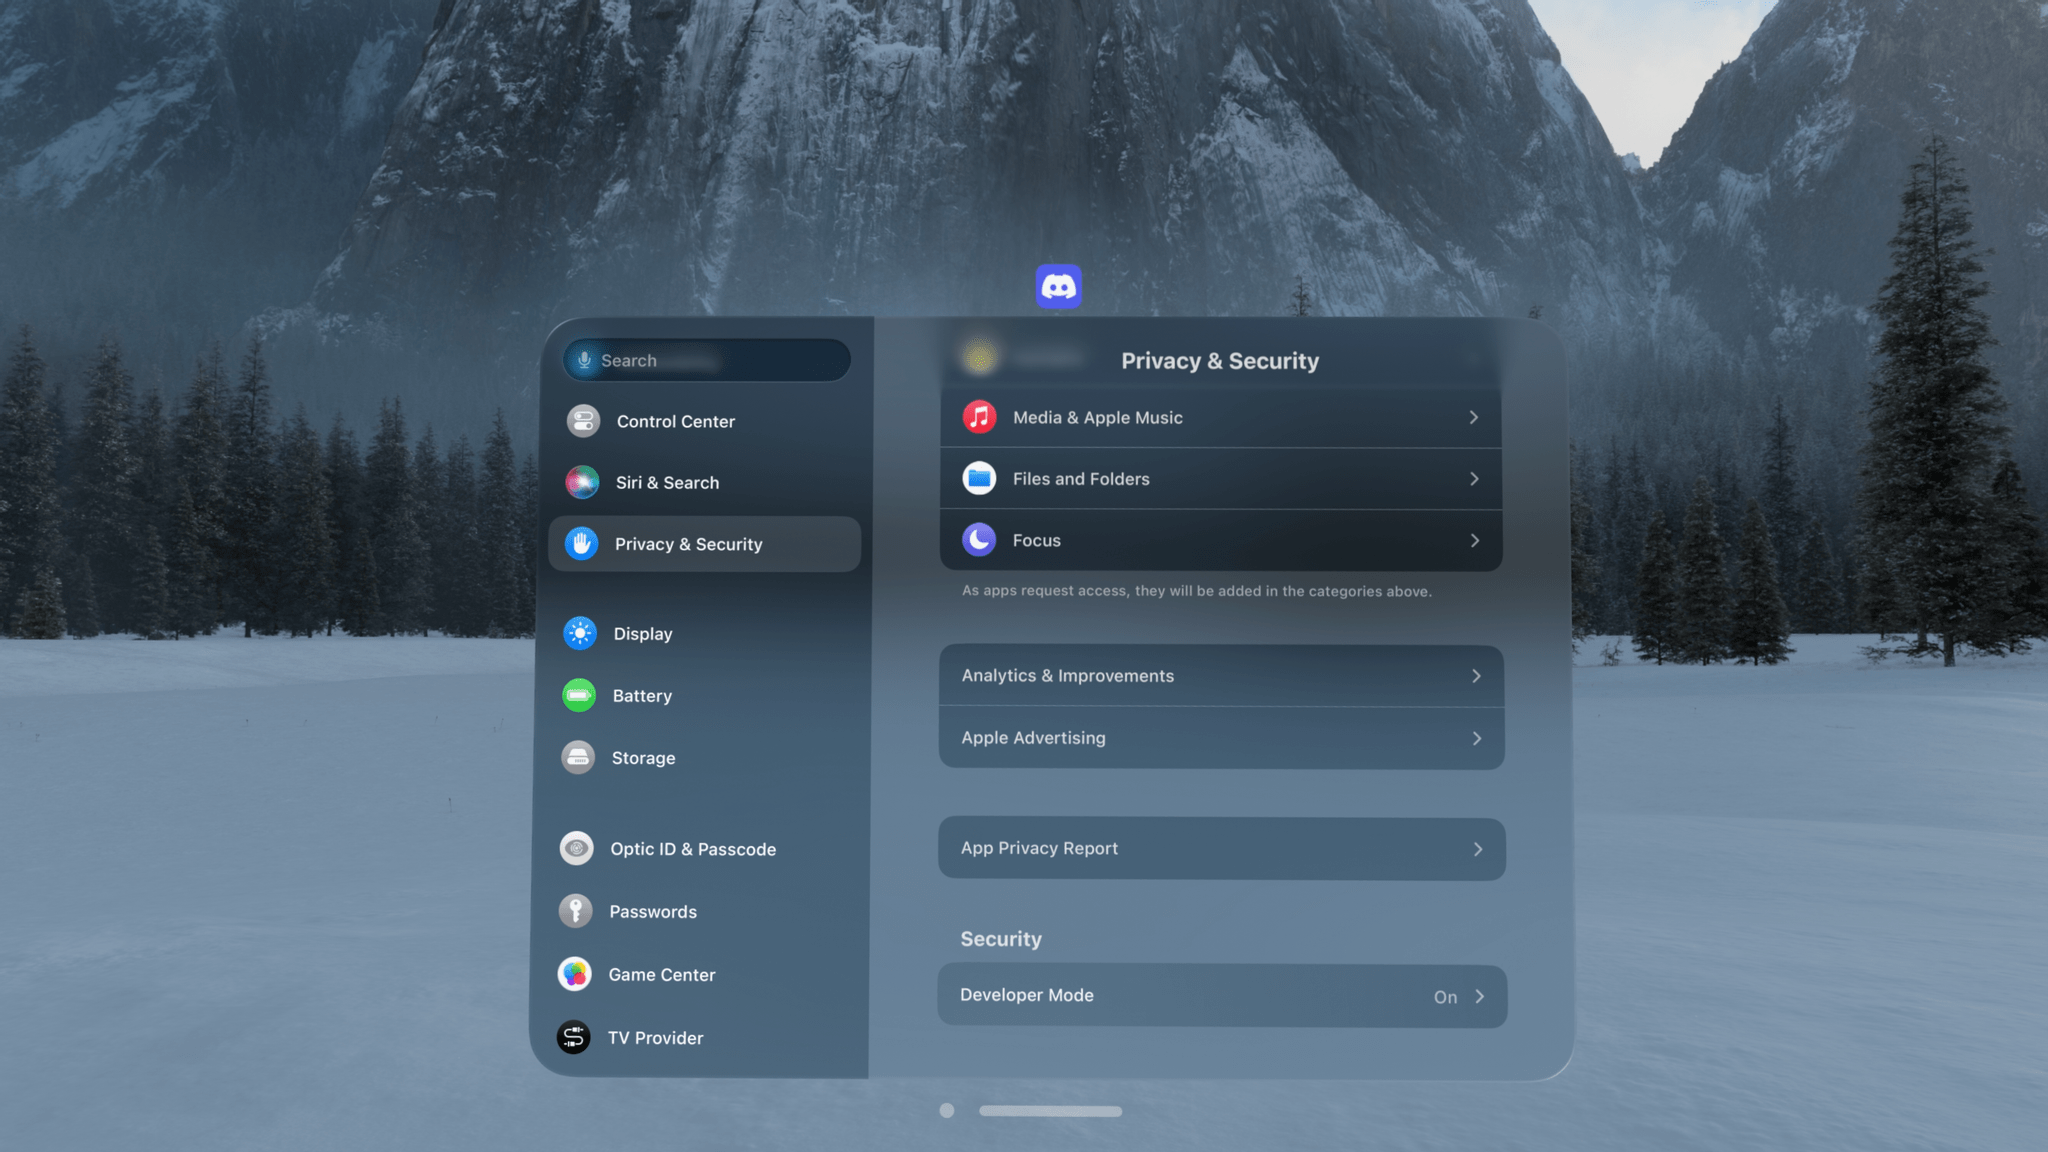
First of all, your Apple Vision Pro and Mac running Xcode need to be on the same Bonjour-capable Wi-Fi network. Next, go to Settings -> General-> Remote Devices on your Apple Vision Pro, and select your Mac running Xcode. You also need to turn on Developer Mode in the Vision Pro’s Privacy & Security settings.
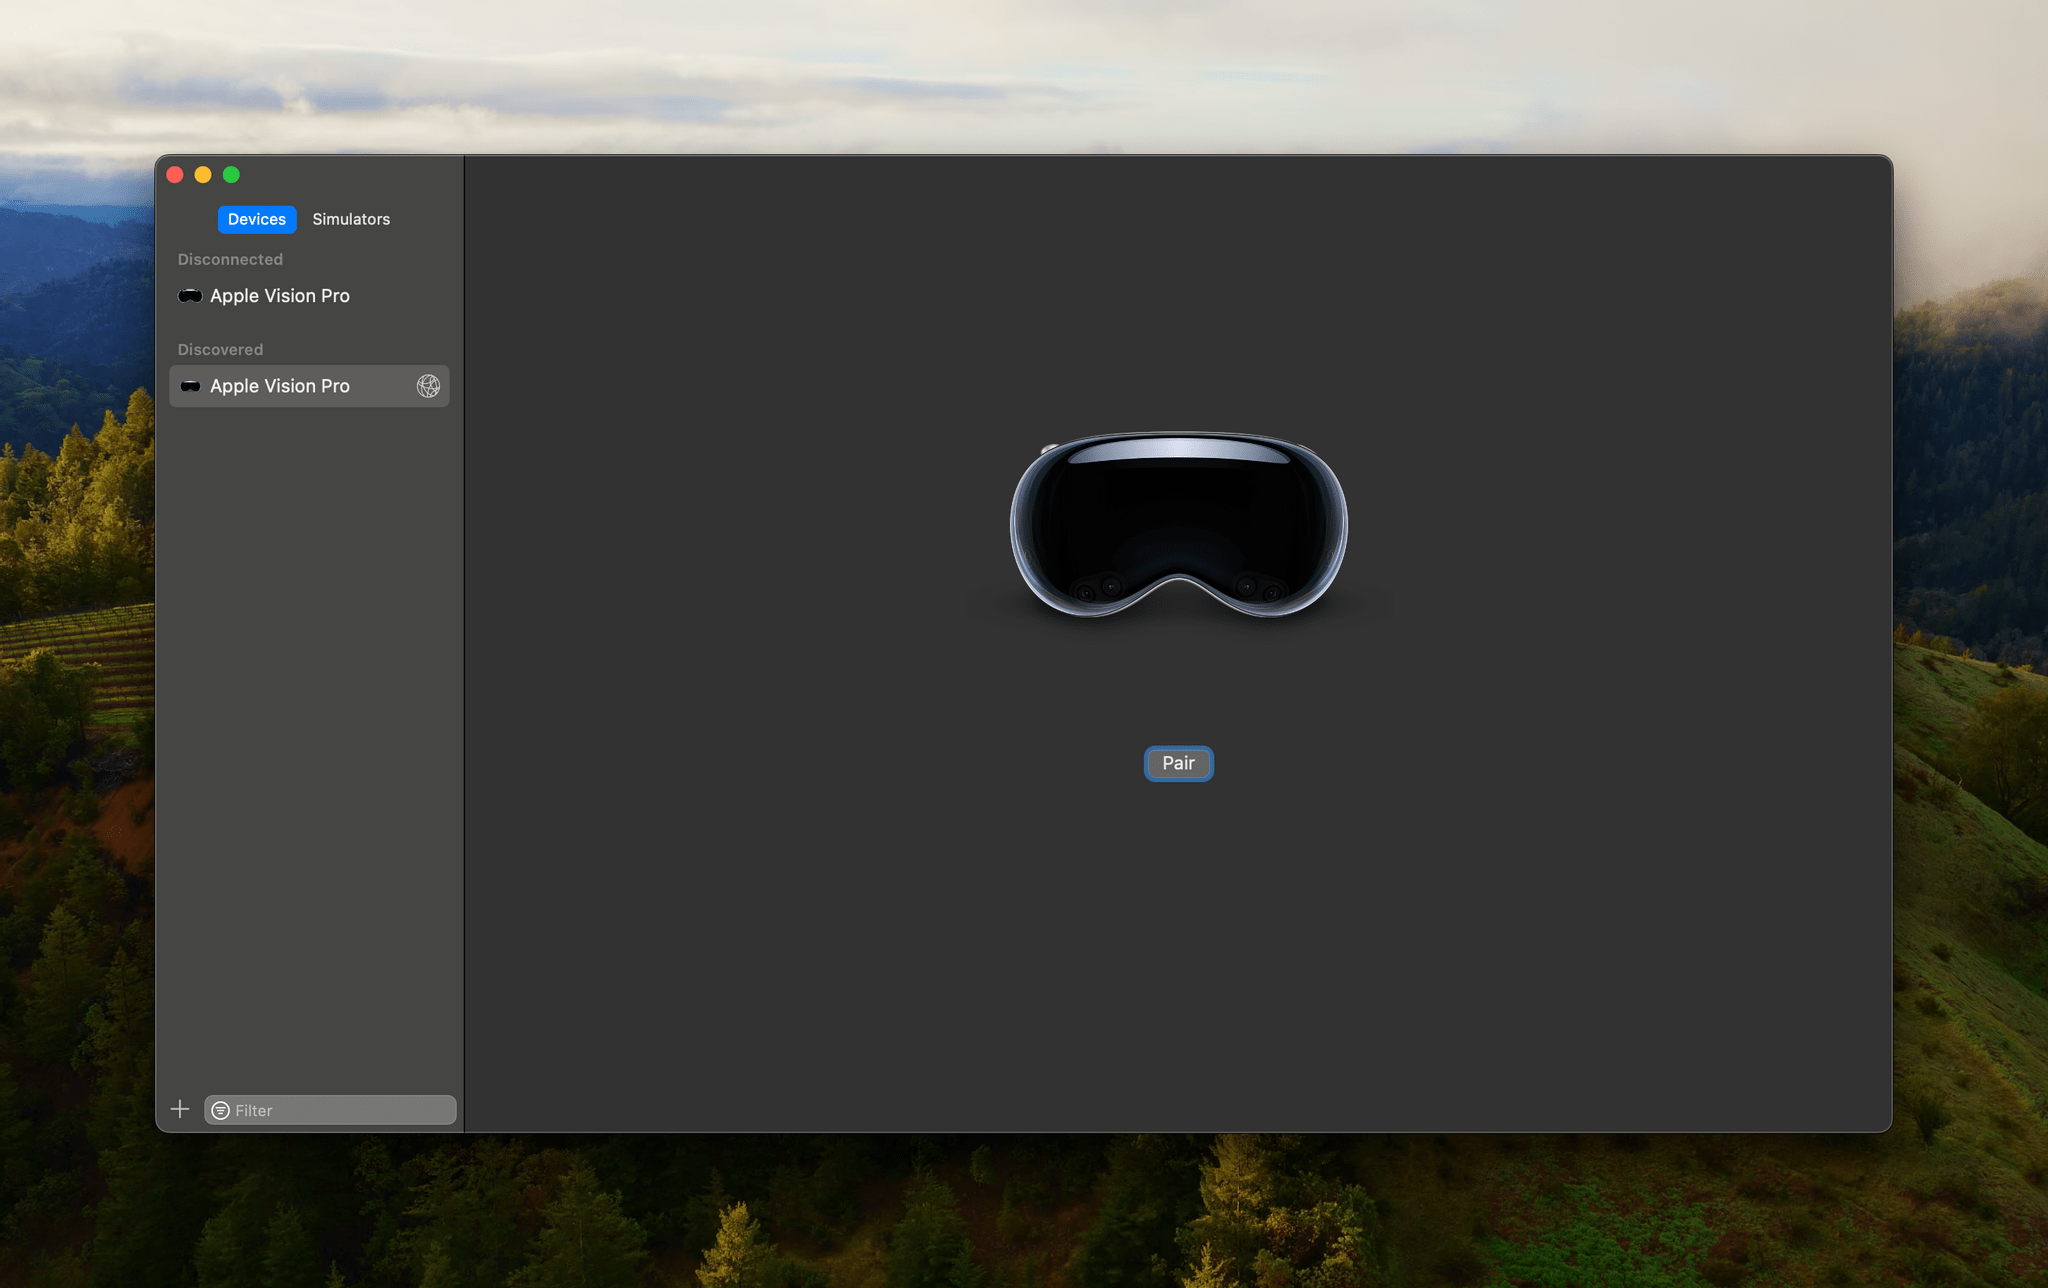
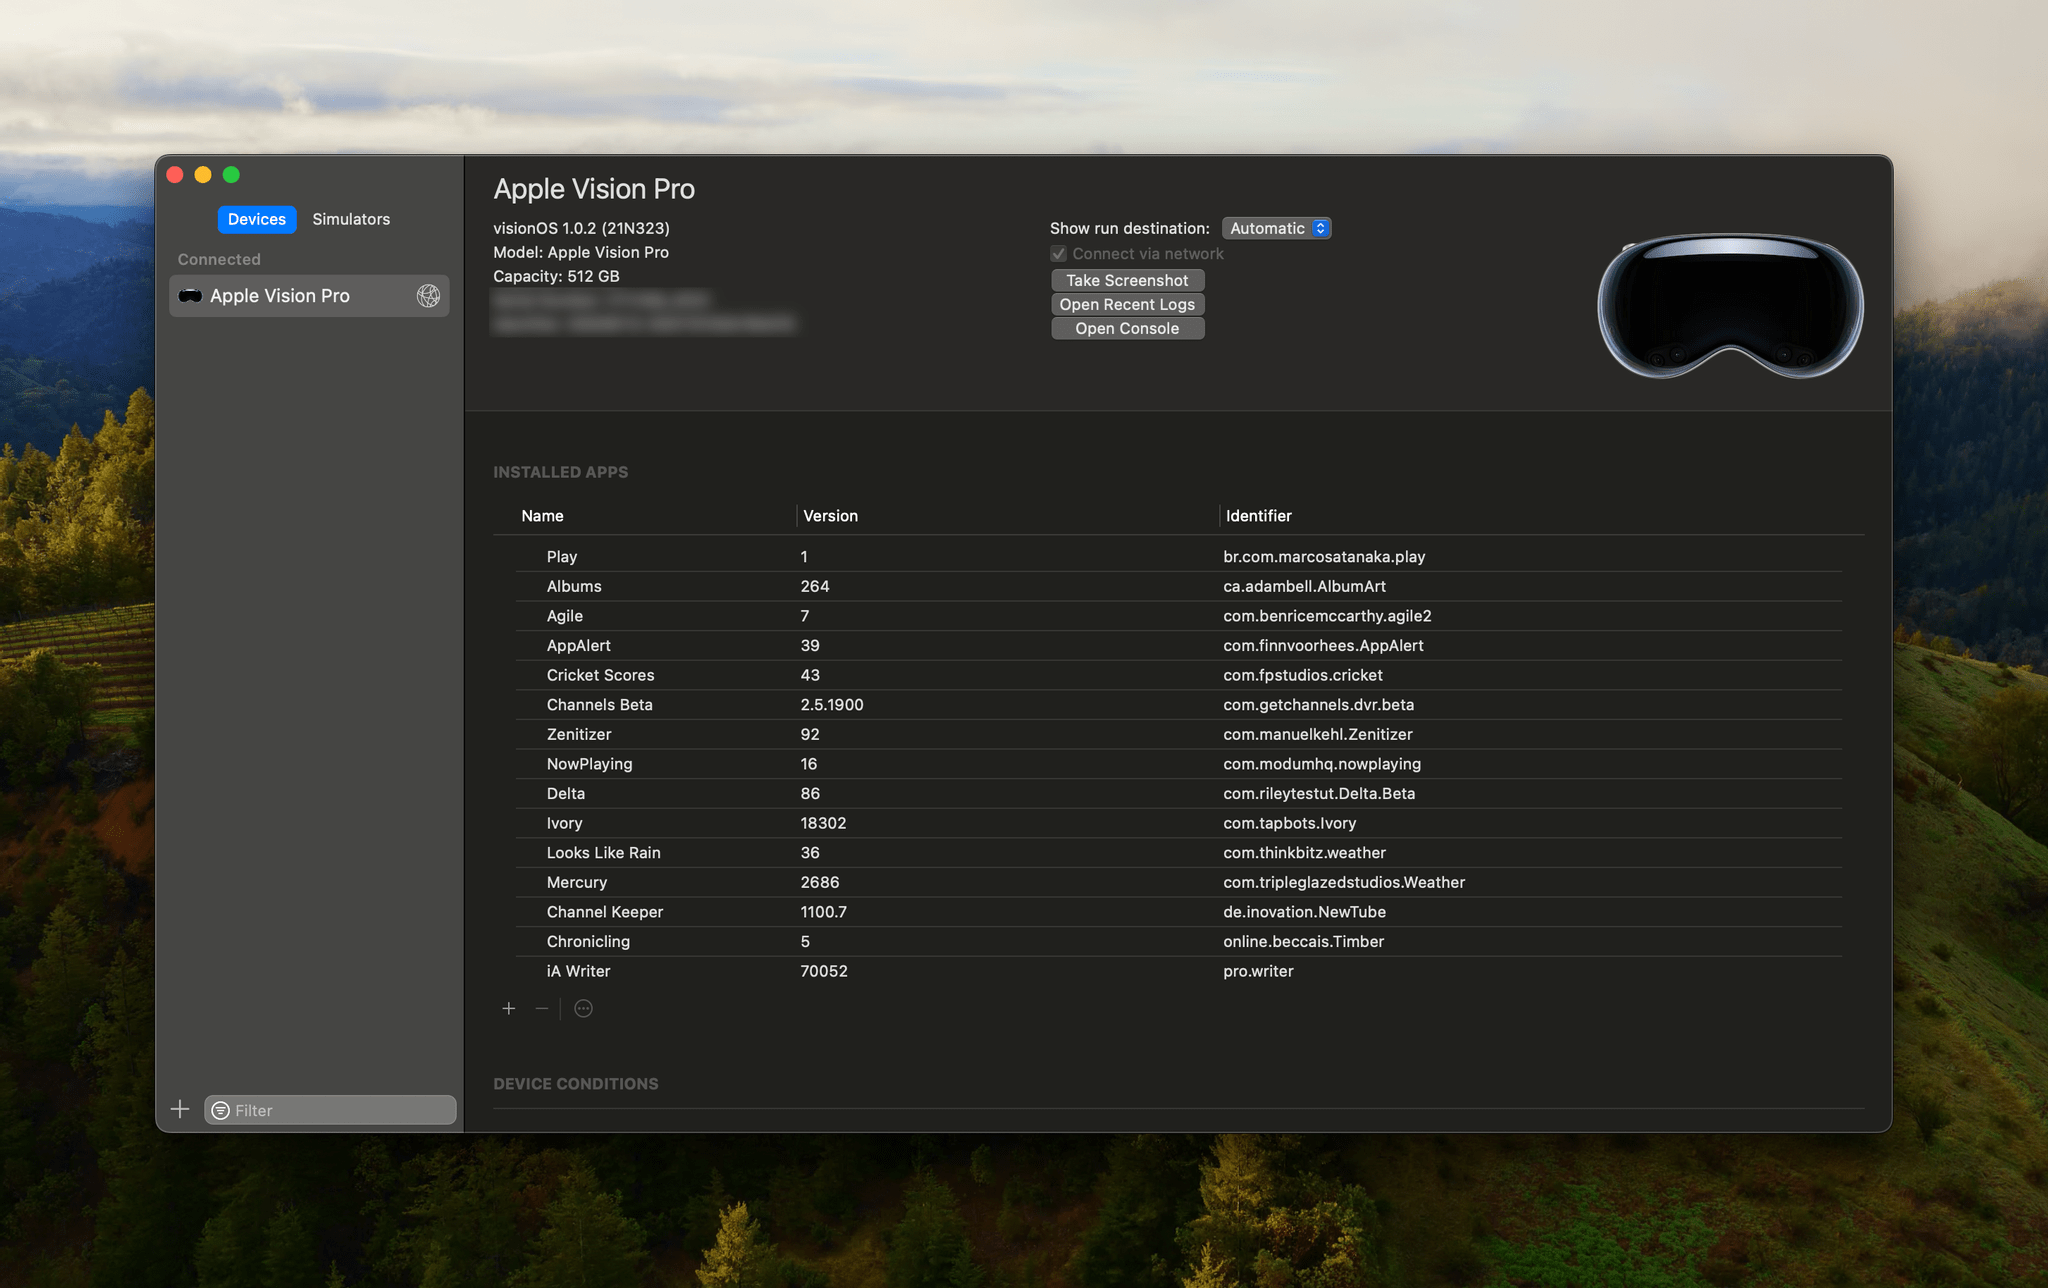
Next, Return to Xcode’s Simulator and select your Apple Vision Pro in the Devices tab in the sidebar. You should now see an image of an Apple Vision Pro and a ‘Pair’ button. Click it and enter the pairing code that will pop up on your Apple Vision Pro. Be sure to give Xcode a minute to load the data about your Vision Pro before continuing.
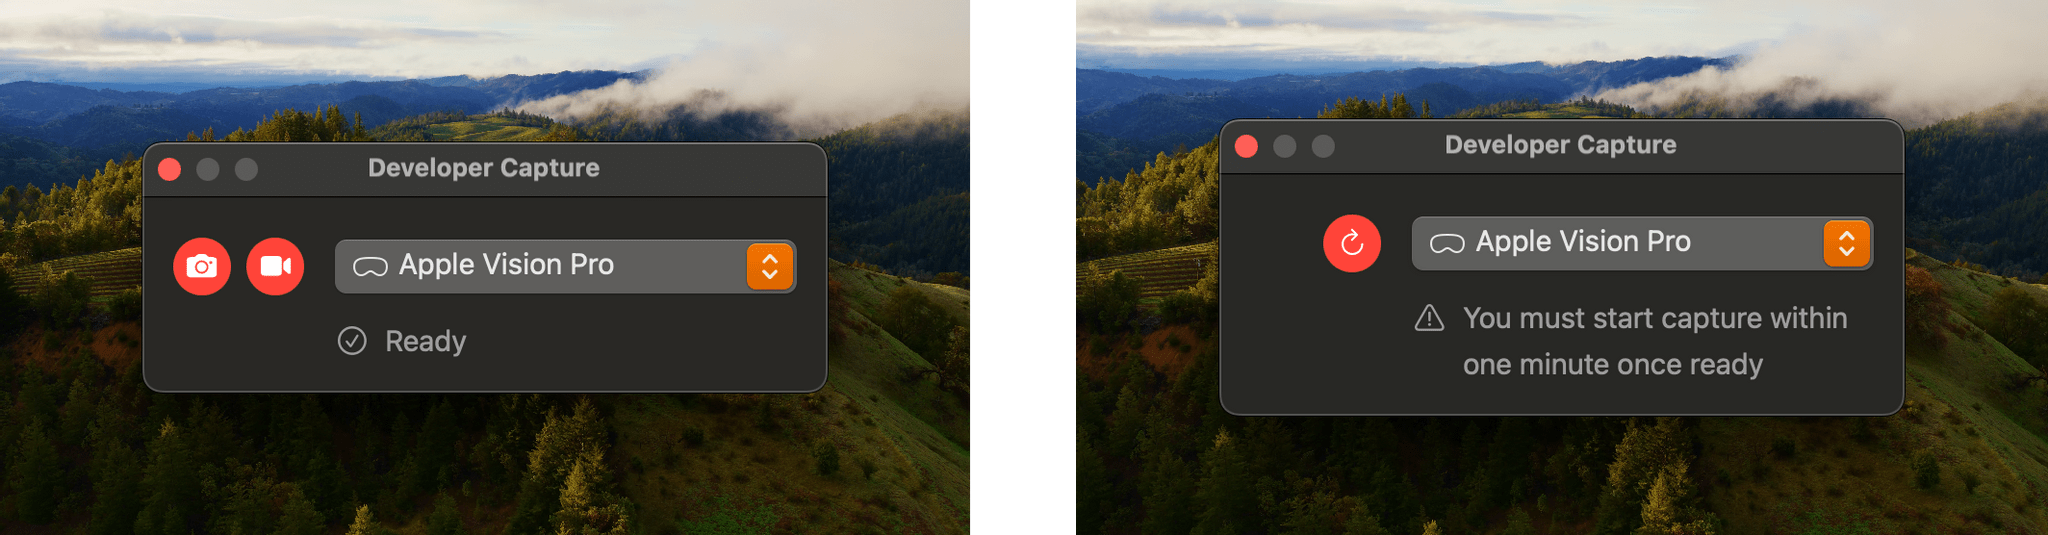
The next step is to go to the Xcode menu, pick Open Developer Tool and then, Reality Composer Pro. Select ‘Developer Capture…’ from the File menu, and a small Developer Capture window will open. That small window has two buttons: one with a camera icon for taking screenshots and the other with a video camera for taking screen recordings. Click the camera button, and you’ll have 60 seconds to take your screenshots. When your time is up, the Developer Capture window will display a refresh button, which usually starts a new 60-second period for taking screenshots when clicked. Again, Apple has great documentation on this process on its developer website.
When you click the screenshot button, the entire image you see in your Vision Pro will jitter briefly and then settle down. To start taking screenshots, just hit the Space bar on your Mac. A screenshot should appear on your Mac’s Desktop and be crisp and clear across the entire image.
That’s how it’s supposed to work, but there are a lot of potential issues you can run into that can seriously slow you down, so I’ve compiled a list of troubleshooting tips:
- If you have trouble pairing your Vision Pro and Xcode, start over by deleting it from the Simulator Devices list, but be patient because it is by no means an instantaneous process.
- Your Environments may disappear and appear like a thick fog instead of a beautiful landscape. This has happened to me a lot. I suspect the Vision Pro gets overwhelmed between streaming from the Mac and de-foveating what you’re seeing. If this happens, restart the Vision Pro by pressing the top button and Digital Crown until the screen goes blank. The Vision Pro will restart whether you’re wearing it or not.
- After a restart, if you want to use an Environment as a backdrop for your screenshots, be sure to check your them first so you know they’re working. Otherwise, you’ll just waste time reconnecting to your Mac and setting everything else up again.
- Sometimes, Developer Capture gets stuck on a ‘Starting Screenshots…’ message. Give it a minute, but in my experience, you’ll probably need to quit Reality Composer Pro and restart it.
- Sometimes, visionOS will crash, and you’ll need to restart it (see above) and set up Mac pairing and your screenshots all over. This happened to me while I was writing this story.
- I’ve seen the screen in front of my left eye freak out a few times where part of it starts to shut down. I don’t know if the issue is caused by taking a lot of screenshots and stressing out the hardware, but whatever the cause, it can be corrected by restarting the Vision Pro.
- If all else fails, remove your Apple Vision Pro from the Devices tab in Xcode and start the pairing process from scratch.
If it sounds like I’ve restarted my Vision Pro a lot, it’s true: I have. But, if you follow the tips above, you can minimize restarts, which are a pain because they require you to sign in again, reconnect your Mac, and restart any visionOS apps.
Wired Screenshots

The bottom line is that taking wired screenshots with the Developer Strap is more reliable than doing it wirelessly. If you were previously connected to your Mac using Wi-Fi, plugging in a USB-C cable using the strap will display a brief ‘Switching to USB-C’ message so you know the connection has been made. The process for setting up Xcode and Reality Composer Pro to take your screenshots is exactly the same as I described above for taking them over a Wi-Fi connection, but in the few days since I’ve had the Developer Strap, I haven’t run into nearly as many of the kind of issues I describe above. The difference is significant enough that I’m glad I spent $300 on the Developer Strap, even if it doesn’t do much more than I care about.
Taking Good Screenshots
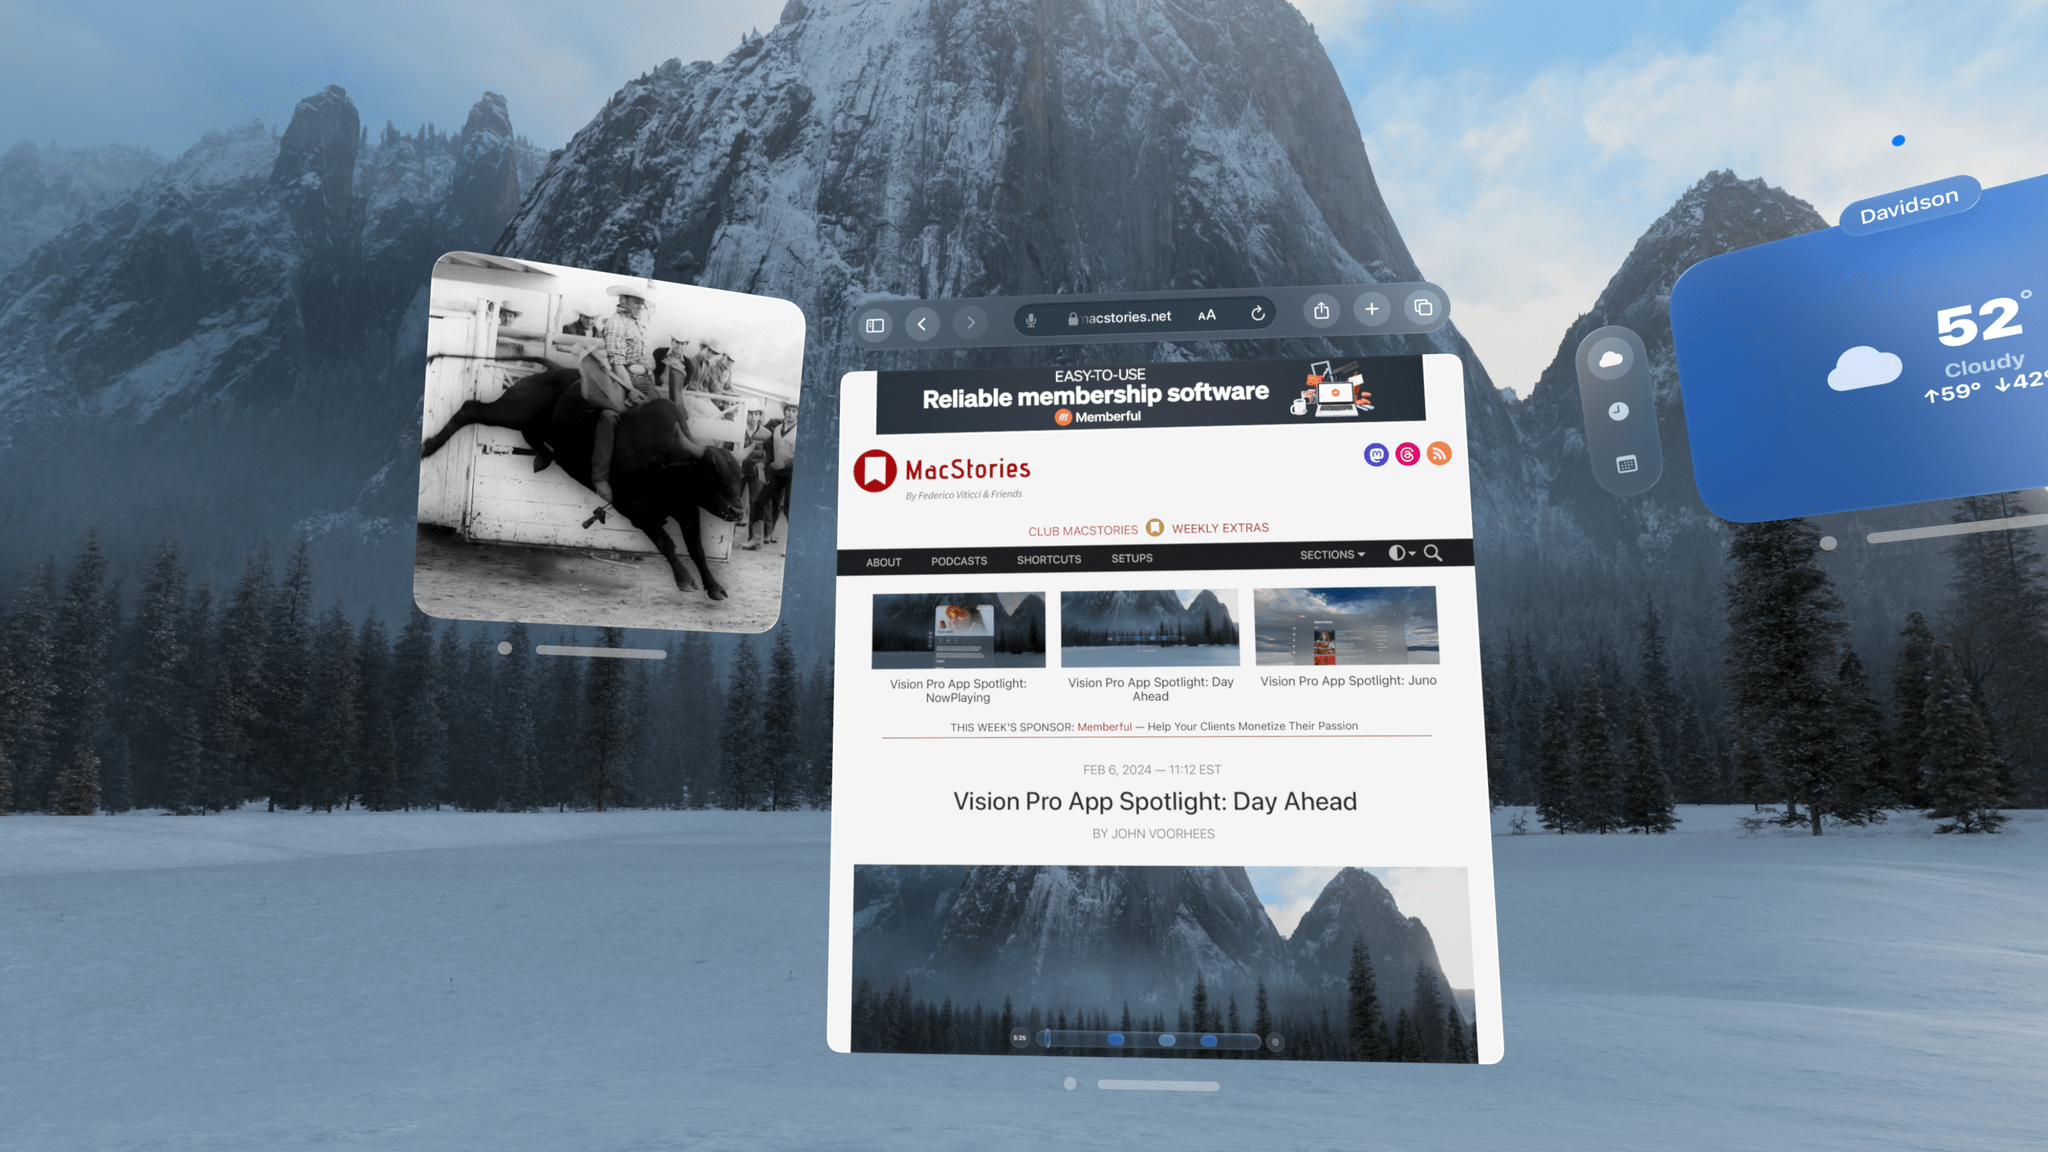
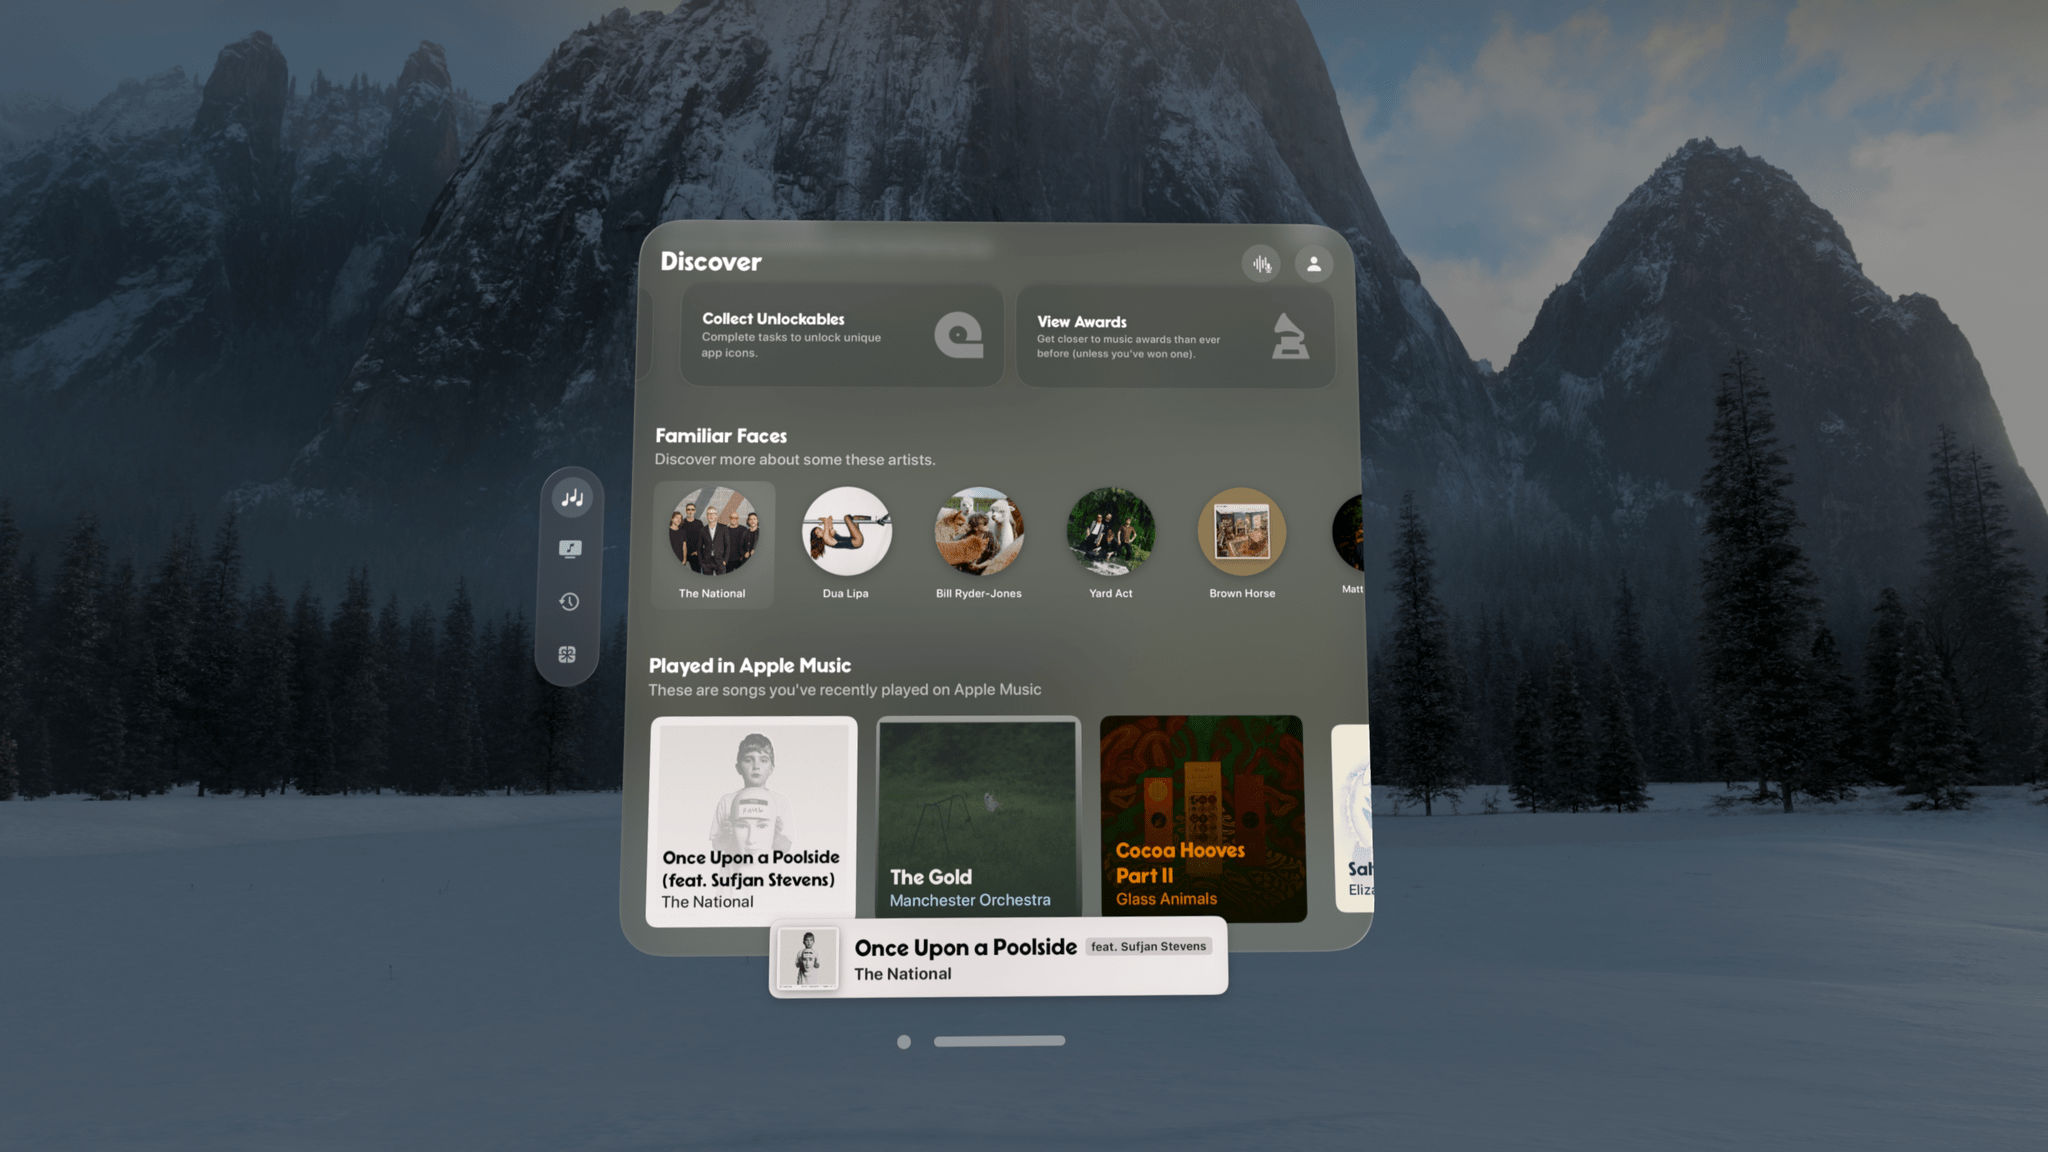
This shot taken with the developer tools and using the tips below isn’t perfect, but it’s much better and easier to clean up in an image editor.
Even if everything is working perfectly, it still isn’t simple to take a good screenshot with the Apple Vision Pro. If you’re not careful, it’s easy to take shots that are tilted. One solution is to open the screenshot in an app like Pixelmator Pro to straighten and crop it along whatever axis is problematic.
However, it’s always best to get a shot that’s as close as you can to what you want the first time to minimize any additional time spent editing. After a lot of experimenting, I’ve found that if you place the window you want to capture directly in front of you and make sure the Vision Pro is parallel with the horizon, not tilted forward or back, and you stay very still, you’ll get the best screenshot possible. Also, if you take a shot that’s tilted up on the left side, you’d expect that you should tilt that side of your head down next time, but it’s like a mirror – you have to adjust the opposite side of your head to level out the shot. It takes some practice, and it’s much easier sitting at a desk or table than lying on a couch, but it’s worth the effort to avoid the extra editing later.
Because taking screenshots can be finicky regardless of how you hold your head, it pays to have your Mac set up for maximum efficiency, too. After pairing my Vision Pro, I drag the Mac’s interface to the side where it won’t be in the screenshot and open Developer Capture from Reality Composer Pro. Next to that tiny window, I open my Desktop folder in Finder. That way, I can click the button to start taking screenshots, and in between shots, glance over at the Finder to be sure my images are being saved. If not, consult my tips above for ways to troubleshoot your setup.
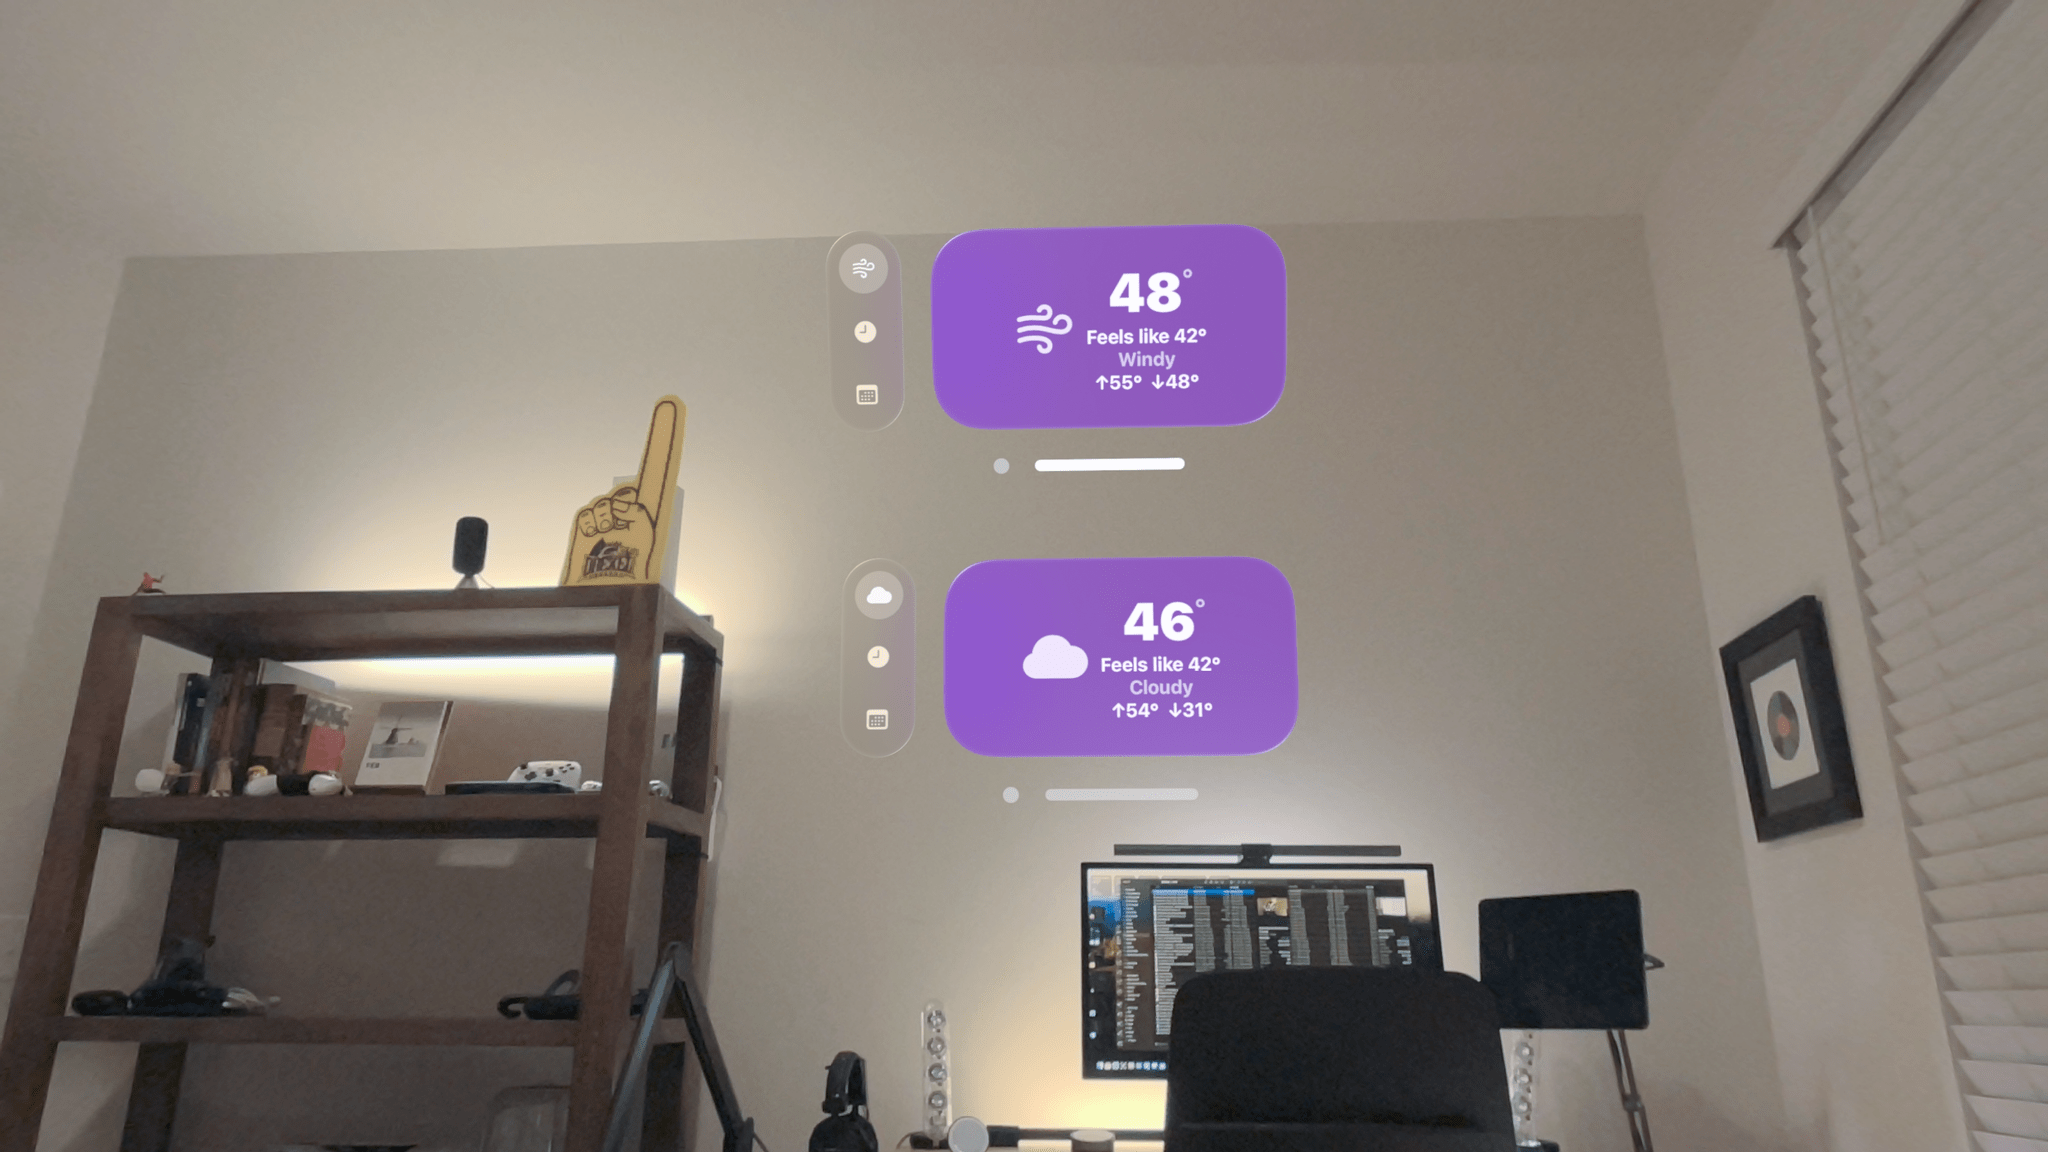
I also recommend taking screenshots against the backdrop of an Environment in most cases. Screenshots of multiple windows floating in a room of your home or office can distract from what you’re trying to show off. The exception to this guideline is when you want to show something like a Crouton timer floating above a pot on your stove, or a clock window from Widgetsmith perched above your office door, for example.
Screen Recording
I haven’t covered taking screen recordings, but the setup is the same. Reality Composer Pro limits videos to 60 seconds, which is the same time limit you run into with screenshots. That’s not ideal, but those short videos will be clear and crisp. You can take longer videos when connected to a Mac using the Developer Strap and an app like QuickTime, which recognizes the Vision Pro as a camera source, but the video you take will be foveated.
What I find fascinating about taking screenshots with the Apple Vision Pro is that so many concepts from photography that don’t apply on other devices apply here. Composition, framing, and the horizon line are all things that are either less important or irrelevant in other screenshot contexts, but are critical with the Vision Pro.
There’s also room for improvement when it comes to taking non-foveated screenshots. I’d love it if I didn’t need to be connected to my Mac or use Xcode. However, even if that remains a requirement for the foreseeable future, there are clearly bugs in the existing system that need to be addressed to make the workflow easier for people like me and developers who are taking screenshots of their apps.