I have tried a bunch of file sharing services over the years and many of them are good, including Droplr and CloudApp. These services have the advantage of being dead simple to set up and use, but they also happen to be subscription services. Over time, the expense adds up. The tools that come with those services are also limited.
Recently, Timo Josten released Dropshare 4 for Mac, an app that helps you create your own file sharing by connecting to services like Amazon S3, Rackspace Cloud Files, or your own server. I was skeptical about whether setting up Dropshare with one of these services would be worth the trouble, but I knew Amazon S3 has a generous free tier, so I thought I would give it and Dropshare for iOS a shot. The setup process was much easier than I anticipated and now with Dropshare I’m spending less, and can do more, with the files I share.
Setup
To set up Dropshare, you need two things – the app and a place to store your files. You can download Dropshare directly from the developer’s website and try it for free for three days, which to my mind is too short. If you put off setting up Dropshare even a little bit, you don’t have much time to try it before being prompted to buy a license. As a result, if you don’t already have a file storage service set up, do that first.
I am using Amazon S3 because it has a generous free tier that should be sufficient for my needs.1 If you decide to use Rackspace or your own server, you will find good instructions on setting up each in Dropshare’s User Guide. S3, Cloud Files, and your own server are all good options, but with the proliferation of file storage services, I would like to see more services supported by Dropshare in the future.
Creating an S3 bucket is easy. Sign up for an Amazon AWS account, navigate to the S3 console, click ‘Create,’ name your bucket, and select a geographical region where your files will be stored. Links to files you upload to S3 will have the format http://bucketname.s3.amazonaws.com where ‘bucketname’ is the name of the bucket you created in S3.

It adds an extra layer of setup, but if you want to use a custom domain that you already own for your links, you need to name your bucket to match the name of your domain and add a CNAME entry to the DNS records with your domain registrar. Amazon has good instructions on how to set this up and there are helpful tutorials online. I set up an S3 bucket to use sqbnr.co, a domain I purchased through Hover.
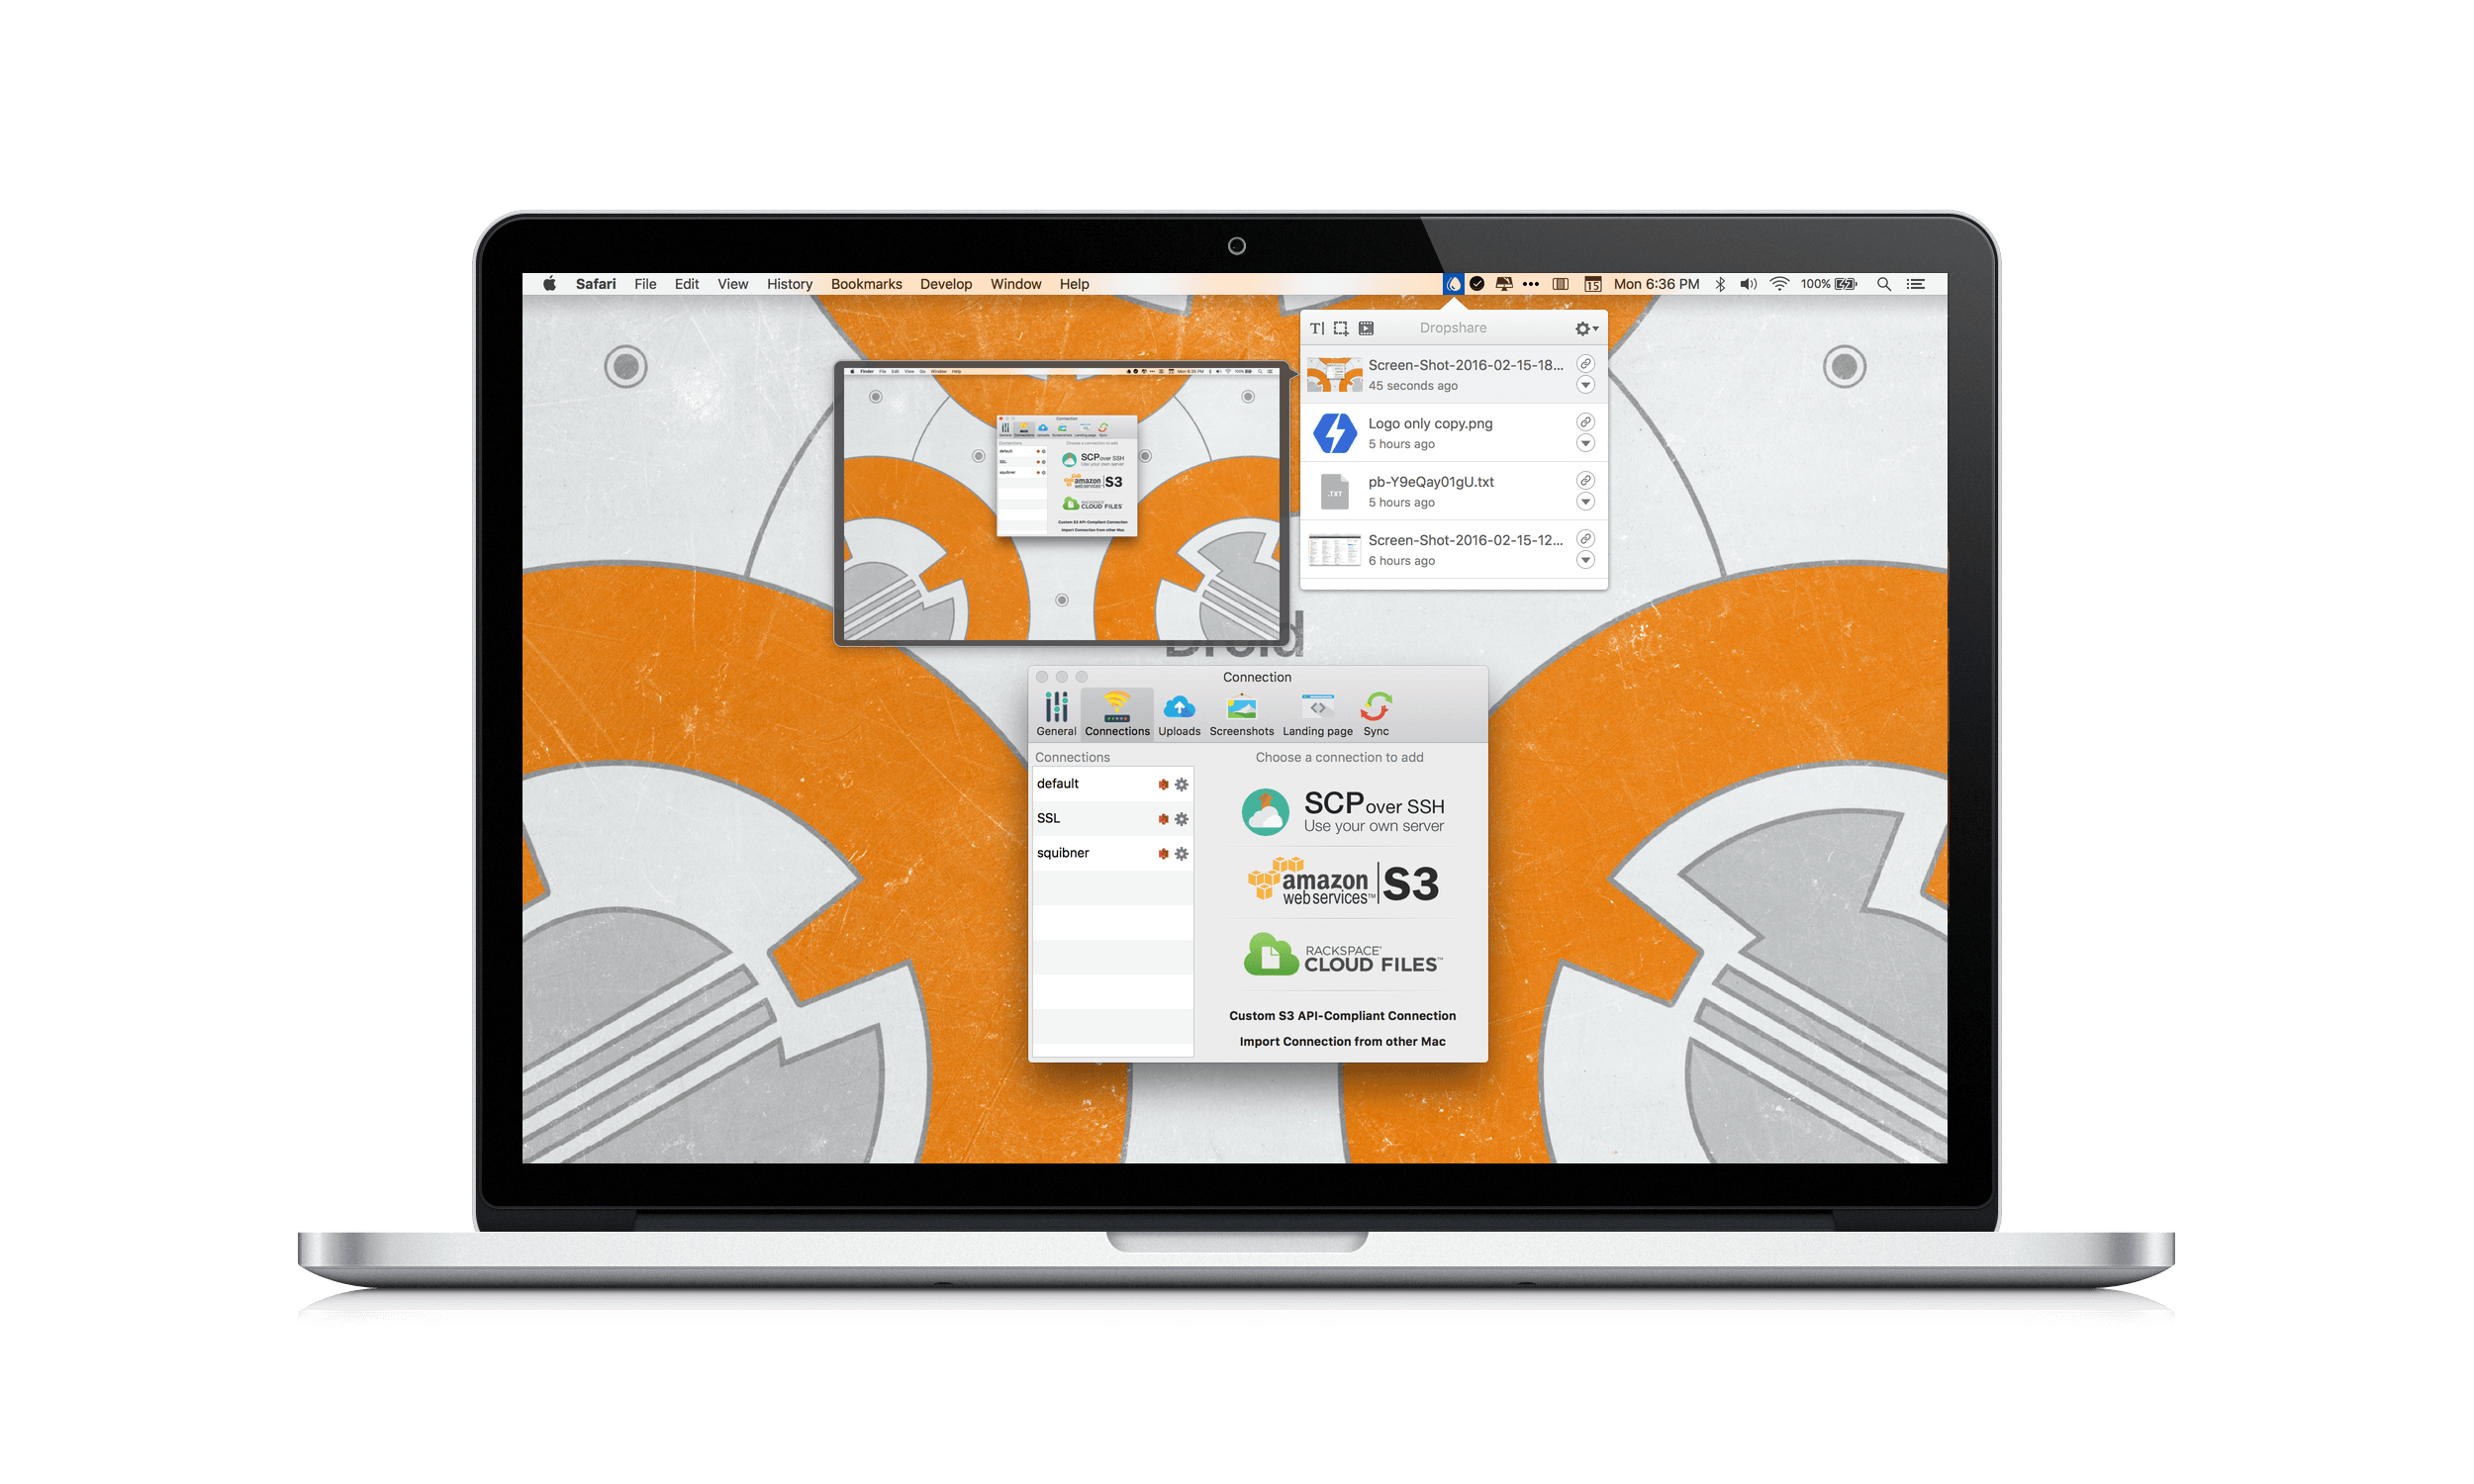
With an Amazon S3 bucket ready, and important files to share, the next step was to create a connection between S3 and Dropshare. Dropshare is a menu bar app. To set up a connection, click on the Dropshare icon in the menu bar, click on the cog in the top right-hand corner of the drop-down window, select ‘Preferences, and then select the ‘Connections’ tab. From here, you can set up as many connections as you like, to as many services as you use.

To set up a connection, select a file storage service from the list on the right-hand side of the window that opens a window where you enter the name of the S3 bucket you already set up, your Access Key, your Secret Key, and the Region you selected when you set up your bucket. The Access Key and Secret Key are available from the ‘Security Credentials’ page for Amazon Web Services. When you finish, click the ‘Test connection’ button to see if your connection works.
Sharing
After you set up a connection, you can begin sharing files by dragging them to the Dropshare icon in the menu bar or using the OS X share extension button in the Finder. File names can have a random suffix appended or the whole file name can be randomized with a name length you choose. This is a nice feature, but it is limited. You cannot create complex naming rules like you could in an app such as A Better File Rename. You can also use URL shorteners from Dropshare, Google, or a custom one you set up yourself in Preferences.

Once uploaded, Dropshare automatically copies the URL for the file that has been uploaded to the clipboard and can even do so before the file has finished uploading, which is nice for larger files. With the URL on the clipboard, sharing the file is then a simple matter of pasting the link anywhere you want to share it.
If there is a file you already uploaded that you want to share, you can click Dropshare’s menu bar icon and select the link icon to copy its URL, or the downward-facing arrow icon to select from additional options, including any app that has an OS X share extension. From here you can also delete an item from your storage provider, making Dropshare a one-stop shop for managing your online storage.

The menu bar drop-down window has the last ten items you uploaded. If you need more, you can open your full upload history with a keyboard shortcut, from the bottom of the list of your most recent ten uploads, or from the options available when you click the cog icon in the Dropshare window.

In addition to basic file sharing, Dropshare has tools for taking screenshots, screen recordings, drafting Markdown notes and uploading the contents of the clipboard. Each feature lets you assign a custom keyboard shortcut, which is a touch I like a lot.
The first thing I did was assign the screenshot capture and upload actions to the keyboard shortcuts assigned to similar OS X actions, which I already have memorized. Previously, I used Dropbox’s screenshot feature to automatically upload screenshots to a Screenshots folder in my Dropbox. That system worked well, but it lead to hundreds of screenshots copied across my Macs and iOS devices. With my S3 bucket the files are still readily available, but they no longer take up space on everything connected to Dropbox. Dropshare also lets you choose between Preview, Skitch, and Napkin if you want to edit a screenshot before it is uploaded.

Screen recording is an interesting feature. After optionally defining a recording region and selecting whether you want to record in HD, with or without audio, or as a GIF, you click the red record button to begin a recording. A record button icon appears in the menu bar with a timer showing the length of your recording. Tapping the record button in the menu bar gives you the option to save and upload the recording or cancel it. Recording GIFs requires the installation of FFmpeg using Terminal, which I found easy to do using the instructions in the Dropshare User Guide. Unfortunately, when you choose less than the entire screen to record, there is no frame defining the recording area, so there is no way to tell where the boundaries are.

The Notes feature is too basic. Notes lets you write in Markdown and upload it as a note. I had no trouble with notes, although after using text editors like Byword, I would prefer it if the notes included syntax highlighting.
There are a handful of other features that bear mentioning. First, Dropshare can create a landing page for your linked file that is editable. This struck me as a great way to provide a link to a downloadable press kit the next time I release an app. Second, Dropshare includes a command line interface that you can install separately and that allows you to access Dropshare from within Terminal. Third, you can set expiring passwords for any file you upload using Dropshare Safe a free web service.
Dropshare for iOS
It is worth noting that Dropshare is also available as a Universal iOS app. Using Dropshare’s free sync service you can sync your file upload history among Macs and iOS, choosing to sync at intervals between 30 seconds and 30 minutes.

Federico reviewed the Dropshare for iOS shortly after its release in late 2014. At the time, one of Federico’s criticisms was that the iOS app lacked a number of the features of the Mac app. Since then, Dropshare has been updated several times to increase the number of file types that can be uploaded using its extension and add landing page and Dropshare Safe support, which bring the iOS app closer to feature parity with the Mac version.
Dropshare for iOS does, however, lag behind other apps in adopting newer iOS features like Split View, which is a real missed opportunity for a utility like this, and peek and pop, which would be a great way to enhance file previews in the upload history view where it can be hard at times to recognize small image previews. 3D Touch on the Home screen icon would also be a handy place to add a shortcut to copy a link to the most recently uploaded file.
The bulk of the files I share are images, whether for sharing on Twitter or screenshots I collect for articles I am writing on MacStories like this one. A combination of Dropbox and Droplr worked for me, but using Dropbox results in lots of screenshot clutter on my Mac and iOS devices and Droplr requires an ongoing monthly fee when my needs fit well within the Amazon S3 free tier. Add to that the ability to use a custom domain for linked files, nicely designed landing pages that I can use to distribute press kits, and the ability to make the occasional how-to screen capture GIF and I was sold. There is no doubt that there is a little more to setting up Dropshare than competing online services, but the marginal additional setup time is minimal and you can’t beat the combination of a lower price and deep features.
Dropshare is available for $24.99 from getdropsha.re. Dropshare for iOS is available on the App Store for $6.99.
- With the Amazon S3 free tier you get 5 GB of storage, 20,000 Get Requests, 2,000 Pull Requests and 15 GB of data transfer out each month for one year. If your needs exceed the free tier, storage pricing is still reasonable. ↩