As much as I like to use Workflow for every task I don’t want to perform manually, until last week there were still some things I couldn’t automate with the app. Those tasks were utterly specific: converting HTML and rich text back to Markdown (with my beloved html2text in Python), or assembling iOS screenshots with pretty device frames (with LongScreen). With the release of Workflow 1.4.4 today, I can finally integrate these two key tasks into Workflow’s automation, and I’m in love with the results.
Overlaying Images
Since Workflow added the ability to combine images from the Photos app with its action extension, I’ve stopped using scripts I had in Pythonista to create images for MacStories reviews. While Workflow was a great way to stitch multiple images together, however, it couldn’t overlay an image on top of another – something that could be easily done in Python by pasting an image on top of a background. This is exactly what Workflow brings with today’s update.
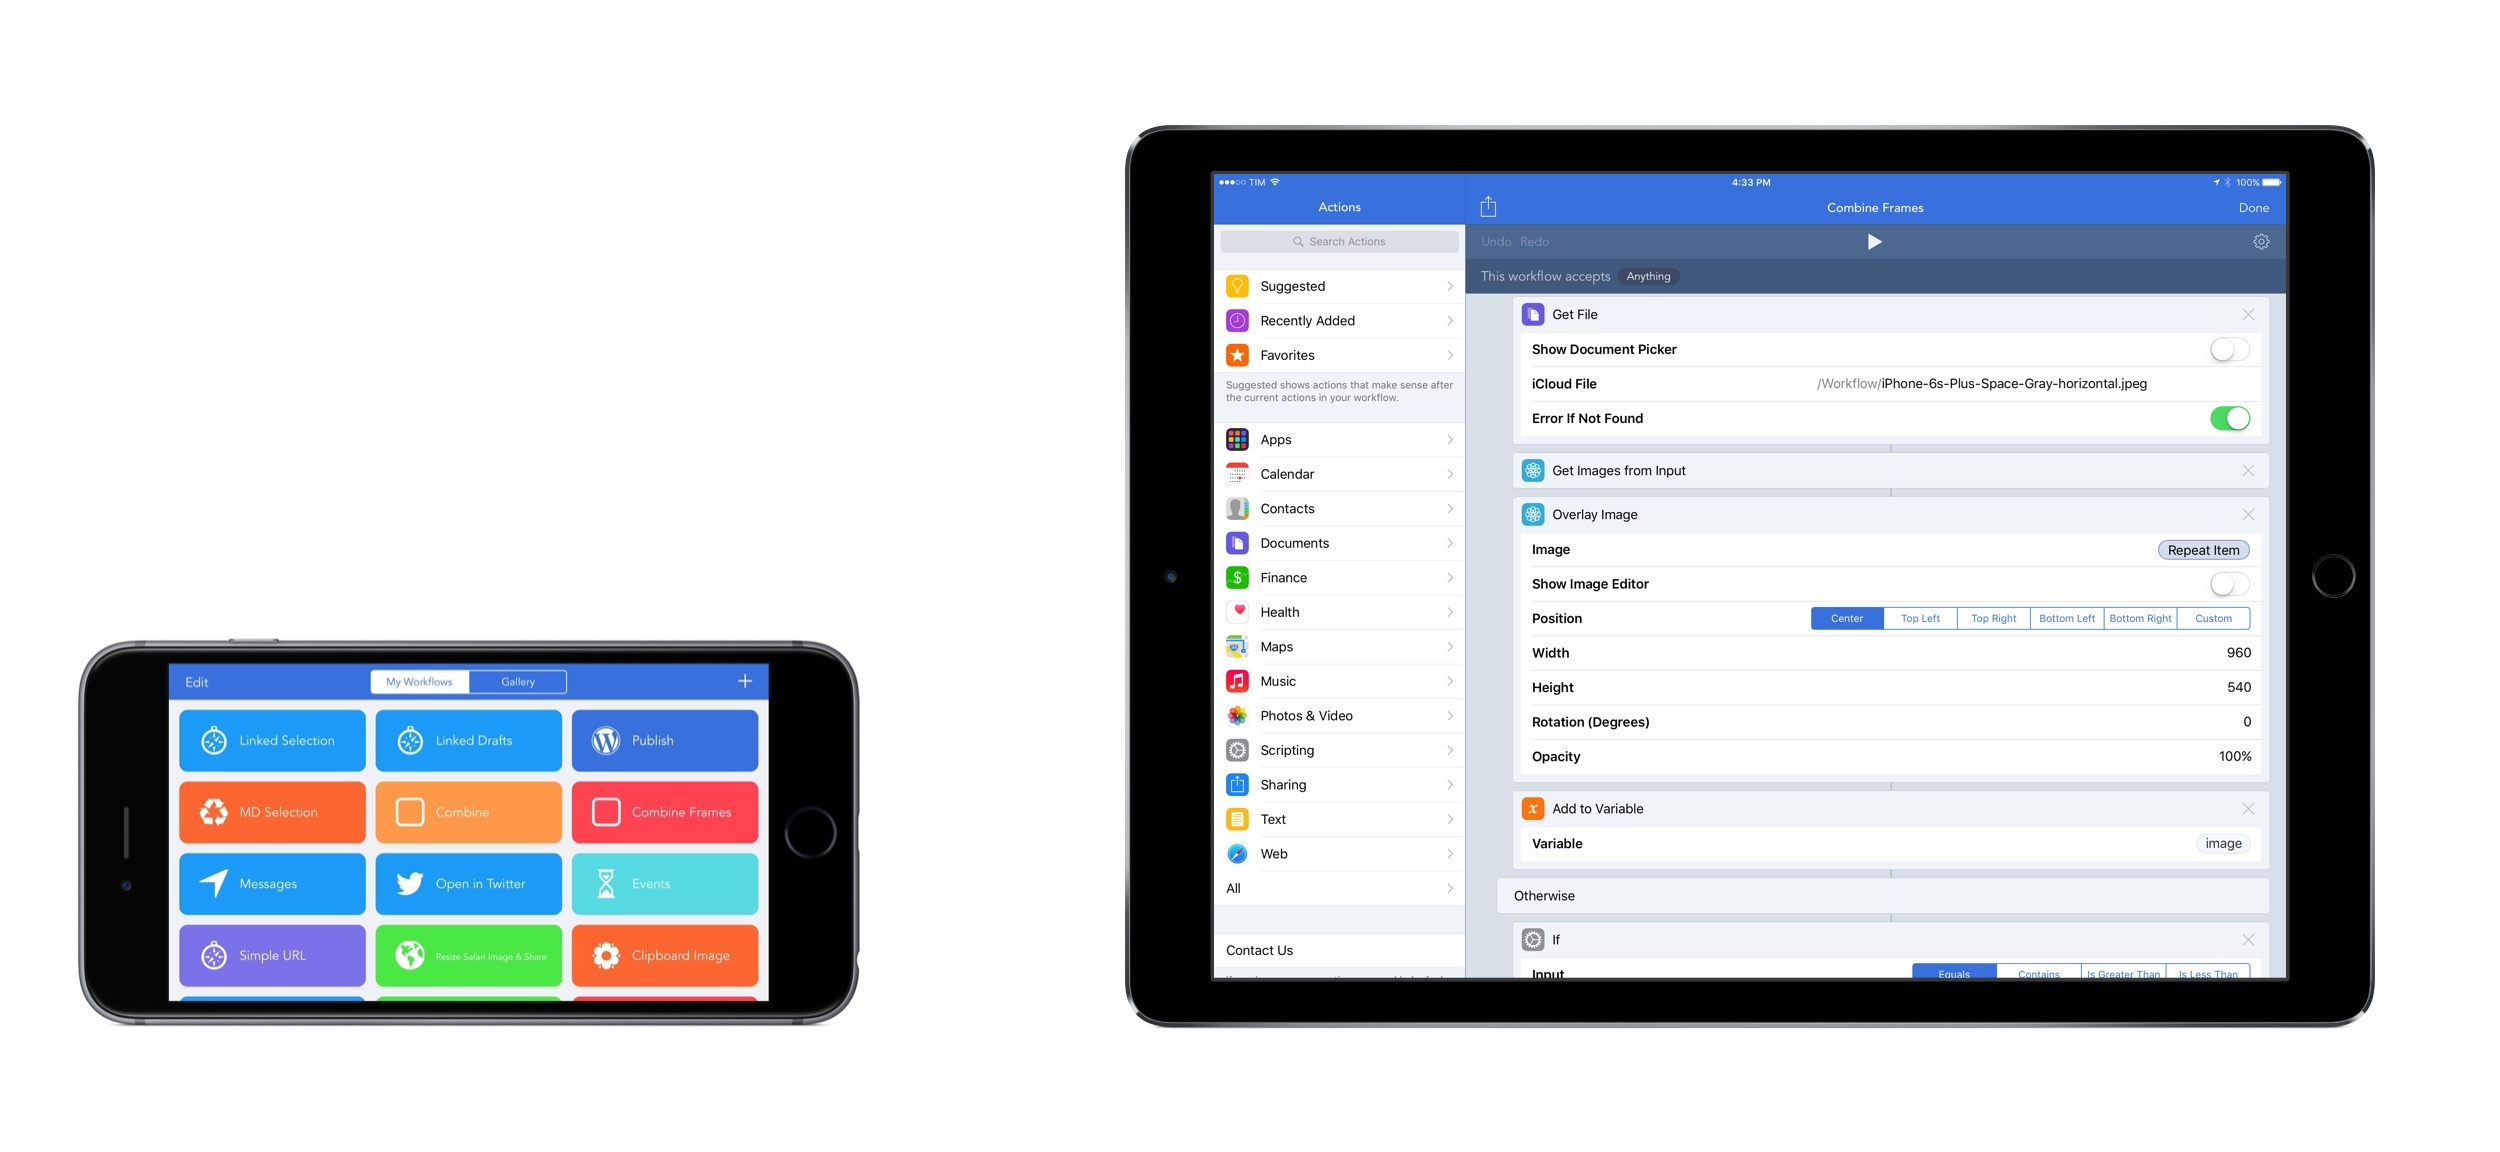
The new ‘Overlay Image’ action allows you to overlay an image (defined in the Image field of the action) on top of another image passed as input. The action offers various customizable parameters: you can tweak the size of the image you’re overlaying, set rotation and opacity, and even adjust the position where the image will be overlaid choosing from five presets or by entering any coordinate you need through variables. If you don’t want to set parameters beforehand, there’s also an option to show an image editor and overlay the image manually. The combined image will be the output, so you can pass it to an action and save it to your library.
This is precisely what I needed to turn one of the few remaining tasks I couldn’t automate into a flexible and powerful workflow. For a long time, I’ve wanted to automate the creation of composite images made of iOS screenshots and iOS device frames provided by Apple. With Workflow’s new overlay action and its Photos integration, I can now put screenshots for the iPhone 6s Plus (both portrait and landscape) and the iPad Pro (only landscape; I don’t need portrait support) into device images without doing anything manually except picking them.
To play around with this:
- Download the workflow here;
- Grab my edited templates and assets for all three orientations.
Once you’ve downloaded the .zip file, save all images into Workflow’s iCloud Drive folder1 and double check their filenames – they should match the ones used in the workflow.
Here’s what the workflow does: given iPhone 6s Plus or iPad Pro screenshots in the supported orientations, the workflow creates framed screenshots and combines them in one final image. The best part: you can mix and match device types (such as two iPhone screenshots and one iPad Pro screenshot) and the result will be a composite image featuring all the correct device frames. At the end, the result is saved to your photo library.
The workflow is built to accept screenshots shared from the share sheet in the Photos app. Whether one or multiple screenshots are detected, the workflow then checks for each image’s width and uses the Overlay Image action to put them into iPhone 6s Plus or iPad Pro frames. As I said above, I only needed to support landscape mode on the iPad Pro, but adding portrait support is easy enough – just create another If block to check for the width of an iPad Pro screenshot in portrait mode.
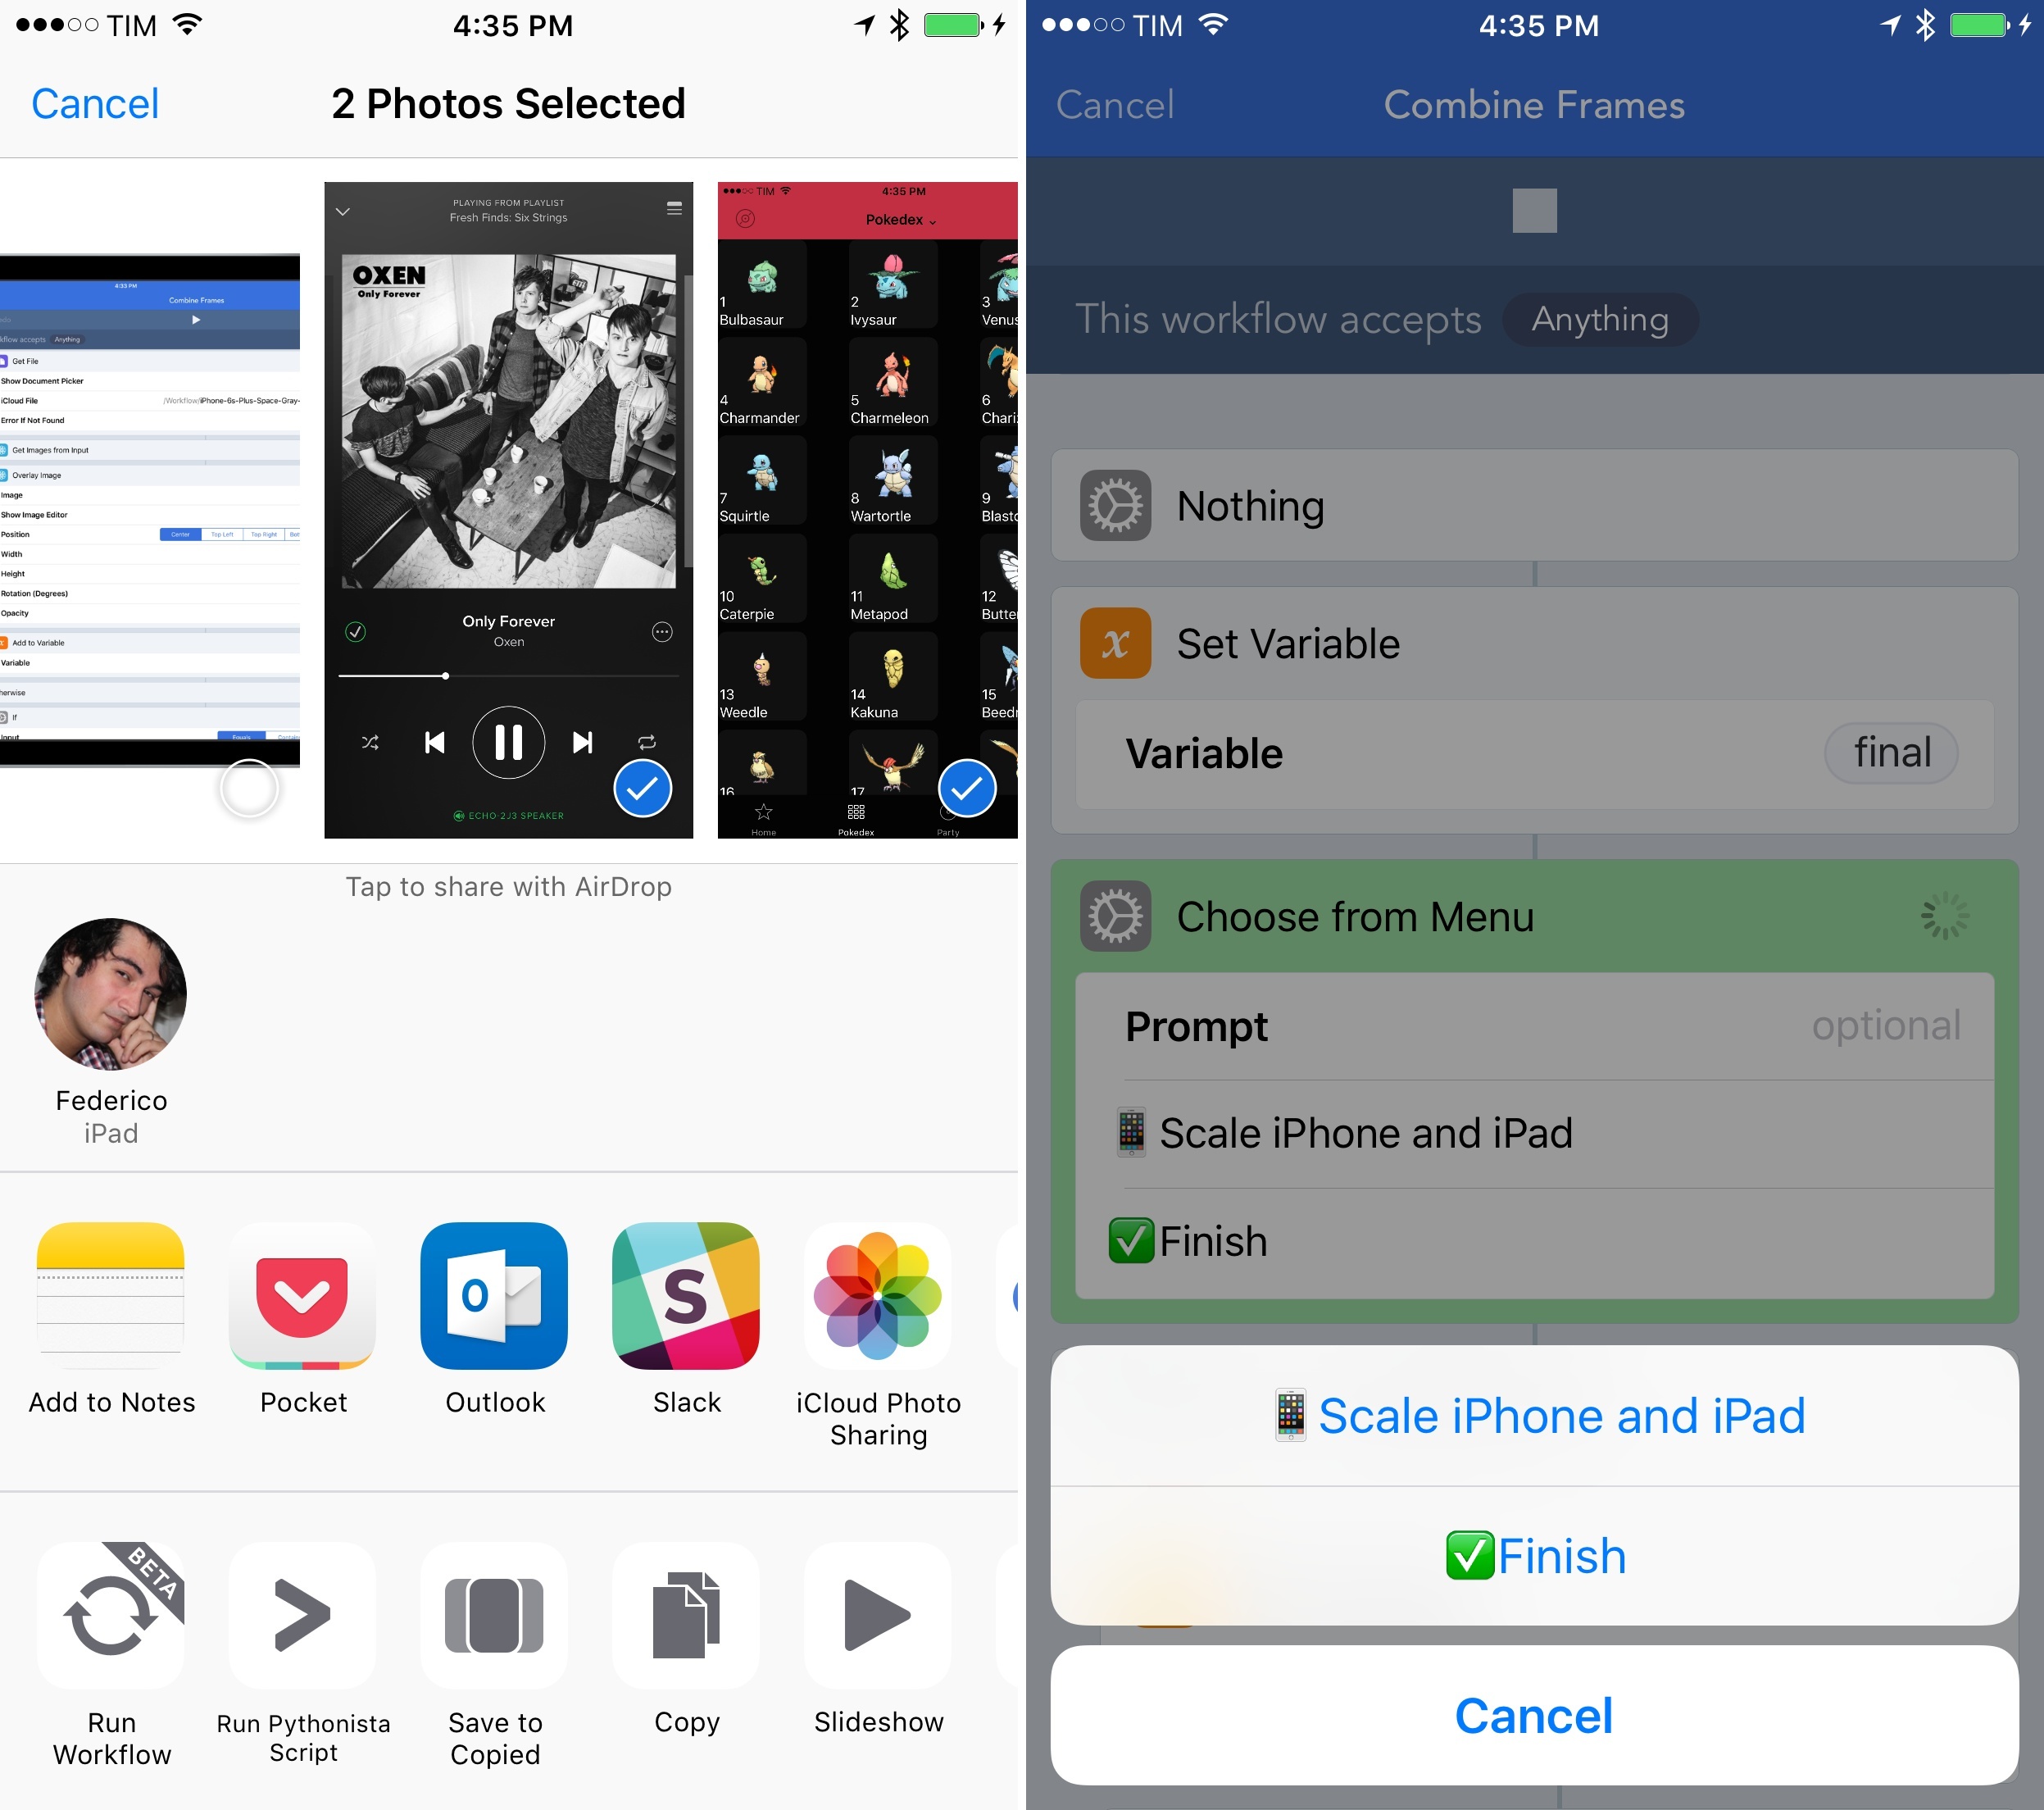
After picking screenshots, the image manipulation process is entirely automated. The only option you’ll have to confirm at the end is whether you want to properly scale iPhone and iPad device frames. If you’re dealing with different devices in the same image, choose Scale iPhone and iPad from the menu and Workflow will take care of resizing the 6s Plus template and aligning both devices toward the bottom edge. For images of the same device type (or if you don’t care about scaling), choose the Finish option and the workflow will combine devices without scaling or aligning them.2
Behind the scenes, this is possibly one of the most complex workflows I’ve built; in practice, though, I only have to choose some screenshots and see if I want to scale iPhone images if they’re next to an iPad. Thanks to the Overlay Image action, this workflow is going to save me a lot of time I would have spent assembling hero images manually, and it’s one more trick in my arsenal of screenshot workflows for image automation.
Converting HTML to Markdown
The other task that I used to run in Pythonista with a script was converting rich text and HTML back to Markdown. I did this to ensure that webpages I linked to on MacStories (where I publish text as Markdown) would keep the formatting of the original source, which is lost if you copy text manually (or with most share extensions) from Safari webpages.
Workflow 1.4.4 includes a simple action called Make Markdown from Rich Text that is comparable to html2text. You can pass webpage selections to the action, and you’ll end up with a Markdown version of the same text to use somewhere else. For anyone who uses Workflow to complement their iOS blogging setups, this is a must-have.
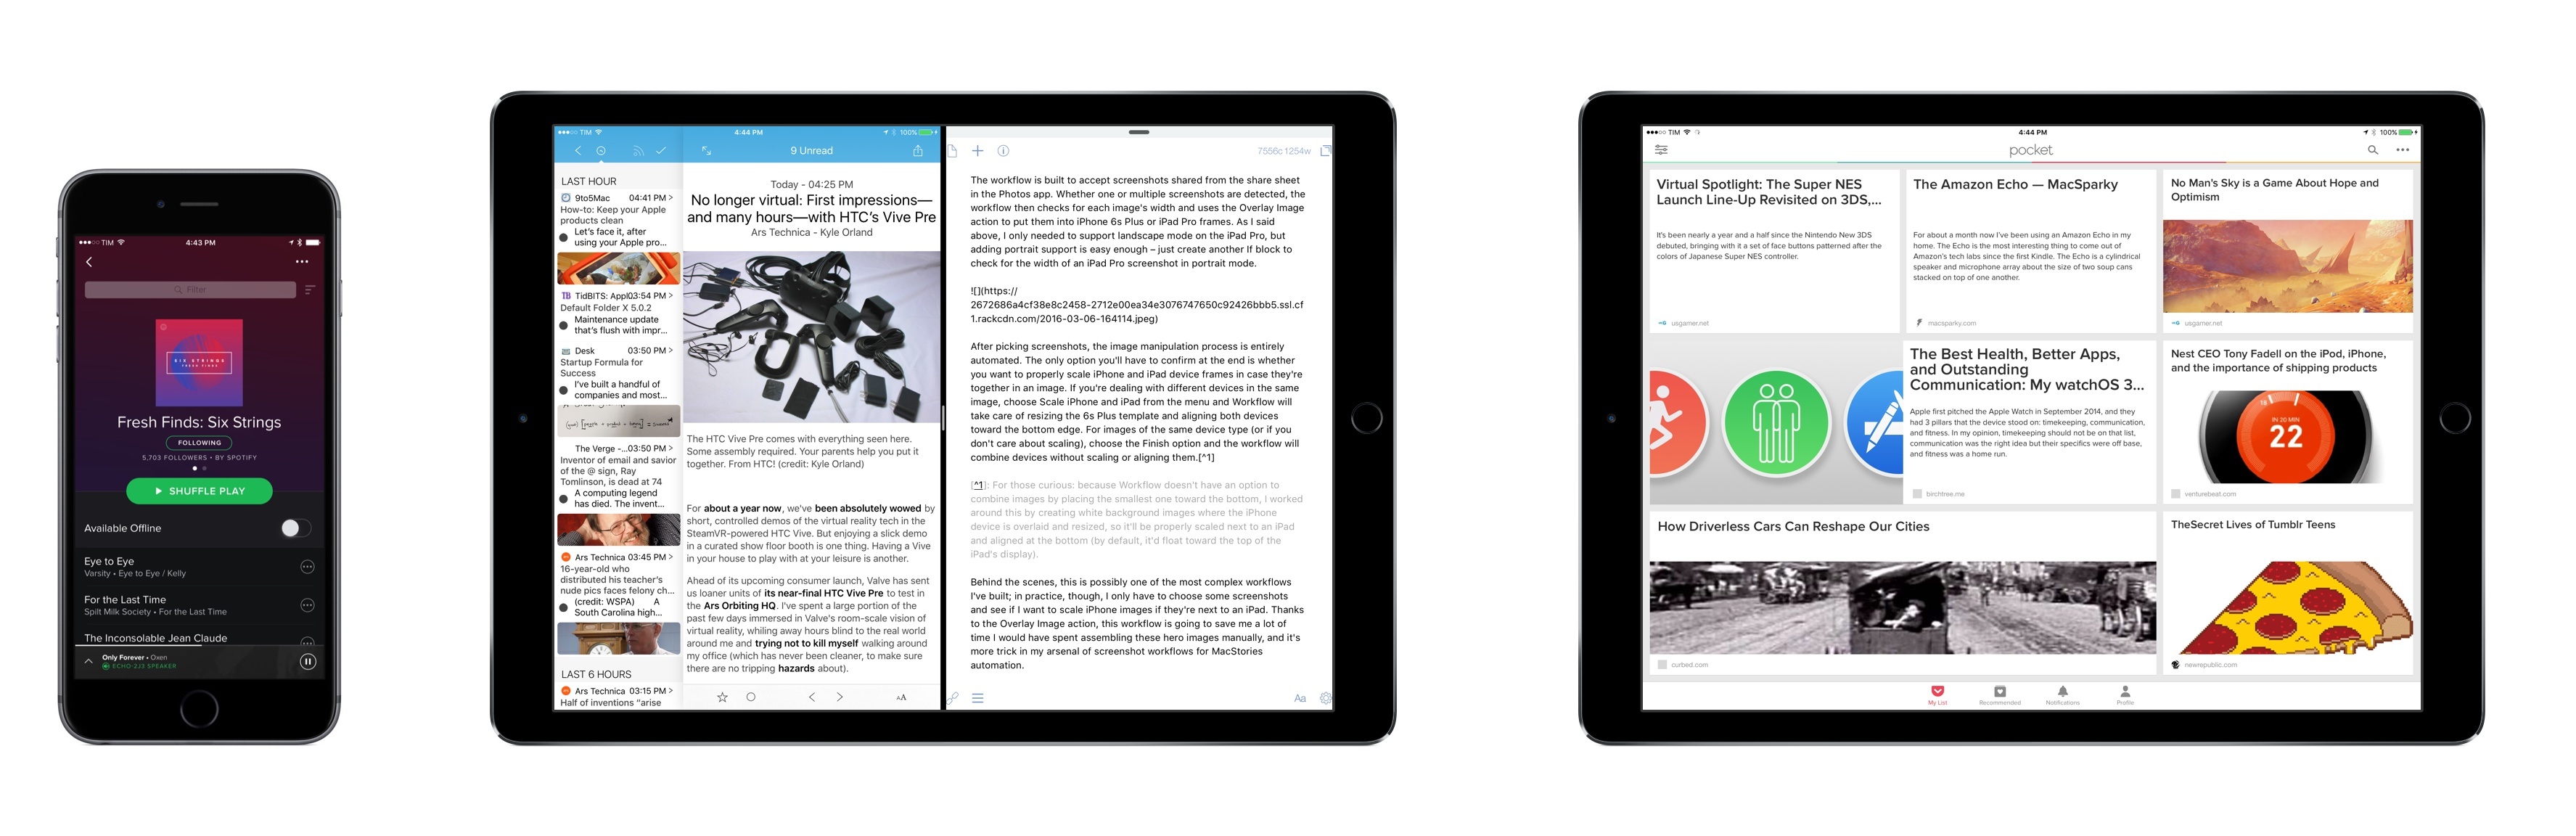
I put together a sample workflow to demonstrate how easy it is to generate Markdown from selections in Safari. Select some content on a webpage – you can select both images and media – bring up the share sheet, and run the workflow. After a second, you’ll have a Markdown version of the content you selected into your system clipboard, ready to be pasted in another app. Under the hood, Workflow uses the also-new ‘Get Details of Safari Web Page’ action3 to extract the page selection parameter from the input variable, feeding it to Make Markdown from Rich Text.
You can download the workflow here.
Workflow 1.4.4
There are more actions worth noting in this update. You can now unzip files in Workflow without having to use a separate file manager; you can use ‘Get Device Details’ to easily see whether a workflow is running on an iPhone or iPad (and take different routes if so); you can even add frames to GIFs and post GIFs to Tumblr.
On each release, Workflow adds features that allow me to work faster and automate as much as I can so I can focus on more important and fun aspects of my job. Workflow 1.4.4 has some great improvements for image processing and Markdown, and it’s available now on the App Store.
- If the Workflow folder in iCloud Drive doesn’t appear at first, try running a workflow that saves a file into iCloud Drive, such as this one. ↩
- For those curious: because Workflow doesn’t have an option to combine images by placing the smallest one toward the bottom, I worked around this by creating taller white background images where the iPhone device is overlaid and resized, so it’ll be properly scaled next to an iPad and aligned at the bottom (otherwise, it’d float toward the top of the iPad’s display). ↩
- Which, by the way, is a nice way to get URLs or titles from webpages more quickly than before. ↩