If you stay a lot of time away from your Macbook but you’ve always wanted to control what’s happening to your Mac while you’re not there, this tutorial is aimed at you.
Today I’ll teach you how you can easily turn your iSight into a security camera system, with automatic refresh time and FTP upload.
Enjoy!
You need:
Automator Loop Utility: to repeat an Automator workflow every x seconds. Download.
FTP server: to upload your iSight pictures.
Upload to FTP Automator action: Download.
isightcapture: a command line utility which capture an image with iSight camera.Download.
First, you have to install isightcapture. To do this, you have to put the file into /usr/bin. But, /usr/bin is hidden in the, so you have to open a new Finder window and hit Cmd + Shift + G and enter the path. Copy isightcapture here.

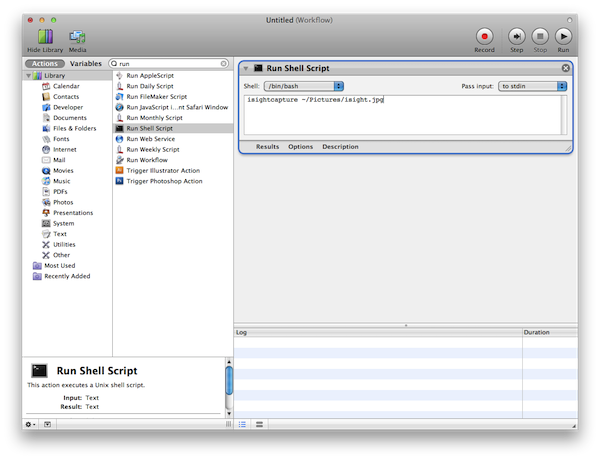
Open up Terminal and paste this command: isightcapture ~/Pictures/isight.jpg iSight will take a picture and move it to your Pictures folder. You’ll need this image later.
Now, it’s time to create the workflow. Fire up Automator.app and create a new workflow.

In the search box type “run” and select the action Run Shell Script. Drag it into the right panel.
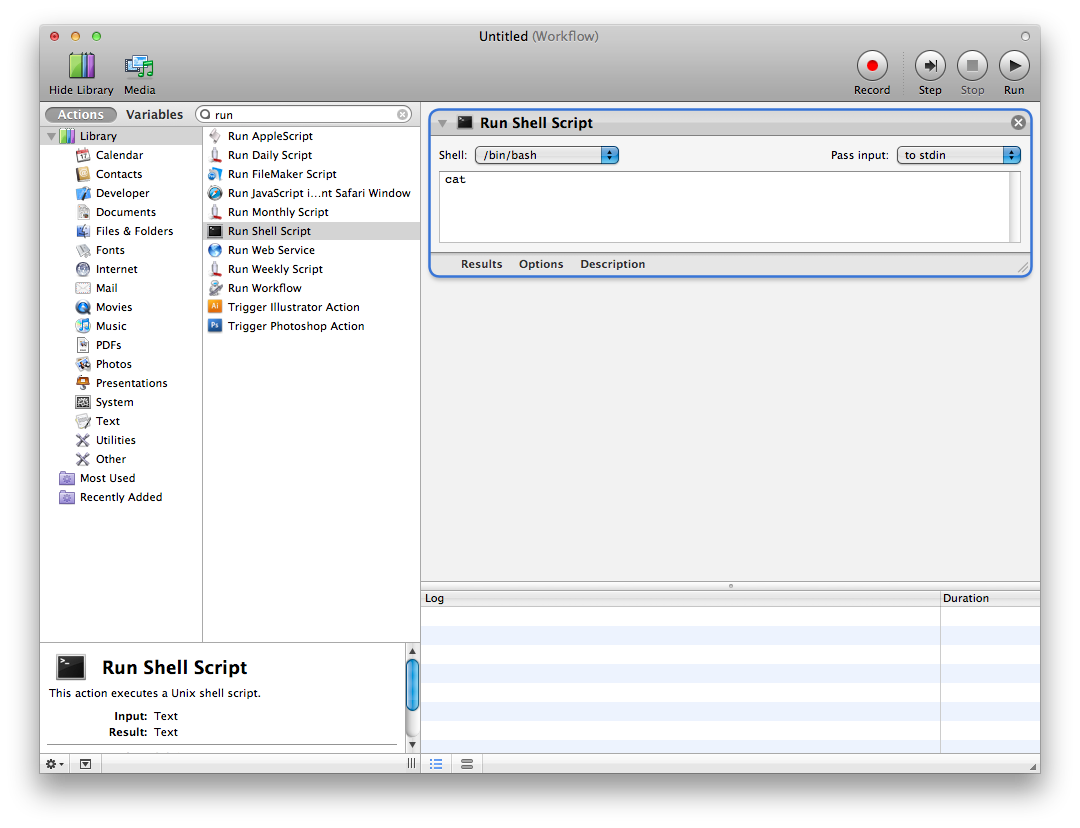
Edit the shell script and paste this command into the text field: isightcapture ~/Pictures/isight.jpg
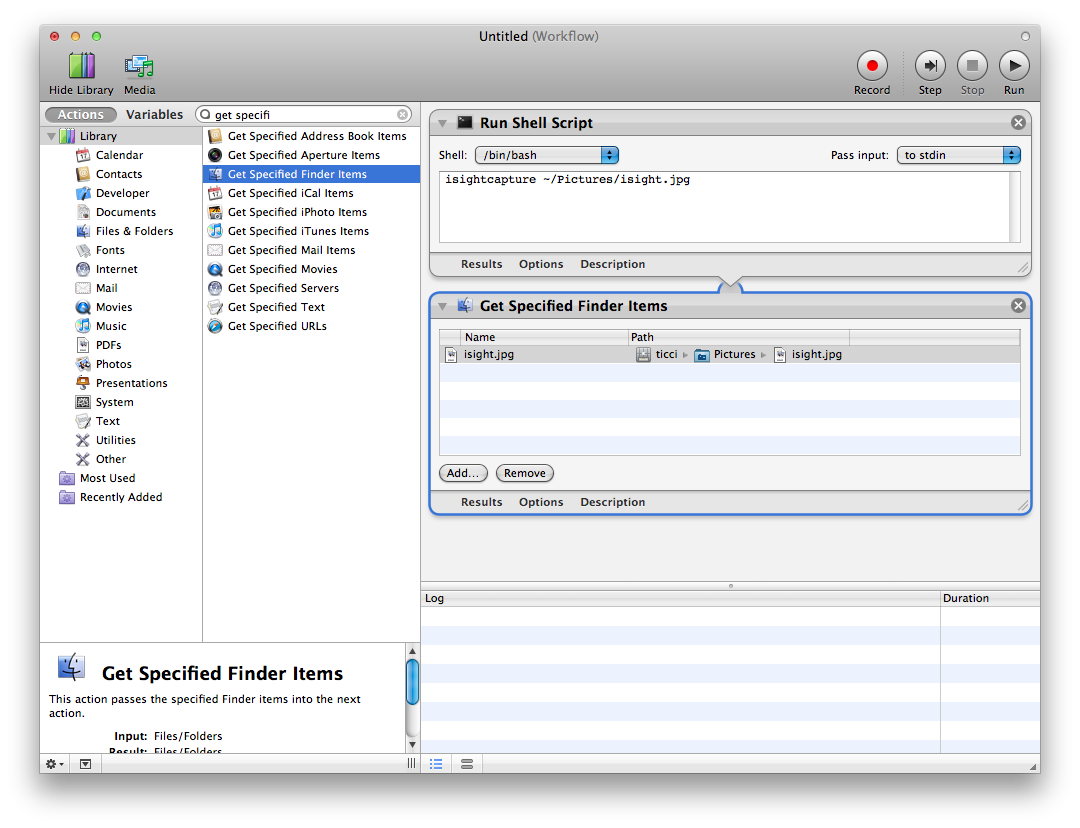
Now, grab the Get Specified Finder Items and drag it into the actions pane. Click add and select the isight.jpg file in your Picture folder. That’s the one you shot before.
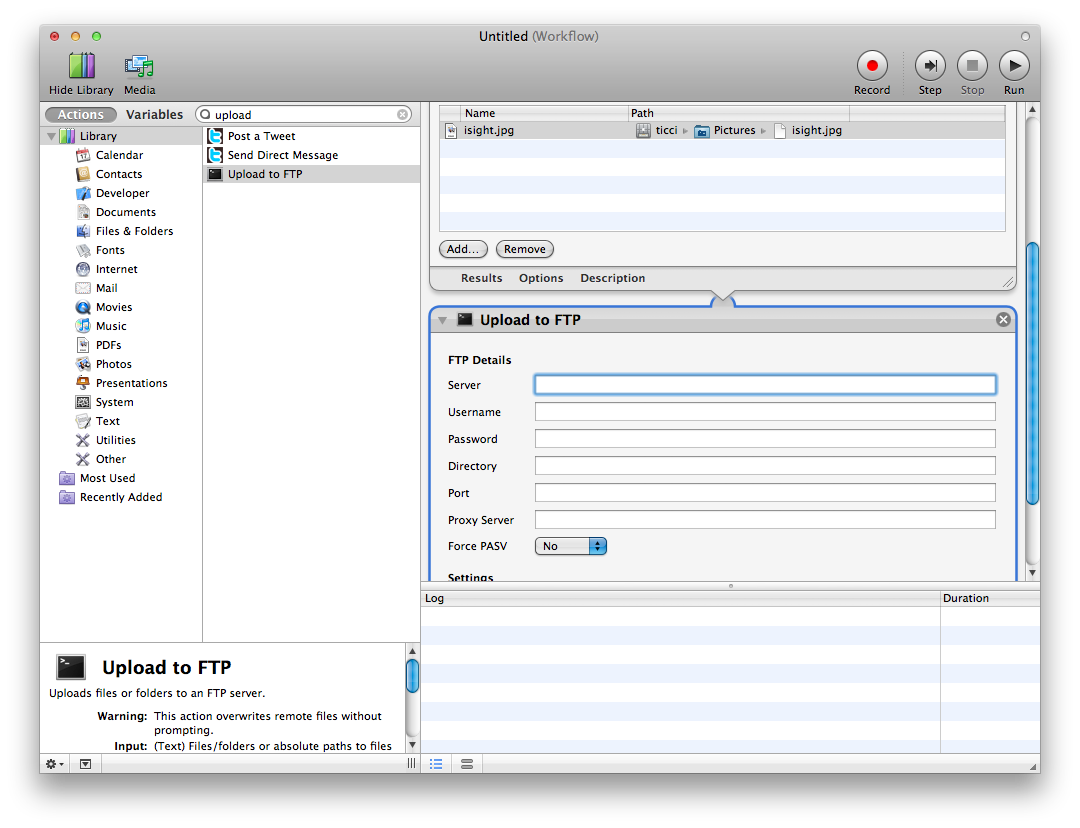
Add the Upload to FTP action and fill the required fields.
Save the workflow.
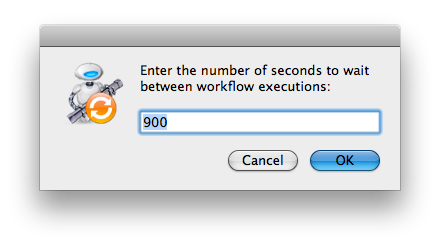
Now, drag the workflow you’ve just saved over Automator Loop Utility. The app will ask you where you’d like to save the new applet and to set a number of seconds to wait between the workflows execution. Don’t enter a small value, as the Upload to FTP action could require some time depending on your internet connection.

With this app you’ve just created you’ll able to see a picture of what’s happening in front of your Mac every x seconds. If you have access to your FTP server on the go, you can refresh the directory you chose and see the new picture.
If you don’t have a FTP server, you can use Dropbox. Leave Dropbox app open on your Mac and edit the workflow removing the Upload to FTP action; then, insert the Copy Finder Items action and set the path to your Dropbox folder. Be sure so to check “replace existing file” in order to see the most recent picture on your DropBox.

And that’s it!