Nudget1 is a budgeting app designed to streamline the daily input of expenses. Developer Sawyer Blatz created a gorgeous and extremely efficient interface to make budgeting feel light and fun. With my beloved bank Simple closing this year, I’ve been looking for new solutions for keeping track of my finances. Over the last couple weeks I’ve worked with Nudget full-time, and the experience has been rewarding.
Getting Started
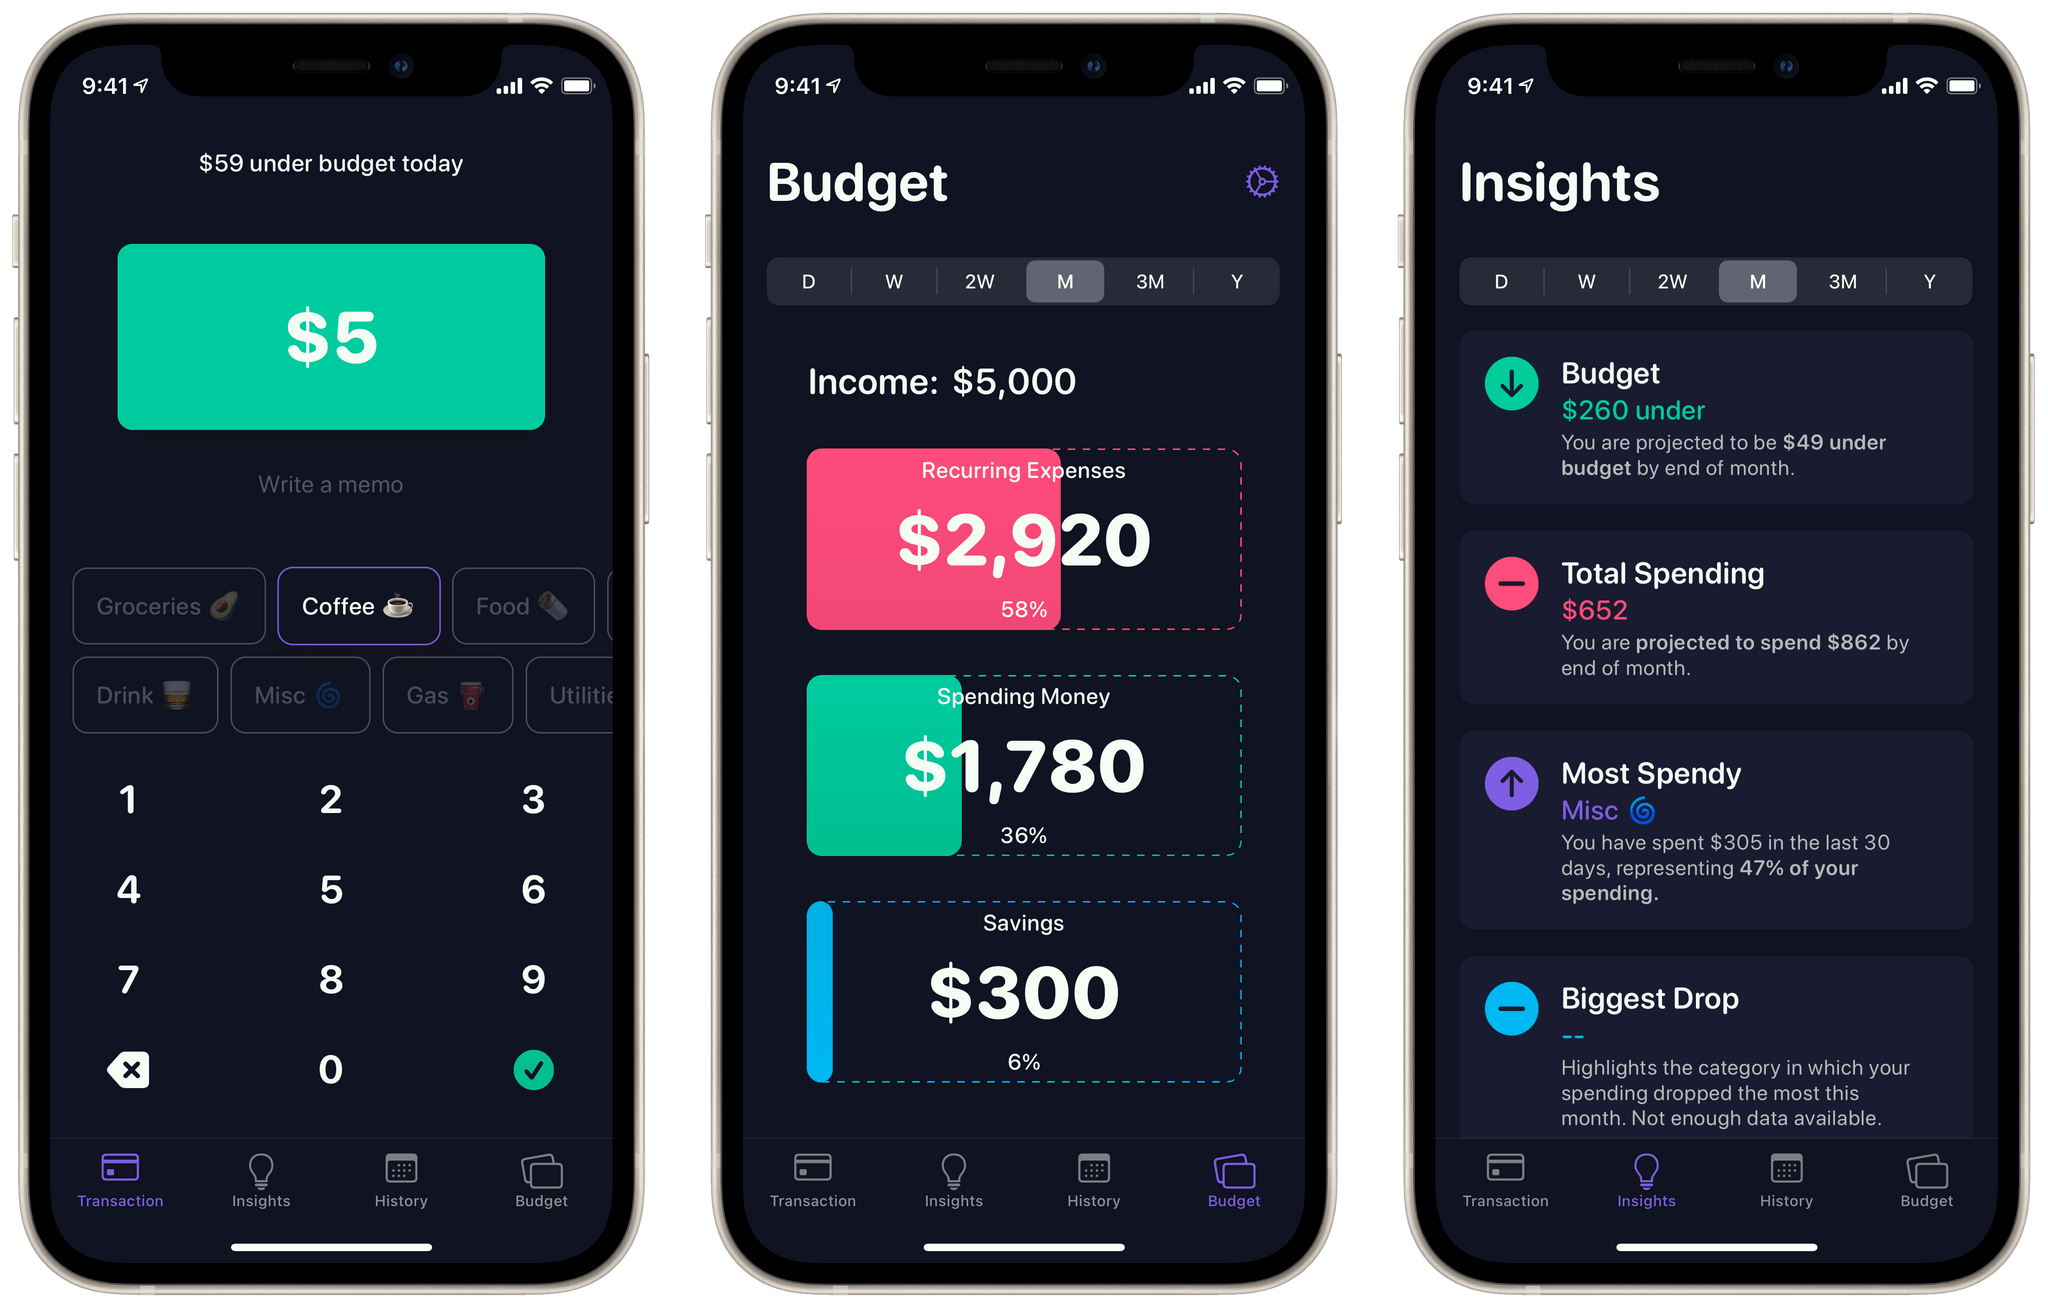
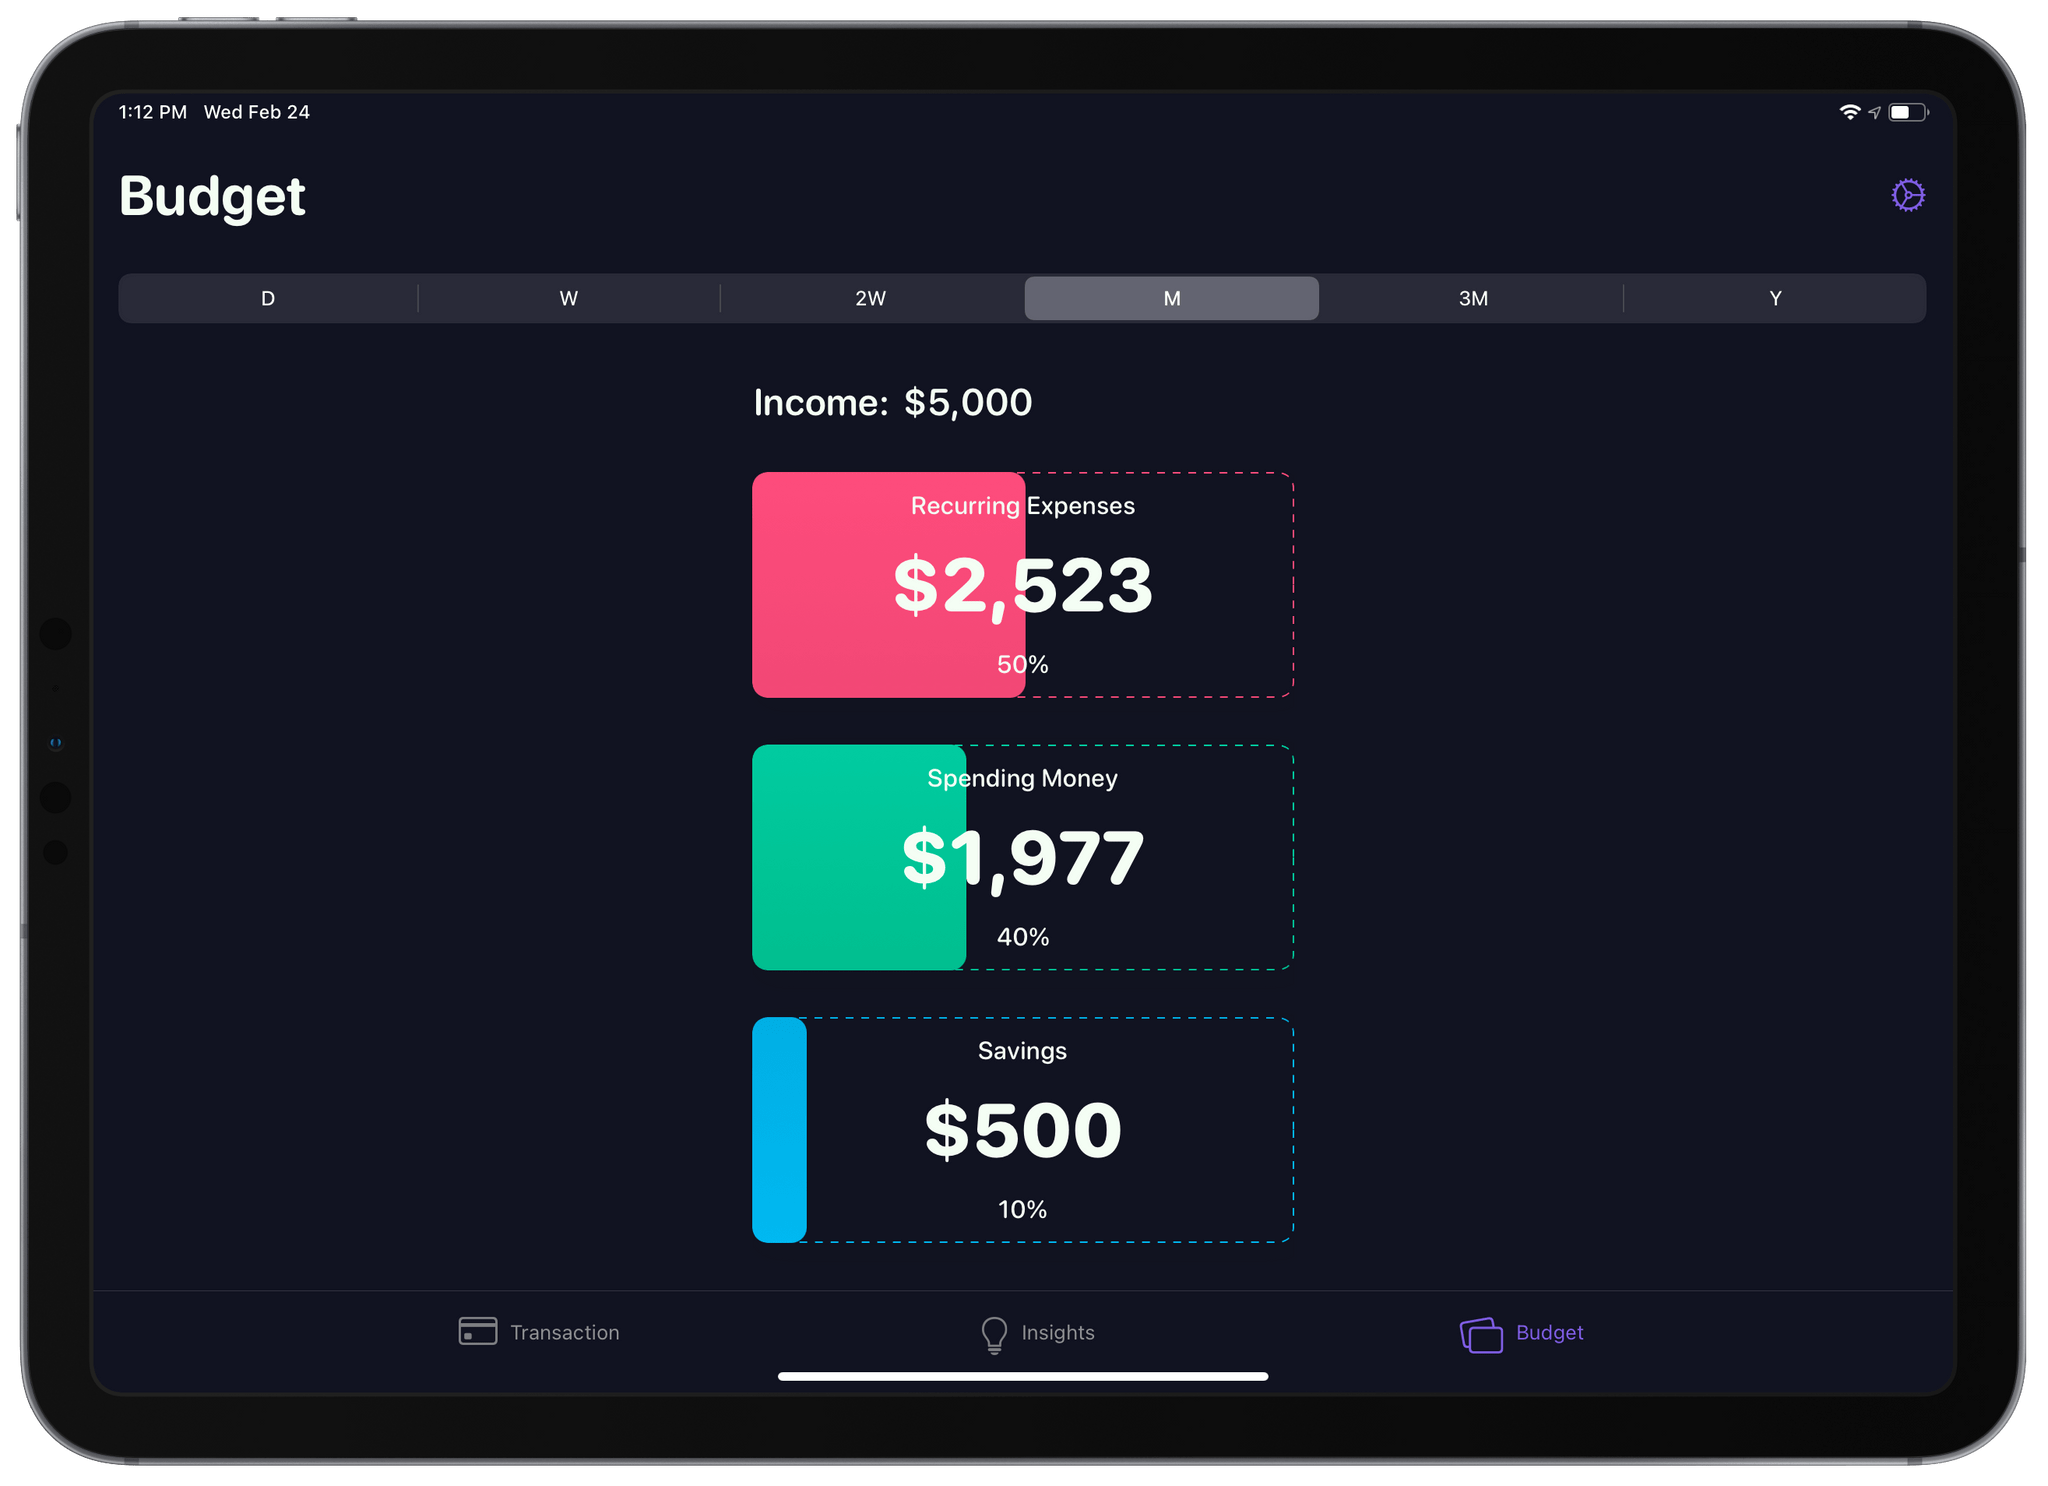
As is the case with any budgeting app, you’ll need to put in a bit of work up front to get started with Nudget. When you first open the app it will prompt you to input your after-tax income and recurring expenses. Nudget uses this data to craft a simplified budget for you. Budget-wise, the app isn’t doing anything too fancy. Each budget consists of three categories: recurring expenses, spending money, and savings. These categories are shown as large cards in Nudget’s ‘Budget’ tab, and you can tap each one to edit it.
Tapping into the ‘Recurring Expenses’ card opens a list interface where you can add new expenses. Tap the ‘+’ button, then give the recurring expense a name and cost. The frequency of each expense is set from a horizontal bar which has options for daily, weekly, biweekly, monthly, quarterly, and annually. The expense list is sorted by cost, and breaks down your expenses by one of the time intervals mentioned above. If you have the list set to monthly (the default) then any yearly expenses will be divided out to show their monthly cost. Weekly expenses will be multiplied to get a monthly total, etc. The interface for this list is simple, but feels very usable and accomplishes everything that I’d want from it. Visualizing my expenses by different timeframes is particularly nice.
The ‘Spending Money’ and ‘Savings’ cards don’t get their own interfaces, but tapping either one brings up a number pad where you can set their value. Altogether your recurring expenses, spending money, and savings amounts must add up exactly to what you set as your total income. As such, if you increase the value in the ‘Savings’ card, that amount will be correspondingly subtracted from the ‘Spending Money’ card’s value (and vice-versa). Nudget handles these calculations for you automatically, and if you try to set one of the values too high then it will be reset to its maximum amount (thus reducing the other category to zero). Nudget won’t mess with your recurring expenses number, so it’s really just balancing the spending money and savings values to match your income after recurring expenses have been taken out of it.
Whatever value you choose for spending money is what Nudget then tries to help you budget for. It divides this value across every day of the month, and then keeps track of whether you’ve gone over-budget in a given day. This is where your manual expense input comes into play.
Transactions

The ‘Transaction’ tab is where you go to add an expense to Nudget. You do not need to add any expenses that you’re tracking as recurring expenses — Nudget considers those to be immediately removed from your income each month. As such, you only need to add expenses that fall outside your known categories.
The Transaction interface makes it simple and quick to add expenses, but it does take a small amount of up-front work to prepare. Each expense consists of an amount, a memo, and a tag. The latter two items are optional, but tagging expenses is important so that the app can give you better insights into your spending habits. Nudget includes a couple example tags, but when you get started you’ll want to hit the ‘Edit Tags’ button and add your own. Once your tags are set, inputting new expenses becomes very easy.
To input a new expense, just tap the tag it belongs to, enter an amount, and hit the check button. If you do want to take the extra step of adding a memo then you can do so as well, but personally I only add memos to expenses under my “Misc” tag so that I know what they were — all of my other tags speak for themselves so that my transaction input is as streamlined as possible (also, if a similar type of expense keeps falling into “Misc” then I know it needs its own tag). I know myself, and if adding transactions takes more than a few seconds then I’ll eventually get lazy and stop doing it. Nudget’s interface makes it so fast that I haven’t had any problem with it.
The interface is filled with nice touches that show how much care went into its design. The font is friendly, the big green box showing the transaction amount is inviting, the custom number pad is spread out and easy to type in, and when you hit the check mark to add an expense you get a nice haptic feedback tap. Following the example of Nudget’s default tags, I also added emoji icons to each of my own tags. This makes the whole tag list look fun, as well as making it faster for me to visually identify the tag I’m looking for.
The tags are sortable, so you can make sure that your most-used tags are shown without you needing to scroll. That said, the tags are displayed as two stacked rows, but sorting them is done via single list column. The result is strangely inconsistent, with the row wrapping mostly, but not entirely consistent with the list’s sorting. I’m not really sure what’s going on with this, but I was able to guess-and-check with the sorting of my list until my tags showed up in the order that I wanted. The row sorting doesn’t change after you set it, so once I got the list right this wasn’t a problem, but I hope a future update makes these tag rows easier to sort.
Once you understand how Nudget’s budgeting works, you can control exactly how much you want to use the app. For instance, I looked at my past expenses and identified that I spend essentially the same amount on coffee every month. That amount is reasonable enough that I don’t feel the need to restrict it, so I just added my average coffee spending as a recurring expense. Now I don’t need to constantly add coffee purchases as manual transactions in Nudget — they’re already accounted for.
You can use the above strategy to wade into budgeting with Nudget a bit slower. Maybe figure out the average amount you spend on food and groceries each month and add that as a recurring expense too. Then you can adjust to budgeting by only inputting your less frequent or unusual transactions. I am not a financial professional, so take my advice on how to build a budget with a grain of salt, but as someone who is resistant to adding a constant repeating task to my life (however quick that task might be), this has been a good way for me to start building the habit without getting frustrated and giving up.
Insights
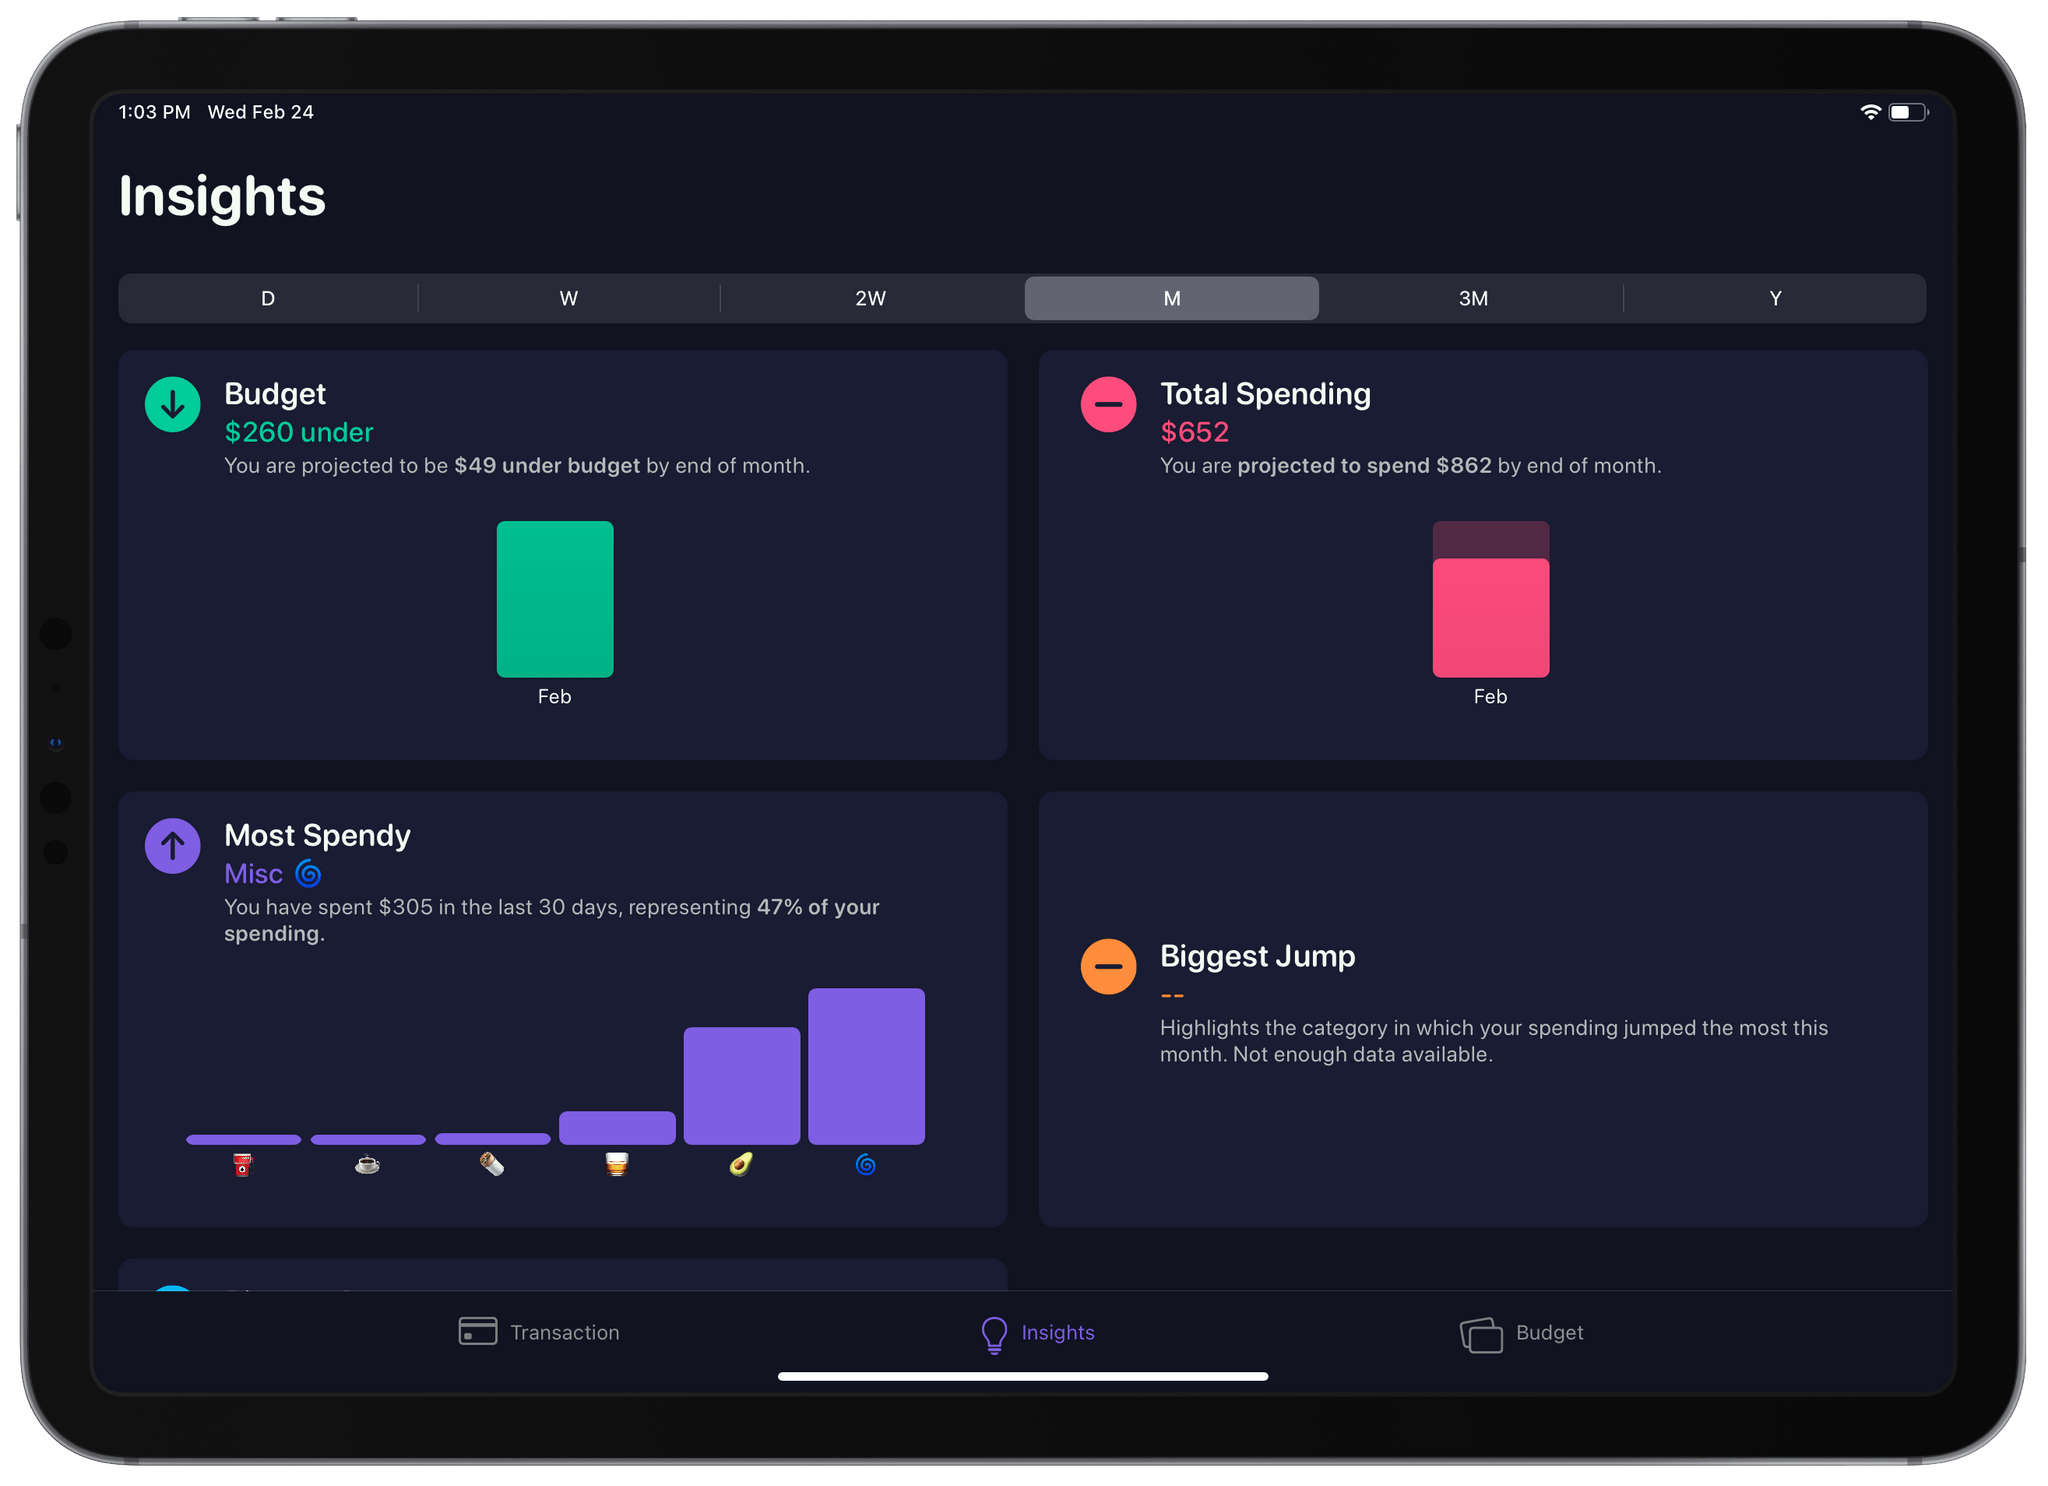
Once you have your budget in place and have started inputting your expenses into Nudget, you’ll start to see data in the app’s ‘Insights’ tab. This is a great place to go to see visualizations of your spending habits. It can show you what you’re doing well, or clearly surface concerns with your state of affairs. Currently this section shows whether you’re over or under budget, your total spending for the month, the category (one of your custom tags) which you’ve spent the most on, the category which has dropped the most compared to last month, and the category which has grown the most compared to last month. Just like in the ‘Recurring Expenses’ list, you can adjust the time interval of this data. Switching it to weekly will make the above comparisons against the week before, yearly will show for the last year, etc.
History
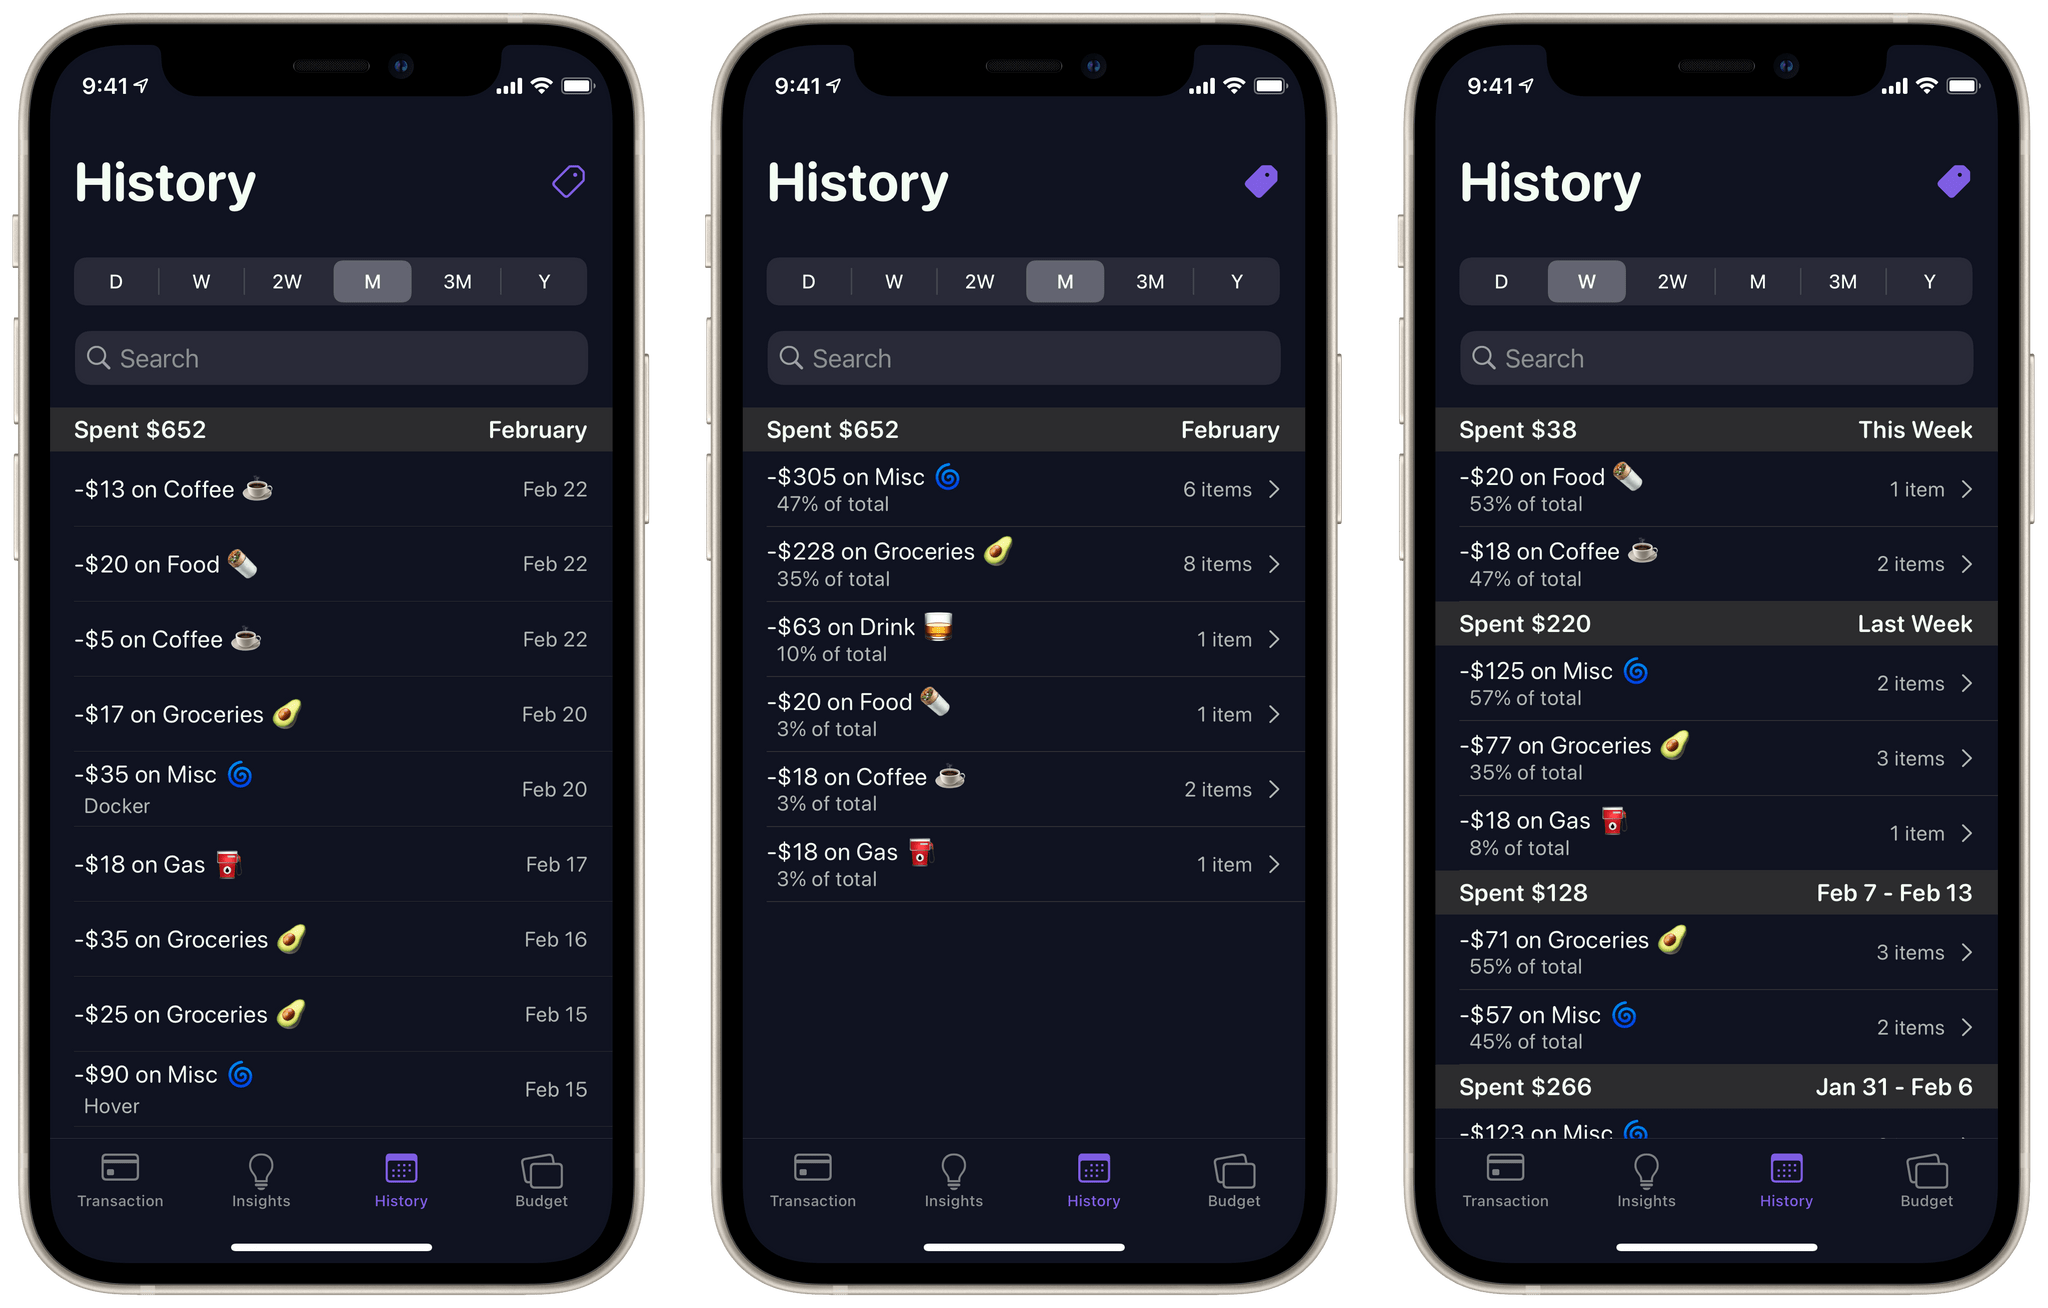
The final tab in Nudget is the ‘History’ tab. This shows a scrolling list of individual transactions which you’ve added from the Transaction tab. This list is most useful for making edits to your transactions. For instance, if you forgot to add a transaction on the day in which it happened, you can add it at a later date and then update it to the correct date from the History tab. You can also delete transactions from this interface.
Transactions in the History tab can be grouped by tag, and can be viewed by the same various time intervals as other sections of the app. My only complaint is that the editing pane allows you to swipe down to close it, but if you’ve made changes then they aren’t saved unless you actually hit the ‘Save’ button in the top right. Changes should be saved automatically when you swipe the view closed, but at the very least you should see a prompt asking if you want to save them rather than silently dumping any edits.
Settings
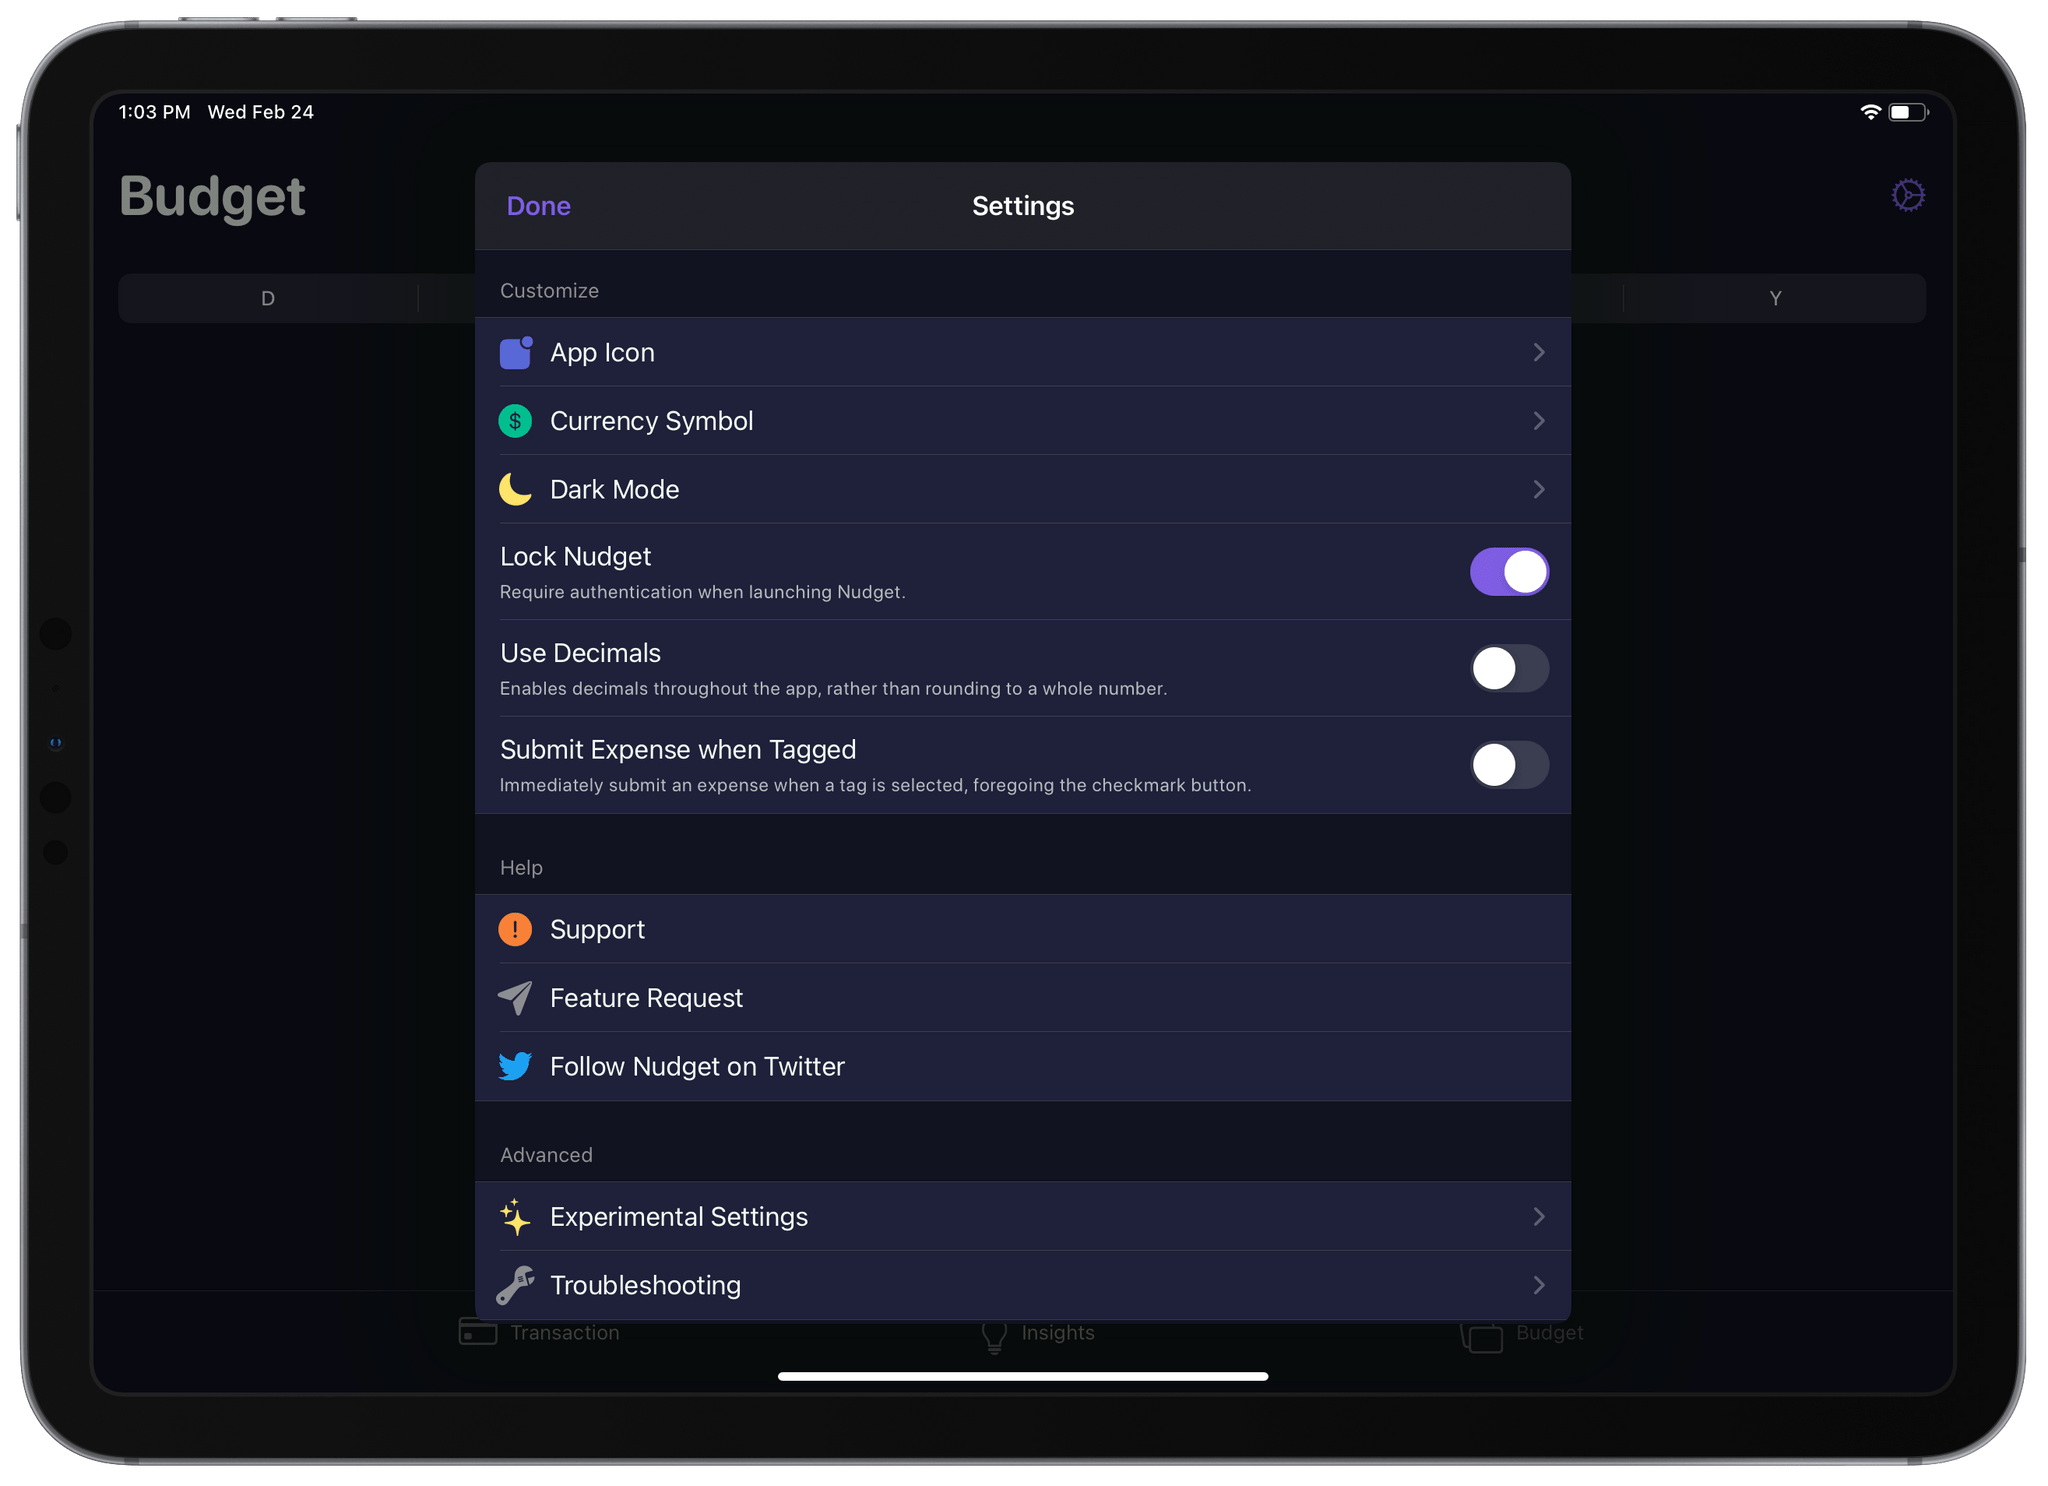
You can access Nudget’s settings from the gear icon in the top-right corner of the Budget tab. From here you can set the app’s currency symbol, choose from a variety of different app icons, set a color theme, and enable biometric authentication to unlock the app. You can also choose whether to enable decimal points throughout the app.
By default Nudget only allows round numbers, meaning you need to manually round your recurring expenses as well as your transactions up or down. This annoyed me at first, especially when I hadn’t yet noticed the existence of the decimal setting. By the time I found the setting though, I’d adjusted to the rounded numbers and I think I actually prefer their simplicity. Since I’m not inputting every single expense, I don’t need Nudget to be 100% accurate. It’s okay with me if my high level budget is off by a few dollars in either direction. If you want to be more precise though, then just flip the setting on and you’ll be back in the land of exact numbers.
Finally, Nudget’s settings pane includes a section of “experimental” settings. I’m not sure exactly what makes these experimental since they all work great for me, but I expect that they haven’t been thoroughly tested yet so your mileage may vary. In particular, there’s an experimental setting to add a date picker to the main Transaction interface. This shows up as an unobtrusive icon in the top-right corner, and you can tap it to set the date for the next transaction that you input. If you find yourself constantly having to change dates from the History tab, enabling this setting will save you some time.
Conclusion
I’ve been really enjoying my time with Nudget. For years now my evanescent bank Simple has handled all of my budgeting automatically. While I don’t relish having to take this task on manually going forward, Nudget has made it something that I don’t dread having to do. I always love using a beautifully designed app, so adding expenses in Nudget hasn’t felt like a chore. I even enabled the experimental confetti feature, which gives me a tiny confetti party every time I add an expense. Who said budgeting can’t be fun?
You can find Nudget on the App Store as a universal app for iOS and iPadOS. Nudget has a one-time cost of $3.99, and the in-app purchases offered are only for a virtual tip jar.
- It took longer than I’d like to admit for me to realize that this is pronounced like “budget.” ↩