If you have any further questions, feedback, or comments, feel free to send us an email at: [email protected]
What are MacStories Perspective Icons?
MacStories Perspective Icons are a comprehensive set of icons for custom perspectives in OmniFocus Pro.
Specifically designed for OmniFocus and spanning dozens of categories, MacStories Perspective Icons will let you fully customize the look of your custom perspectives created on iOS, iPadOS, or macOS.
MacStories Perspective Icons offer 400 unique glyphs in two versions, in 25 different colors – for a total of 20,000 icons you can install in OmniFocus Pro.
What version of OmniFocus do I need to install the icons?
OmniFocus Pro is required to use MacStories Perspective Icons. As explained by The Omni Group here, the Pro version of OmniFocus is the only one that offers the ability to create custom perspectives with custom icons.
What makes MacStories Perspective Icons special?
The set contains 400 unique glyphs, ranging from productivity and utilities to health and entertainment. Each glyph is available in two versions (square and glyph-only), as well as 25 different colors based on OmniFocus’ color palette – for a total of 20,000 icons.
How can I install the icons?
First, make sure you’re using the Pro version of OmniFocus on your iPhone, iPad, or Mac. As explained by The Omni Group here, the ability to customize perspective icons is exclusive to OmniFocus Pro; you will not be able to use our custom icons with the standard edition of OmniFocus.
Second, we highly recommend running OmniFocus 3.8 or higher on iOS or iPadOS. Starting with OmniFocus 3.8, you can customize perspective icons using the Files picker, which greatly simplifies the installation procedure.
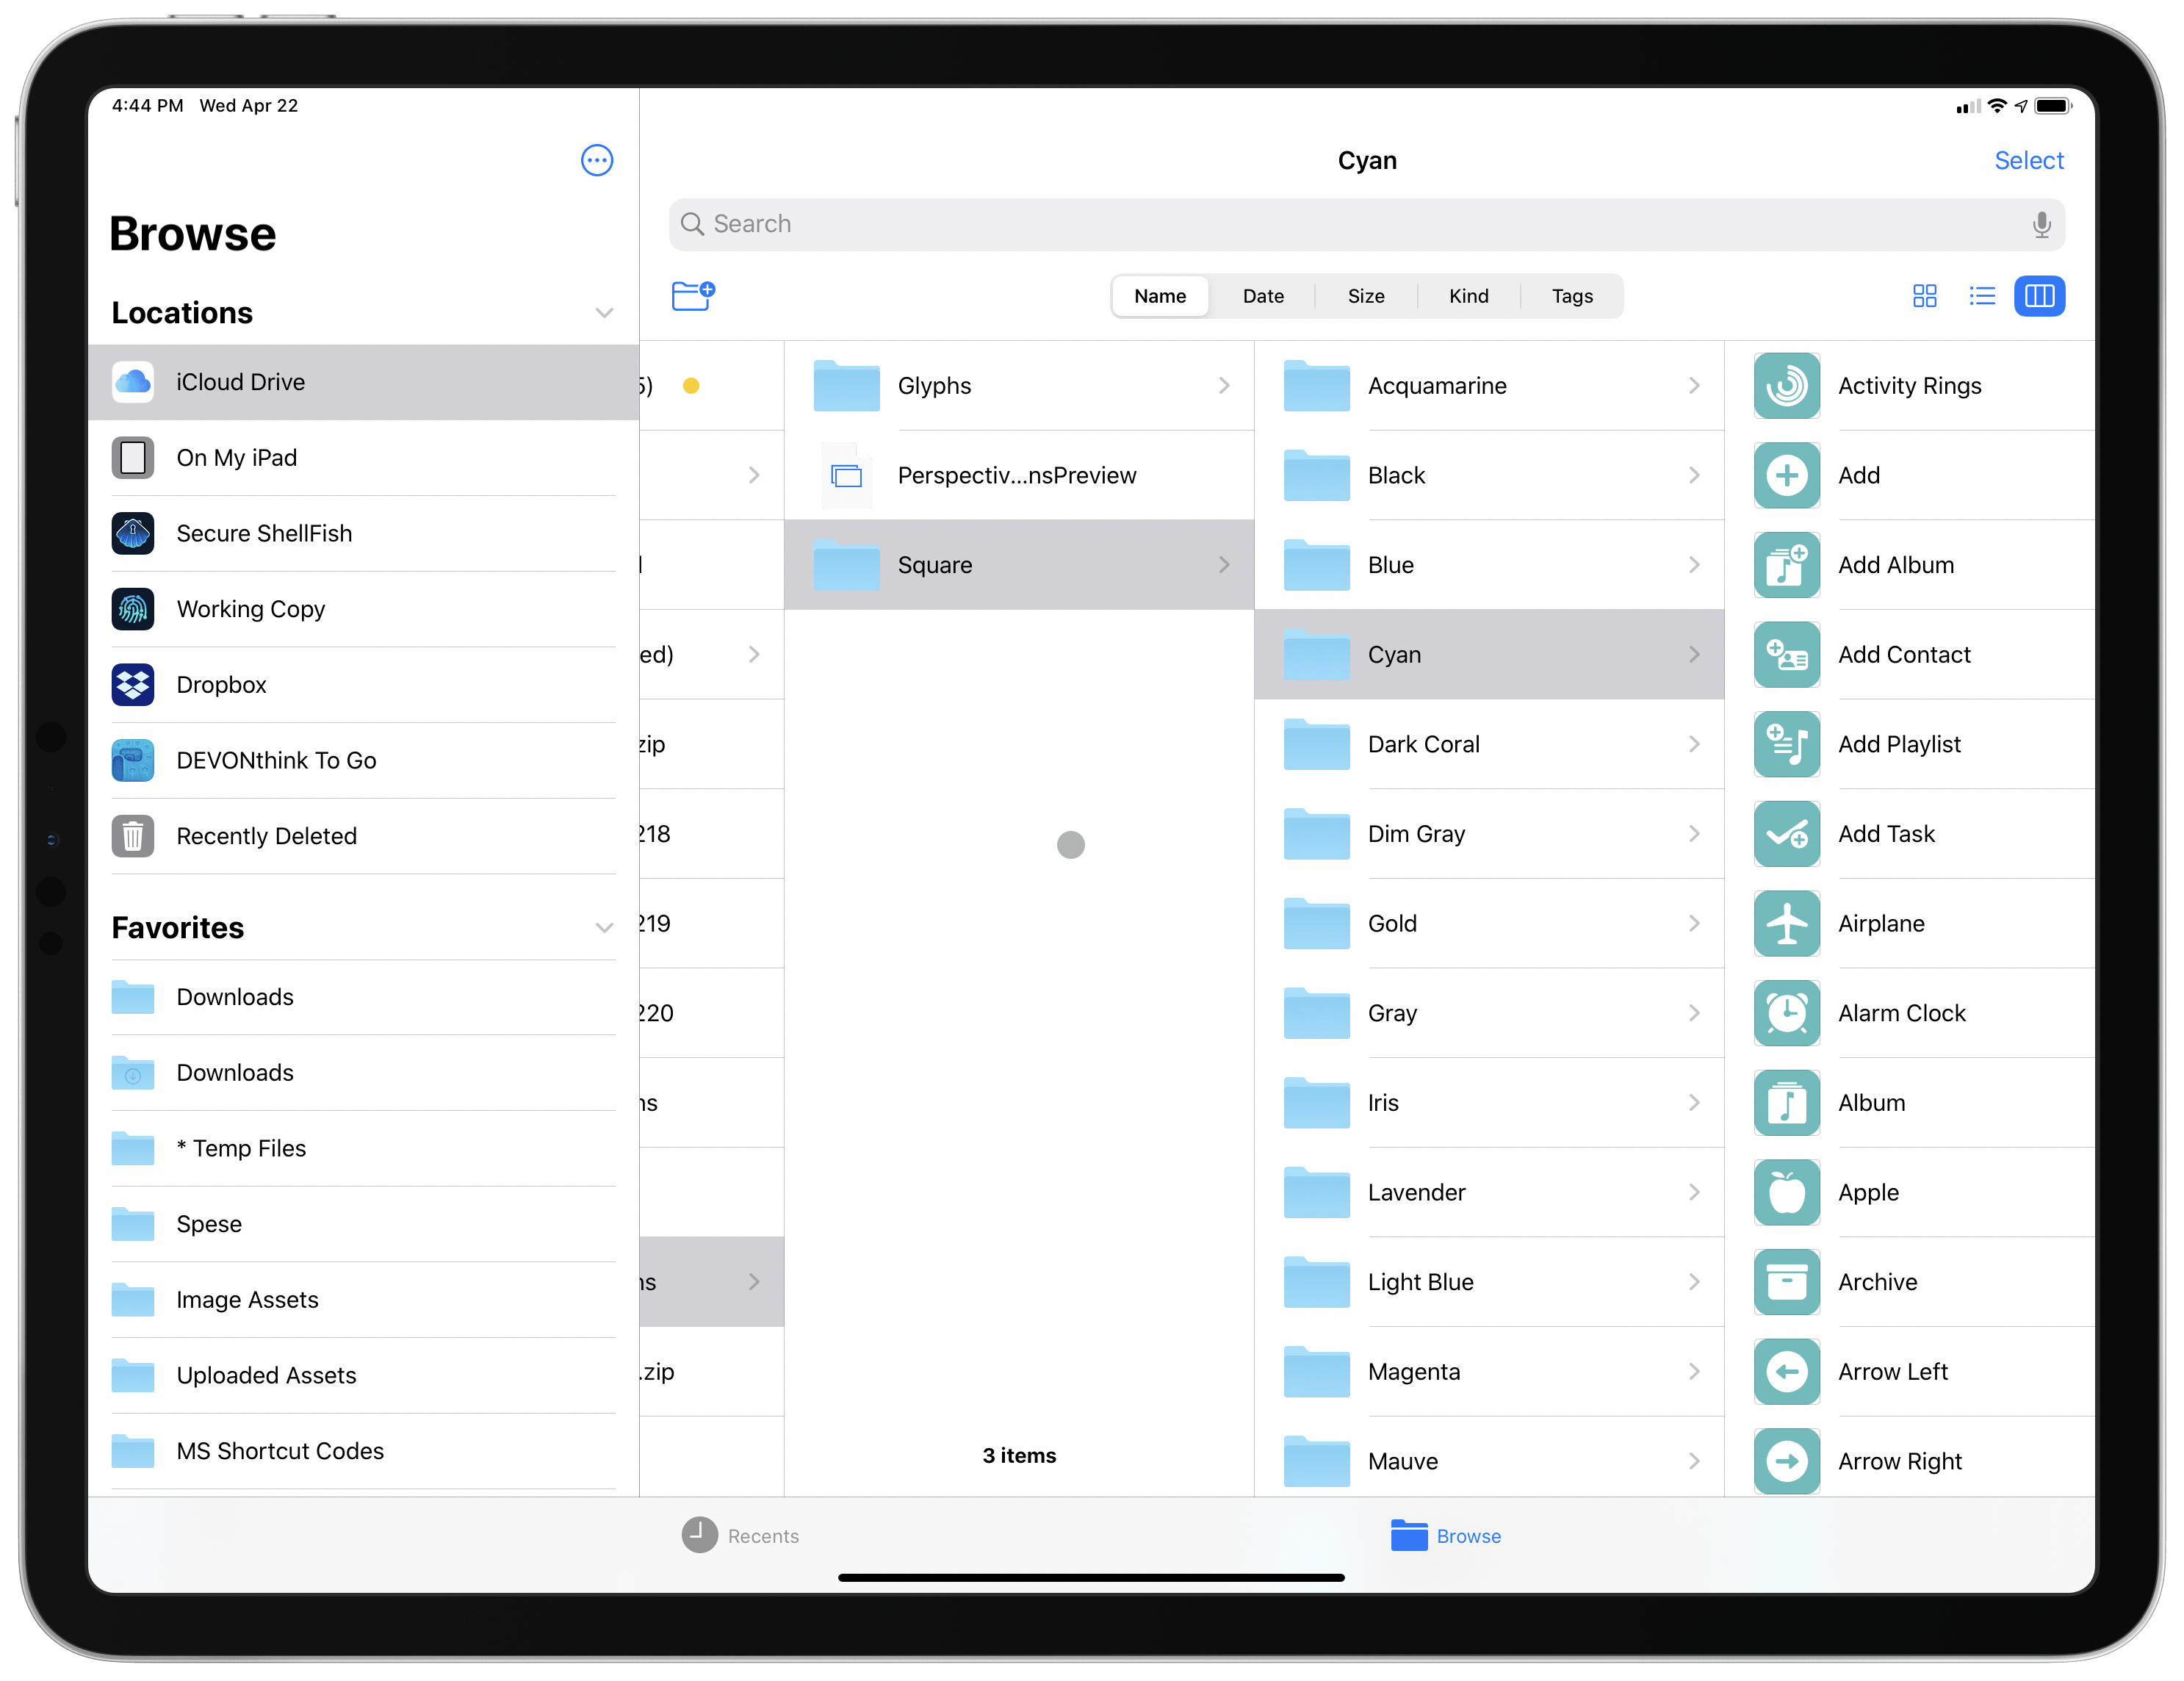
After downloading the icons, you’ll find a .zip archive called ‘MS Perspective Icons.zip’ in the Files app or Finder. After extracting the archive, you’ll end up with a folder containing two sub-folders: Glyphs and Square. These are the two versions of MacStories Perspective Icons, each available in 25 different colors with 400 icon files for each color. Everything is organized by folder, as pictured below:
The process of installing custom perspective icons in OmniFocus is easy, but slightly different across iOS, iPadOS, and macOS. Let’s go through each platform step-by-step.
macOS
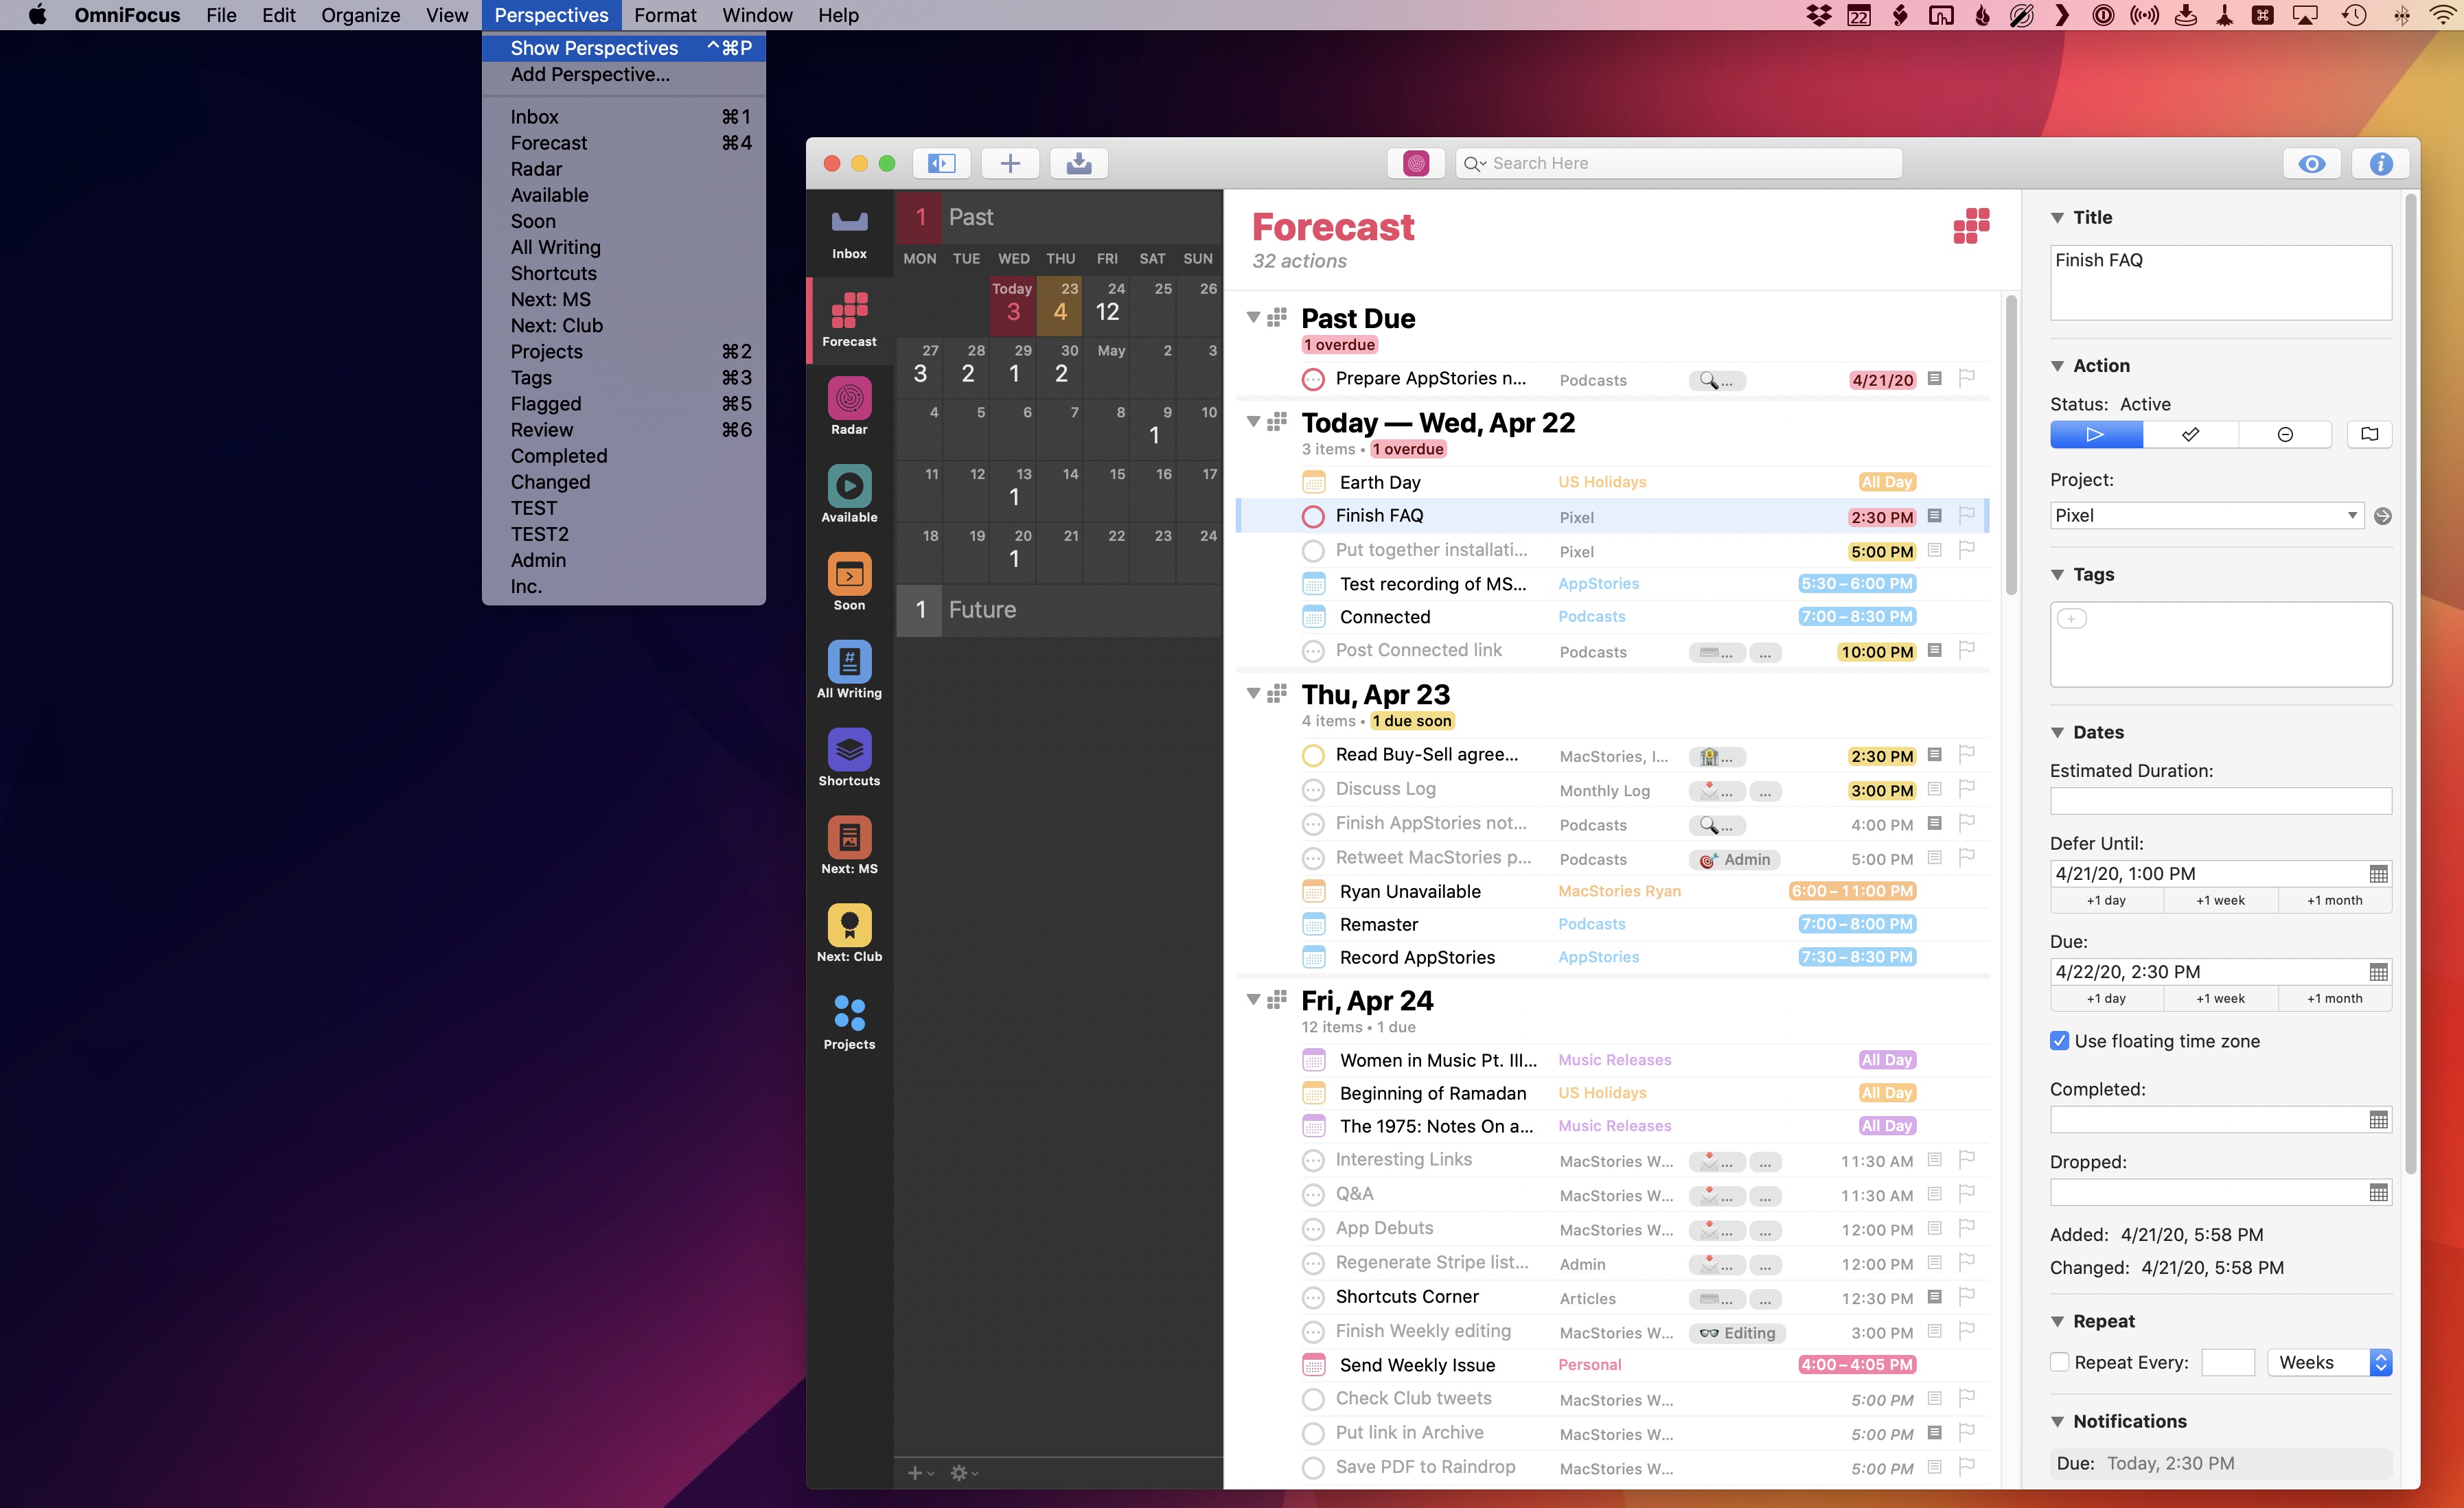
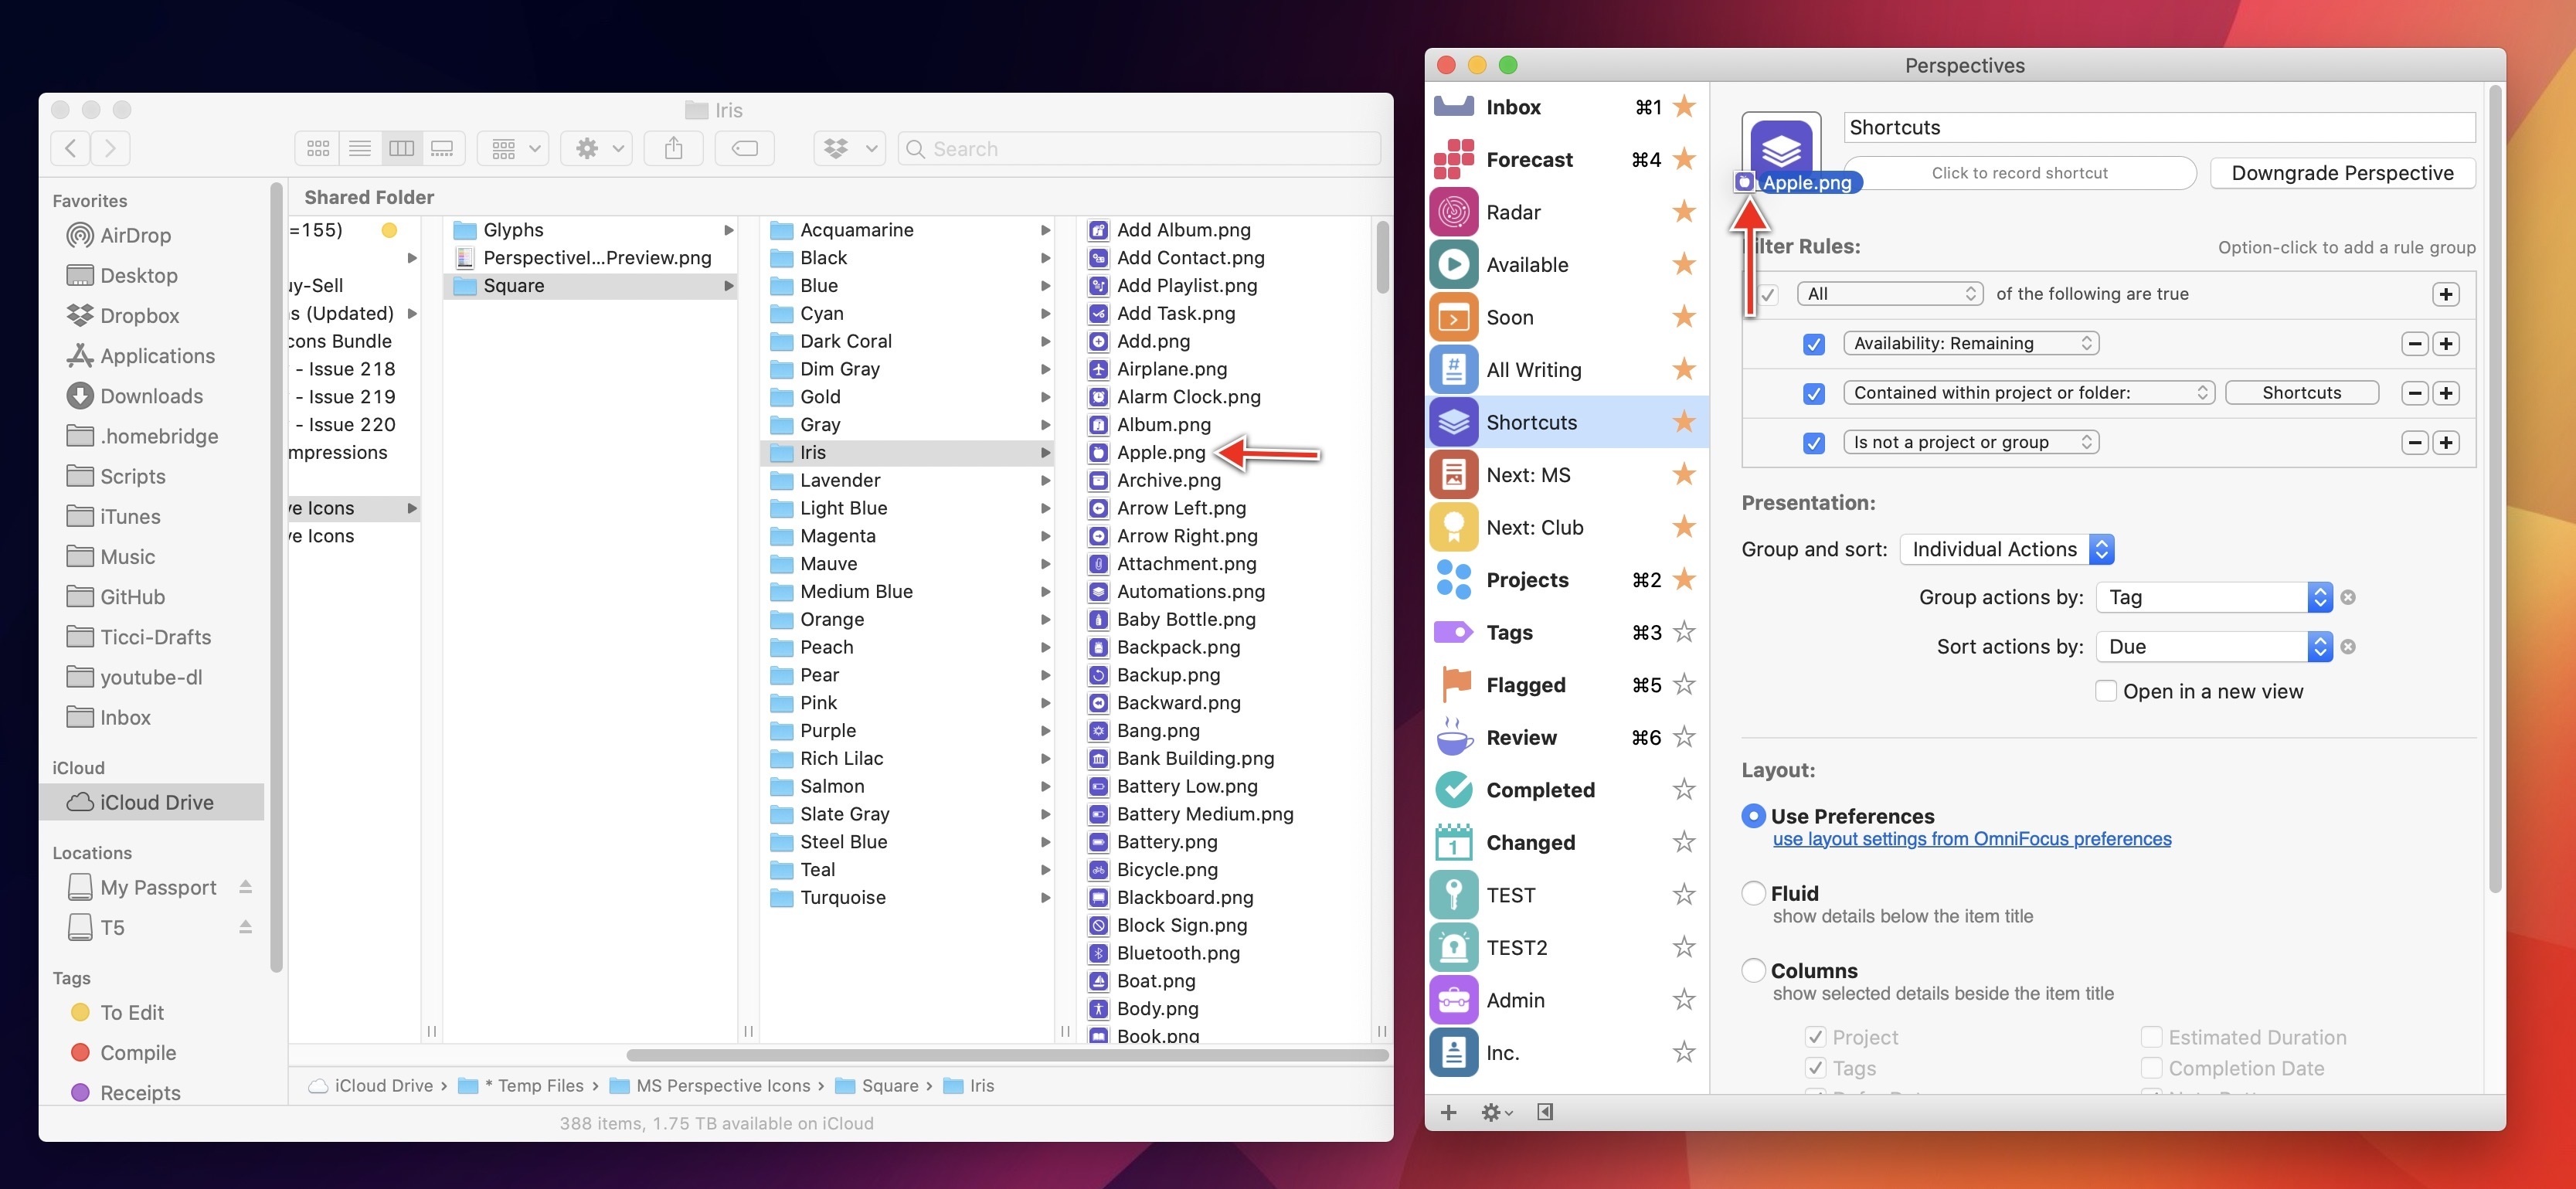
In OmniFocus Pro for Mac, select Perspectives ⇾ Show Perspectives (or hit ⌃⌘P) to open the Perspectives editor.
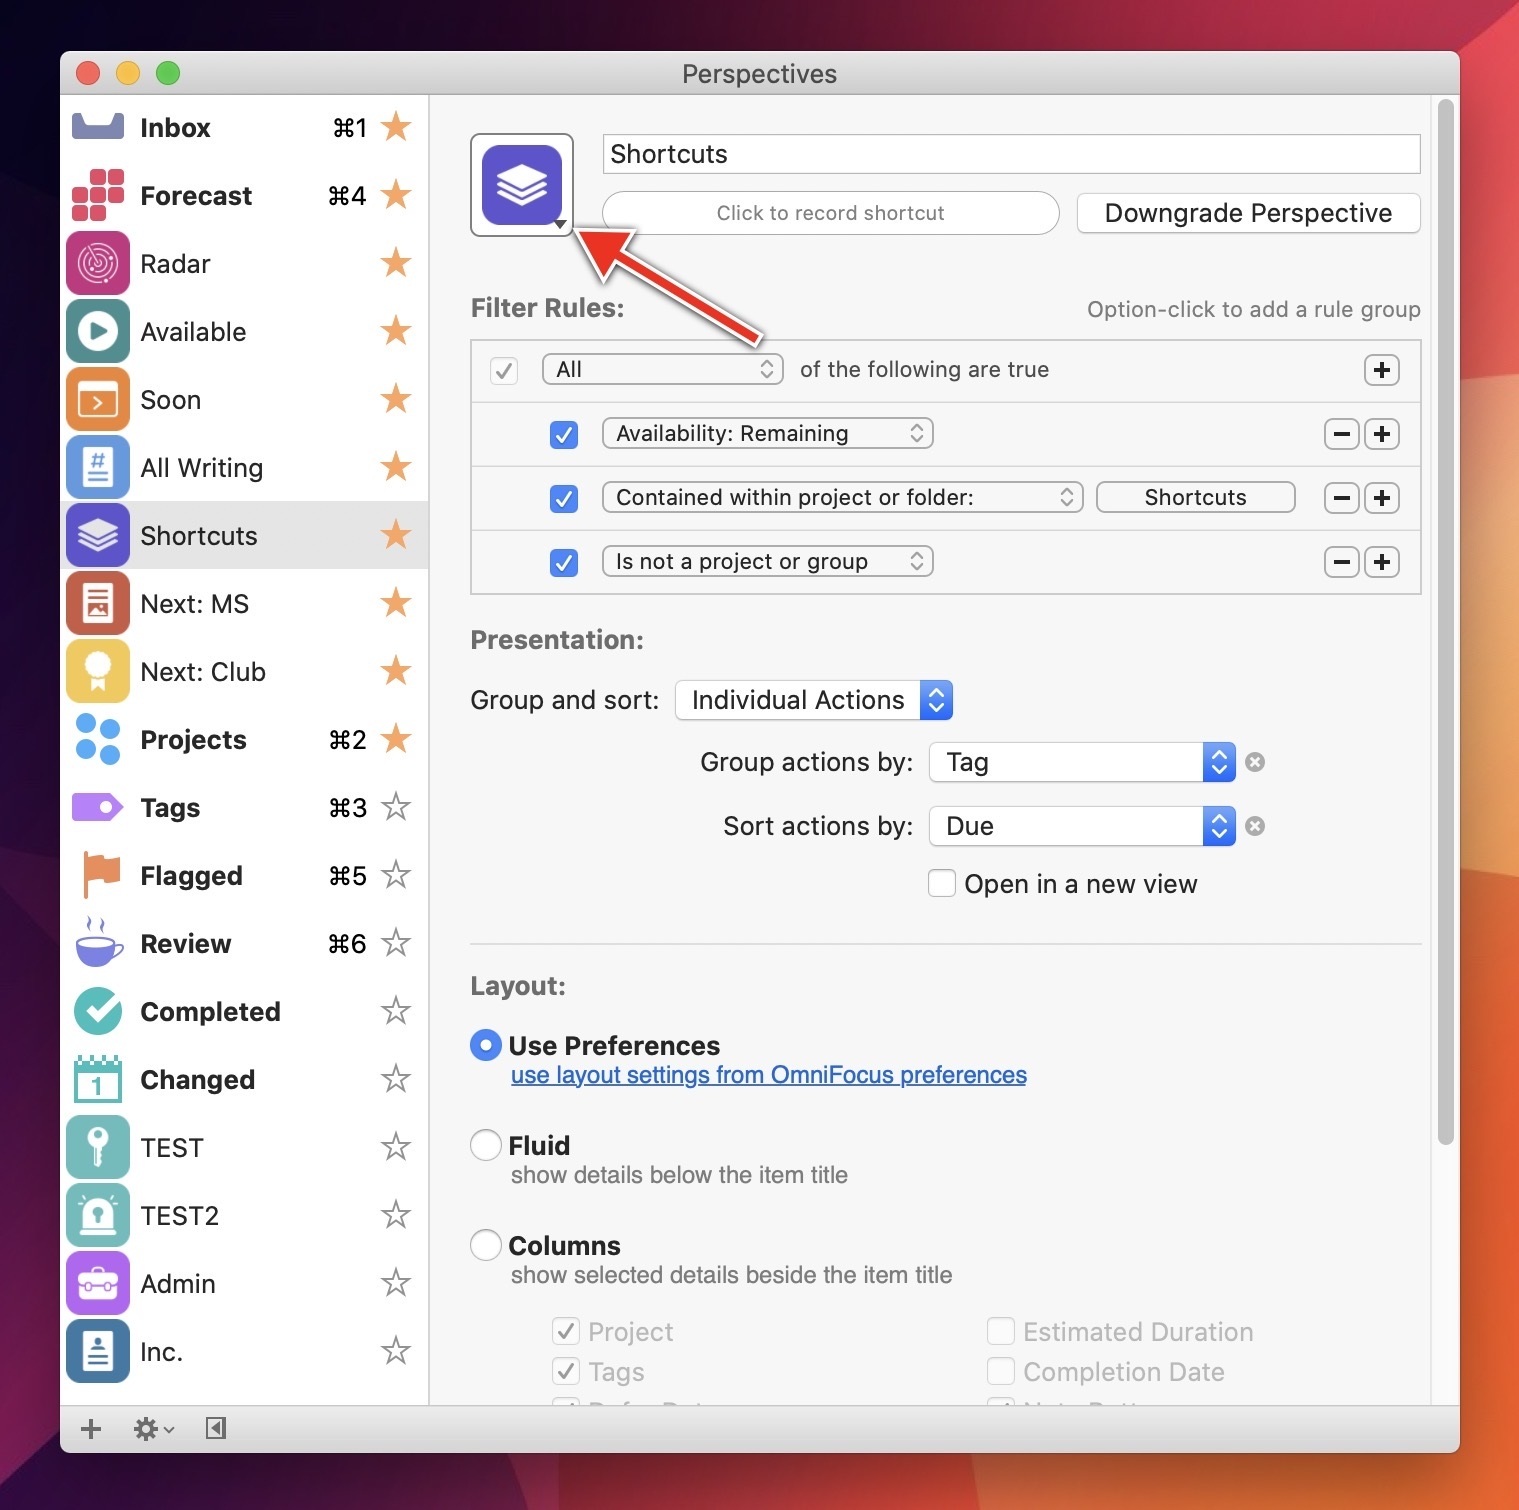
In the Perspectives editor, find the custom perspective you want to customize, place the cursor over it, and click the disclosure triangle to open the icon customizer.
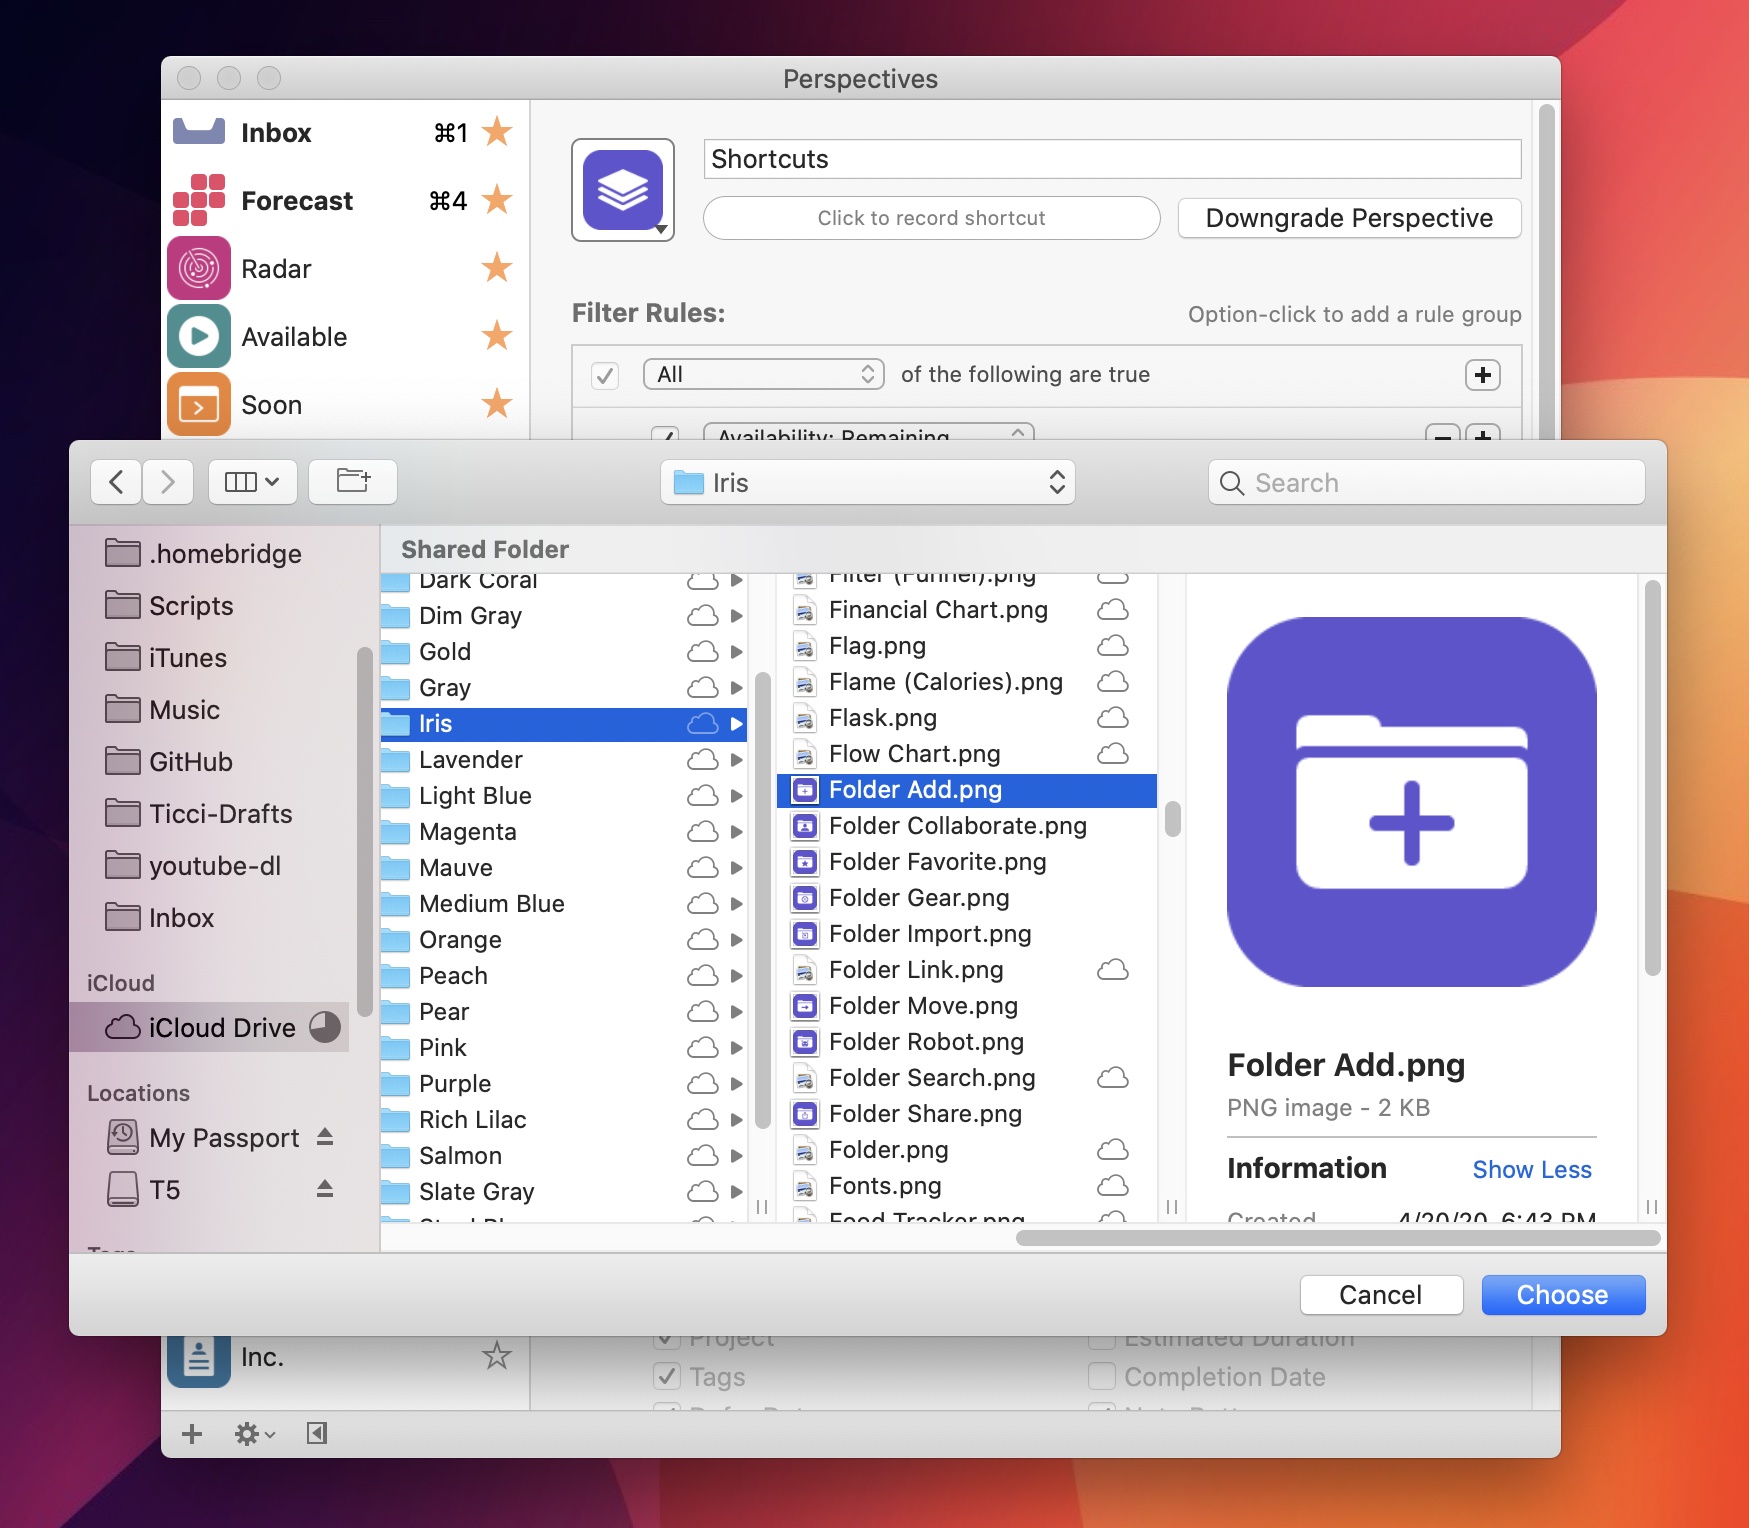
Select ‘Choose File’ at the bottom of this panel to open a Finder popup.
In Finder, navigate to the folder containing MacStories Perspective Icons and select the icon you want to apply to the selected perspective. Click ‘Choose’ to confirm and change the icon.
Alternatively, you can also use drag and drop to modify a perspective icon. In Finder, select the icon you want to use and drag it over the existing perspective icon in OmniFocus’ Perspectives editor.
Once installed, your custom icon will sync across platforms, so you won’t have to change it on other devices running OmniFocus Pro.
If you want the color of the perspective’s title to match the color of the selected icon, you can pick a color in OmniFocus’ icon customizer. MacStories Perspective Icons come in the same colors offered by OmniFocus – there’s an icon for every default perspective color in this set.
iOS
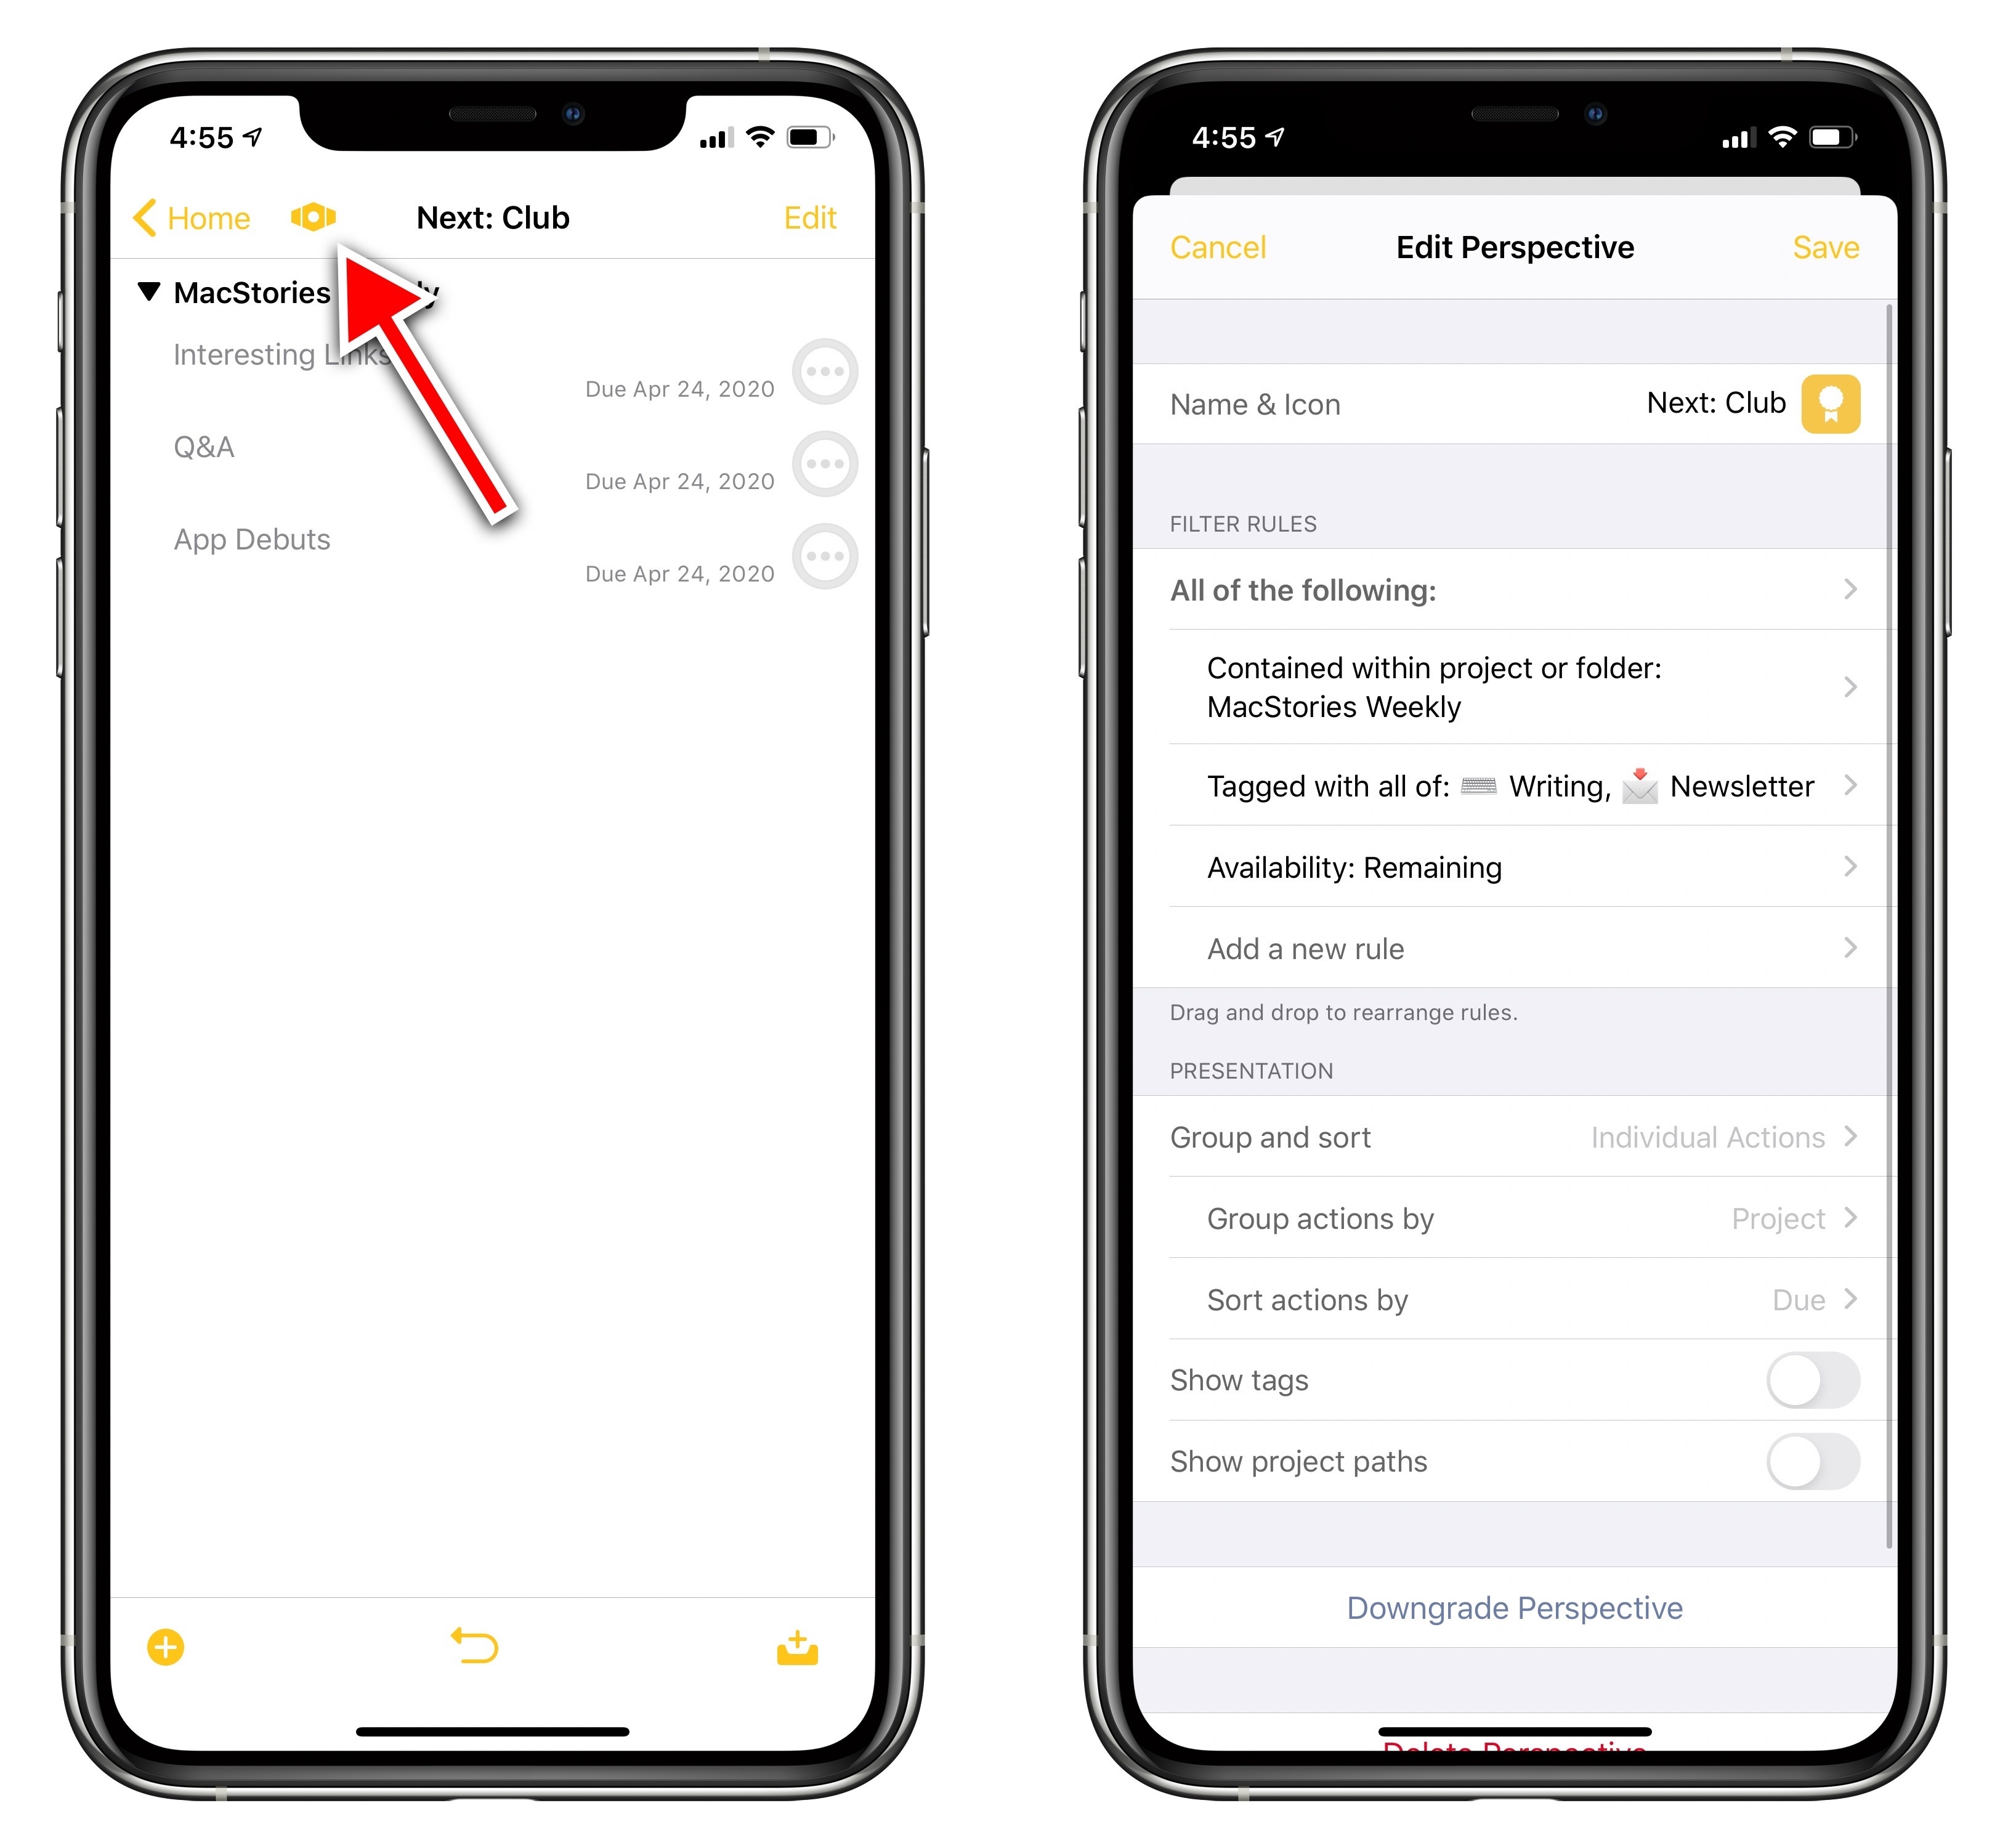
To customize perspective icons in OmniFocus Pro for iOS (iPhone and iPod touch), navigate to a custom perspective and tap the perspective button in the title bar, on the left side of the perspective’s title. This will open the ‘Edit Perspective’ screen.
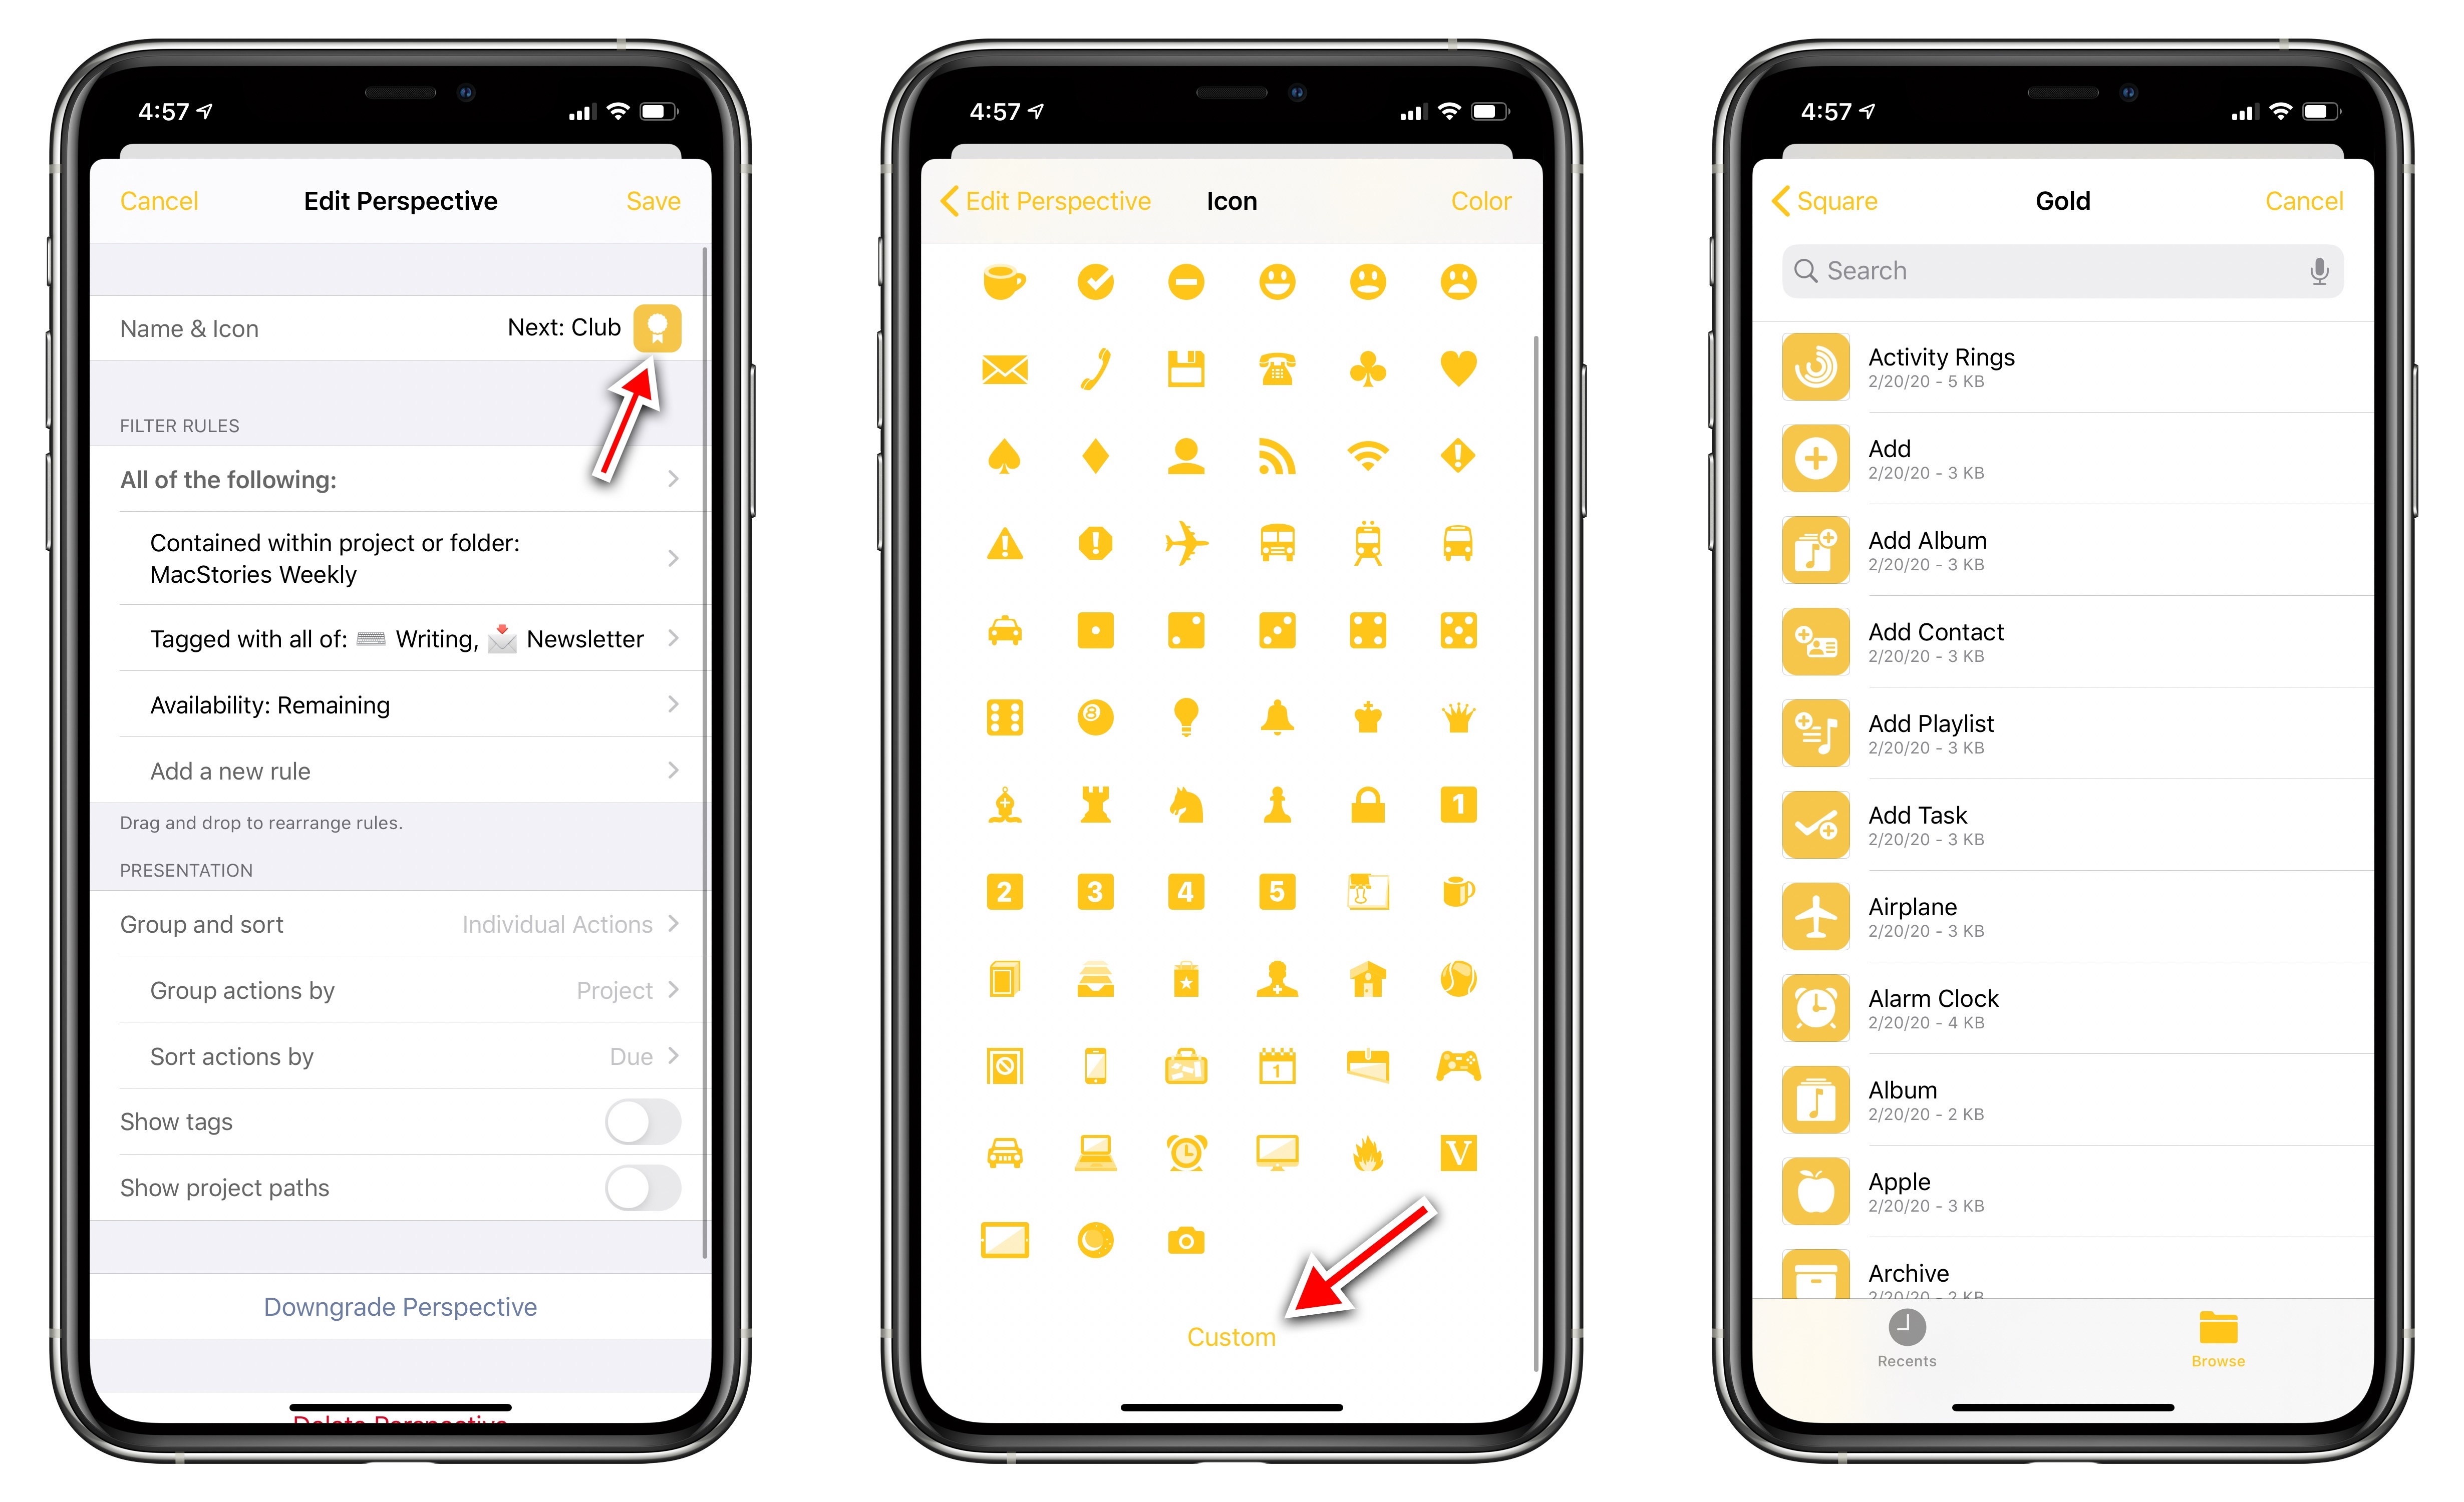
Tap on the icon in the ‘Name & Icon’ field to open the icon customizer page. Scroll to the bottom and tap the ‘Custom’ button. Starting with OmniFocus 3.8, this will open the native iOS Files picker.
In the Files view, navigate to the unzipped MacStories Perspective Icons folder and select the icon you want to use. Tap the icon to select it, and it’ll be applied to your custom perspective.
As with macOS, if you want the color of the perspective’s title to match the color of the selected icon, you can pick a matching color in OmniFocus’ icon customizer.
iPadOS
The process of installing custom perspective icons in OmniFocus Pro for iPad is the same as iOS. You can follow the steps mentioned in the iOS section to customize your perspective icons on iPad.
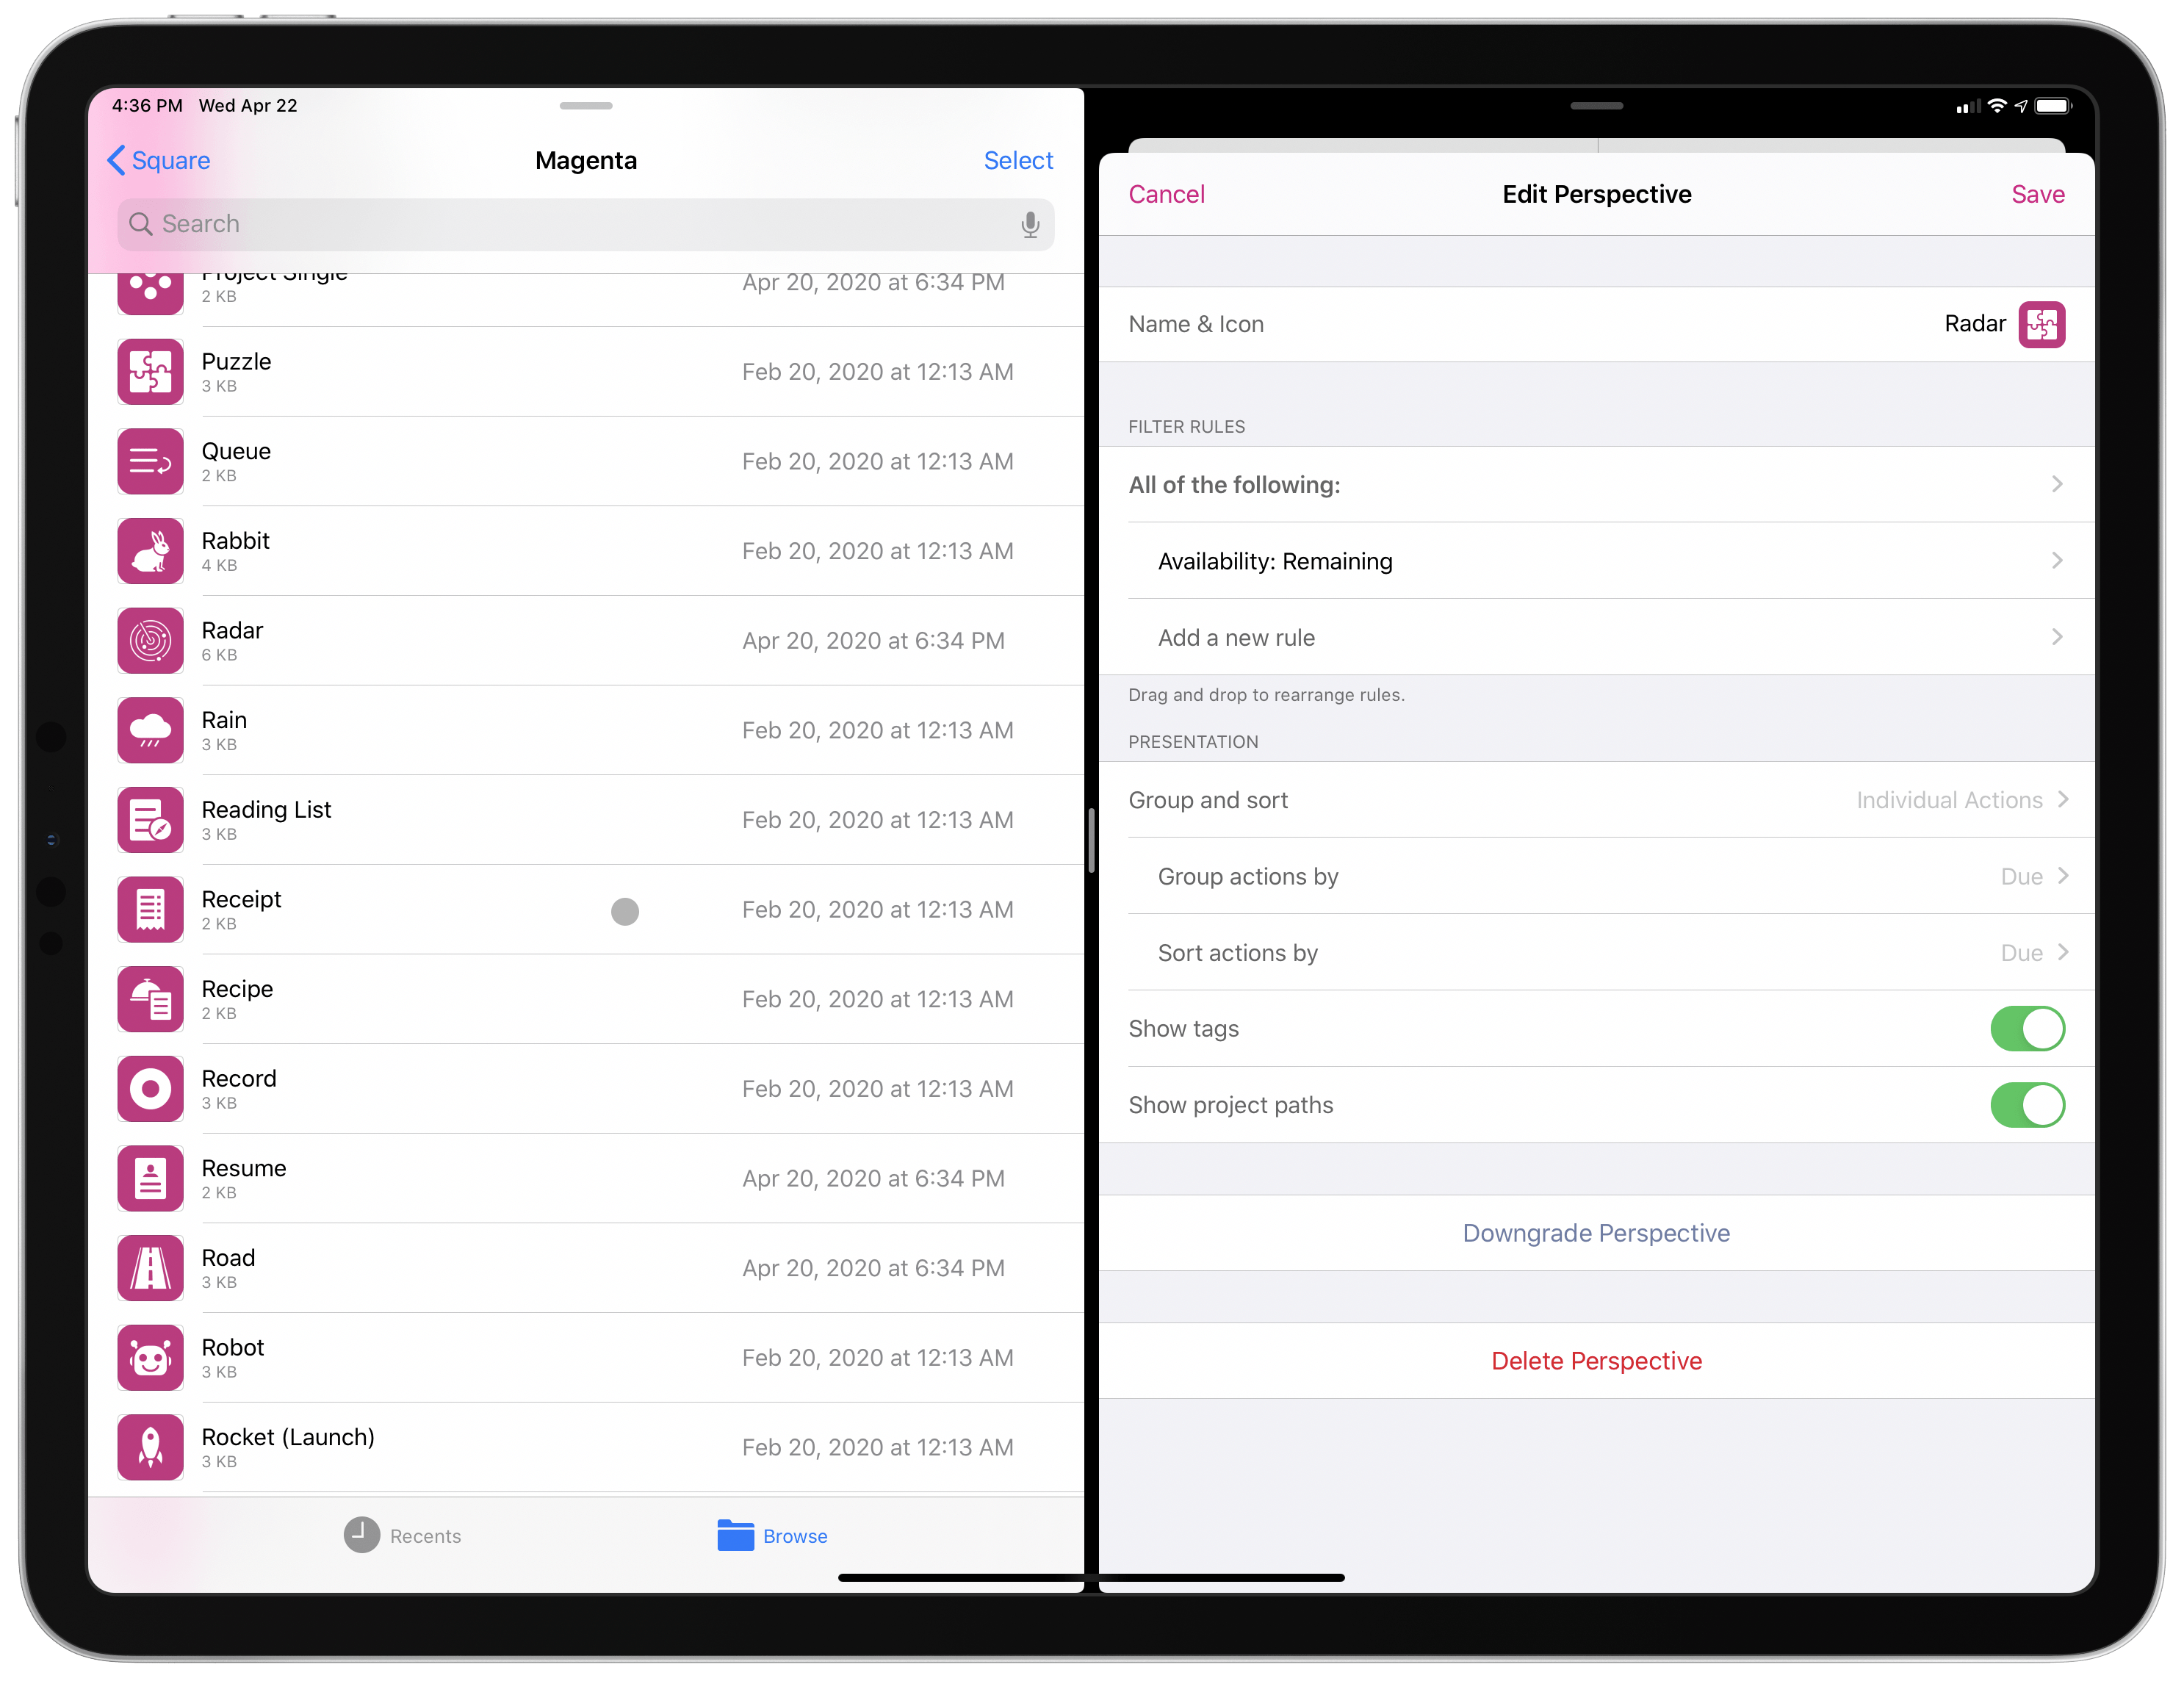
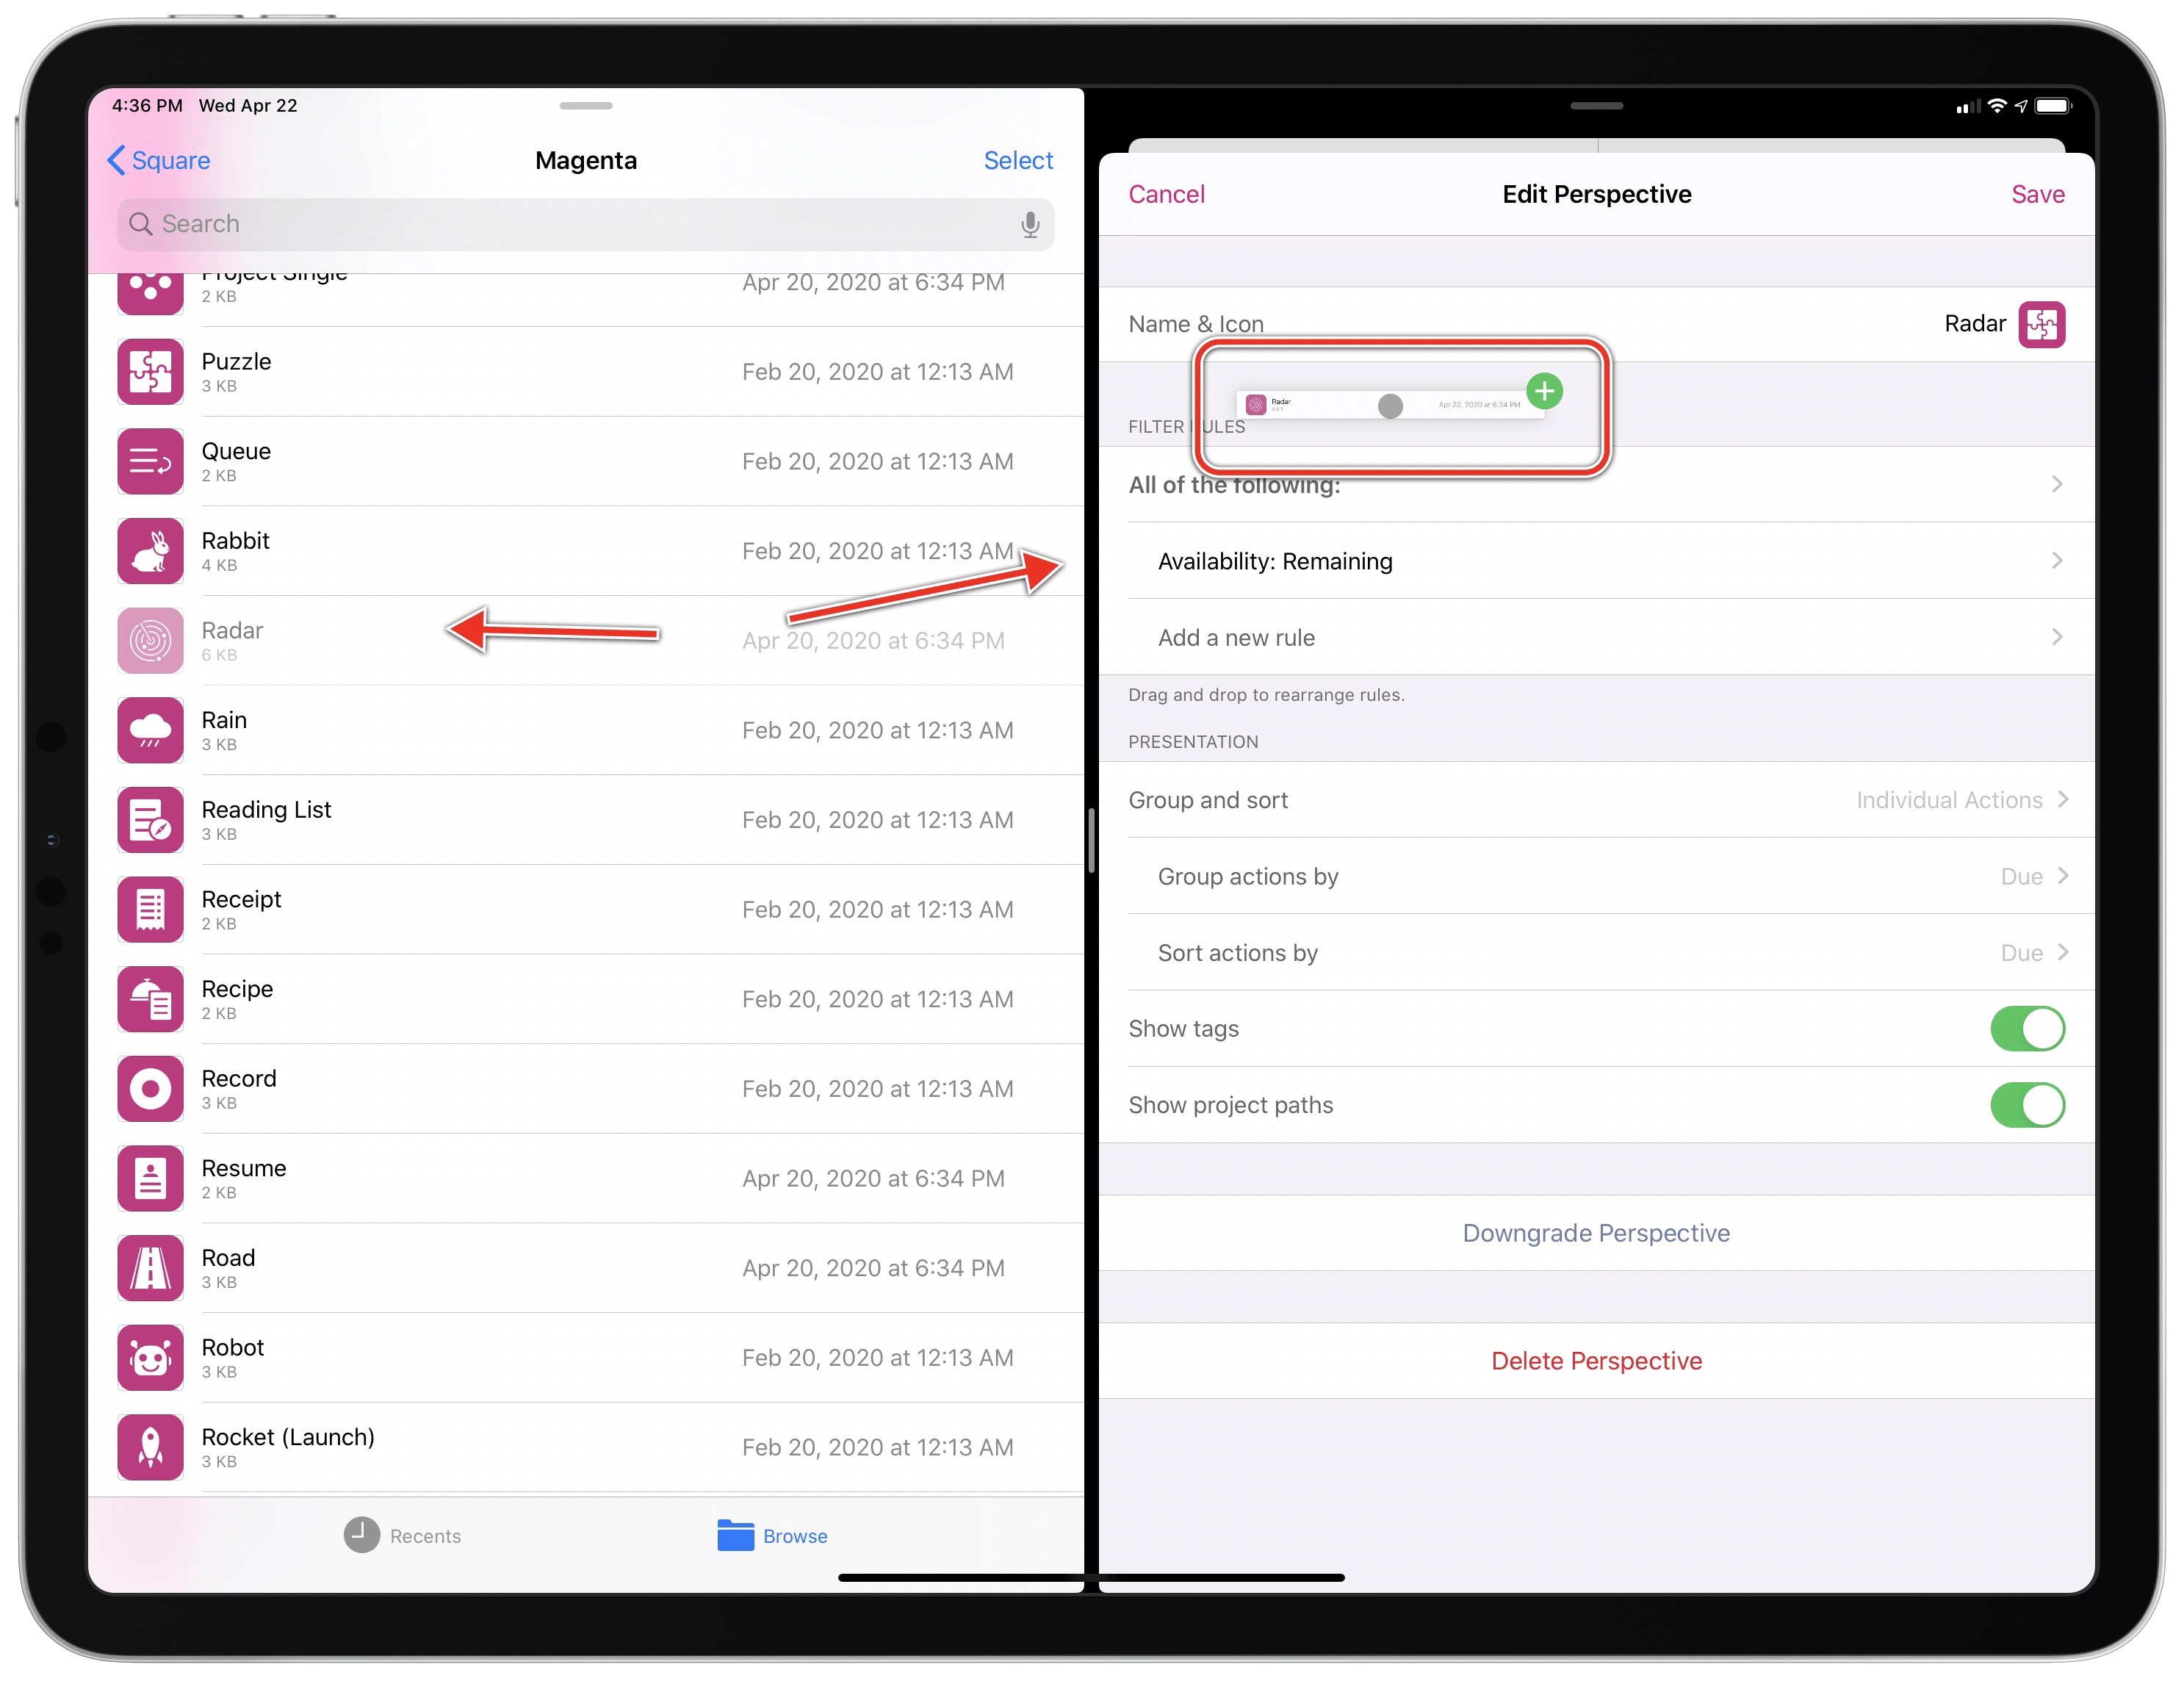
In addition to the standard installation method, OmniFocus for iPad also lets you customize icons with drag and drop. To do this, put the Files app and OmniFocus in Split View. In Files, navigate to the folder containing the icon you want to use; in OmniFocus, open the perspective editor for the custom perspective you want to modify.
In Files, pick up the icon you want to use and drag it over the OmniFocus window. When the green ‘+’ badge appears next to the icon you’re dragging, let go, and the icon will be applied to the selected perspective.
Can I search the icons by name?
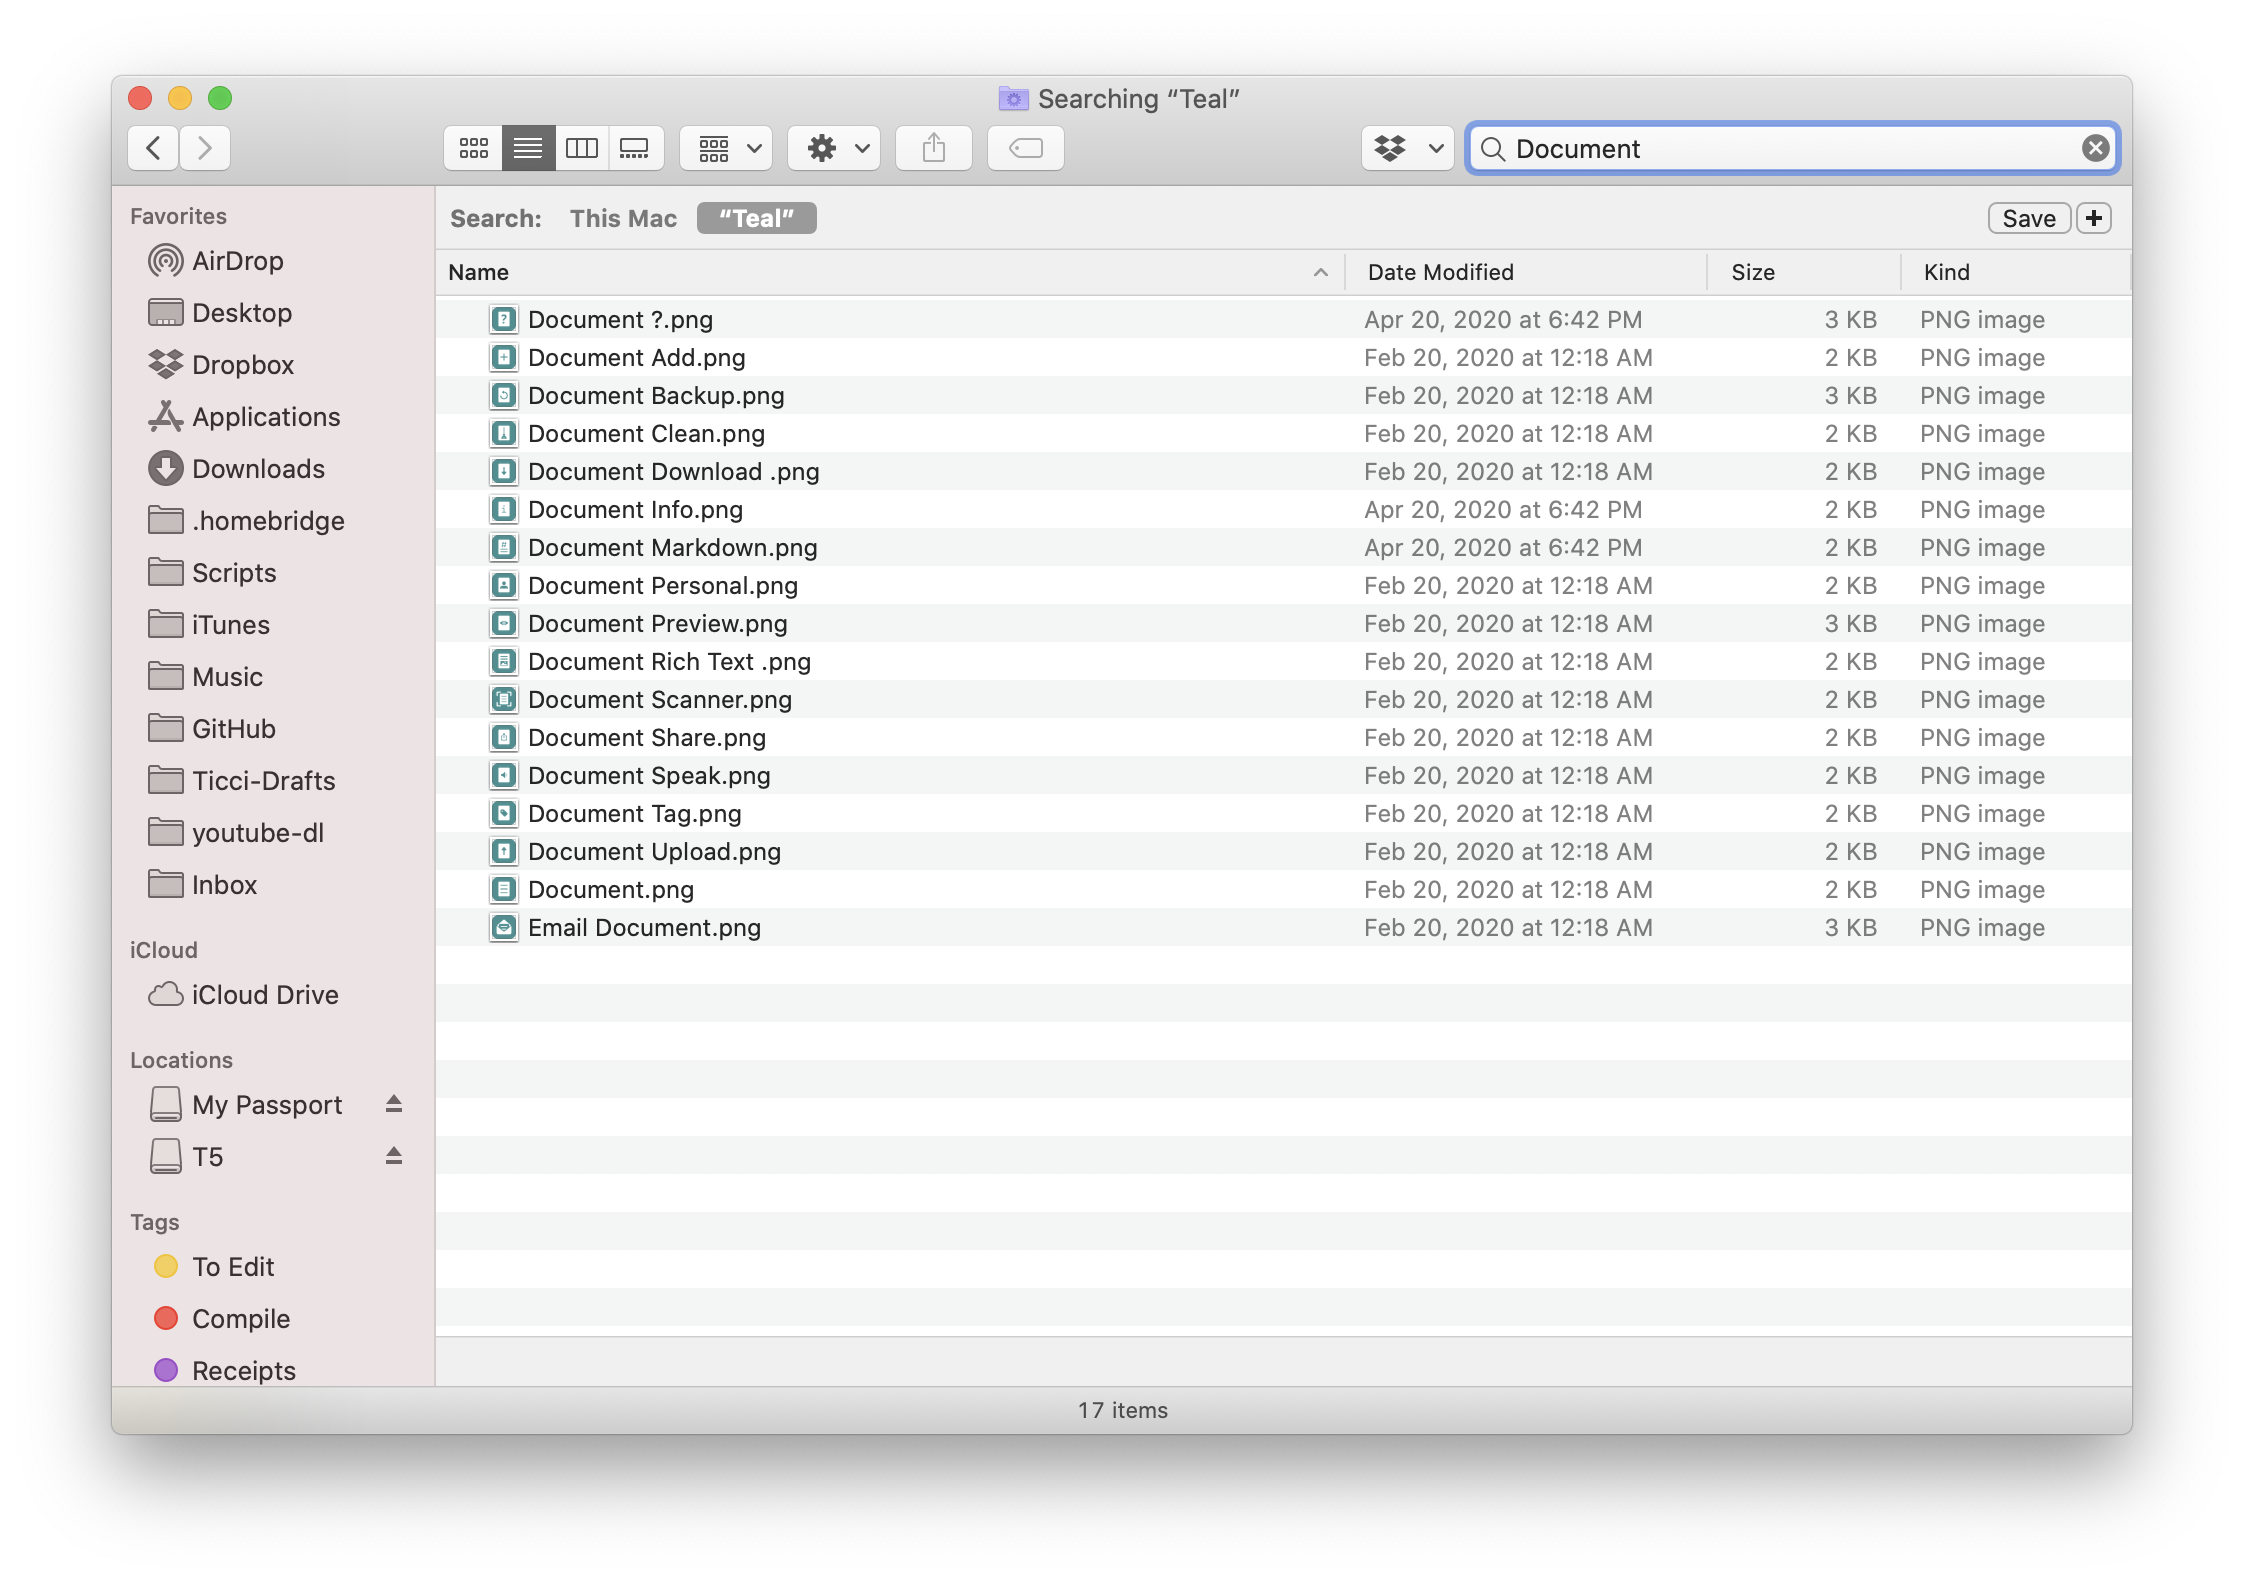
Yes. In the Mac’s Finder, open the folder containing the icons you want to use, then enter a search query in the search box. Finder will show you the icons from that folder matching the term you’ve searched for.
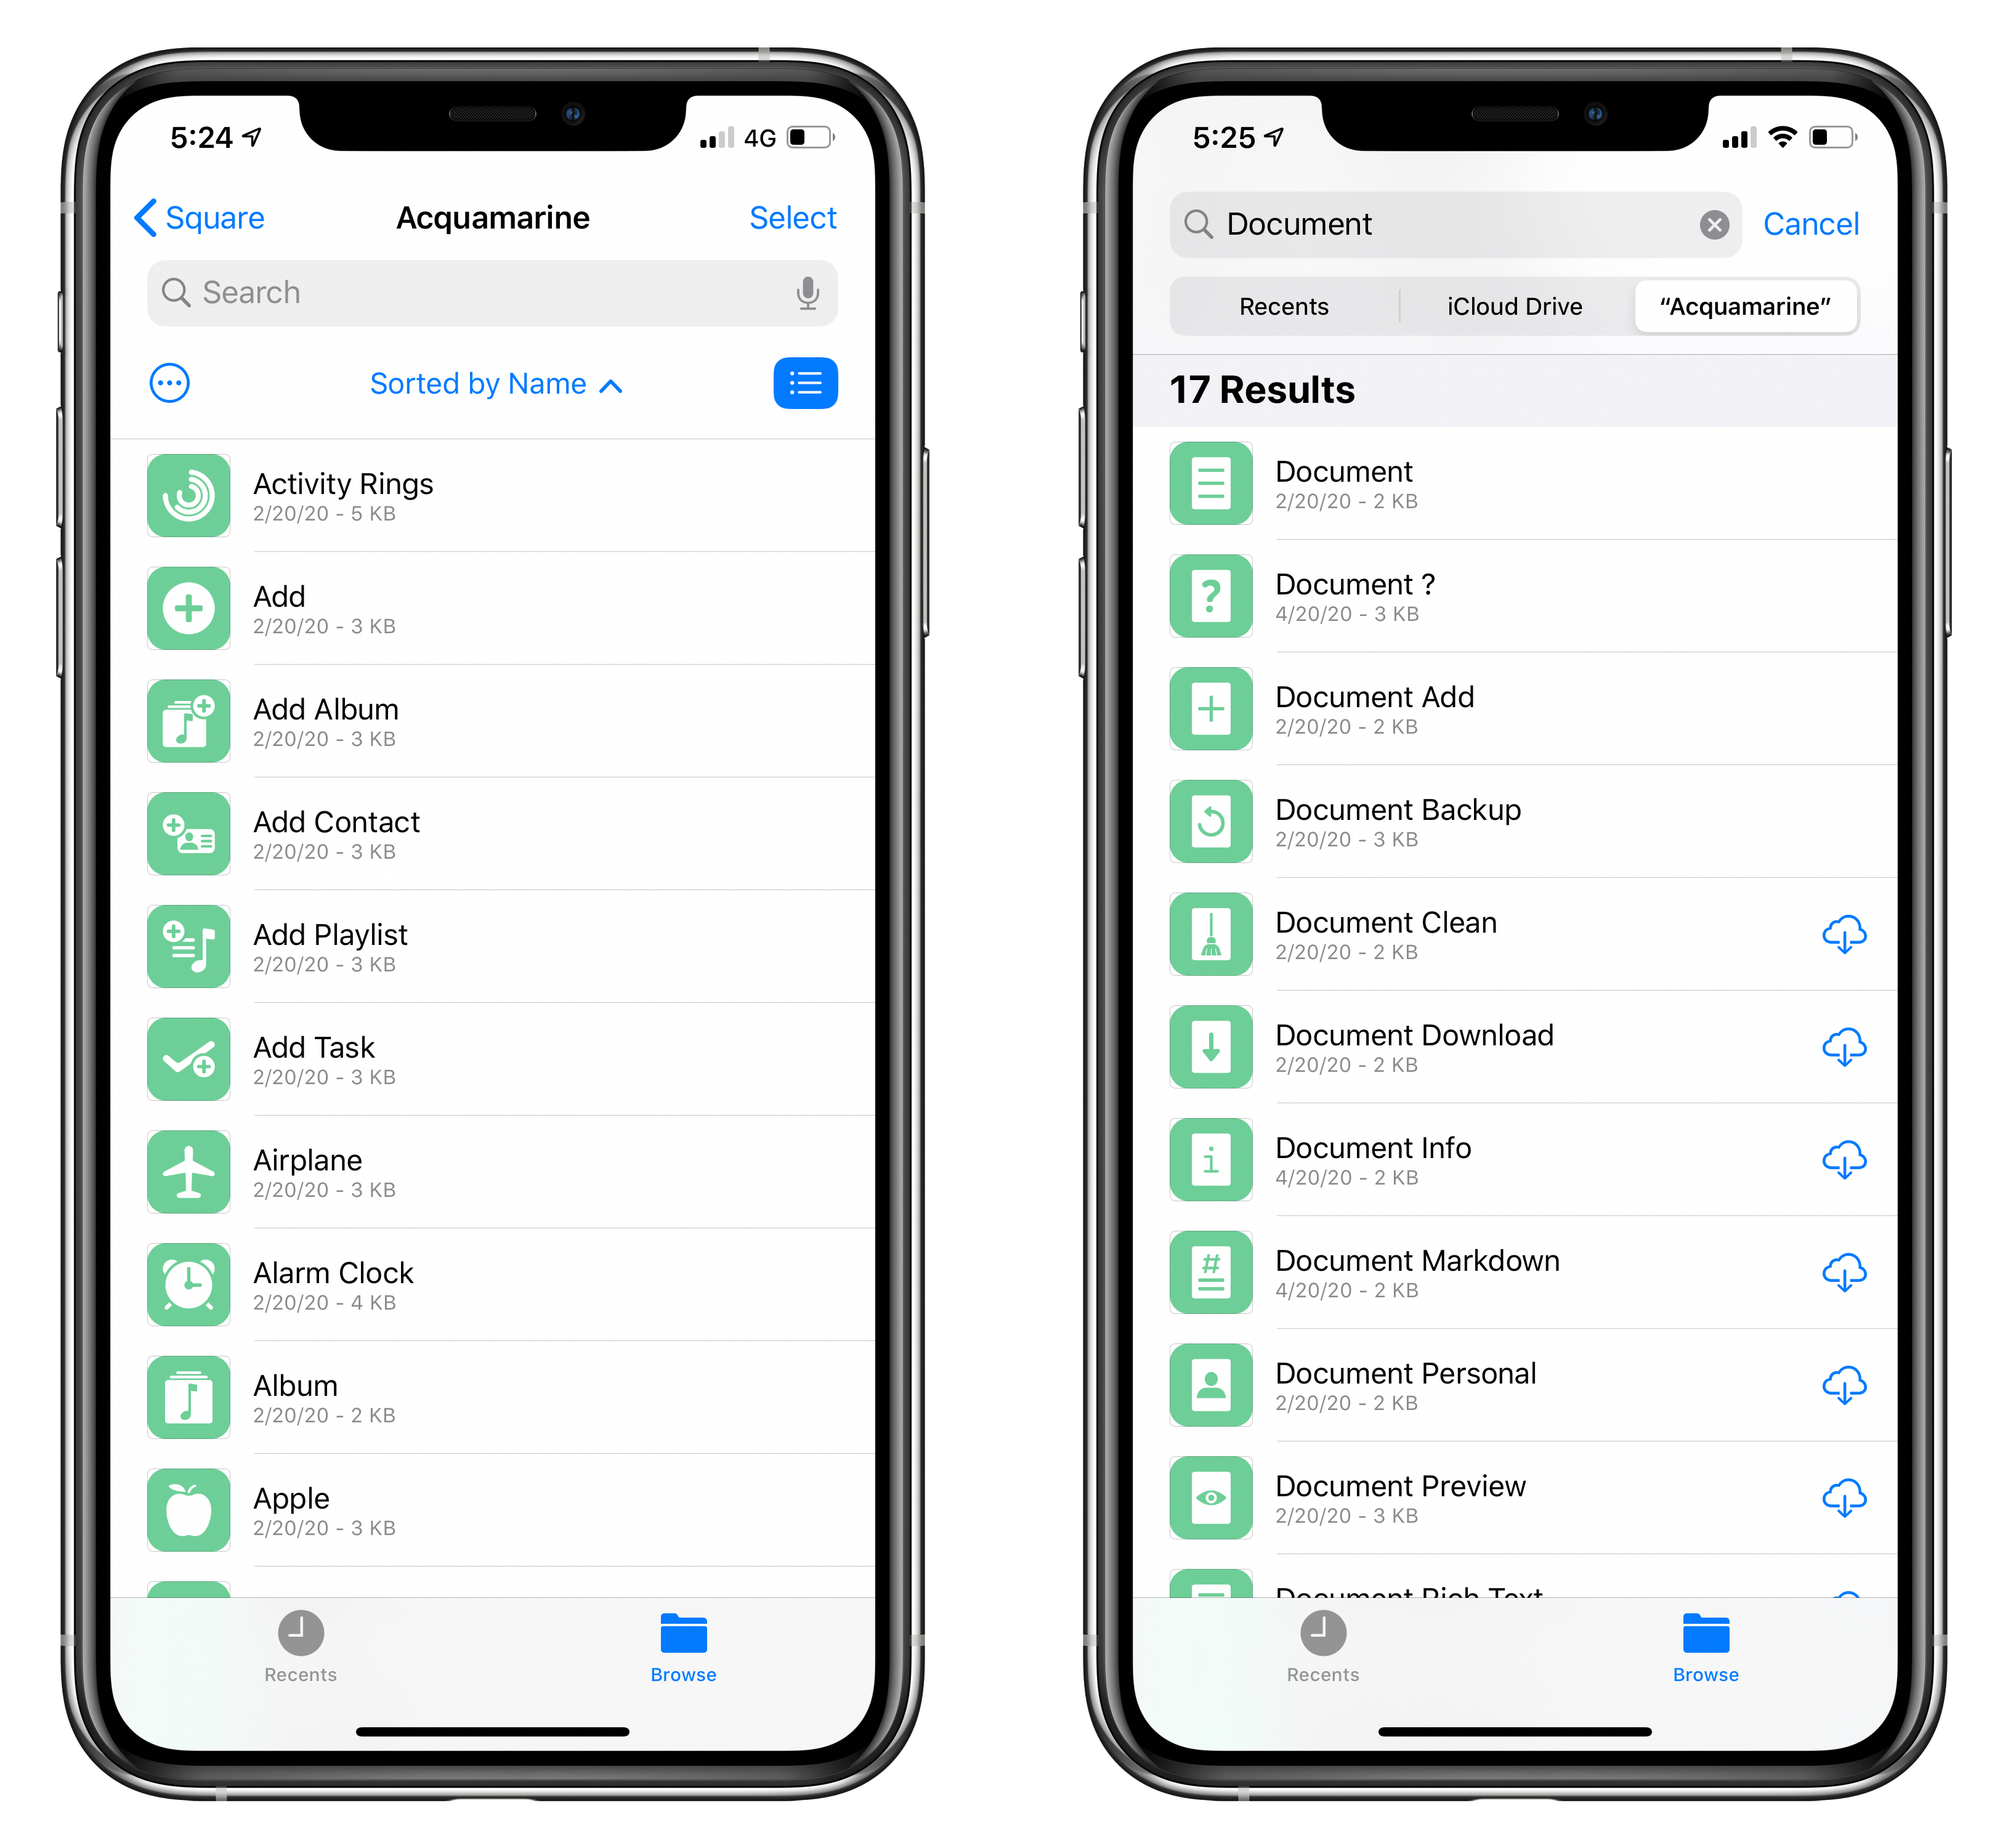
The process is similar on iPadOS and iOS: once the icons have been downloaded and extracted in the Files app, open the folder containing them, enter your query in the search box, then restrict your search to the current folder, as pictured below:
How can I download MacStories Perspective Icons? How large is the download?
After completing your purchase, you’ll be taken to a page where you’ll find a download button. Click it, and your web browser will begin downloading the .zip file containing the icons.
Once the download is complete, you’ll find the .zip file at your default download location. If you’re using Safari for Mac, you can check the default download location in Safari Preferences ⇾ General ⇾ File download location.
If you’re using an iPhone or iPad to download the icons with Safari, you can check the download location in Settings ⇾ Safari ⇾ Downloads. By default, Safari for iOS and iPadOS should download files in iCloud Drive ⇾ Downloads in the Files app.
On both Mac and iOS/iPadOS, you’ll have to extract the .zip archive to browse the folders containing the icons. To do this:
- Mac: right-click the .zip file in Finder and select ‘Open’
- iOS and iPadOS: long-press the .zip file in the Files app and select ‘Uncompress’
The total size of the download is 63 MB. Depending on your Internet connection, the download may require a few minutes.
Do the icons support dark mode?
Yes. MacStories Perspective Icons support both light and dark mode automatically. Like The Omni Group’s built-in icons, MacStories Perspective Icons will match both system appearances in OmniFocus.
Okay, where can I buy the icons?
You can buy MacStories Perspective Icons here.
Why do I have to subscribe to the mailing list?
The short answer: so we can send you free product updates and discounts in the future. We’re not going to spam you: we just want to make sure you get access to updates you’re entitled to.
Due to GDPR regulations, we cannot send our customers product updates (such as new icons or discounts) unless they’ve chosen to subscribe to the mailing list beforehand. You can do so in two ways depending on your preferred payment method:
- Credit/debit card: the ‘Subscribe’ box can be found at checkout;
- PayPal: the ‘Subscribe’ box is available on the final download page.
To ensure you receive product updates over email in the future, make sure to mark MacStories Pixel and E-Junkie (our payment processor) as safe (not spam) in your email service of choice.
I’m a Club MacStories member. Do I get a discount?
Yes. If you’re a Club MacStories member, you always have access to an exclusive discount on all MacStories Pixel products.
For more details on the discount, log in with your member account at staging.macstories.net/club and read the ‘MacStories Pixel Discount’ section.
What payment methods do you accept?
We accept credit cards (via Stripe) as well as PayPal.
We use E-Junkie to securely process payments via PayPal and Stripe.
Why don’t you accept Apple Pay?
We’d love to support Apple Pay; unfortunately, our current payment processor doesn’t let us integrate with Apple Pay at the moment. We’d like to make this possible in the future though, so stay tuned.
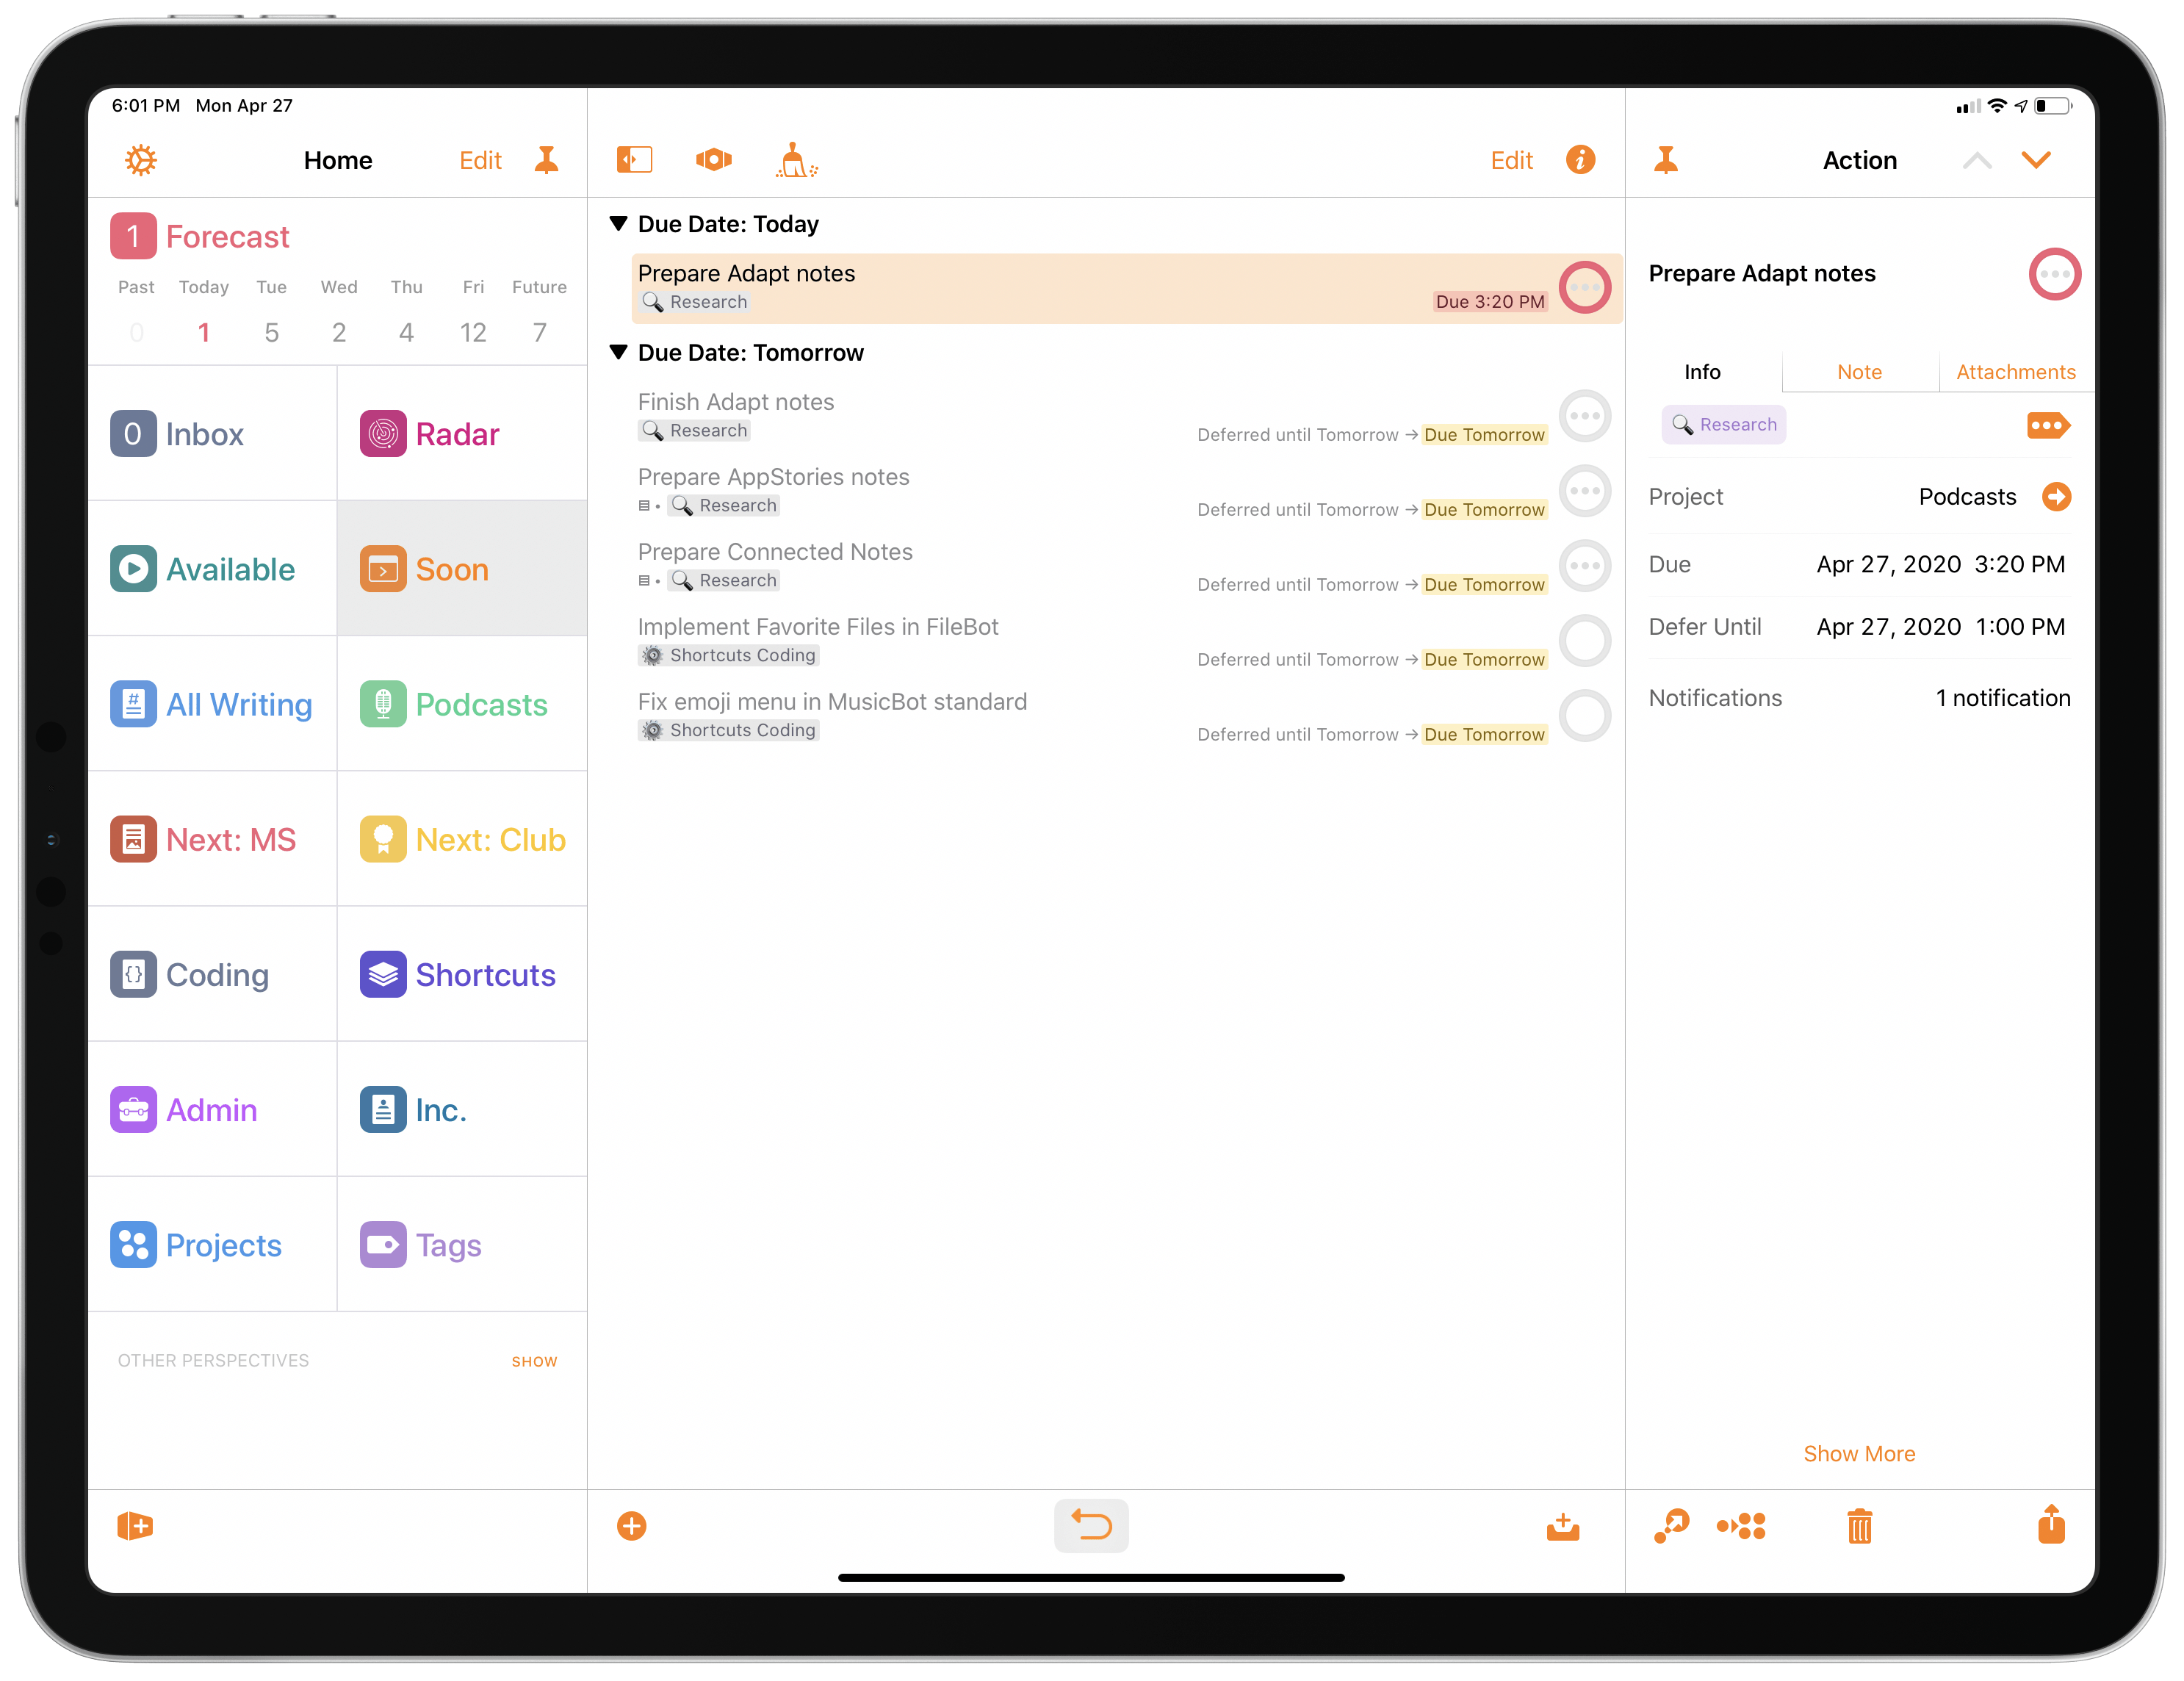
So what does Federico’s OmniFocus sidebar look like?
Here’s Federico’s current setup in OmniFocus, featuring MacStories Perspective Icons:
Can I show you what my OmniFocus sidebar looks like with MacStories Perspective Icons?
Yes, please! We’d love to see your OmniFocus sidebars with MacStories Perspective Icons installed: feel free to tweet at us (@viticci and @_silviagatta) with a screenshot of your OmniFocus sidebar and the hashtag #PerspectiveIcons so other OmniFocus users can take inspiration from your setup.


