
A few weeks ago on the Accidental Tech Podcast, Casey reminded me that it’s possible to customize the icons shown for hard drives. I knew this, but hadn’t done it in a long time. John chided Casey for not continuing this habit, but I felt just as guilty. I enjoy it, it’s easy to do, so why not do it?
The only hard part is finding a good image. You’ll want something square, and ideally at least 1024x1024. Fortunately, Google Images will almost certainly turn up something that you want. For example, I wanted an icon of the El Capitan “X” logo for my SSD, so I searched for “os x El Capitan” and then clicked on “Search Tools” and and then “Exactly” and put in “1024” in each box.
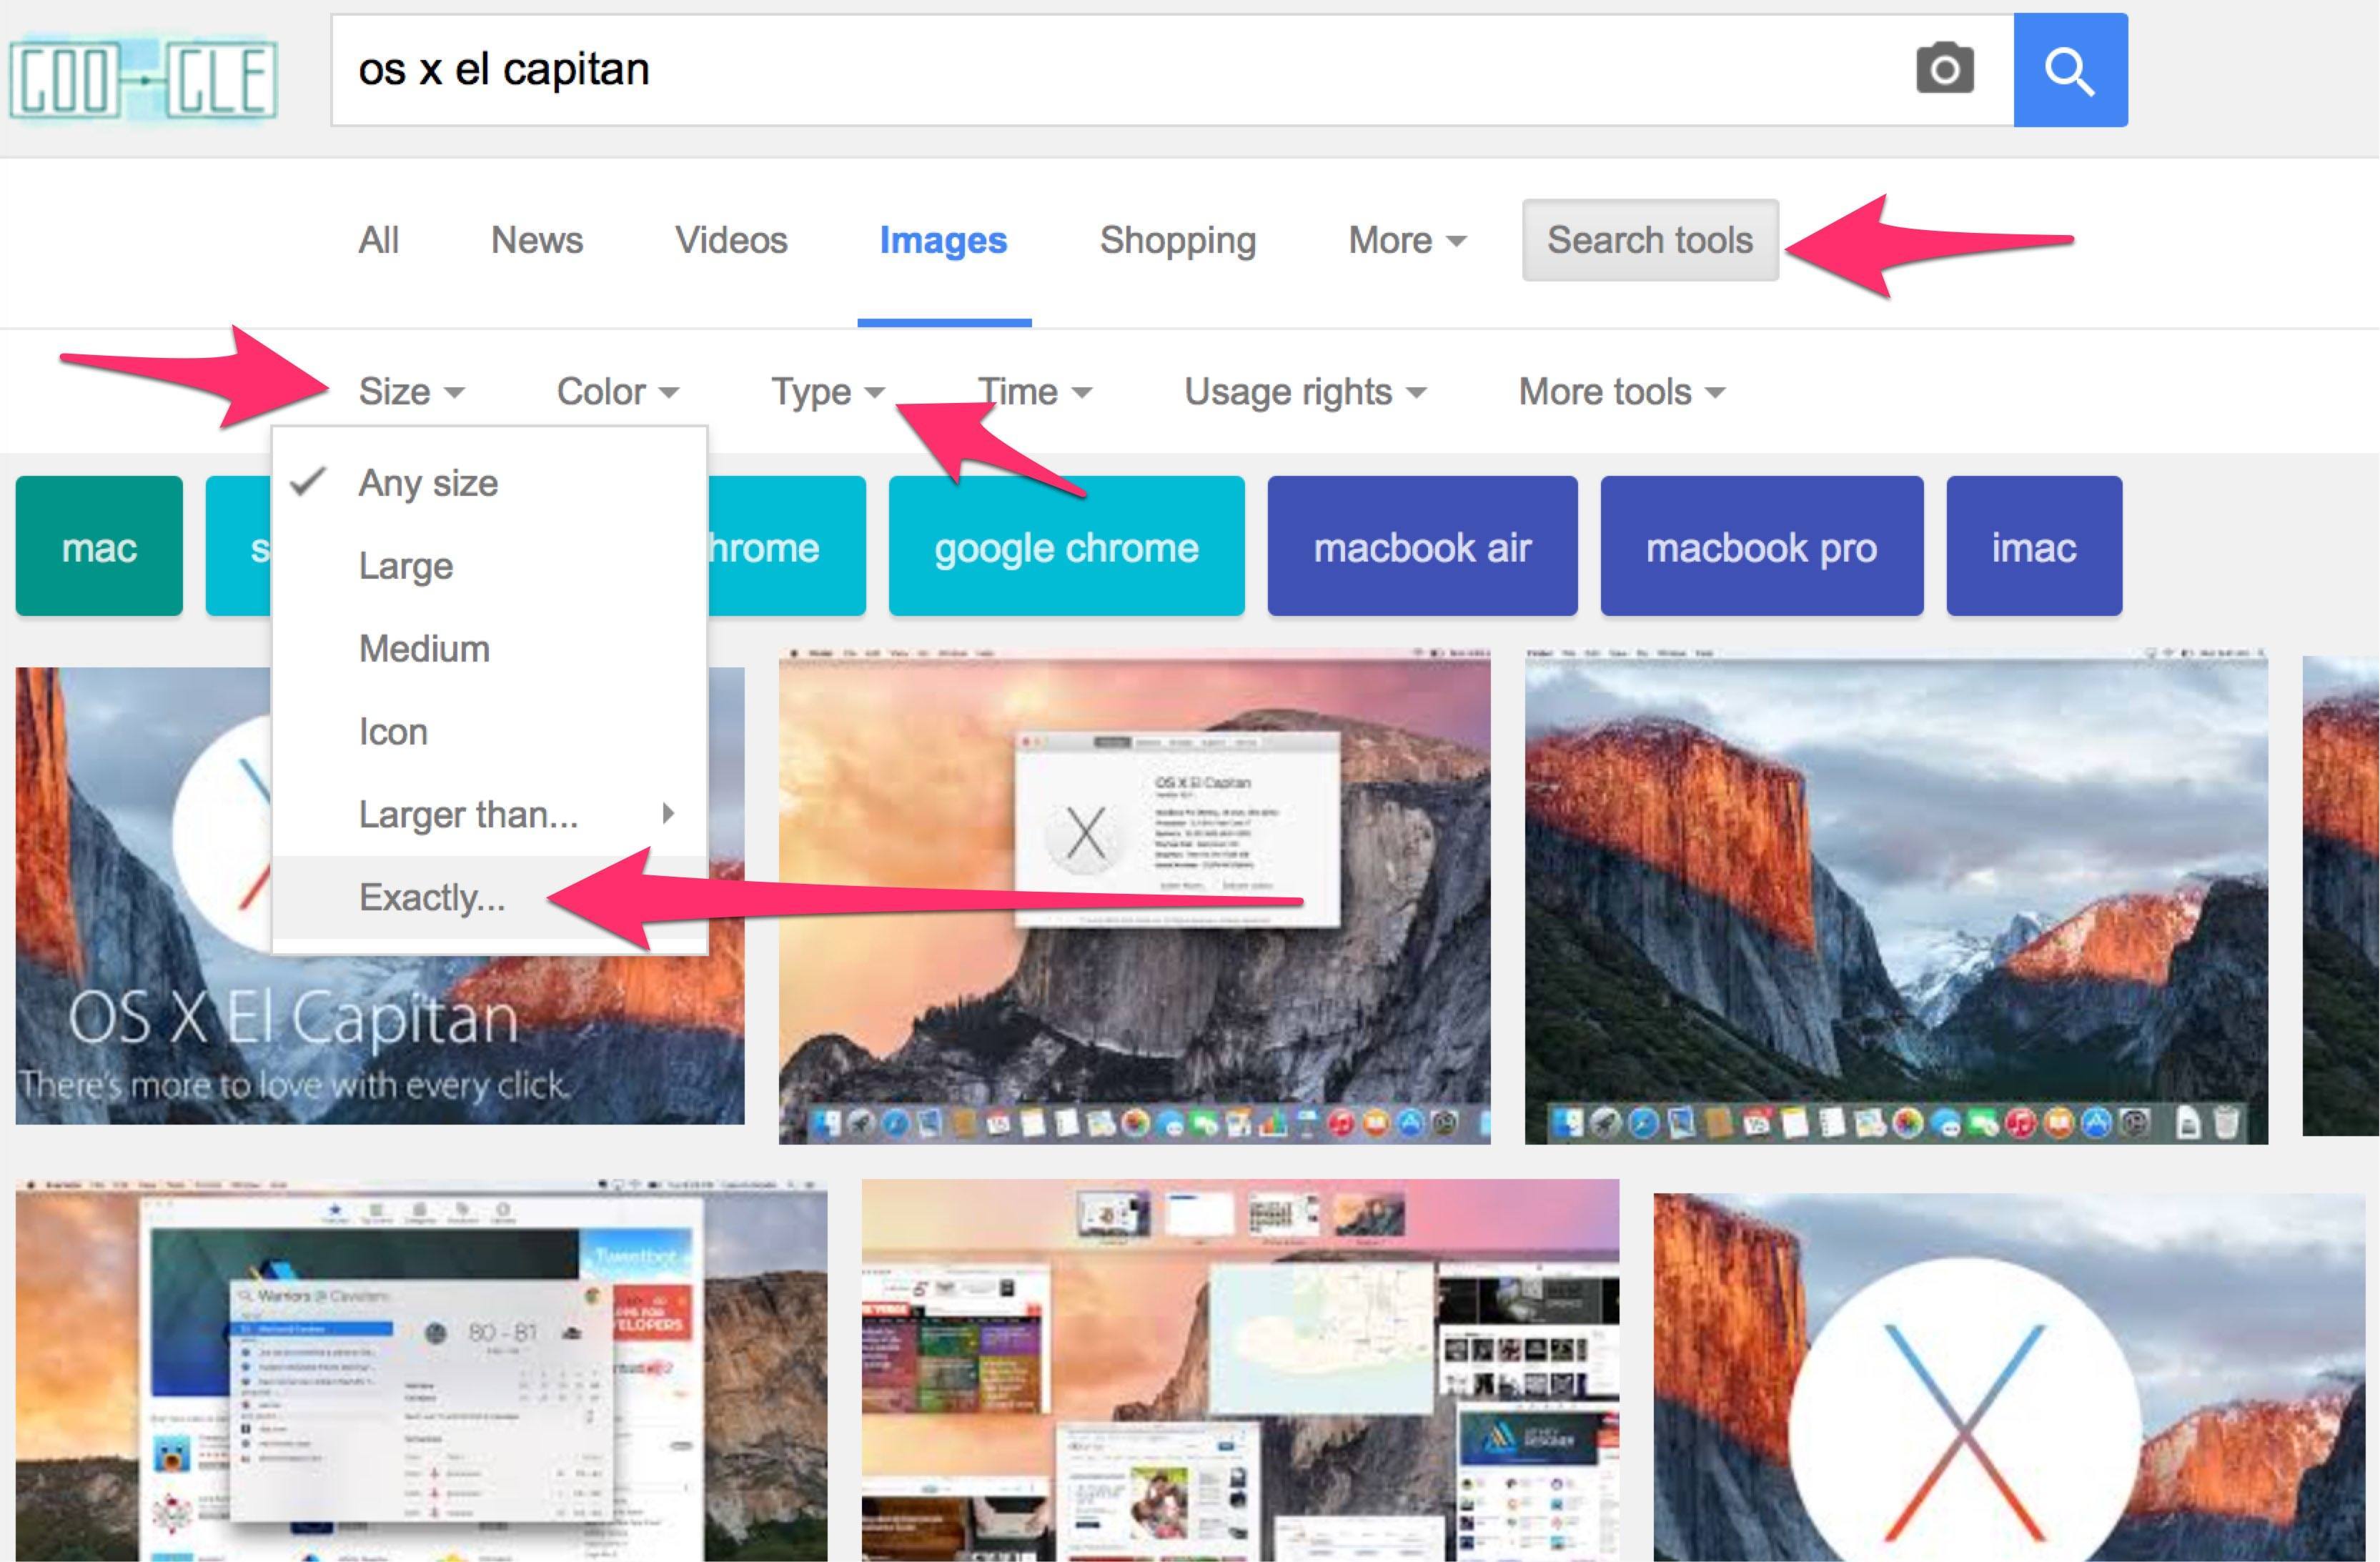
(I could have also clicked on “Type” and changed to “Transparent” if I needed to, but I didn’t need to in this case.)
- Find the image you want to use
- Open it in Preview
- Select All
- Copy
- Go to Finder
- Select the drive you want to customized the icon of
- Do “Get Info”
- Click on the existing icon at the top-left corner
- Press ⌘V to paste the image from Preview
- Enter your administrator password, if required
Note the light blue circle around the logo:
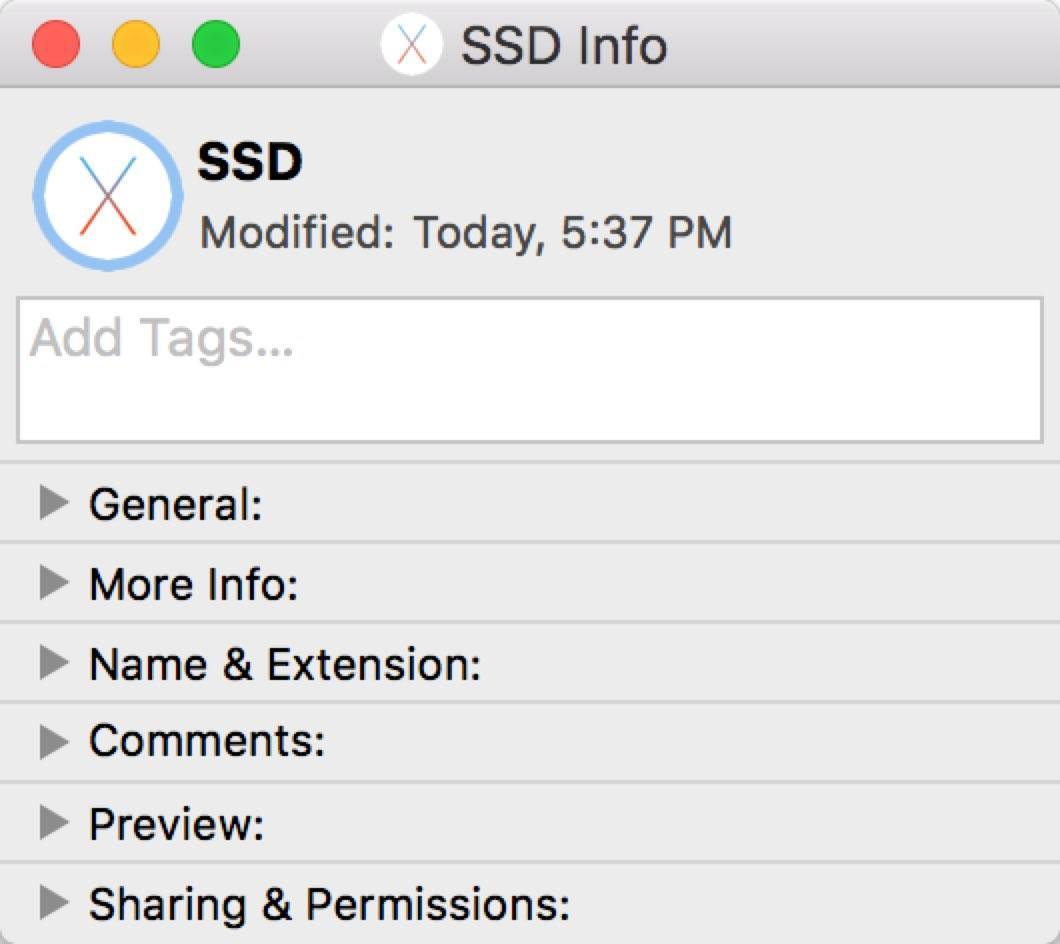
which is how you know that it is ready to accept a pasted image.
Note that there appears to be a bug in OS X where once you have changed the icon once, Finder may not notice that you have changed it again until you manually restart the Finder (control+option+click on the Finder icon in the dock and choose “Relaunch”).
A Few Last Tips
If you want to use an OS X app icon, you don’t need Google Images, you can just select the app in Finder, press ⌘C, and then go to step 6 in the list above.
These icons can be used on network drives and external drives too. For example, I mount Dropbox using ExpanDrive, and the TimeCapsuleDisk is, as you might expect, the disk to my Time Capsule, which I back up to using Arq Backup (see my review of Arq here).
If you decide you don’t like the custom icon, just go back to the Get Info panel (Step 6 above) and press the Delete key, and the custom icon will be removed and the default restored.
This isn’t the most powerful of OS X’s features, but it is one of those little touches that makes things more enjoyable.