Let me begin this review with a disclaimer: I am not a photographer. In high school I took a class called Photo Imaging, which taught me how to use Photoshop and attempted to teach me how to take quality pictures. Now I know the Rule of Thirds, and can create images of middle schoolers defeating lions in battle, but it didn’t fix the problem that I simply don’t have a natural eye for photography, nor the patience to develop one.
What I do have, however, is a world-class camera that I carry in my pocket everywhere I go. While I might not be taking world-class photos with it, I do take pictures of my family, my friends, and my life. These pictures are not thoughtfully composed, they are not shot in Raw, and I do not spend hours meticulously editing them. Despite that, they are very dear to me.
As someone who’s written tens of thousands of words on automation, you might expect me to have some crazy photo management workflows in place, or at least to be using one or two or five different services devoted to the practice. In truth, I don’t use any photo management workflows or services. I’ve always been interested in them, and I’ve tried almost all of them, but they’ve all been too much of a hassle for me.
I take all of my pictures on my iPhone, and I take a lot of them. I have a habit of hitting the shutter button at least three or four times whenever I’m trying to capture something, because often at least one or two of them are blurry, or someone’s eyes are closed, etc. Eventually I get around to going through and deleting all but one of these groups of multiple pictures, but sometimes this isn’t until days or weeks later, and any third party photo management service I’ve used will have already uploaded the duplicates. The result is huge amounts of extra photos taking up often limited space and cluttering companion apps built to let me view my stored photos. Worse, making changes to the photos on my phone won’t sync to the backups, and vice versa.
Eventually I’ve grown tired of every third party service I’ve tried and reverted to just cramming everything into iPhoto (so that I at least had some sort of backup) and ignoring it. iPhoto is outdated, slow, and ugly. Any time I’ve wanted to look through my photos, I just go to my iPhone and look there. Any necessary edits are similarly completed on my phone, and the extra features that iPhoto may have offered (smart albums, faces, etc.) I’ve simply gone without.
Enter, Photos for OS X.
The Cloud
Technically speaking, there are two parts to this review: Photos for OS X, and iCloud Photo Library. Chances are good that if you already have an iPhone or iPad running iOS 8, your photos are already stored in iCloud Photo Library. The service has been around since last October – there just hasn’t been a portal to it on the Mac. Until now.
iCloud Photo Library is off by default in the new Photos app; turning it on can be done in the Preferences window in Photos. In my opinion, iCloud Photo Library and Photos, the app, are one and the same. Without iCloud Photo Library, Photos is just a newer, prettier place for me to dump backups of my photos to rot. With iCloud Photo Library, Photos is a living, breathing depiction of my life that I can see on a beautiful 13-inch Retina display.
I imagine it may be controversial for me to put so much emphasis on iCloud Photo Library. After all, if that was really the main draw of the app, wouldn’t it come turned on by default?
I thought this at first as well, but then I started thinking a bit about the future. Most of you who are reading this are probably older than me, and that means that since I have photos from before the days of my iPhone, you definitely have photos from before you had iPhones. While Photos is perfectly suited to handle this, as exemplified by the easy import from iPhoto on first launch, I don’t think Photos for OS X is really made with us in mind. Rather, I think it’s made for the future OS X users, prepared to stand the test of time and be a great app for many years to come.
These days, the first phone that kids are getting is an iPhone, and they’re getting them at increasingly younger ages. These kids have iPhones long before they have Macs. These iPhones are their first cameras, and that means that potentially every photo they ever take could be taken on these devices. When, eventually, they do get their first Macs, they aren’t going to have a massive iPhoto library to import into Photos. They’re only going to have their iCloud Photo Library. They’re going to open the app, flip that switch (although I bet it will eventually just become the default), and have all the photos that they love pulled right in from the cloud. For these future users, there will be no Photos without iCloud.
With this in mind, when I started using Photos, I pulled down my iCloud Photo Library first, then went through all my old photos stored in iPhoto and brought over only the ones that weren’t already in my iCloud Photo Library. I am not recommending you do this, but as I mentioned before, iPhoto has just been a dumping spot for me in the past, and I wanted Photos to be streamlined and only contain the photos I want to keep forever.
I decided to go all in on Photos, so after going through every photo in my iPhoto library and moving over those that I wanted1. This process took a long time, but what I was left with was a semblance of the libraries of these future Photos users who will have lived with cameras in their pockets at all times since they were kids: everything in the cloud, everything curated; just a massive, mobile library of photos which are by themselves a visual representation of my life, and within which every individual photo means something to me.
When I take a new picture on my iPhone, it is immediately, automatically added to my iCloud Photo Library. If I take a series of pictures, then go back and curate them (regardless of when or on which device I do this curation), the ones I delete are deleted from all my devices, and the ones I edit are edited on all my devices. All of this happens without me needing to do any maintenance or manual syncing. No wires are ever required. Photos for OS X, combined with iCloud Photo Library, is a perfect representation of Apple’s classic “It Just Works” ideal.
All that said, the one place where Apple seems to be delibrately holding back the progress of this app and its cloud counterpart, is in the iCloud storage pricing plans. Apple has more than enough money and income to take a small hit here and at least make the 20 GB tier free – and that is truly the bare minimum, as many people will need even more. Lack of storage space should never be the reason why people lose all their precious photos when their phones are stolen or heavily damaged. If Apple wants to step up and take care of basic photo management for the masses, they need to pull out all the stops and do it right.
Finally, if your problem is more a lack of space on your computer than a lack of space in the cloud, there is also an option called “Optimize Mac storage” in Preferences which could help. When you choose this option, Photos will store only low resolution thumbnails on your actual machine, and keep the rest of our data in the cloud. If you want to view a photo which isn’t local on your device, just open it and wait a few moments for it to download. The downside to this is that you need an Internet connection to see all of your photos, and also that there will always be a bit more lag when you add the step of downloading from they cloud before the photo can be displayed.
The App
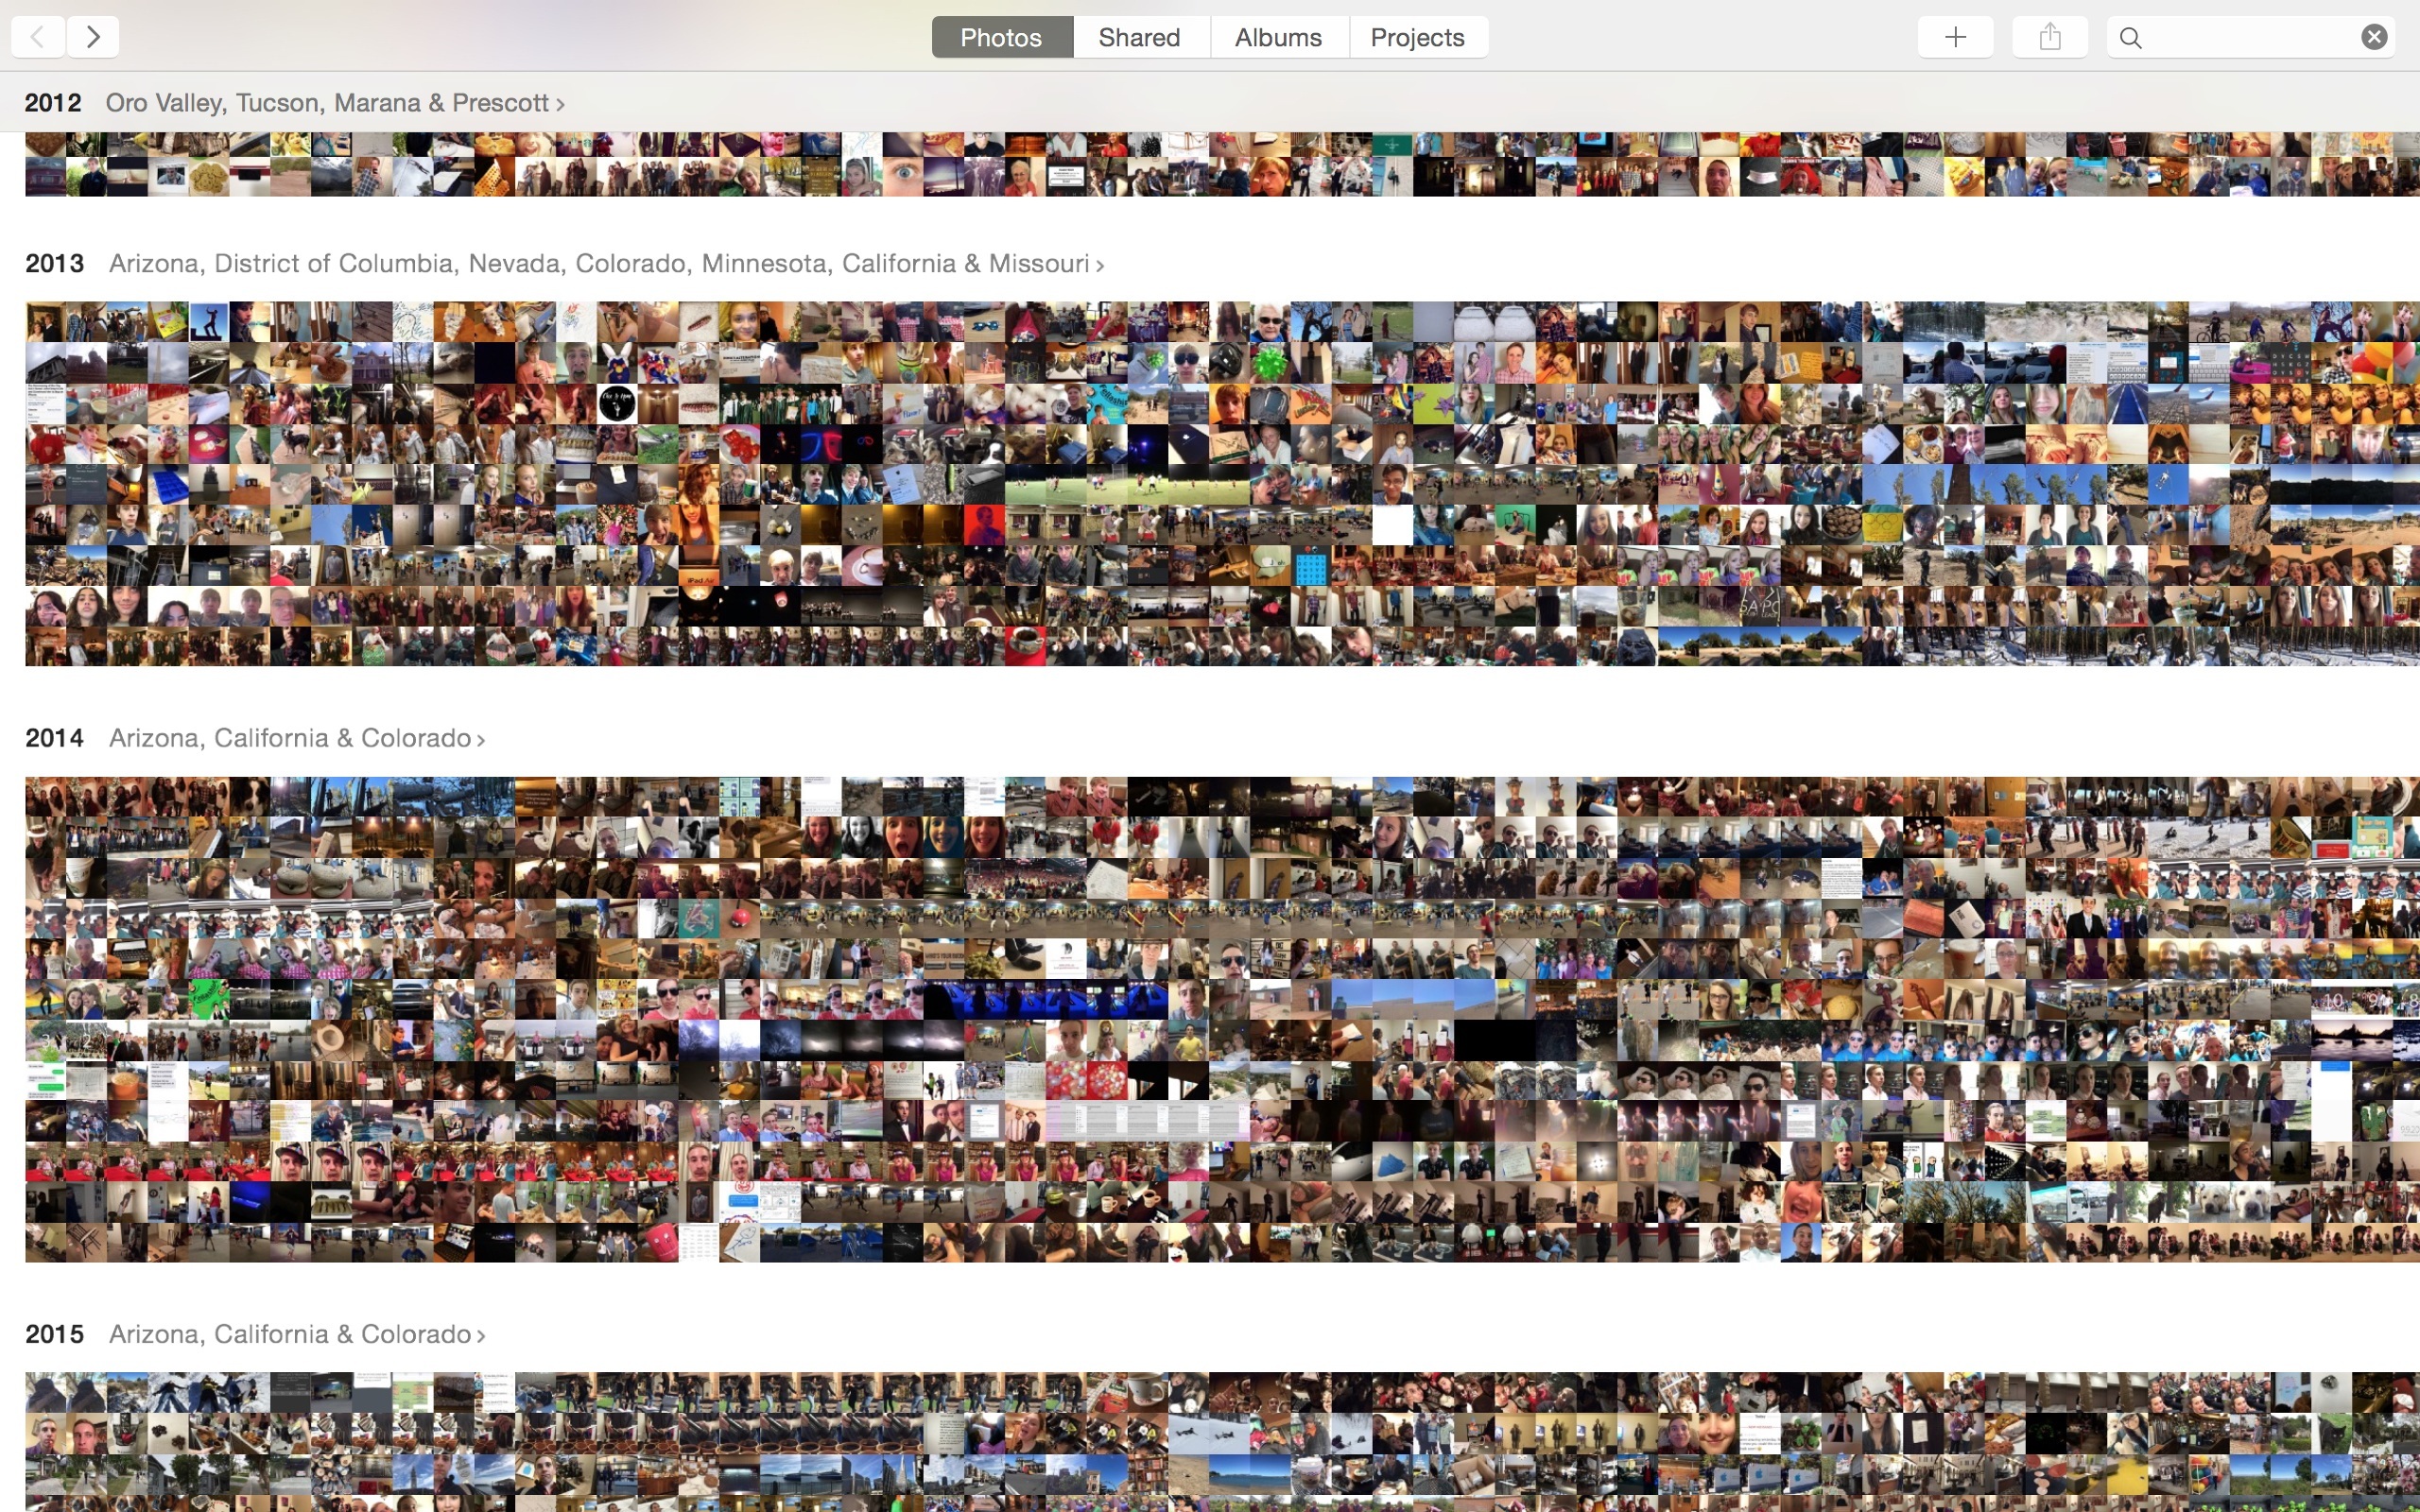
Getting to the app itself, if you’ve ever used Photos on an iPhone or iPad, it should seem pretty familiar to you. The interface is nearly identical, just blown up to the much bigger screen of a Mac. While most apps would require design changes to fit such a wide range of screen sizes, this doesn’t really apply to Photos. The extra screen space just means the full screen grid can display each image at a larger size, making it much easier and less straining for your eyes to pick out individual photos.
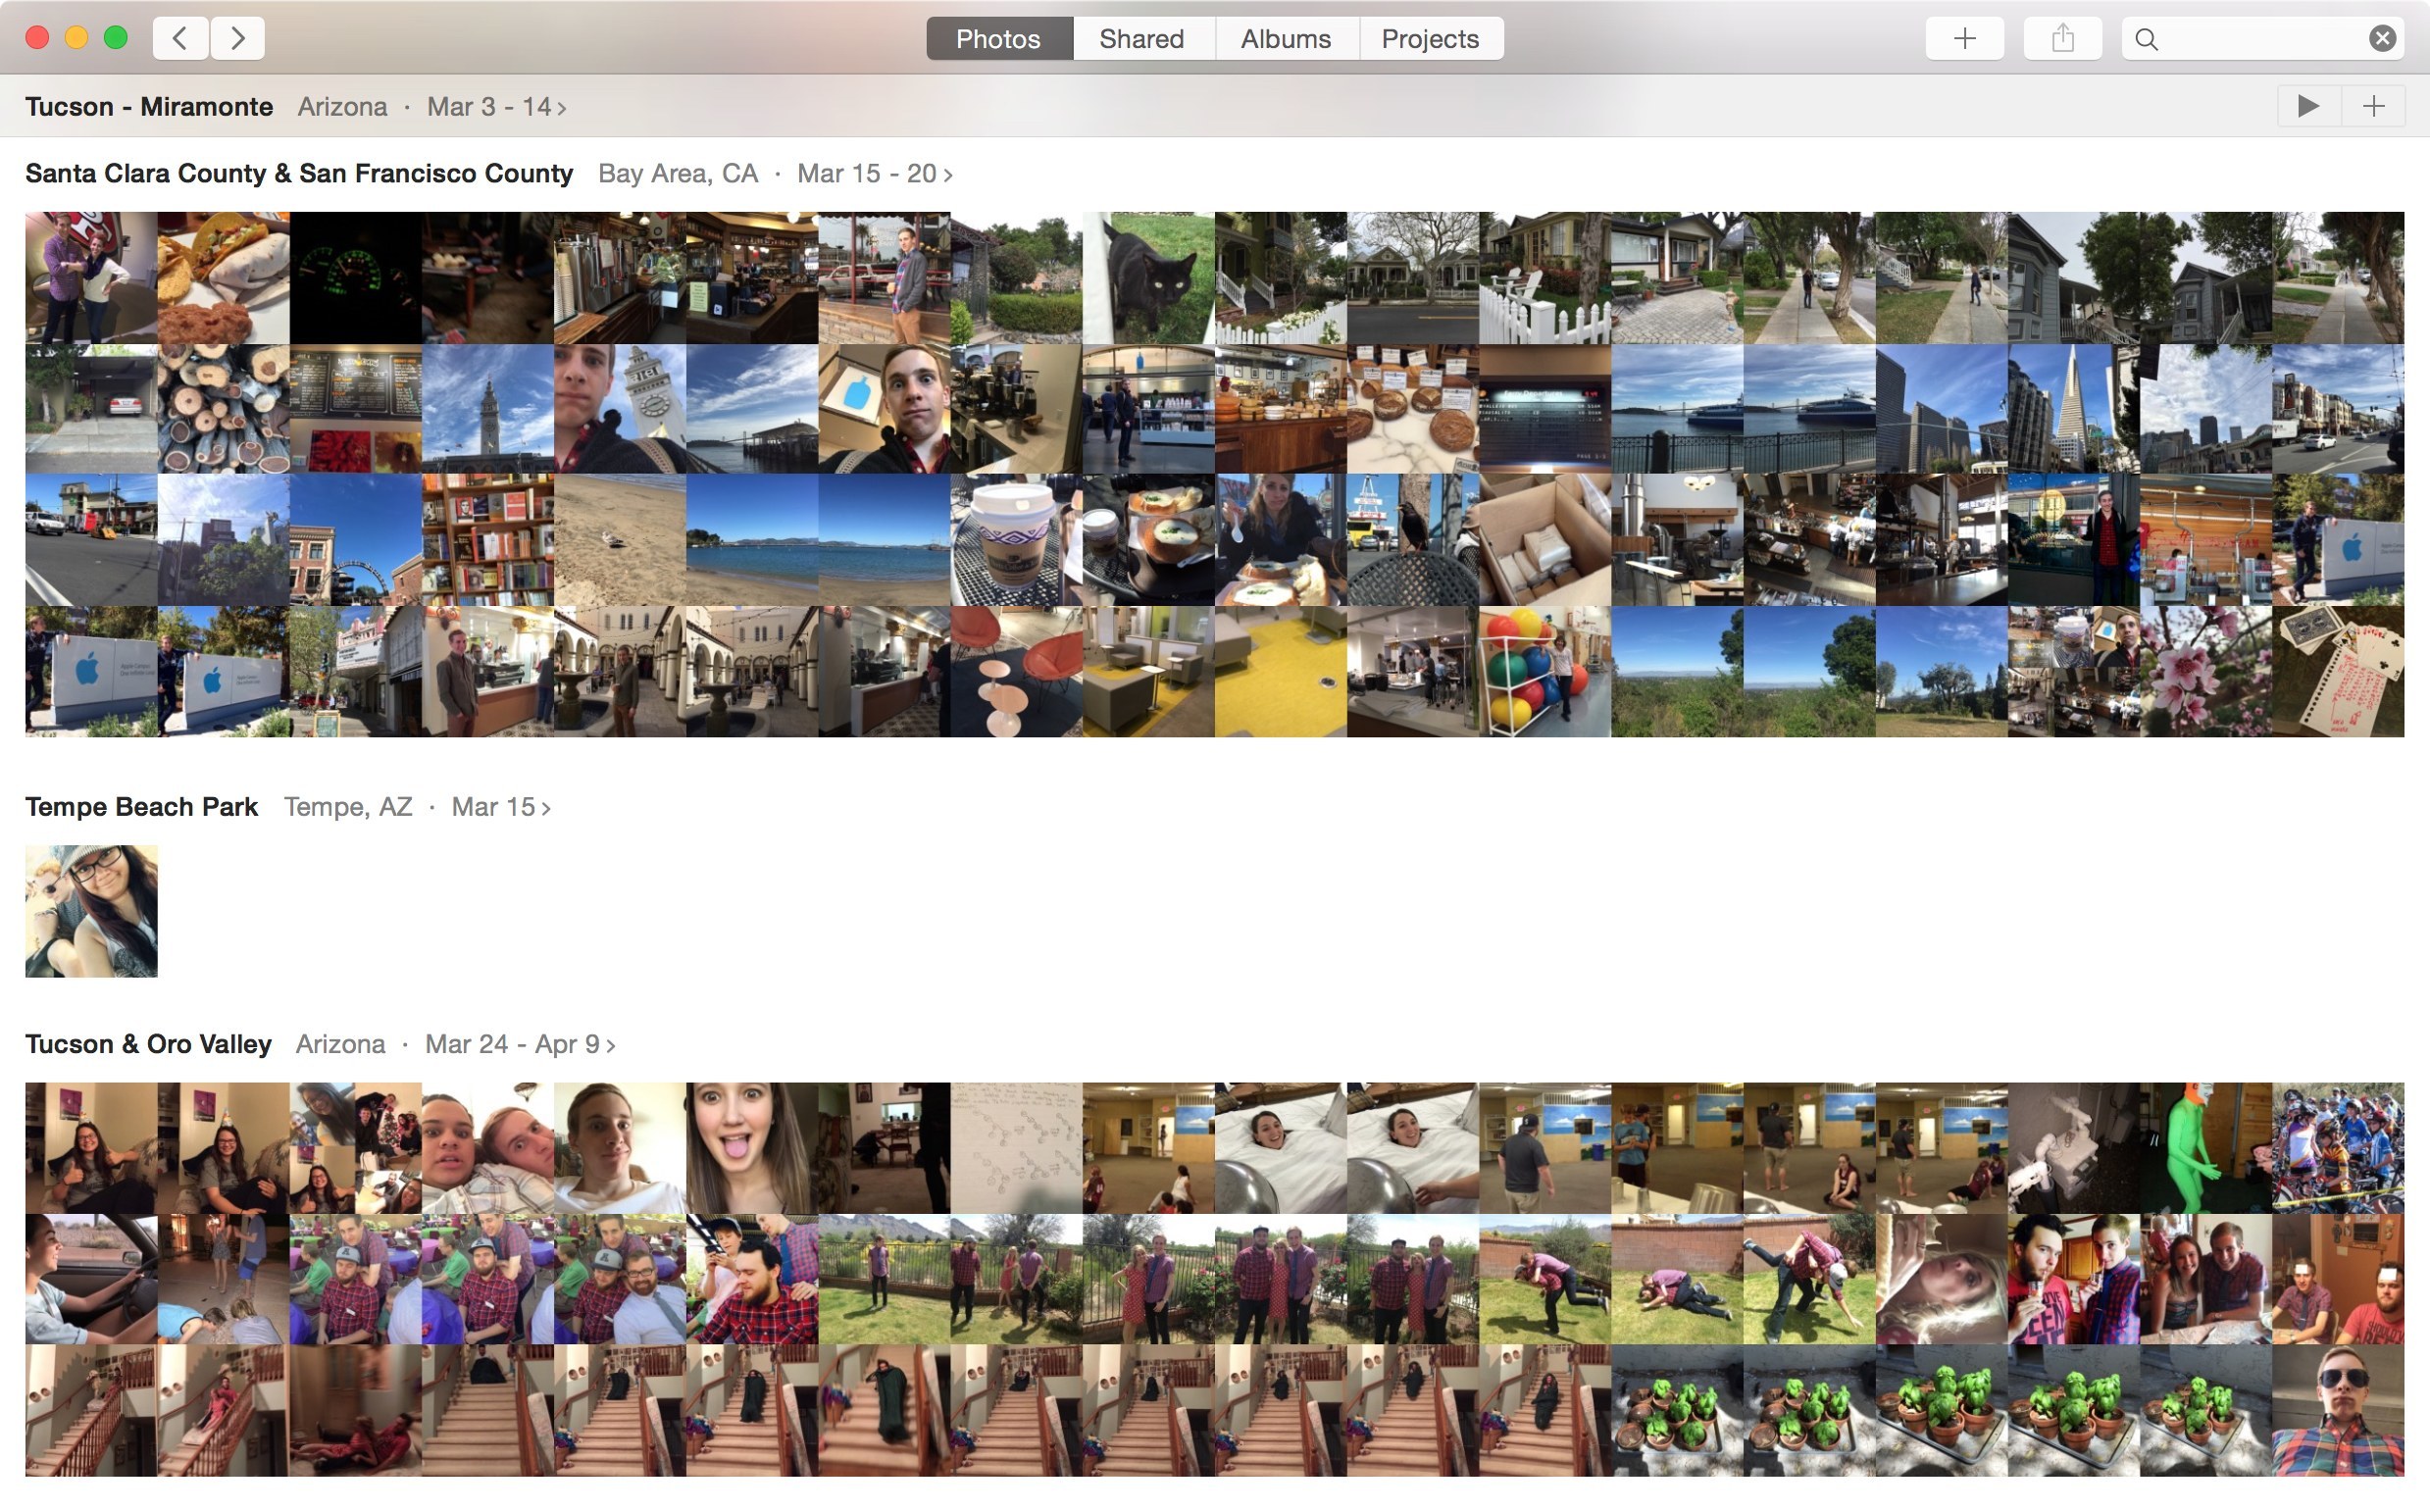
There are four tabs in the app: Photos, Shared, Albums, and Projects. Along with these tabs in the main bar are a forward and back button for navigation, a slider to adjust the size of the thumbnails in the view, a plus button to add selected photos to an album or project, a share button to share selected photos through iCloud Photo Sharing or other means, and a search bar. If you open an individual photo, you also get info and favorite buttons for the image, an edit button, and a sidebar button which will show a small grid next to the photo that contains all the other pictures in that “moment”.
The main Photos view, as alluded to in the last paragraph, is just a large grid of all of your pictures. You can zoom in and out by pinching on your trackpad to switch between year, collection, moment, and individual photo views. In the moment view, you can hover your mouse over any photo and click the heart icon that appears to favorite it. Favorited photos will be added to a Favorites album that is automatically created when you favorite your first photo (I’ve also heard that only favorited photos will be synced to the Apple Watch). When in the main Photos view you can also click the names of locations that will appear above each group of photos to enter location view, which displays all of your pictures on a map based on where they were taken.
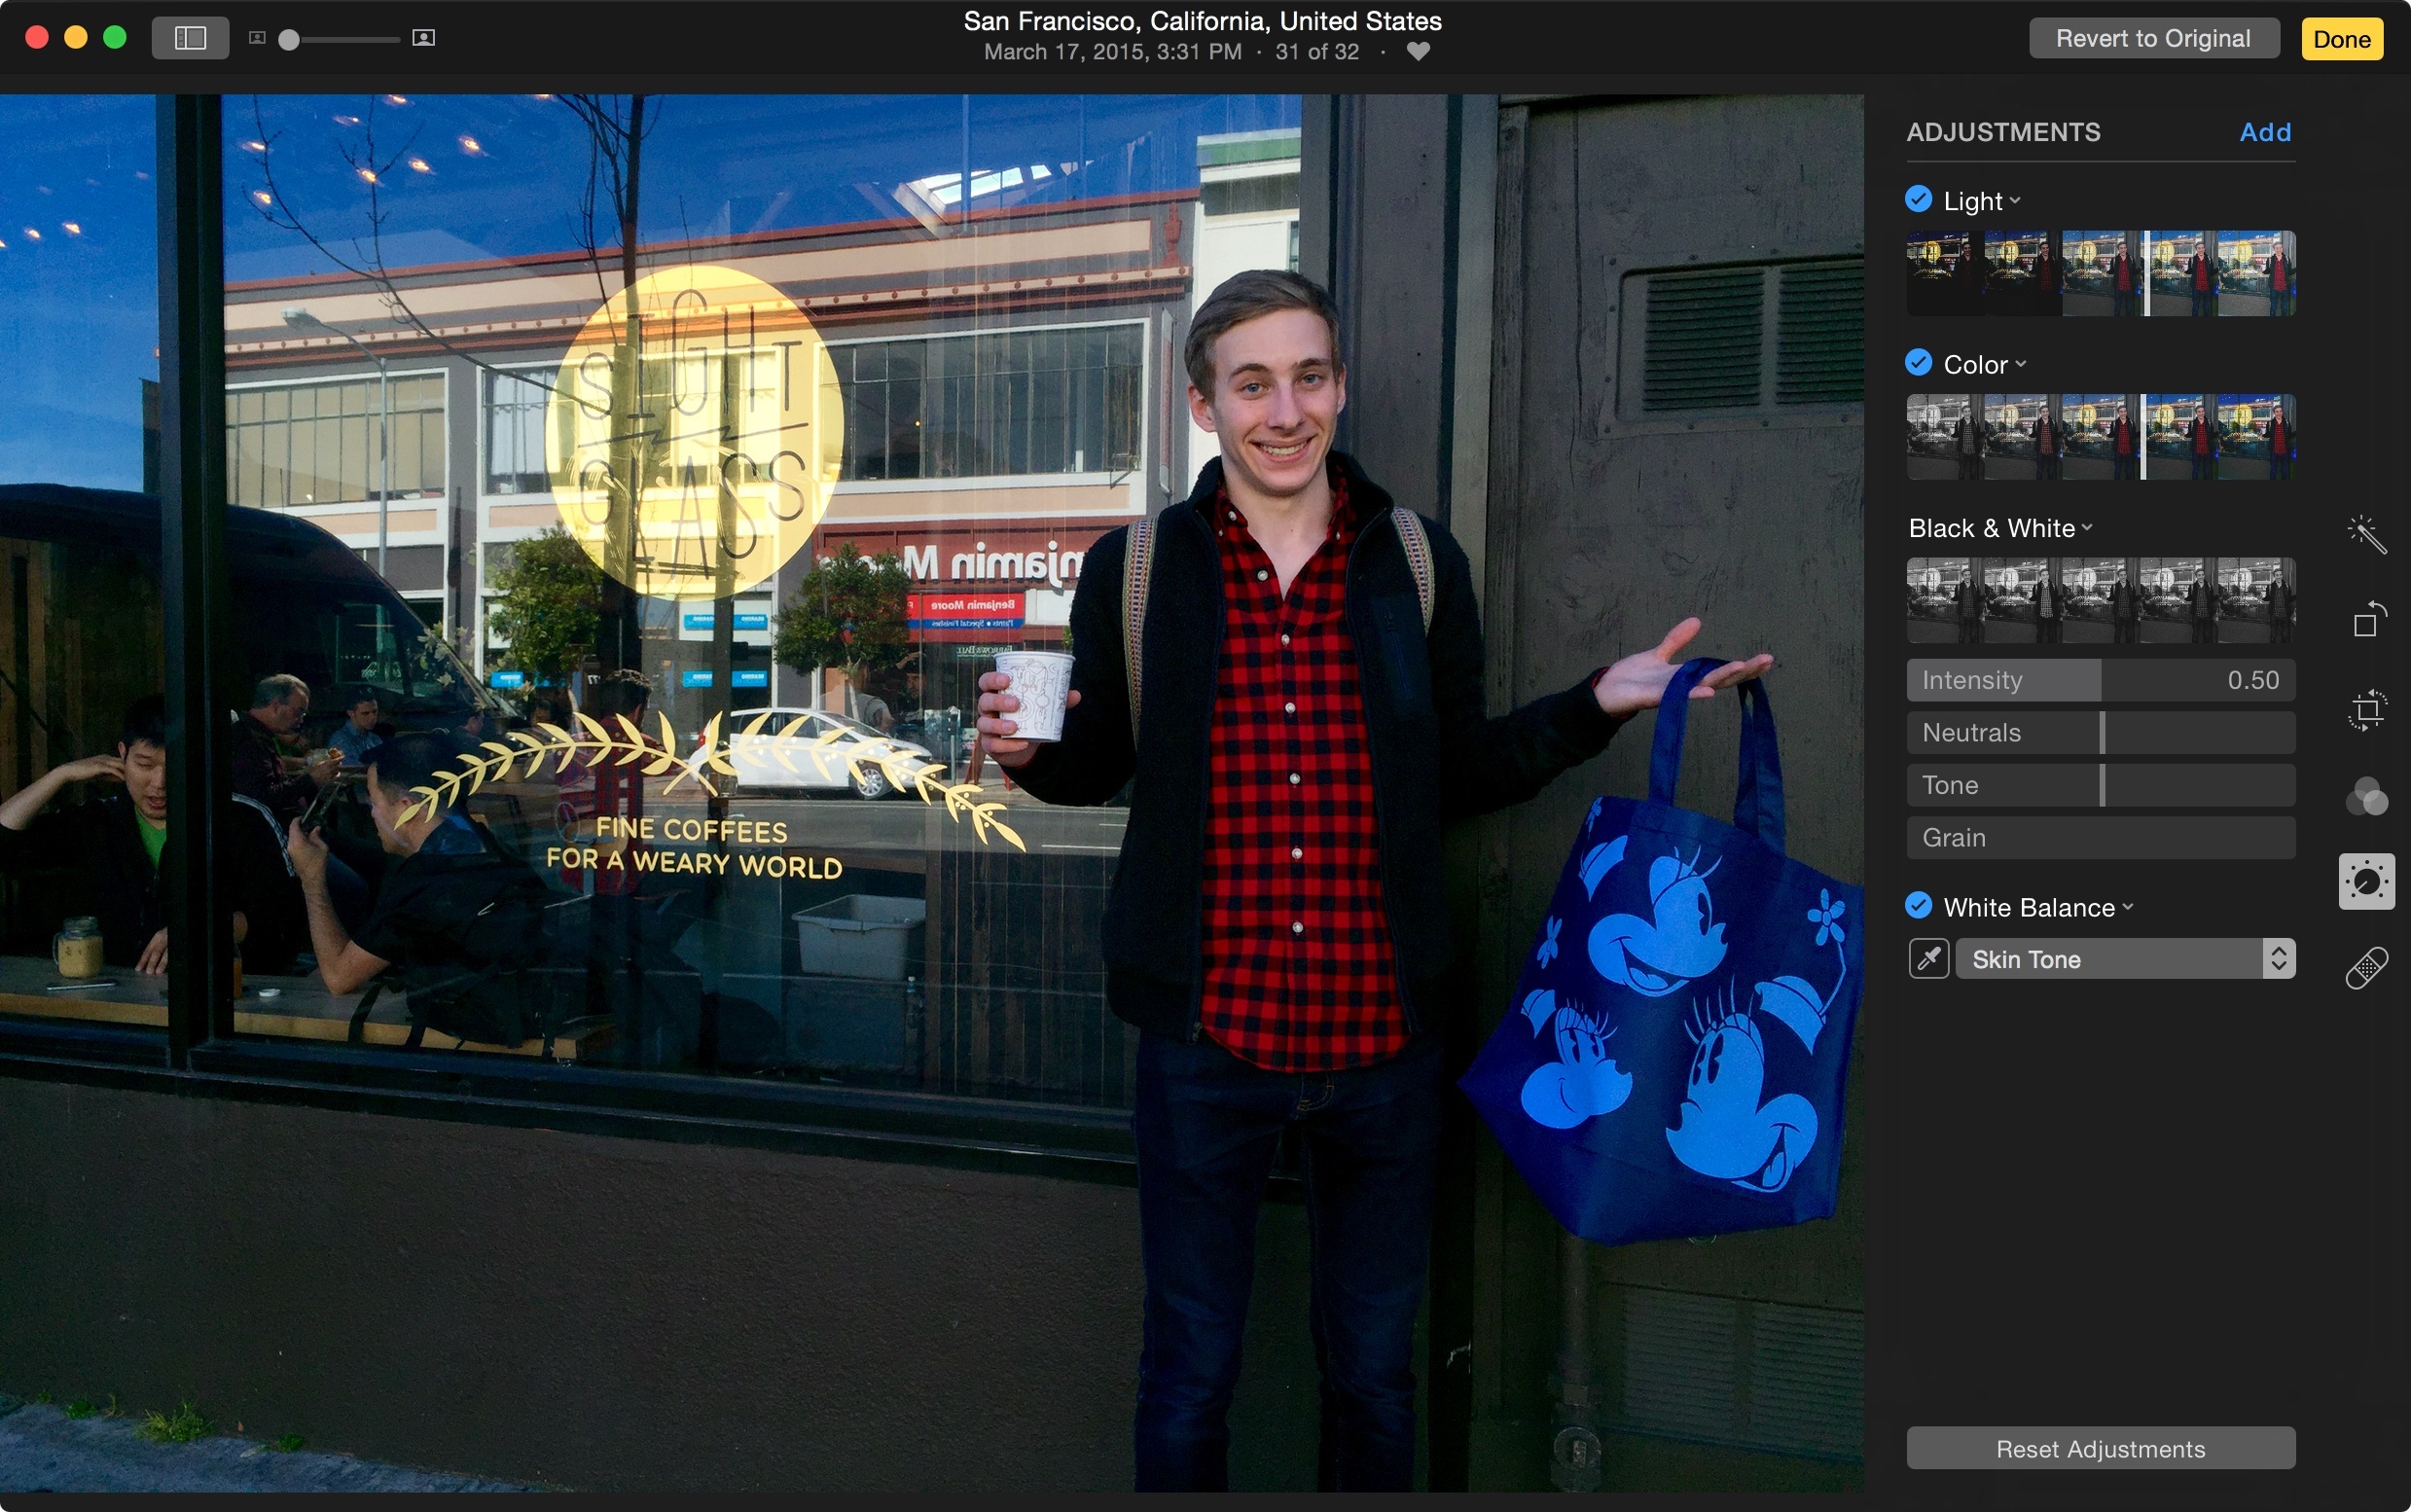
If you open an individual photo and choose Edit from the top right corner, Photos fades to black on the edges and the six main editing tools slide into the right side of the frame. Most of the tools are fairly self explanatory, but the last two are noteworthy. The adjust tool will bring up the Adjustments options, which by default show you three sliders to play with: Light, Color, and Black & White. You can click the blue Add button to add or remove Adjustments from a list of possibilities, then move the sliders around to get your photo just right.
Scrolling over each Adjustment also reveals individual “Auto” buttons, which you can click to have Photos attempt to set the slider automatically. You can also click the down arrows which appear next to the Auto buttons to reveal extra options for each type of Adjustment, so you can really start to fine tune things if you want to (generally too much work for me, but I am addicted to those Auto buttons). Lastly, all edits made to your photos are nondestructive, so you can always hit Revert to Original at the top right to remove all edits, or click the tiny arrows next to each Adjustment title to reset Adjustments individually (another useful detail: when you make an adjustment, a blue check mark appears next to it which can be toggled to rapidly switch the entire adjustment on and off for easy comparison).
The final tool is the Retouch tool, which lets you quickly edit out blemishes or other small details in your photos. Just option click near what you want to remove and then click and drag to highlight the offending area. Photos will do its best to intelligently remove the highlighted area by basically duplicating the option-clicked area on top of it. This feature works great for correcting small details, and is super fast and easy to use, but if you want to remove something larger or more complicated you’re probably going to need a more powerful editing app.
The Shared tab consists of any albums that you have shared in iCloud. Apple has been pushing this feature since iOS 7, but I still only have three albums here, all of which were created for sharing between some close friends and all of which were quickly forgotten. Maybe you find iCloud Photo Sharing useful, and if you do then maybe there’s a whole section of Photos here that you’ll love, but for me its easier to just post photos I want to share to Instagram, Facebook, or Twitter.
You will not be surprised to hear that the Albums tab has all of your albums in it. The top part of the view is dedicated to albums that are automatically created for you by Apple: All Photos, Faces, Last Import, Favorites, Panoramas, Videos, Slo-mo, Time-lapse, and Bursts. If you don’t see some of these albums, it’s probably because you don’t have any of that particular kind of media in your library yet. Beneath Apple’s automatic albums are any albums that you have created yourself. You can create a new album or folder by right clicking a blank space in the view, but if you want to create a new Smart Album you have to do so from the File menu.
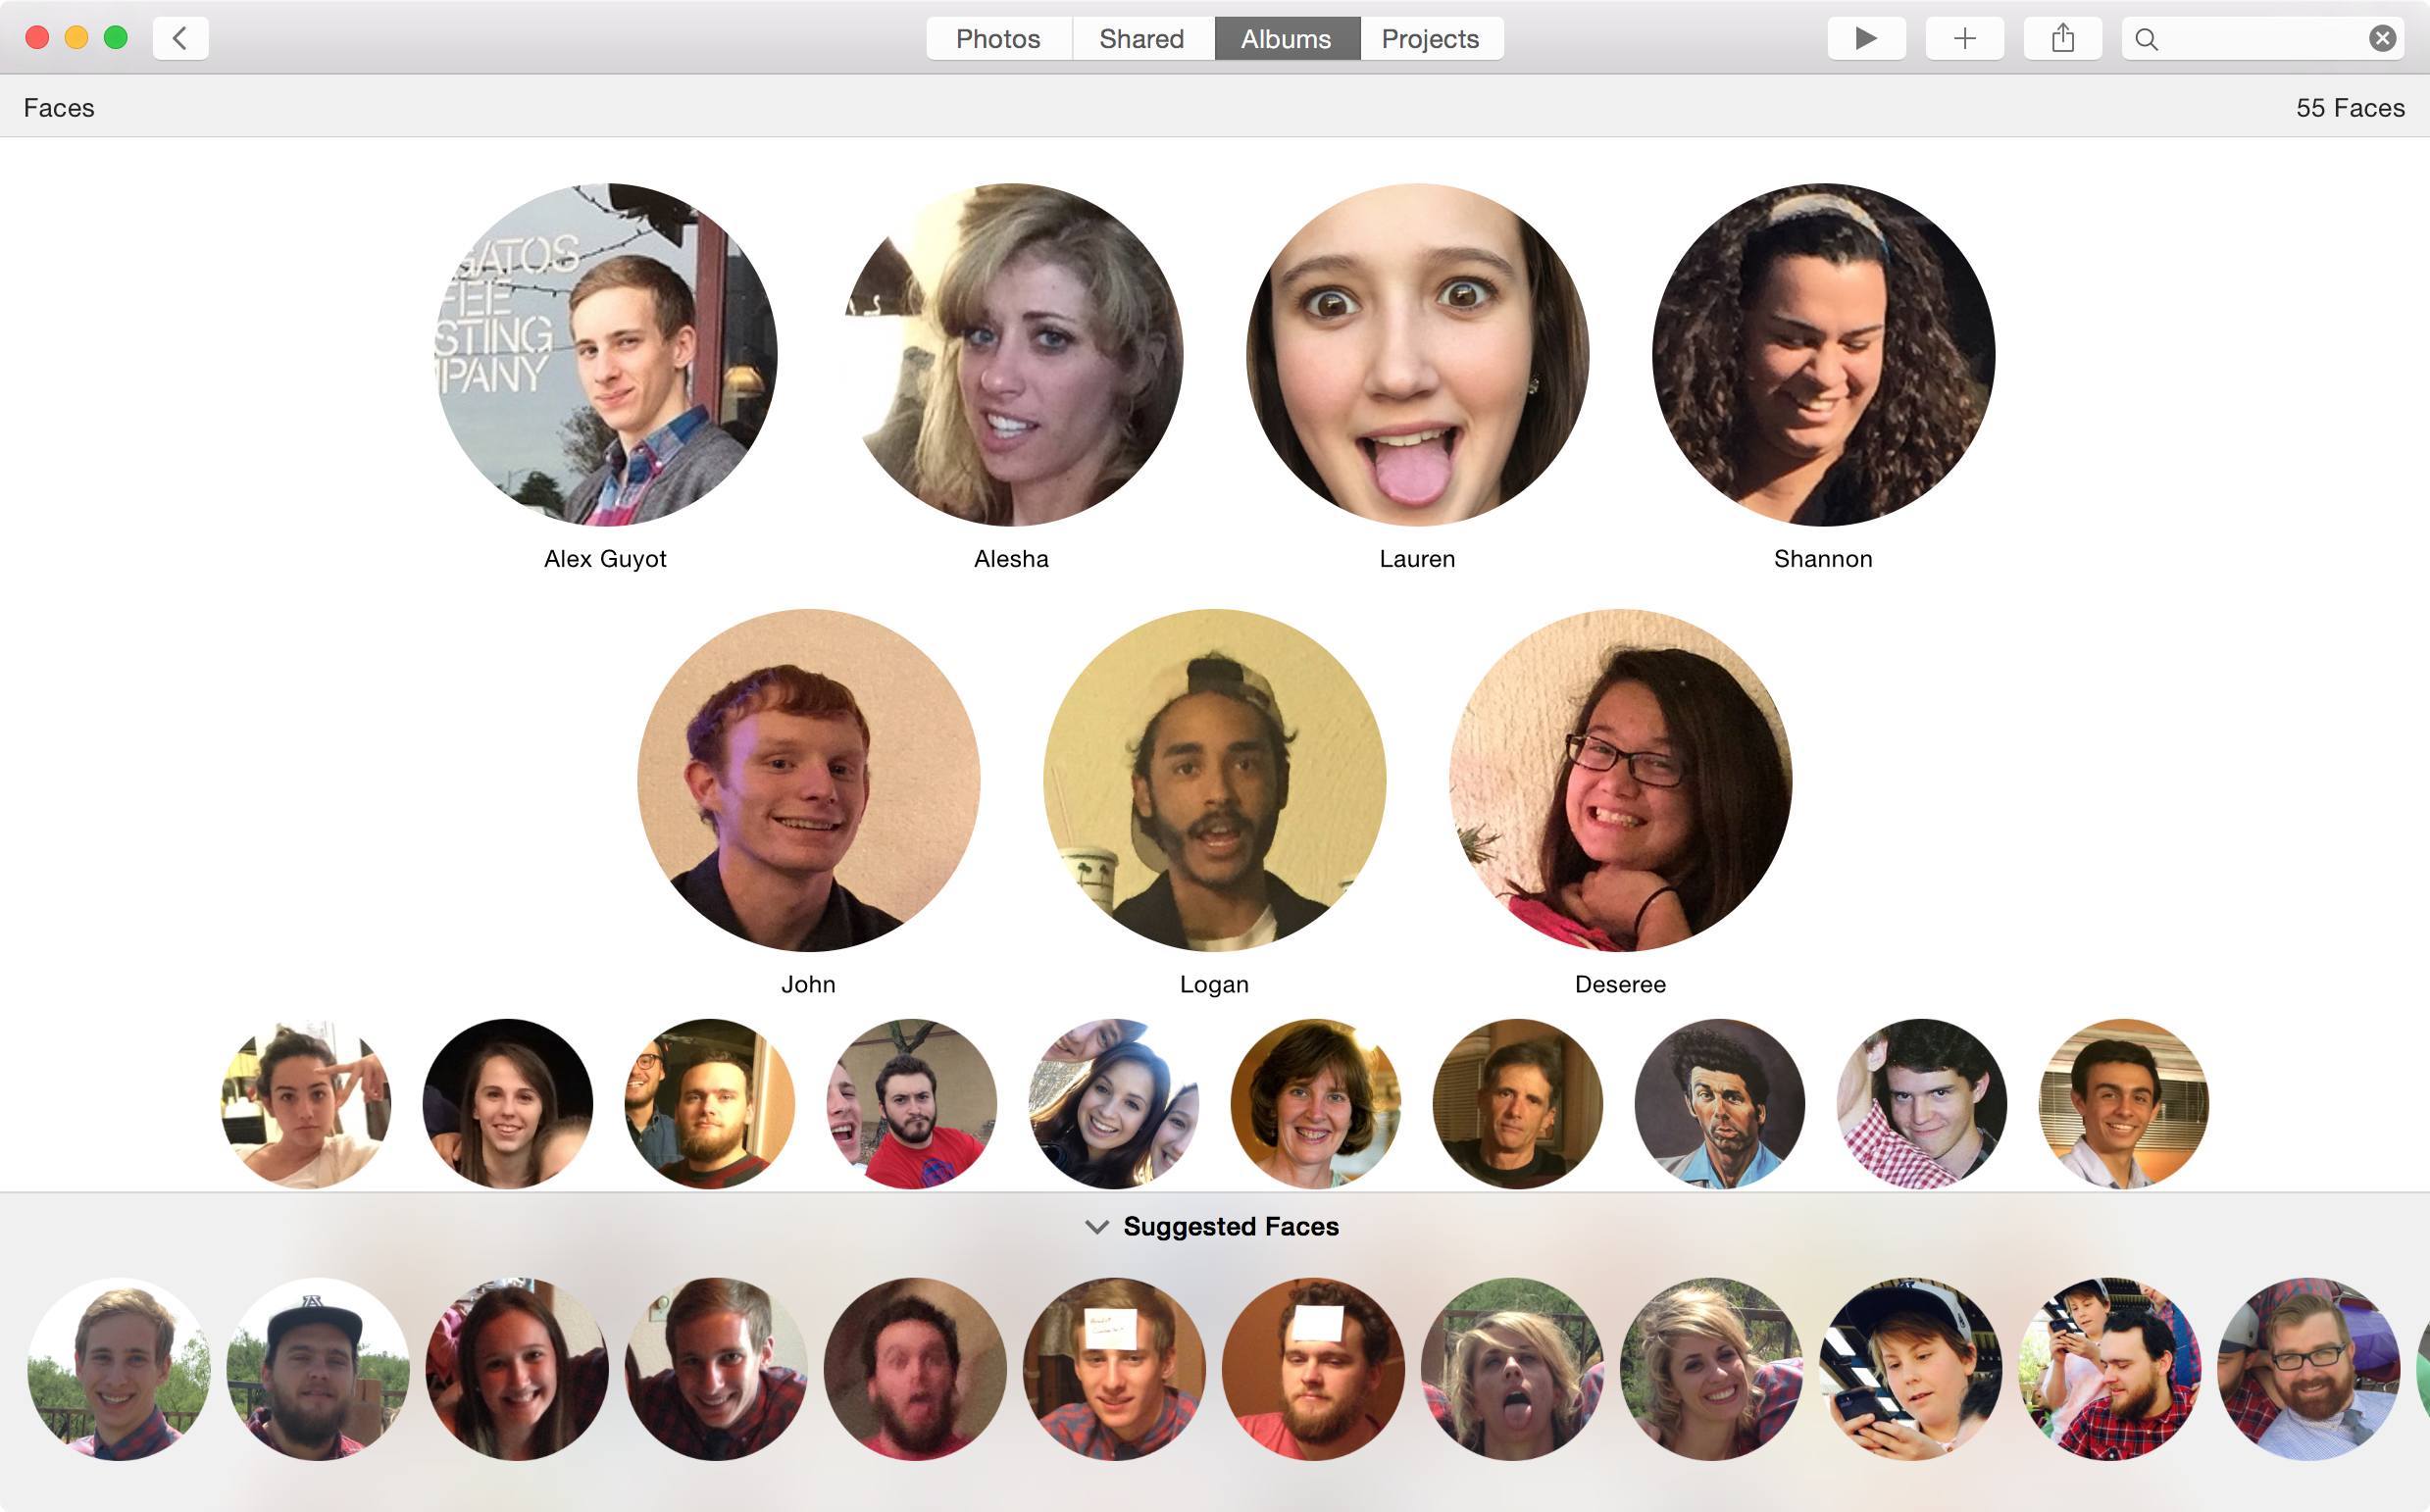
The Faces album is the only one here that isn’t self explanatory. Open the album for the first time (you may also just get an alert prompting you to do this at some point while using the app) and Photos will present you with an interface to identify the faces within all of your photos. This interface consists of a pane at the bottom of the window which is filled with various faces that Photos has identified within your photos. You can double click on any of these faces and Photos will prompt you for a name to match it. Once you’ve given this, Photos will attempt to find all other occurrences of this same face throughout the rest of your photos.
Faces it finds are presented to you as suggestions, and you can click any faces that are incorrect once to quickly deselect them before accepting the rest of the correct ones. For each new face you identify, a new circle with that person’s face and name are added to the large upper pane in the view, so as you go through this process you accumulate a grid of circles showing all of the people in your photos. Each time you add a new person, Photos will set that person’s main picture in the Faces grid to the first photo of them that you identified. If you want to change the photo that is shown, double click the face to open the page of all that person’s photos, right click the one you want to be shown for the main interface, and choose “Make Key Photo”.
In my experience, Photos is great at deciding what is a face and what isn’t a face, but far less great at determining which faces are the same person. It’s not that it was actually incorrect about the faces it suggested as the same, but instead that it prioritized being correct so much so that it seems like a detriment to its ability to make a lot of matches. I wish they would tweak whatever algorithm they are using for this so that it would go out on a limb a little more with its guesses. I would much prefer deselecting a few more faces in exchange for Photos to correctly identify a lot more faces. As it is, the first time I identified a popular face from amongst my pictures, Photos consistently correctly identified that person in a decent sized batch of other photos. However, this batch was by no means comprehensive, and after the first time or two of identifying the same face from the list, it stopped finding the person in any other photos at all, forcing me to identify them manually time and again.
Unfortunately for me, when I was doing this I was unaware that I could identify faces by dragging them from the bottom pane onto their already identified face in the top pane. Instead, I spent hours of time double clicking and typing and selecting and hitting enter and waiting for animations and hitting enter again for the same name for every one of my friends and family hundreds of times over, when I could have just been quickly dragging pictures onto pictures. I am still bitter about this. I will always be bitter about this.
My last couple issues with Faces: first, why on earth can you not hold Shift or Command to select multiple faces at once and categorize them all as the same person at the same time? I have no understanding of why that system-wide feature is disabled in this interface. Second, I am sad that the Faces album is not synced onto my iPhone and iPad. I can see why we can’t add Faces from there, but it would be nice to be able to look through those I’ve added from my Mac. Hopefully we’ll see this in iOS 9.
Overall, I love the new Faces interface, and if you’re willing to go through the long process of identifying every face in your library, it becomes an amazing new resource for finding old pictures or a particular picture you may be looking for.
For instance, a few weeks ago I was looking for an old picture I knew I had of me when I had my first cup of coffee, but I couldn’t find it among all of my photos. This photo is significant because I refused to drink coffee when I was a kid (I was short and people had told me it would stunt my growth) until a largely sleepless mission trip with my church the summer after my freshman year of high school. The other kids convinced me to have my first cup, and a picture was taken to commemorate the moment.
Today, coffee is my favorite beverage, and I don’t go a day without my delicious, Aeropressed cup of fresh Blue Bottle (née Tonx) in the morning. As such, that photo is momentous. After sorting all of my photos with the Faces feature of the new Photos app, I remembered having looked for that picture, and a quick search for the name of my friend who was in the picture with me had me looking at it mere seconds later.

Touching on this briefly, the final tab of the Photos app is the Projects section, where you can go to make photo books, cards, calendars, prints, or slideshows. Apple will then print and put together your project and send it to you, for a price. I don’t have much to say about this feature, as I haven’t tried it out myself, but it’s a pretty classic feature which has existed in iPhoto for years, so I would assume it works as advertised.
Wrap Up
Photos for OS X is an incredible step up from its predecessor. Its streamlined interface and easy initial import mean that if you’ve already been using iPhoto, there should be nothing but advantages in moving your existing habits over to the new app.
However, while Photos is built to support the past and present, it is also fully capable of handling the future. As people who have grown up with iOS devices start getting their first Macs, they’ll be bringing the libraries that they’ve spent years developing on their iPhones, iPads, or iPod touches, and they will love the familiarity that Photos will immediately offer.
Photos for OS X completes the promise of iCloud Photo Library: your photos, on all your devices, synced together perfectly and with no maintenance necessary. This is Apple at its best.
-
On the off chance you do want to do something like this instead of importing your entire iPhoto library, the best part is that you can have both apps open and just drag a photo or a group of photos from iPhoto onto Photos and all the importing will be taken care of automatically. ↩︎