For those looking for a decent IRC client for the Mac, it’s slim pickings.
Certainly there are a couple of free solutions available, such as Colloquy, but if you’re interested in a single window IRC client that looks absolutely gorgeous, look no further than Linkinus.
[This review was written by Cody Fink, an Apple enthusiast and college student out of the great American East Coast. He currently runs the Apple-Bits blog and tweets as @codyfink]
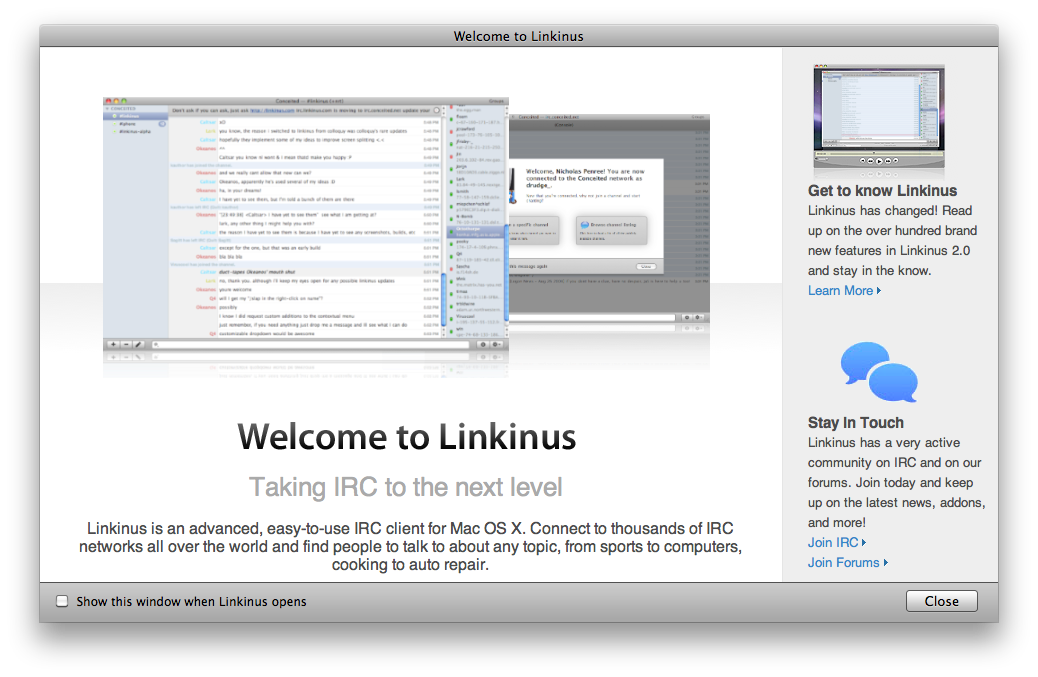
Conceited Software’s Linkinus isn’t short on features, such as smart highlighting, embedding media, chat grouping, AppleScript support, an identity manager, advanced security settings, and even interface themes that make this a Mac IRC lovers dream. It’s packed with all kinds of settings you can tweak to your hearts desire, perfect for Mac fanatics. Linkinus is built with new IRC users in mind. From the moment you start the app, you’re walked through the process of creating an identify for yourself, connecting to a network, and joining new channels. Although I didn’t necessarily care for the hand holding, the interface presented to you is pretty enough where I let it slide. Besides, at least for network and channel options, they don’t deny you the ability to manually type your commands into the console.
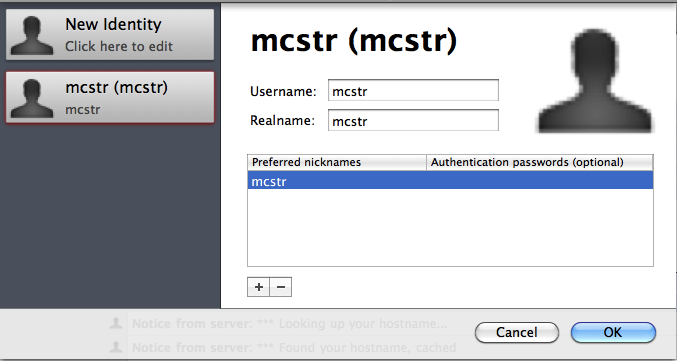
The initial setup process however, does concern me. For your Realname and Username, Linkinus pre-fills these spaces with your Mac identity, which new IRC users might find convenient. Linkinus should instead leave these spaces blank, if to somewhat dissuade this behavior. It should be made clear that it’s not recommended to use your real name online, especially if you’re going to venture the unknown world of IRC. You should instead, make an appropriate alias for yourself.
My second issue with the setup process is that while it’s obvious you need a Realname and a Username, it’s not obvious that you should also input a Nickname. Your nickname (I think) is the most important piece of your online identity, and users will have to click an empty space in the panel to create one. Only through curiosity would a new user touch this. If you’re a previous IRC user and you have a registered nickname, you can also enter your password here.
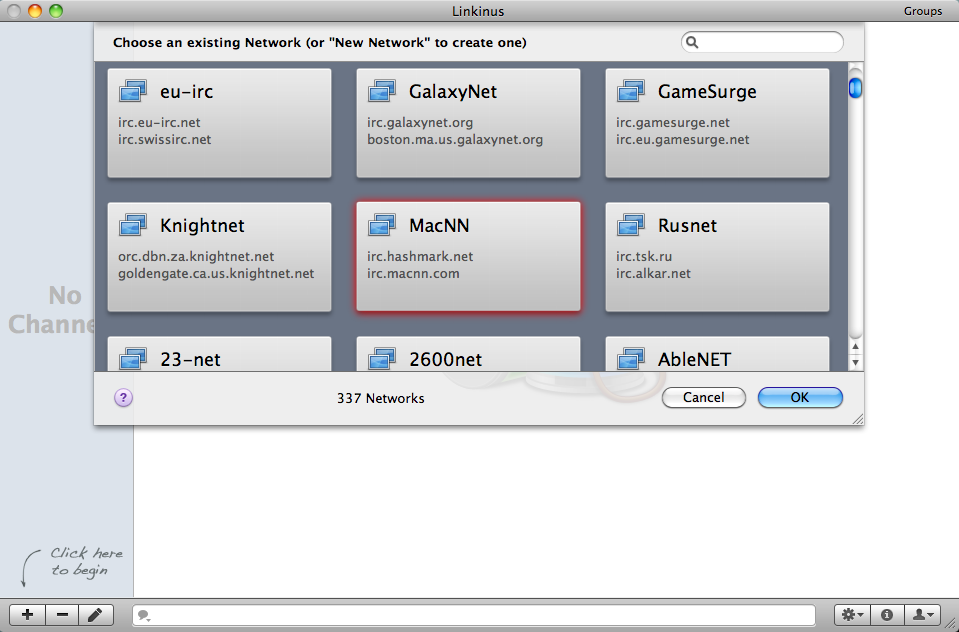
Once you’ve created your online identity, you’re presented with the console. From here, there’s a notifier on the bottom left hand corner of the screen that tells you to “click here to get started.” Easy enough. Clicking the button will drop down a list of all of the IRC servers available to you. Surprisingly, I wasn’t able to locate Moofspeak, which is the IRC network dedicated to anything Macintosh. Seriously? And despite a pretty pane, I felt confined to the default window sizing (even after pulling it down) due to the largeness of the network buttons. Instead of the “icon” view, I wish they provided me with a list view instead, or an option to change it. Anyway, to connect to Moofspeak, I ended up typing /server irc.moofspeak.net to connect. And the console comes through! Using the pane however, I was able to connect to Geekshed, which was pretty easy. Linkinus does pick favorites though, as it seems to lists the most popular IRC networks first in alphabetical order, before listing the remaining networks known.
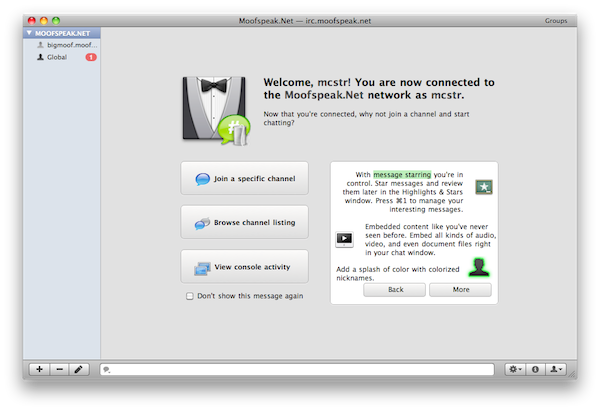
Once you’re in a network, you’re acquainted with a beautiful page that tells you you’ve successful connected to that network, and it gives you some options in the form of buttons where you can join a specific channel, browse the channel listing, or view your console activity. I prefer to view my console activity and use the /join command to connect to my channels, but new users will appreciate the ease of point and click. Because Moofspeak wasn’t initially listed, neither where the channels unfortunately, but I could still manually connect to any channel in existence. As for Geekshed, I was able to amass a huge list of channels to choose from (which sometimes took a while to aggregate), though scrolling through all of them quickly can get tiring. The most annoying though is if I typed the /list command in the console, I expected to receive a text list of all the channels on the network in the console. Instead, Linkinus intervened and used the channel pane.
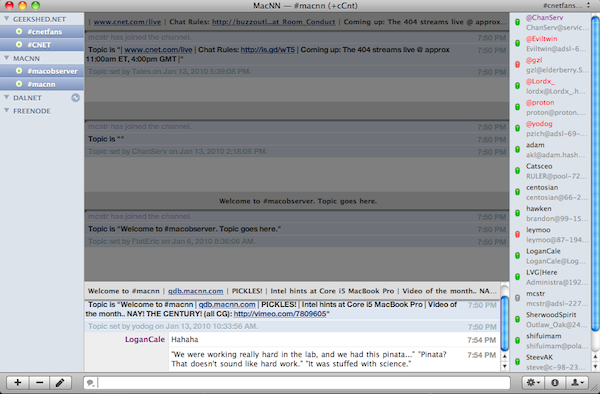
The chat view is welcoming, as there are plenty of features in this particular mode that I love (albeit with some tweaking in the settings). Here is where your themes are applied from the preferences, and here is where you’ll spend the majority of your time talking to other fellow IRC members. If you quit Linkinus, then return, the last few conversations are saved, followed by a spacer that defines your new chat session. It’s an easy way to recollect what you last talked about, especially if it pertains to the current channel topic.
On the user pane to the right, hovering over a user’s name provides some basic information, such as their nickname and hostmask, preventing me from having to /whois an unknown user. You can then control click their name to initiate options like private chat. The status markers aren’t my favorite however, and I enabled the ability to see a user’s privileges (mode) in the preferences. At the bottom of the pane, the three buttons allow you to control user specific settings. The gear button allows you to invoke filters or view a buddy list, while the information button allows you to create and manage your identities. The last button (the bust) gives you options to assign privileges to highlighted users (if you have the required privileges yourself), add them to an ignore list, send them files, and more.
One of my favorite features was the ability to star messages. Although Linkinus does sport the ability to sort through messages and show you what it considers the most important, being able to manually star messages is pretty cool. If someone posts a link, you can essentially bookmark that message off for later.
Another really (and I mean really) cool chat feature is groups. If you command click multiple channels on the left sidebar, Linkinus divides your console into multiple panes, allowing you to view multiple channels at the same time. Then, you can press command-S to save that group of channels to the top right corner of the Linkinus window for easy access later. If you don’t feel like clicking, you can assign and invoke your own custom keyboard shortcut for viewing those channels later. Pretty sweet huh? You don’t have to group multiple channels - you could group just one for the sake of a keyboard shortcut - but it’s a nifty feature I found plenty of use for.
Concerning the left sidebar, which displays your servers and channels, I did not like the default settings. By default, the sidebar not only shows you channels and servers, it shows you queries as well. I like my queries to be listed in the server’s console, and not as a separate entity. It can be easily disabled, and soon after that I was rocking.
One pretty nifty feature I liked quiet a bit was the ability to individually set server & channel settings just by double clicking on the name (or the pencil at the bottom of the pane). Double clicking on the name presents you with a small floating window that is stuffed with options from running custom commands as you join, switching your identities, choosing your user modes, and defining custom “stalk” words that can be highlighted specifically in that server or channel instead of globally.
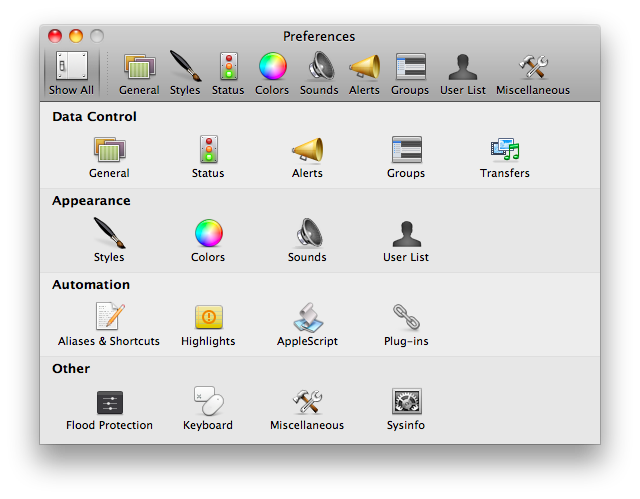
Linkinus isn’t short on preferences, and it’s here where you may spend most of your time tweaking the IRC client to your desired needs. All of your preferences are arranged similarly like System Preferences, using the first tab to displays rows of icons prevalent to your needs in their own categories. Using this view, you can navigate the preferences pretty quickly if you’re looking for a specific setting, such as applying an AppleScript for example.
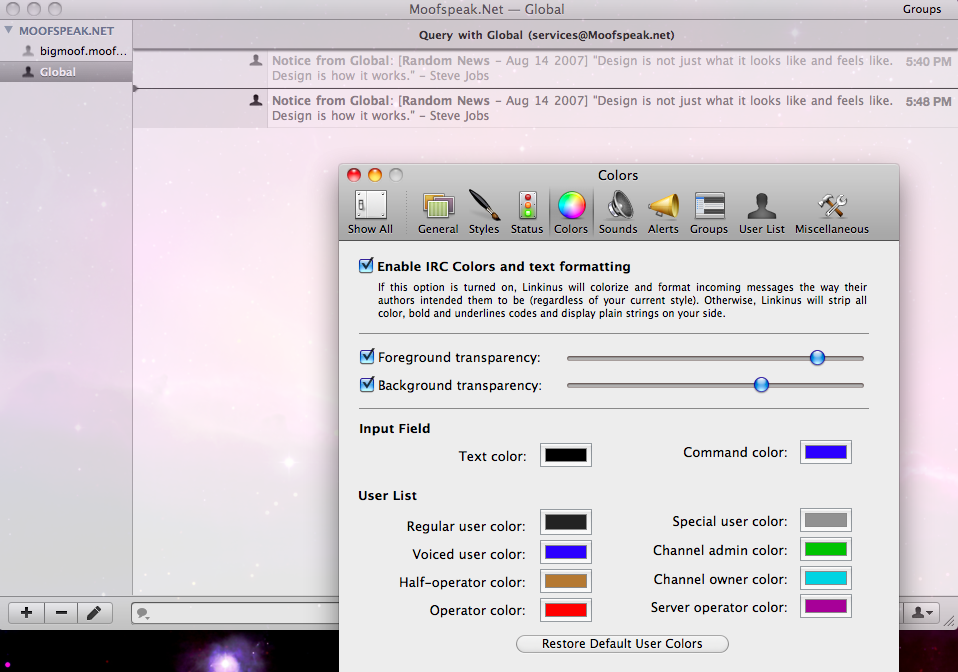
If you want to skip right to customizing the interface, you’ll want to click on Styles, where you can change Linkinus’ chat view. Some themes have “sub-themes” that will alter color schemes, which is a nice touch if you want a particular look, but would rather have black than white. Once you’ve tackled styling, the colors options will provide you with a way to customize input field and user list font colors. Although those options are available, what might catch your eye is the transparency settings. Foreground transparency allows you to chance Linkinus’ opacity, resulting in nothing but the geekiest of giggles. Background transparency allows you to set the opacity for when Linkinus is not the active window.
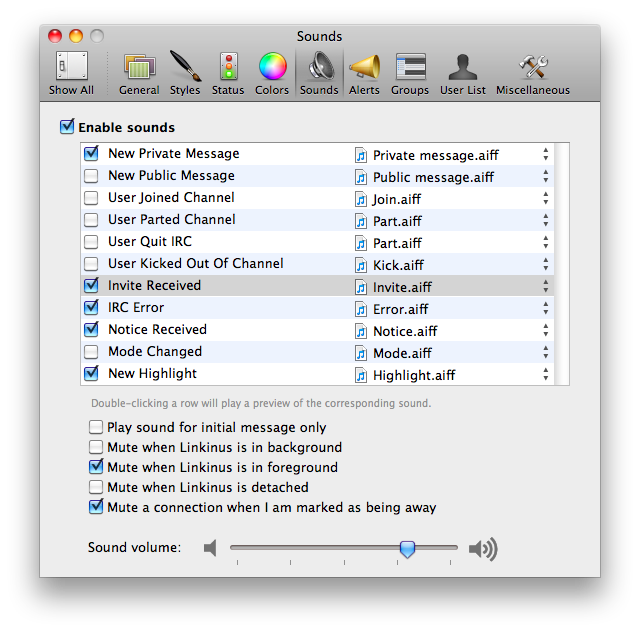
Linkinus allows you to customize the sounds it makes for most events, and even gives you the ability to point to your own sounds. I later opted to use AIM’s classic door opening and closing sounds to notify me when users entered and left a channel for example. You also have the option to set when you’ll hear the sounds (you can turn sounds off if you’re away for example).
Other settings include the abilities to rejoin after kick, manage plugins that increase functionality, enable scripts, create your own command aliases, choose how to display alerts, and more. It’s pretty incredible how much you can actually alter Linkinus from the preferences pane, so it should make most IRC users happy in knowing that there probably won’t be an option that’s missing.
Linkinus is a great IRC client that lacks in some areas, but greatly excels in others. While searching for servers and channels can be a pain, chatting is brilliant and packed with plenty of features that allow you to manage content in any way you desire. With its abundance of customizable options and a stunning interface for an IRC client, it’s definitely one I’d take a seriously good look at, especially if you’d rather navigate IRC through point and click.
While it isn’t cheap at about twenty euros ($30 USD), you can give it a fifteen day trial.
An education discount is also available for students looking to save a few bucks.


