Finally.
It was just over a year ago that CEO Ken Case of The Omni Group outlined the company’s plans for 2013, following a successful “iPad or Bust!” campaign that allowed the company to bring all five (well okay… “four”) of their desktop productivity apps to the iPad. So it was back to the Mac as it were, with OmniFocus 2 being at the forefront of the company’s plans with OmniOutliner 4 due afterwards in the first quarter. As an app that was first released in January, 2005, OmniOutliner 3 was in need of an update. As Ken Case said himself, “… other than a few tweaks to the inspectors and toolbars, its design has mostly stayed the same: it’s starting to feel a bit long in the tooth.” 2013 came and went, and as they say, all good things take time.
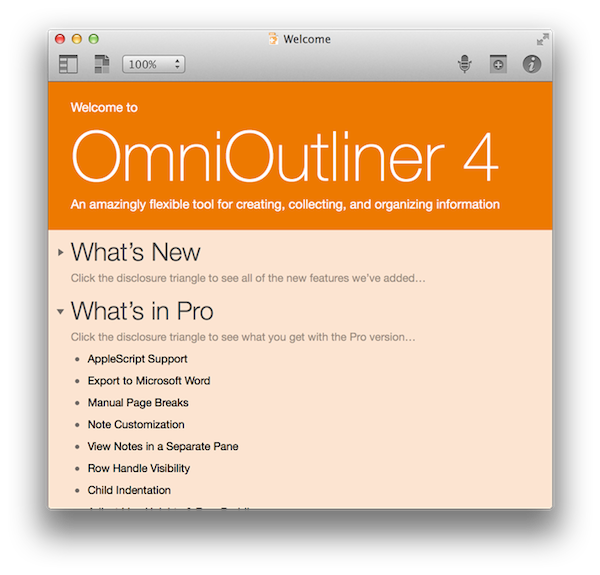
OmniOutliner 4 is a big update. For posterity, we’ll call it Outliner for the rest of our overview. And honestly, I really don’t know where to start.
 What OmniOutliner is
I tend to think in bullet points, whereas Federico tends to think in relationships, so I use Outliner the same way he uses MindNode. The skinny, if you’re not familiar with Outliner, is that it’s basically an app that makes really pretty lists. Ideas are defined as hierarchical relationships, with topic headings expanding into sub topics expanding into specific details and so on and so forth. It’s an app for brainstorming, for taking class notes (and even like they taught you in school with a margin for page numbers), for keeping a list of items you’re selling at a garage sale, and really for just about anything that doesn’t quite need an actual spreadsheet. And unlike Microsoft Word’s outlining tools, Outliner is, for the most part, pleasant to use.
The basics of the app are pretty easy to grasp. You type, you get characters next to a bullet, and you hit enter to start another bullet below. Tab indents rows, potentially making them children to what might be above. You’ll see little arrows, which you can click to hide and reveal information. And each bullet point can be annotated with a footnote, which is just called a note. This is basically the app in a nutshell.
Where the cool stuff happens is in the sidebar, which is much improved over whatever was going on in OmniOutliner 3. It’s where you’ll see a basic overview of your outline, where you can search through everything, and where you can apply various Styles to spice things up a bit.
Styles are Outliner’s bread and butter, which are kind the equivalent of “swatches” for text. In a style, you can define a number of properties like the font, font size, font color, background color for the row, if text is emphasized, how it’s aligned, the line height, and the list goes on and on. Styles can be applied to the whole document, to individual rows, or to highlighted characters within the rows themselves. Once you kind of get what’s happening, creating and applying Styles isn’t too hard.
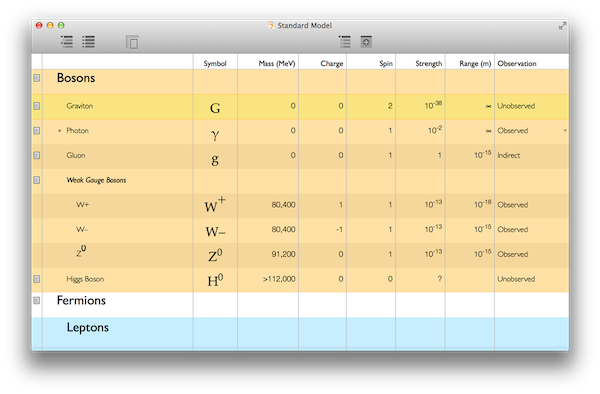
Outliner is unique in that you can have multiple columns like a spreadsheet, but columns really don’t interact with one another. They’re really just isolated verticals of information, providing additional places to store information like dates, check boxes, pop-up lists, durations, rich text, numbers, and sums. Thus, the outlines you create with Outliner can be interactive. By default, Documents are up with a rich text column that gives you ample space to type away (as check boxes aren’t exactly useful on their own).
Information in Outliner isn’t limited to just text. You can drag and drop files into rows, paste hyperlinks, and record audio right from the toolbar. I’ve never been one to attach files to my Outliner notes, but the recording audio in the app is incredibly handy when taking meeting notes or recording lectures.
With the Pro version of Outliner, The Omni Group adds a few extra features like Word export, added customization for text (line height), the option to hide row handles (the bullets), the option to hide columns, and ability to customize the toolbar per document. While these are nice-to-haves, I don’t think they’re necessarily must have features. The one thing that the Pro version does get though is the ability to expand and collapse rows using the disclosure triangles.
A quick primer on styles, the inspector, and templates
Styling in Outliner can be intimidating since there’s so many different ways you can customize your document. It’s the core feature of the app, but they’re not necessarily intuitive until you start playing around with them.
Styles are split up into two sections in the sidebar: the top half is for document styles, and the bottom half is for named styles (rows and highlighted text).
Document styles affect background color, default fonts, default font sizes, row colors, how various children rows are styled, etc. It’s where you’ll design the look and feel of your document. They save you a lot of time since you don’t have to style each individual row.
Named styles are useful for quickly changing text sizes, for adding emphasis to text, for highlighting, and for changing font colors so that text stands out. They’re intended to be used for making important bits of information stand out.
Next to each style is a little square icon called a Style Chit. I wouldn’t worry about these, but they’re used to relay what kinds of properties the style has associated with it.
As you add content to your outline, the document styles will automatically update to include the number of rows you have. This makes it incredibly be easy to apply changes across a large number of rows, especially if your top level rows are consistently used as headings.
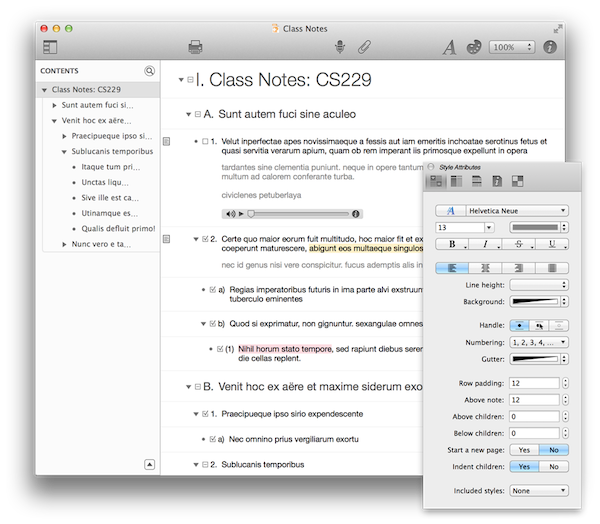
Styles are customized through the inspector, which can be found by clicking on the i in the toolbar.
The inspector is a little toolbox containing properties for what you have selected with the cursor. This means that you can use the inspector to individually style rows and texts outside, but I highly recommend that you create and apply a style for anything you want to do. The only two tabs you need to worry about are the first two, for Properties and Columns. The third tab, Outline, deals with row outlines for further customization. Most people will probably have no use for the Document tab, which is used for adding copyright info. The last tab, Style Attributes, shows all of the properties currently associated with the style and is useful for troubleshooting when things don’t look the way you expect them to.
For the Properties tab, everything’s pretty much self explanatory. Clicking on the boxes vs. the tiny arrows will bring up different options depending on what it is, leading to menu presets or an actual color picker for example. As you set properties and start to define your style, you’ll see the document updating in real time.
Remember when I emphasized, “What you have selected with the cursor?” Having a style selected, vs. a column, row, or piece of text highlight matters to the inspector. If you keep in mind that named styles will override document styles, you’ll be fine.
Pro tip: you can drag and drop a style onto another to combine their properties.
Something you’ll want to keep in mind, especially with named styles, are the little check boxes next to them. As you highlight rows or type, the check boxes in the sidebar will indicate which named styles are active. If you have more than one, it might be a good idea to check if you’re getting the results you want. From what I could determine, the last named style applied always takes precedence.
Once you get your document just so, you’ll probably be interested in saving your styles out as a template so you’ll never have to set them up again. This is as easy as browsing to File in the menubar, and selecting Save As Template.
Outliner comes with a brand new Resource Browser, which contains recently edited documents and a handful of ready-to-go templates that jump start or be applied to your current document. The Resource Browser appears when Outliner opens, and can later be accessed by clicking on the checkered file icon in the toolbar. As a bonus, you can import templates created in OmniOutliner 3.
The brief review part
OmniOutliner 4 just looks so much better than the previous version. It’s almost a decade apart in design. My review of this thing pretty much ends there.
The two significant improvements that were needed have finally been implemented on the Mac. Outliner on the iPad brought a much improved look to the outline (the actual writing space), and that’s been carried over to the Mac along with a much improved inspector.
I belabor styling because The Omni Group’s description of their app is very different from mine. I see it as a place to customize your writing environment, whereas they see it as a place to collect bits of information, to clip and store audio, video, and pictures in “easily-referenceable nodes.” To them it’s about the act of organizing information, to me it’s more about visually differentiating the kinds of information you want to store. Their styling tools dominate much of the app’s functionality, and they don’t really advertise it.
I think there’s a lot of people who don’t see the point in the styling stuff, because folk like me get caught up trying to say, “Here’s all this cool stuff that you’re not using that you’re probably afraid to touch.” I think the experience of writing in the app is so nice that people who like this kind of thing will naturally gravitate towards customizing their environment once they see they can do stuff like simulate lined paper.
Outliner is flexible in every sense of the word. Pretty much anything you write down on a daily basis can be stored in an OmniOutliner document.
How and where to buy
Download a trial from https://www.omnigroup.com/omnioutliner, and if you decide it’s for you, you can buy it direct or from the Mac App Store (pending approval from Apple).
OmniOutliner 4 will come in two editions: standard and pro (which I talked about above). The standard edition will retail for $49.99, and the pro version for $99.99. Both editions will ship on The Omni Group’s own storefront and in the Mac App Store. For MAS buyers, an in-app purchase can unlock the pro edition from the standard edition. Customers who purchased OmniOutliner 3 since January 2011 will receive a free upgrade. Remaining customers can upgrade for 50% off the retail price.
If you don’t see OO4 yet the website is being updated.