Perhaps you’re visiting this article because you’re strongly interested in applying Fever as your RSS client, or you’ve read our previous review of Fever and Ashes here on MacStories. We understand you may be a little weary of tackling such a project. Installing Fever can admittedly be intimidating for non-geeks, an audience Fever was clearly not intended for. But we have you covered. In ten minutes, you (anyone) can have Fever up and running, provided you’re prepared for the following:
1.) There is no trial of Fever available. It’s $30 with no refunds. Be ready to pay when prompted via Paypal.
2.) We’re suggesting a cheap hosting solution you’ll have to pay monthly for. At minimum, about a dollar a month. You will not need to purchase a domain name.
3.) You’ll need to have a SFTP client available so you can upload Fever to the host. We will use Forklift Beta 2, free to download (Mac only). However, you can use any client you want. You just need to use it once.
4.) These instructions should work as of July 14th, 2010. We can’t promise Fever or the host we choose will change the installation process - if they do we’ll gladly update this article when we can.
If you’re ready to tackle the tedious installation process, then let’s get started.
NearlyFreeSpeech.NET Web Hosting
NearlyFreeSpeech is the service we’ll be using to set up our Fever installation. It’s an amazing hosting solution that’s relatively cheap, especially for light use.
To get started visit: https://www.nearlyfreespeech.net/ and click the Sign Up link. You’ll be asked to enter some relatively basic information, and a confirmation email will provide you with a password and launch your service. NFS (NearlyFreeSpeech) will provide you with a trial, thus no payment information is required at signup. In fact, you will not need to add any funds to your NFS account until after Fever is installed.
Setting Up your Site
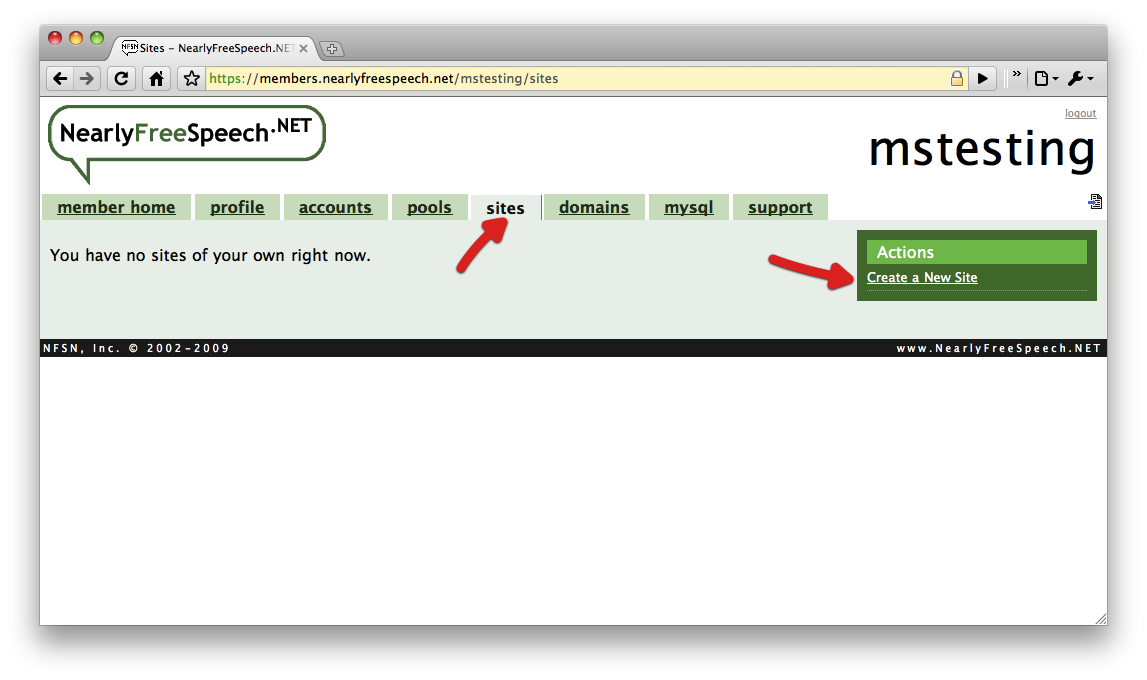
Once you’ve created your NFS account and provided the host with the required information, you’re ready to make a site. Click the ‘sites’ link in the navigation bar, and click, ‘Create a New Site’ on the right.
You’ll be asked to enter a short name. This can be anything you wish. Continue, and you will be given your site’s URL. Select the ‘no’ radio button in the options below, then continue with the site creation. Details given, you will be prompted to confirm then complete the site creation process.
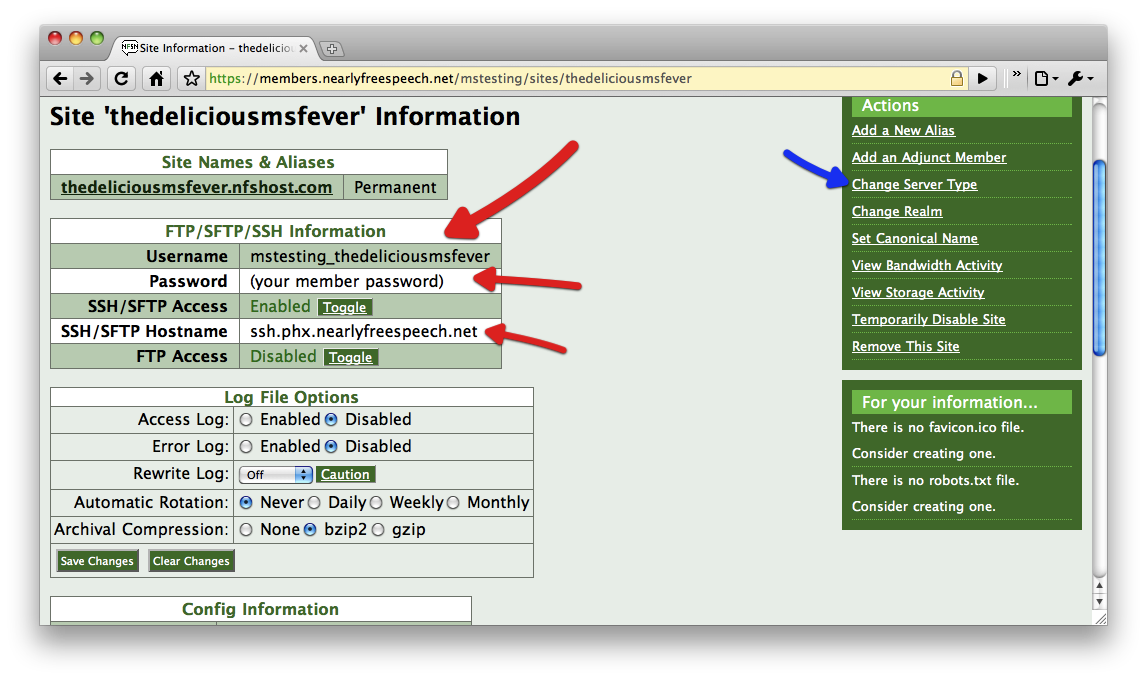
These steps just take a few seconds to complete. Once your site is created, you will be presented with your site information, which includes valuable SFTP information. Keep in mind the following information:
- SSH/SFTP Hostname
- Username (unique to the site)
- Password (same as login password)
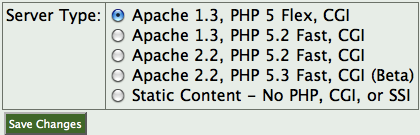
Before we continue, we need to change a setting so that Fever will install correctly. On the right, click ‘Change Server Type.’ From the options, select ‘Apache 1.3, PHP 5 Flex, CGI.’ Save your changes when done.
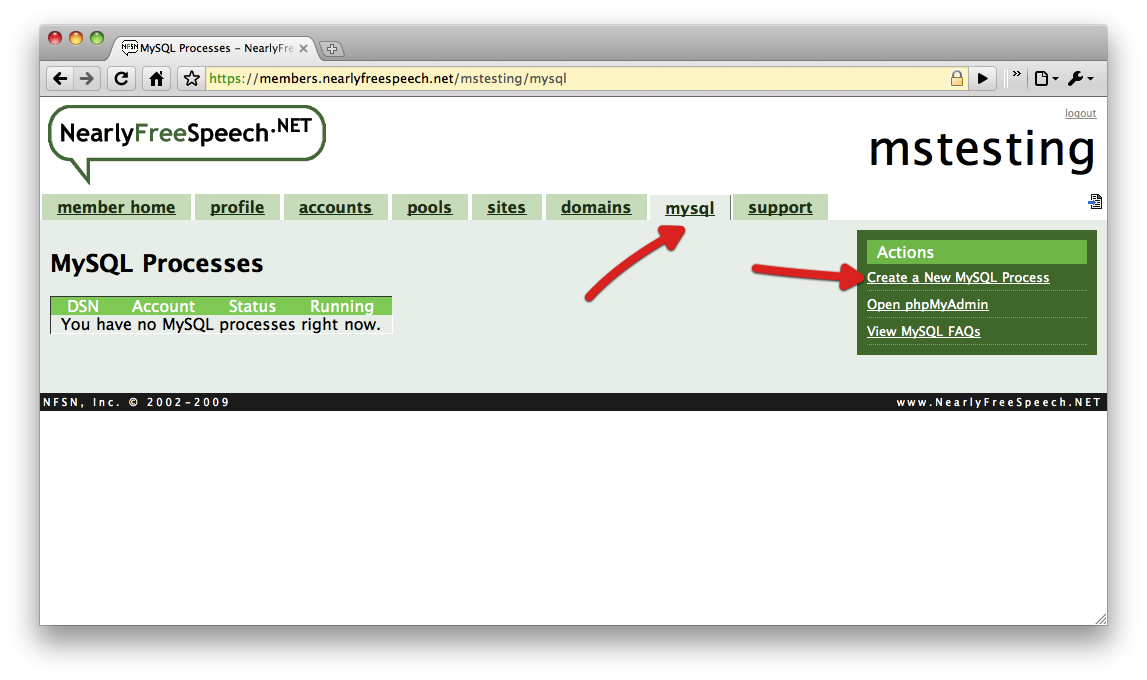
To run, Fever requires its own MySQL process. You don’t need to be concerned with what MySQL is or how it works, but we’ll need to create a running process that can be utilized. At the Site Information page, click MySQL in the navigation bar. On the right, click ‘Create a new MySQL process.’ You’ll be required to enter a process name (it can be anything) and to select your only account from the menu below. When finished, your process will be generated. If taken to your MySQL Process Information, return to the MySQL page, and refresh until the process is running.
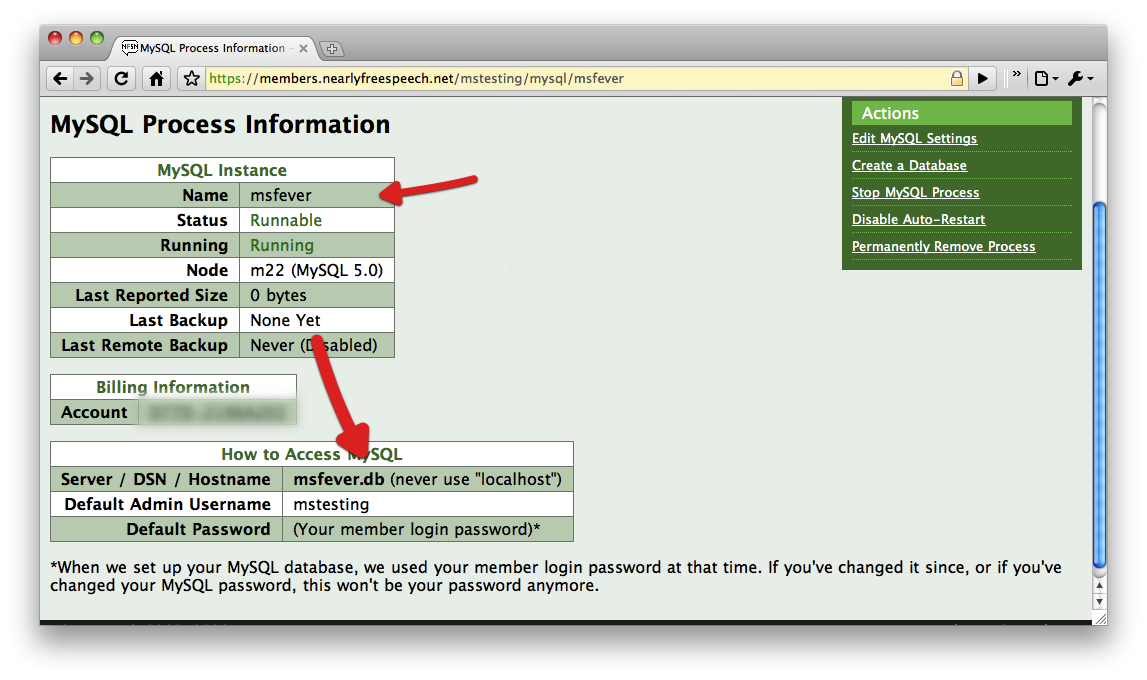
With a MySQL process active, pay attention to the following information which we’ll use later.
- MySQL DSN / Hostname
- MySQL Instance Name
- Admin Username (same as login name)
- Admin Password (same as login password)
Installing & Activating Fever
Our site and MySQL process created, we can now install Fever. Visit, http://feedafever.com/ and scroll down to create an account. You will not be asked for payment information at this time.
The Fever account created, you’ll now have access to a download link for Fever. Download Fever (it comes bundled as a .zip), and unarchive (unzip) the file. You may now delete the .zip file after extracting its contents. The Fever folder in hand (do not remove what’s inside), you’ll need to launch your favorite SFTP client.
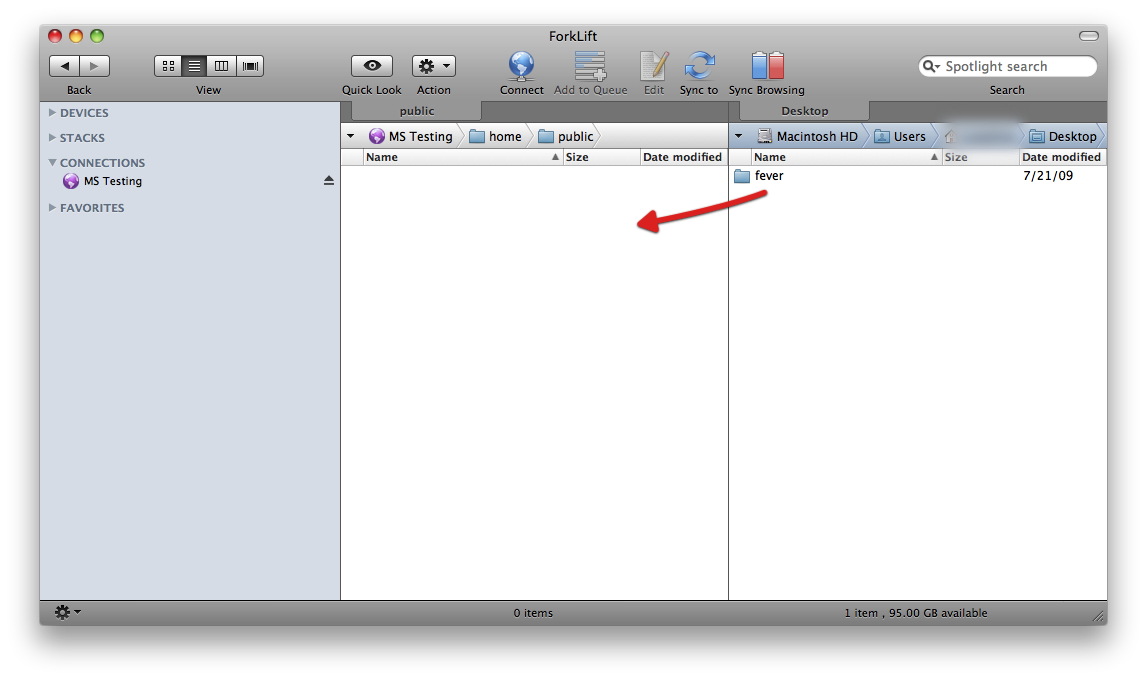
Using the Forklift Beta 2.0, you’ll simply need to connect to your site using the site details in the first steps. Simply select the connect icon, use SFTP as the protocol, and fill in your information (the name can be anything). Once connected, simply drag the Fever folder into your site’s blank pane.
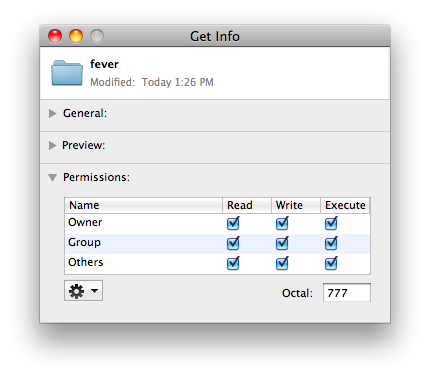
Uploaded, you’ll need to right click the Fever folder and ‘Get Info.’ In the permissions group, check all the unchecked boxes, and the octal should change to 777. Close your client, and launch a web browser. In the URL, enter the following:
http://yoursitename.nfshost.com/fever/boot.php (Where yoursitename is the short name of the site you created)
If you receive an error, check the permissions on the Fever folder via your SFTP client, and make sure you’ve correctly chosen the correct Apache information as detailed above through NFS Host. More than likely, you should be greeted with information that Fever has installed correctly.

If no MySQL information is presented, reload the page. The URL should automatically change to http://yoursitename.nfshost.com/fever/, where you’ll be asked to provide the MySQL process information listed above (in that order).

Upon successful entry, Fever will congratulate you on your success, and you will asked to reload the page. Doing so will provide you with an Activation screen so that you may purchase Fever. Simply visit the ‘Handy Link,’ and purchase Fever through the account you created a few minutes ago. Once you have your activation code, you’ll be able to successfully activate Fever.
From here, setup is painless. You’ll be asked to create login information for your Fever install, which you can access (again) at http://yoursitename.nfshost.com/fever/. The entire install takes under 10 minutes to complete, and should be relatively simple to accomplish using this guide. Fever walks you through the rest.
Conclusion
Once Fever is working, you can access it via your URL, or you can use Fluid or take a Chill Pill to access the service as an application. Chill Pill requires minimal setup, and Fluid shouldn’t be too hard to figure out. For Windows users, we imagine you can use Prism as a substitute for Fluid.
No technical understanding is needed about any of theses processes (except maybe for some light knowledge on FTP software), thus anyone should be able to have their own Fever client running in no time. So if PHP and MySQL jargon scares you, we hope this guide helps alleviate some of those fears. As a big benefit, none of the services we use will ask for payment until both the trial is over and Fever is successfully working, ensuring you can iron out installation issues before turning in your hard earned cash.
A big thanks to @daylenyang for his initial suggestion to use NearlyFreeSpeech when we were researching Fever. It turned out to be a great service.