Annotable, an image annotation app from developer Ling Wang, received a major update yesterday. Version 2.0 of the app is all about customization. From the tools that appear when you open the app, to the formatting of text added to an image, Annotable gives you precise control over how you use the app and the look of marked up images, making it my hands-down favorite app for image annotations.
It’s important to understand what Annotable is not. Annotable is not a Pixelmator competitor. The difference between the two is that Pixelmator is an image editor that alters the image itself, while Annotable is for making annotations on top of an image like adding text, call-outs, shapes, and arrows.
If you’ve ever found yourself wanting to highlight a detail in an image or add some text before sharing it, Annotable is worth a look. I use it regularly in my work at MacStories to create screenshots that call out small user interface details that might be hard for readers to spot otherwise. For the same reasons, Annotable is also excellent for commenting on the design of app interfaces and mobile website layouts.
When Annotable was first released, it filled a hole left by Skitch for iOS, which was abandoned by Evernote in late 2015. At the time, Annotable was like a breath of fresh air. Skitch for iOS was notoriously buggy, so it was just nice to have a tool that did something similar and worked.
Annotable has grown up a lot since version, 1.0 adding tools that make it much more than a Skitch for iOS replacement. Last year, Federico called Annotable the most versatile image annotation tool on iOS, which still holds true today. If you’re not familiar with Annotable, its tools fall into six categories:
- Shapes: You can add rectangles, rounded rectangles, ovals, lines, arrows, and freehand drawings to any image.
- Text: There are five text styles, five pointer types, and dozens of fonts from which to choose.
- Blur: You can obscure personal information in a screenshot or other image by blurring it, overlaying multiple types of pixelation, or blacking it out with opaque rectangles.
- Spotlight: Dimming all but the portion of an image that you want to call attention to is a great way to highlight image details.
- Magnification: One of my favorite tools is the loupe that lets me call out a detail from an image with one of five pointer styles by magnifying a circular region of an image.
- Highlighter: Annotable has a set of highlighters that can be used with text in screenshots, which is an excellent way to call out a specific passage from a wall of text.

Annotable lets you customize things like arrow heads, colors, and even which tools appear in the app.
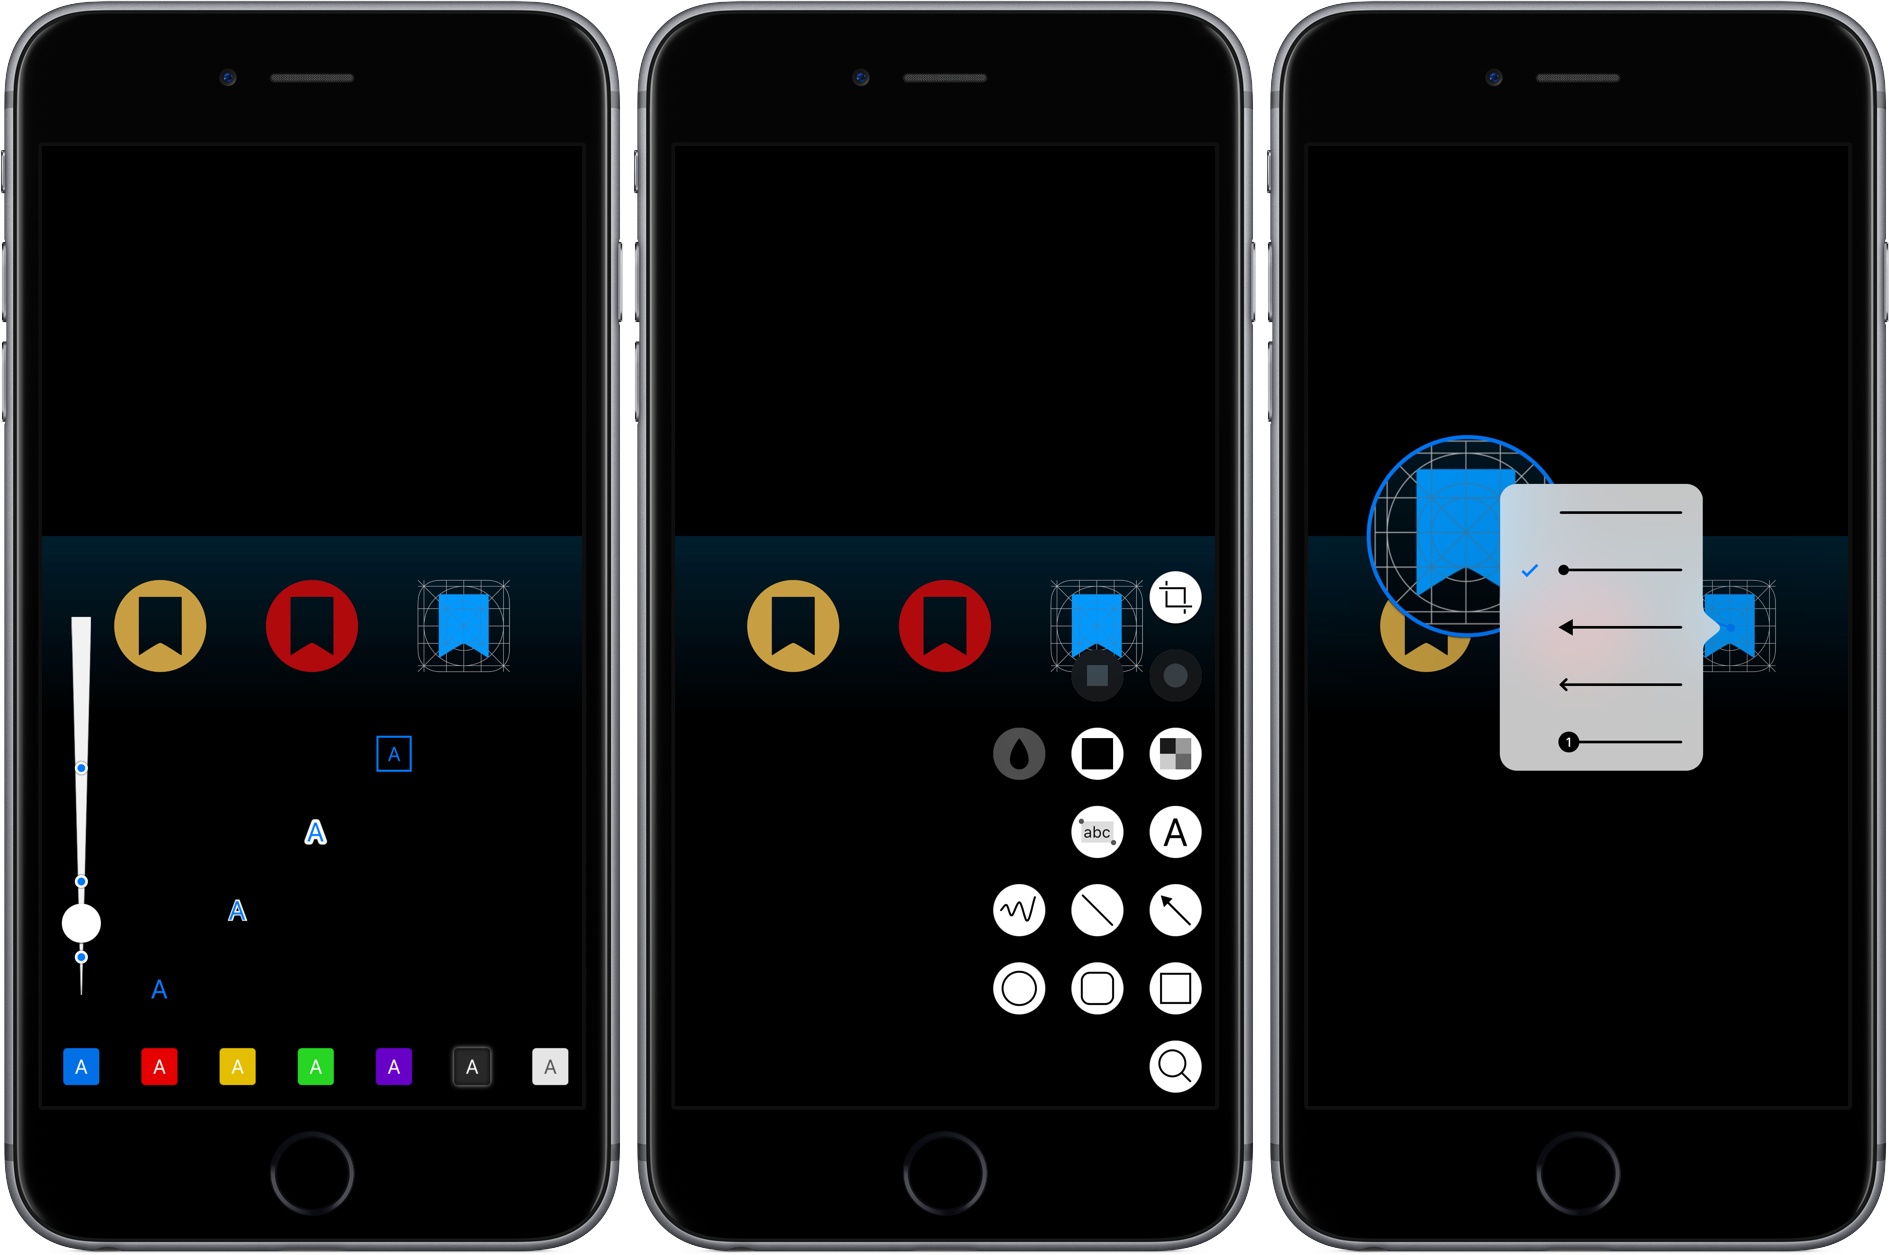
That’s a lot of tools, which is why Annotable’s new tool customization feature is a welcome addition to version 2.0. Now, if there’s a tool you don’t use often, you can hide it. Long pressing the tool button displays all of the tools in the lower right-hand corner of the screen along with a gear button in the lower left-hand corner. Tapping on the gear triggers editing mode, transforming the gear button into a checkmark button. In editing mode, there are blue checkmarks next to each of Annotable’s tools that are currently active. You can toggle tools off and on by tapping their icons and save the changes by tapping the checkmark button.
Version 2.0 also adds color customization. All default colors, some of which were unlockable as part of an In-App Purchase in prior versions of Annotable, are now free. Customers who previously paid for the expanded color palette get the new color customization feature for free; for everyone else, it’s an In-App Purchase. Color customization allows users to define colors and to reorder the list of colors that appear when you tap the color button. The color picker interface is accessible by swiping left on the row of colors that appear along the bottom of the screen when you tap the color tool.
Text annotations also received a major update. Customers who buy the In-App Purchase can now choose from dozens of fonts, five label styles, and four different pointers. With so many possible combinations, it’s easy to create text annotations that suit your personal taste.
Line widths for shapes are now customizable too. When you tap the color button, a vertical slider appears that lets you pick the exact line width of the shapes you draw. You can also define three pre-set widths, which makes it fast to jump between your favorites and ensure uniform line widths when making multiple annotations.
A couple of other changes worth noting include a new way arrow styles are picked. Tapping the head of an arrow displays a pop-up menu for choosing from among four types. In addition, the Blur tool added the option to use opaque rectangles to obscure information instead of pixelation so your textshots can look like redacted government documents.
With all the new features added to Annotable, I appreciate the tips that it displays the first time you try something new. However, a couple features, like the color picker and pointer style customizations, are a little hard to discover if you miss the tip and would benefit from a dedicated in-app help document.
Annotable has grown into a rich tool for annotating images. Before Annotable, I used several different apps that each did some of what I can now accomplish in one integrated package. That alone makes Annotable extremely valuable. Combined with the powerful new customization tools in version 2.0, Annotable offers a depth of features that is hard to beat.
Advanced features are available individually as In-App Purchases for $1.99 each or as a set for $9.99, which gives customers the choice to pick and choose the tools they need or buy the whole set for less than the à la carte price.
Annotable is available on the App Store.