Lukas Hermann

69 posts on MacStories since April 2012

Former MacStories contributor.

This Week's Sponsor:

Kolide

Ensures that if a device isn’t secure it can’t access your apps.  It’s Device Trust for Okta.


Review: Kuvva for iPhone

I recently posted a longer review about a cool app called Kuvva for Mac OS X. The app automatically displays series of cool, professionally designed desktop wallpapers for you. By setting up an account on kuvva.com you can select your personal favorites from the constantly growing database of tremendous desktop art. These are then displayed as your personal series of desktop wallpapers in a set timespan on your desktop in order to make your working day at the computer a bit more beautiful. Kuvva also works with your Twitter profile background wallpaper.

Last week, Present Plus, the developers of kuvva finally published an iPhone version of their very popular app. I was lucky to be one of the app’s beta testers, and as I now hold the final version of the app below my fingers I again have to admit that this is a truly great app.

Kuvva for iPhone (watch a cool demo video made by my friend Joost Van Der Ree over at Vimeo) adopts the same basic features from the web service for wallpaper discovery like the Mac client does. You can view all wallpapers published on kuvva.com (of course in an iPhone-optimized scale and resolution) in the main screen sorted by release date, artist, and popularity.

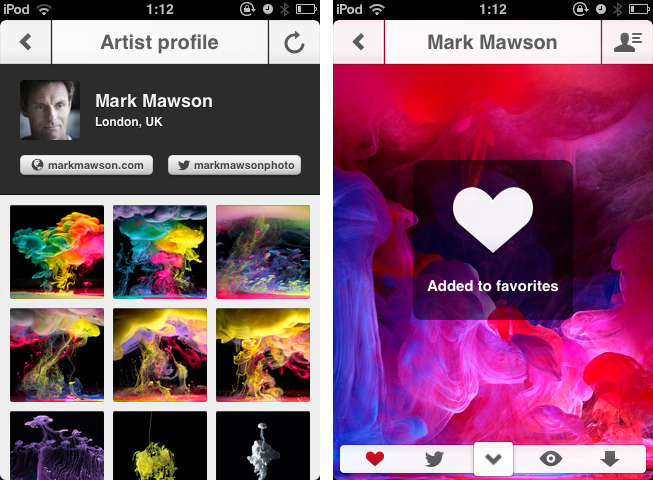
Tapping on one of the wallpaper previews in the main view brings up the single-wallpaper inspection interface. In this view you can smoothly bring up a small interaction menu by tapping on the small arrow laid over the (now scaled up) wallpaper covering the full screen. If you have a Kuvva account, you can mark the wallpaper you’re currently looking at as a favorite (and thus add it to the list of wallpapers which are also also displayed on your Mac desktop). Additionally you can tweet about it, preview it (which is done via a cool transition effect bringing up the lock screen interface to show you how the wallpaper looks in the iOS- context), and download it right from the app into your device’s camera roll.

Via a paneled side menu you can access all the mentioned sorting categories as well as all of you favorites. If you find a wallpaper you like a lot, you can tap on the button in the top right corner in the preview window to get more information about the artist who made the respective wallpaper, which not only includes all of the artist’s wallpapers on kuvva and a photo of him or her, but also a link to his/her twitter account and website for immediately getting more information if desired.

The app works well, more or less without any performance flaws on my (now considered very old) iPod touch 3rd Gen on iOS 4.1. All subtle UI gimmicks like transitions or moving effects (e.g. the aforementioned navigation menu in the wallpaper view) work just as they should and make Kuvva fun to use.

If you’re already a user of Kuvva (like I am), consider this to be a must-have (it also includes wallpaper optimized for the new iPhone 5). The app extends your wallpaper “workflow” perfectly as you now can like and view wallpapers on the road for usage on your Mac. And of course this is a great, handy resource for new wallpapers on your iPhone if you’re a fan of eye-catching, vividly designed backgrounds. If you are a lover of minimalist wallpapers or photography on your lockscreen though, Kuvva probably won’t suit your tastes. But for everyone else, it is a perfect, easy to use resource for getting new wallpapers for your iPhone without any hassle. I can’t wait to see if the app will be available for iPad as well in the nearer future; it definitely should be a great app as well.

Kuvva for iPhone is available for purchase on the App Store for $1.99.


Gain Magical Control Over Your Music Player With Flutter

It’s a bit like Minority report. Just raise your hand and your computer responds with an action. Motion-based controls with your hands, now more common with modern gaming consoles (PlayStation Move and XBOX Kinect), still feels a bit futuristic.

On personal computers and modern tablets, peripheral input and touch-based gestures won the race against camera-based gesture recognition. Still, some developers are in love with the idea of controlling devices without any actual hands-on. In small doses, this can be fun and useful. This is the case with Flutter, developed by a large team of developers at BotSquare.

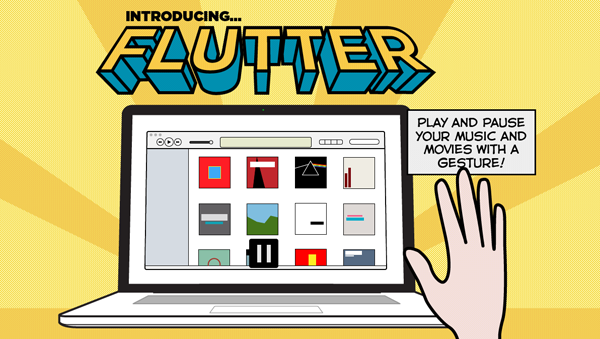
Flutter is a small tool for recognizing motion gestures on OS X, which recognizes you via a webcam (iSight or external) to control your favorite music player. After downloading it, you have work through a tutorial to get to become familiar with the hand gestures. Flutter then sits in the background, with your Mac’s iSight camera on (obviously required for running Flutter) and awaits your actions.

The current version of Flutter (0.1.237 — don’t be afraid, it’s not a beta version, the developers just want to add more features before calling the app 1.0) supports three gestures: a flat open hand, and a fist with your thumb either pointing to the right or the left. Do those gestures in front of your webcam, and Flutter will recognize them and do the action associated with them. To make sure the app recognizes your hand’s action, you have to keep it one to four feet away from the camera.

With the open hand gesture, you can play and pause your music. Using the thumb either pointing to the right or left you go to the next or previous track. The Flutter team is working hard to implement more gestures such as volume control (I suggest a single index finger pointing upwards or downwards respectively for this one).

All three gestures work well in the current version — you just have to get used to the fact that you often need to move your hand a bit to make the camera notice it. Knowing where to position yourself at first so that your hand is inside the viewing area of your camera can be tricky at first. But after a while you also get used to it; when Flutter recognizes you it’s easy to use, looks like magic, and can be a very intuitive way of controlling your music player (the app currently supports iTunes, Spotify, VLC, and QuickTime; no Rdio support unfortunately).

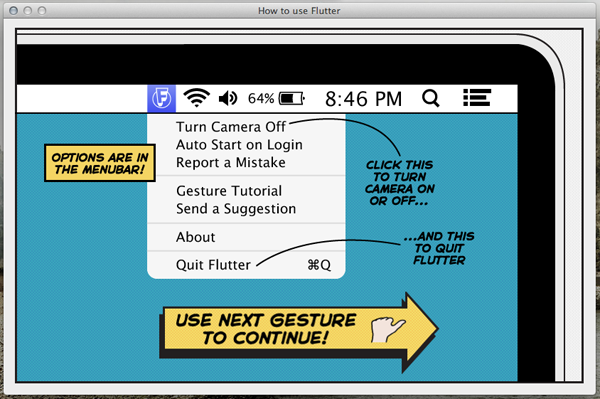
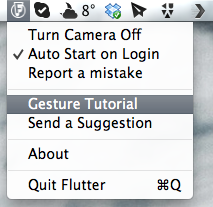
Through the app’s drop-down menu, you can turn the camera on and off (for privacy and energy saving reasons), set Flutter to automatically launch at login, as well as report bugs and re-watch the aforementioned (very interactive and easy to understand) tutorial. The app also sends notifications to the Notification Center when you change apps to let you know that you’re still able to control the newly activated player with Flutter.

Flutter is a small app, although it’s not something I would recommend because not everybody needs it. However, I can imagine that lots of people would want to try it for the novelty of it. It’s a magic little piece of software that can be fun to use.

Flutter is available for free on the Mac App Store.


Drip Makes Sharing Large Files Simpler

I recently discovered Drip, a new small menubar filesharing app developed by Scott Savarie (@ScottSavarie) and Florian Denis (@Olotiar), released last month. After I got to take a look at it, I think I maybe know where the drop-down menu redesign in the latest Dropbox beta introduced yesterday got partly inspired by. Drip is a small, really useful tool for sharing large files quick and completely without hassle.

Drip uses the servers of hosting service sendspace to store files. Sendspace offers a completely free data plan (called sendspace Lite) with which users can upload files sized up to 300 MB which are available for download for 30 days starting from the time of the newest download; after this period of time they get deleted. The free plan is ad-powered, so you need to click through some ads if you download a file from the sendspace website. But this is the only disadvantage: as far as I know from the sendspace FAQs, there ist no upload limit in total for free users. Perfect for quick, temporary file sharing of smaller, but also suited for quite large files. If you want to upload even larger files and store them for a longer time on sendspace, you can sign up for a Pro or Premium account which support larger file sizes and higher download bandwidth (see detailed plan information here).

Drip is your desktop companion for Mac if you use sendspace. Download it for free from the app website, install and launch, and you can immediately start uploading files. There is no signup needed, new users automatically are connected to a free sendspace account without having to login. If you want to be more flexible with using the free account (maybe you want to use the web upload interface) or if you are a Pro/Premium user, you can enter your login data for sendspace in app’s preferences (I’ll come to them in detail in a bit).

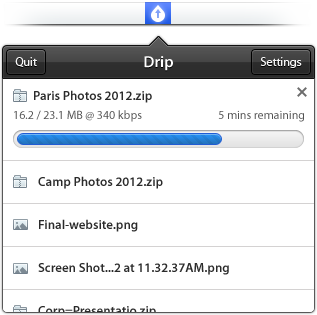
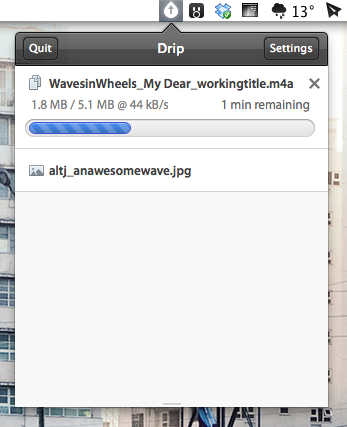
Uploading files works just like you would expect it: drag the file you want to upload for sharing onto the menubar icon, drop it, and it gets uploaded. If the upload is finished, the related sendspace.com download link is automatically copied to you clipboard for sharing.

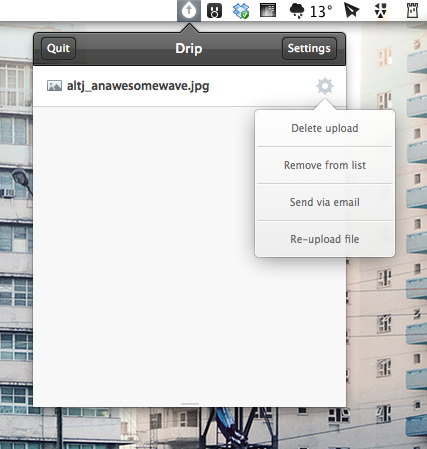
If you drop a file onto Drip’s menubar icon or if you click on it, a really great-looking drop-down menu appears listing the last uploaded files. You can change its height to view more elements without scrolling using a small draggable element at the very bottom of the list — I state this feature, since the dragging indicator is designed a bit too small in my opinion and is hard to aim at. You can click on any file in the list to copy its download URL again. Using the preference icon which always appear when you hover over a file list element you can do even more actions. The drop-down menu which appears when you click on it (my personal UI highlight of Drip) offers you to delete the upload, remove the file from the list to keep Drip uncluttered, automatically share the file download link with your default email client, or re-upload the file if you need a new link for any reason.

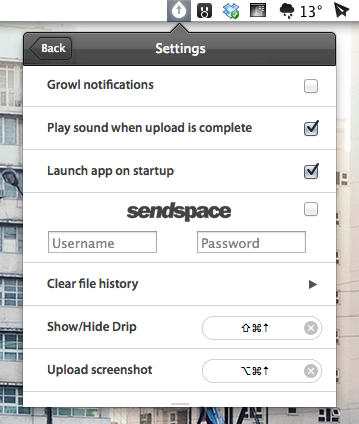
As you can see, Drip is very versatile, but still drop-dead simple to use. It also features extensive settings to make it work just like you want it to. You can bring them up by clicking the settings button in the top right corner of the main drop-down menu. Apart from the aforementioned sendspace account login panel, you can also activate Growl notifications (see example below), set up upload completion sound, clear the whole file list, or let the operating system start Drip at launch. However, the best option available in the settings are the shortcuts. Besides the standard one to bring up the app window, you can also set a custom shortcut for uploading the last screenshot you took, a truly great feature for quick thought sharing or reporting bug fixes.

After I researched a bit about the current free data plans of sendspace, I decided to make Drip my default app for quick, temporary file sharing. I had accounts for Droplr and Cloudapp in the past, as well as a free Dropbox account. But non of those services supports large file uploads (or they didn’t work like with Cloudapp), or in case of Dropbox I had to intricately delete unused files to free space for new ones. With Drip, all this hassle is gone (at least for now). It’s not just a new app supporting another web hosting service in the game, version 1 is already a serious competitor for apps like Droplr and iCloud. I can’t wait to see if they manage to develop a fitting iOS client of it as well to have all the uploaded files and links available on the road. Currently, Drip is Mac-only. But if the app gets as popular as I think it will, this will surely change soon.

You can download Drip for free on the app’s website. 


Review: Tyype HD for iPad

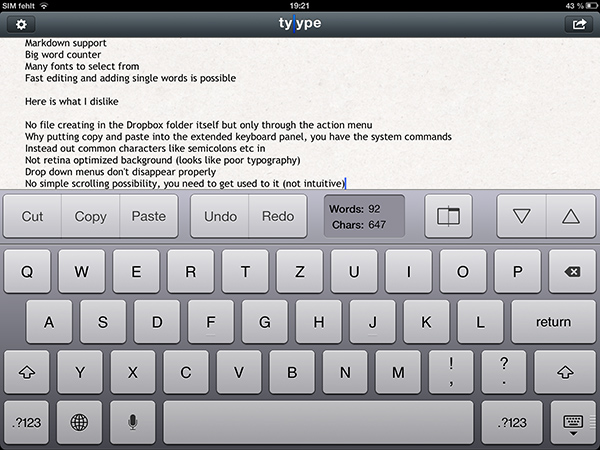
Text editors on iOS are always difficult to review. More or less everyone who writes on a computer or other digital device has a favorite mobile and desktop text editor, and is accustomed to the workflows connected to it. To give an example, I am totally in love with iA Writer. Its easy iCloud sync options, readable typography, and Focus Mode fit my needs. I don’t need Markdown, lots of different fonts, or an extensive amount of settings. I just want to write, and with iA writer I found the perfect, distraction-free environment to do so.

However, when I recently discovered Tyype, a new iOS text editor by Polish app development company Appvetica (who also developed apps like QRSight, an OS X QR code scanner), I got curious. Their clean, minimalist website and product video promise a text editor with easy text navigation, selection, and copying using custom gestures. Its interface seemed easy to understand, and the icon looks gorgeous. So I went ahead, downloaded Tyype HD for the iPad (which I’ll refer to as “Tyype”) and starting writing with it. Unfortunately, I have to say that Tyype does not work as great as it is shown in the demo video on the app’s website. But it’s certainly not a bad app either. Read more


Omnikey Simplifies Website-Specific Search In Safari

When I search the web for something, it’s mostly about music and artist discographies. Therefore I am used to the following typing workflow: “cmd+L” for toggling the URL bar, “en” to bring up the Wikipedia bookmark, open the site, and search there. I’ve often wished for a simpler key combination for quick access to such searches. Earlier this year I reviewed Bang On for iOS – a small app for easy website search on the iPhone and iPad. Using “!” as a toggling prefix you could create search commands for any website you can imagine, from Wikipedia to Amazon. It worked pretty well. I really wished for a similar functionality on the Mac.

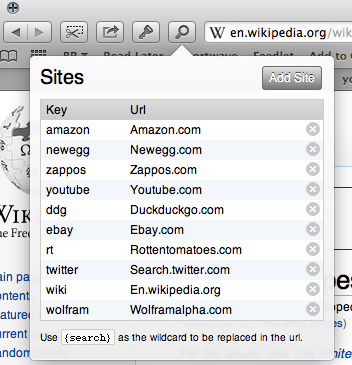
Now, Safari users can have exactly this feature through a new extension called Omnikey, developed by Mario Estrada. Install it, and afterwards you’ll just need to type “wiki [search query]” into the Safari address bar to automatically open up the search results to your query on Wikipedia.org.

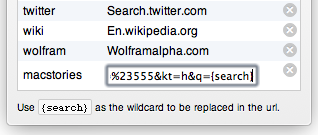
The “wiki” is the “omnikey” for toggling this kind of search. The same system also works for YouTube, Amazon, and some other websites out of the box. Put a “!” in front of your URL bar search query and Safari will use the default Google search. You can also easily add new websites you want quick Omnikey search for: just open up the extension’s editing panel in the toolbar, click “Add Site”, select a key for toggling the site search and paste a dedicated search query URL into the panel. Now you just have to replace the search query in the URL with a “{search}“ wildcard (like a software placeholder) and you’re done. I tried it with the MacStories search powered by DuckDuckGo, and it immediately worked.

Omnikey is a very handy Safari extension. It is lightweight, fast, and easy to use. Setting up new search keys is easy and works flawlessly. For people like me, who often need to search specific websites for links and information, Omnikey is a great companion. Download it for free at the project’s GitHub page.


Uberlayer Is A Handy Tool For Pixel-Perfect Design

Twelve Twenty, the Dutch maker of the print-size checking OS X app Will It Fit and the iOS calendaring tool Get Together, recently published their third app, Uberlayer. Uberlayer is a small tool for UI and web designers on Mac OS X to quickly overlay images of a new design work onto your desktop.

Let’s say you just designed a mockup of an update to an existing website or application. Drop it onto Uberlayer to bring it on the screen. Using shortcuts you can move it around in pixel steps, make it more or less transparent, and activate click-through options. If you make the design half-transparent and you have the current version of an app or website just behind it, you can easily check how the current design changes will affect the overall look of the whole product. Using the click-through option, it’s easy to select certain parts you want to change to copy or delete them in the “real” version of your product.

I tried Uberlayer on my personal website by trying out a different style for an ad I currently have on it. This is what a half transparent “uberlayed” image looks like:

It’s actually pretty hard to describe how the app works using only words and pictures. If you’re curious, I recommend you head over the Twelve Twenty website and check out their Uberlayer demo video. I think Uberlayer can be a useful tool in a web or application designer’s workflow. Uberlayer is $1.99 on the Mac App Store.


Apple To Developers: Submit Your iOS 6 Apps Today

Following the introduction of the new iPhone 5, new iPods and an upcoming new iTunes earlier today, Apple has now sent an official mail to its third-party developers. In it, Apple asks its developers to submit updates of their apps or completely new ones built with the newest iOS 6 SDK and APIs.

iOS 6 will soon be in the hands of hundreds of millions of customers. Take advantage of beautifully designed and smooth panning maps using the new vector based engine in MapKit. Provide tickets, loyalty cards, and other passes with Passbook. Integrate sharing capabilities for Facebook. Explore new camera APIs and new features for Reminders, In-App Purchase, and Game Center to create your best iOS apps yet.

To prepare your apps for submission, download the GM seeds for iOS 6 and Xcode 4.5 and test your existing apps for compatibility. Be sure to review the updated App Store Review Guidelines and the iOS 6 Readiness Checklist, and submit your apps today.

Developers can now head over to the Apple Developer website to download the new GM seeds for iOS 6 and Xcode 4.5.


Interactive Fiction In The iOS Age: A Text-Based Love Story

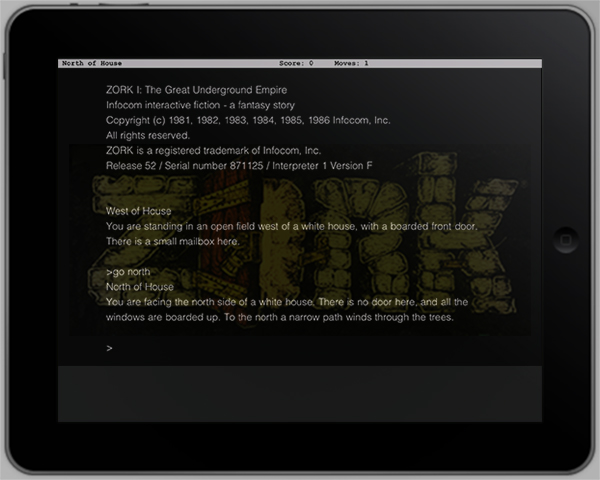
It all started with an episode of “The Big Bang Theory”. Protagonist Dr. Sheldon Cooper sits in front of his laptop, his face distorted by heavy concentration. He’s playing a game. Suddenly, he starts yelling at Leonard, his roommate: “It says there’s a troll!” Leonard answers: “Type ‘Hit troll with axe’”. Silence. “Oh yes that worked!”, Sheldon yells with a wide smile on his face. A few episodes later, the title of the game is revealed: ZORK.

At that point, I was curious. I googled the title, and just a few minutes later I was lost in the world of Interactive Fiction (hence abbreviated as IF) which is the official genre description of games commonly known as text-based adventure games.

After hours of research, I found out that although the first IF games were released in the early ’80s and quickly decreased in popularity due to the rise of graphics-based games in the middle-80s, the genre is not dead at all. IF has a vibrant and very active community of gamers, journalists, story writers, and modern implementations of any kind to emulate and play IF games on any imaginable platform. There are even modern development tools and languages available to write your own IF games.

In this post, I will discuss all these topics: the history of IF, the community and its current state, and how to play and develop IF — with a focus on IF and Apple’s operating systems – Mac OS X and iOS. The following paragraphs will be full of external links leading you to download resources, information wikis about IF, interesting essays and blog posts about the community, and all kinds of software you could use to play and write IF. Read more


Living Earth HD — My First Mac OS X Weather App

I’ve never seen the need for a desktop weather application. I’ve always considered it way easier to fire up Chrome, go to the website of my favorite German weather forecast provider, look up the forecast, then get to work. So why should I clutter my menu bar or even my desktop with another app I have to update and look at to justify its purchase? On iOS the situation is completely different: I need a weather app on my iPad for quick glance without the hassle of typing in a web address into Mobile Safari.

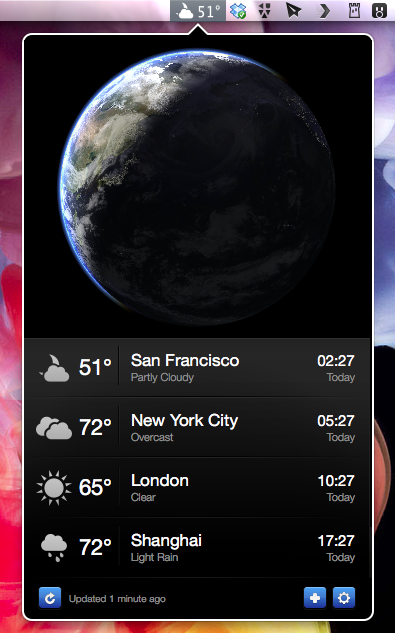
Living Earth HD is one of the newest iPad weather apps featuring an interactive 3D animated world globe with live weather forecasts. After testing it, I realized that this concept didn’t suit me on the road, although the app looked pretty awesome on a Retina Display. I want precise forecasts I could quickly glance at, just like Weather HD 2’s new Quick View feature. So although I like Living Earth HD for iOS, it didn’t have any chance to become my default weather app. Two weeks ago, Ryan and Moshen from Radiantlabs published a port of Living Earth HD to Mac OS X, which I will refer to as Living Earth Desktop throughout this review. I got curious and started testing it. After more than a week now it is still in my menu bar, right beside the Dropbox and Tweetbot icon, which means it’s a really good app.

Read more